 Fellow Canadians: All inFlow plans are available in Canadian dollars




 Home
Home


How to set up Stockroom workflows
Stockroom workflows let you decide exactly what your team sees when they pick up a device and start scanning.
You can build one workflow or several, name them the way your team talks (“Grab supplies for truck”), and choose which fields your scanners fill in. Here’s how to set them up in inFlow for Web and what your team sees in the Stockroom app.
Please note: Stockroom workflows are available with an inFlow Stockroom plan or the Stockroom add-on.
What a Stockroom workflow does
A workflow controls what happens when your team scans products. Each workflow saves four things:
- The workflow type — whether the scan creates a stock adjustment or a stock transfer.
- The name and short description your team sees in the app.
- The location(s) affected by the stock adjustment or stock transfer being created, and whether your team can select them.
- The extra fields your team fills in after scanning, and which ones are required.
Workflows are set at the company level, so every Stockroom device sees the same list.
Stockroom scans created before September 15, 2026 are now saved as stock adjustments. Your existing scans move over automatically and keep the same order numbers, so you can still find them by their original SR document number. See how to adjust stock levels in inFlow for more on stock adjustments.
How to create a Stockroom workflow
- Go to the Stockroom settings in inFlow for Web.
- Find the Stockroom workflows tile, then click Add new workflow.
- Choose a Workflow type — Stock adjustment or Stock transfer.
- Enter a name for the workflow your team will recognize, and add a Short description if it helps.
- Set the Basic fields and Configurable fields for the workflow (see below).
- Click Save when you’re done.
Give each workflow a name that matches the job, not the inFlow term. A stock transfer workflow named Load the service truck is much easier for a new team member to pick than “Stock transfer 2.”
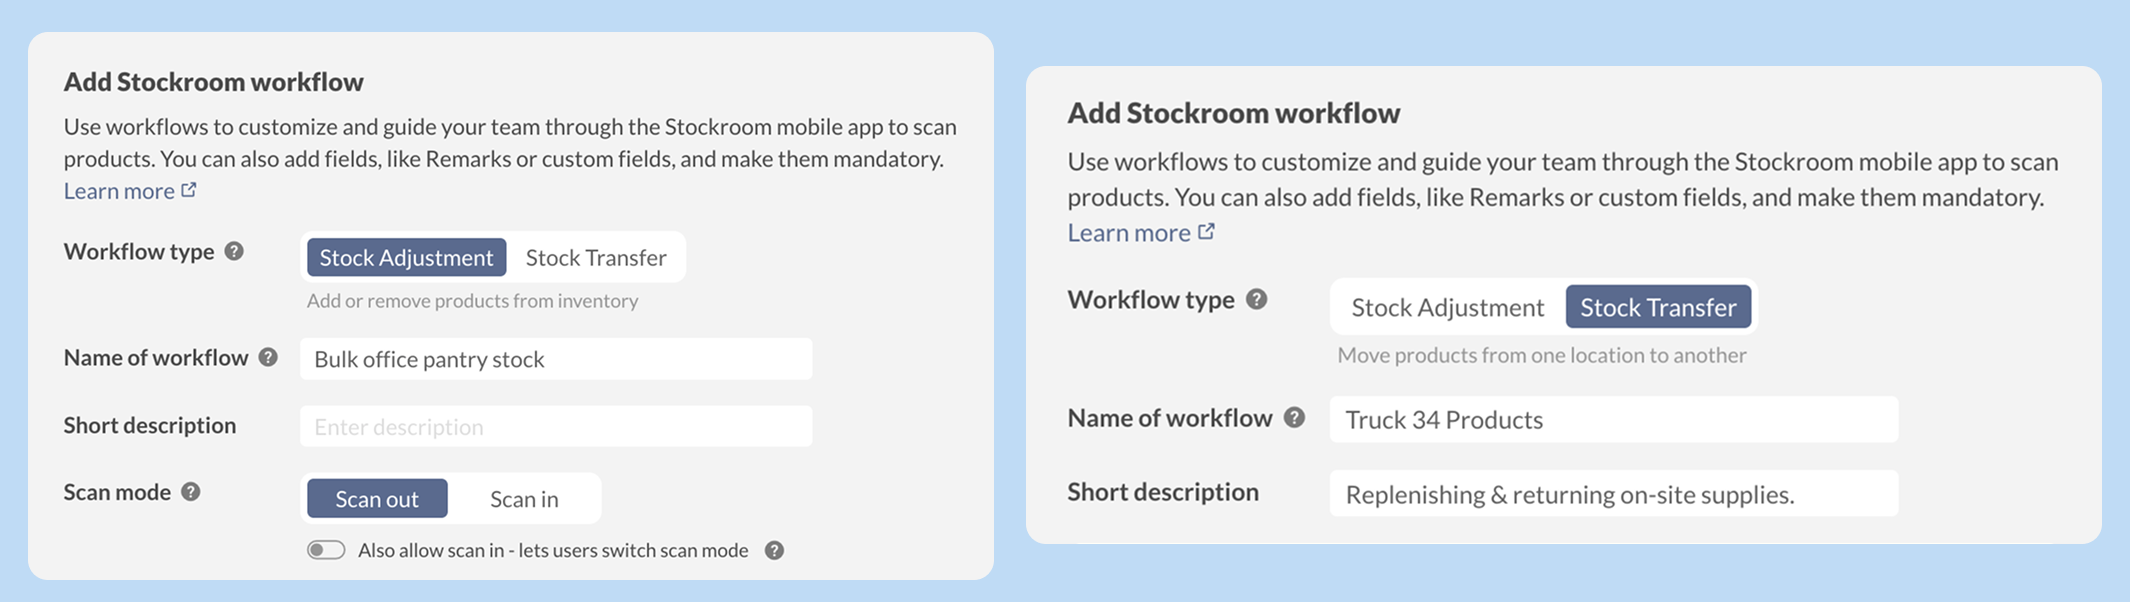
How to choose a workflow type
The workflow type decides what inFlow creates when your team taps Done.
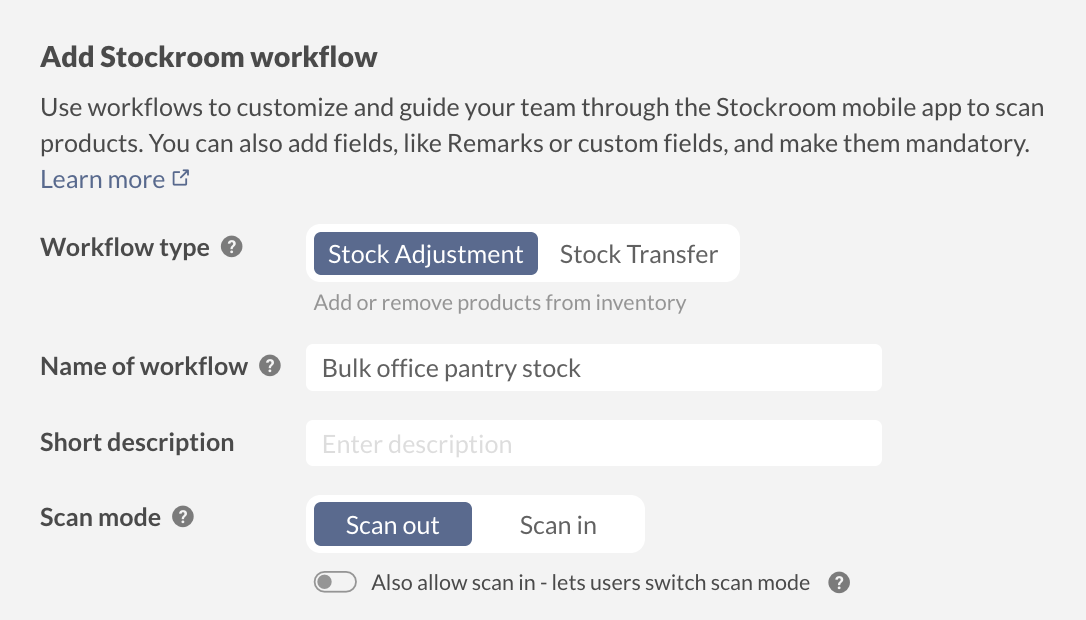
Stock adjustment workflows
Use a stock adjustment workflow when your team takes stock out of a location or puts it back.
Stock adjustment workflows have a Scan mode setting:
- Pick the mode the workflow opens in — Scan out or Scan in.
- Enable the “Also allow scan in/out” option to let your team control whether they can switch between scanning in and out during a scan. Leave it off if the workflow should only ever go one direction.
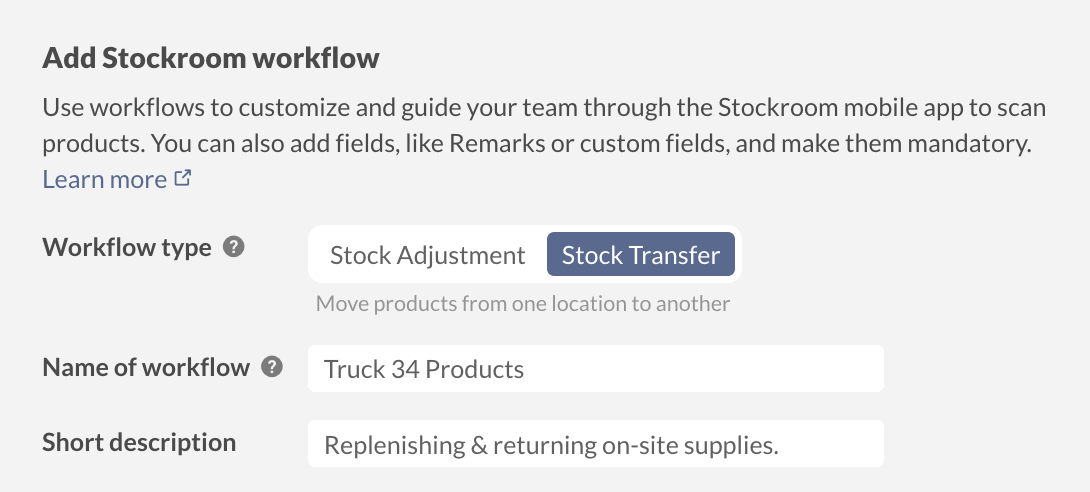
Stock transfer workflows
Use a stock transfer workflow when your team moves inventory between two locations, such as from the warehouse to a technician’s truck. This process is more effective than merely adjusting quantities using the Stockroom app.
Before you start, ensure you have more than one location set up—see the section on managing Stockroom locations for guidance.
Stock transfers in the Stockroom app complete in one step, skipping the In transit stage seen in transfers created in inFlow for Web.
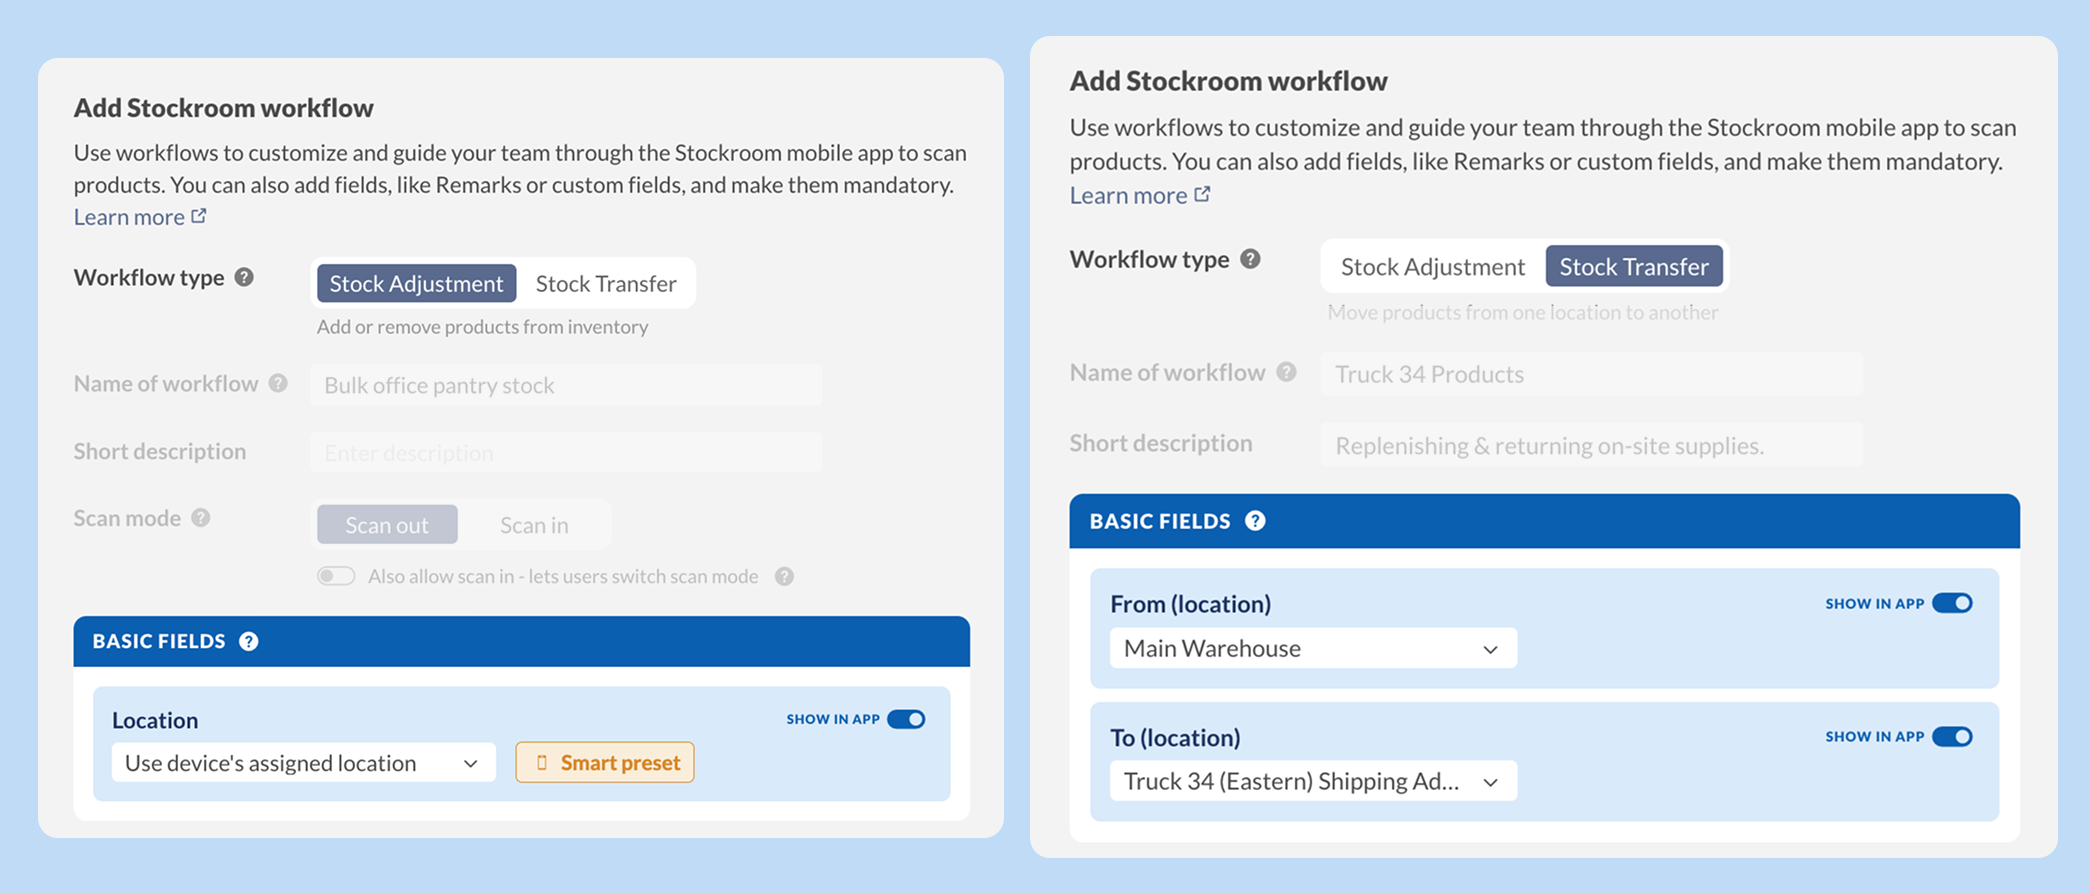
How to set basic fields for locations
Basic fields are the location fields a workflow needs to save. A stock adjustment workflow has one location; a stock transfer workflow has a From and a To location. For each one you can:
- Use the device location settings to set the scan’s location. If the device is set to a specific location, the user cannot change it. If the device allows user choice, the user must pick a location from a drop-down list.
- Keep it at one location for consistency. This is helpful when the From location should always be your main warehouse or storage area.
- Allow your team to choose from a list of locations each time they start the workflow.
Device locations are set per device, so pair this with your device setup. A device can be assigned to a single location or granted access to all locations — see Stockroom devices & users for instructions on adding and editing devices.
A location field must be shown in the app if you leave it empty or set it to use the device location — otherwise, your team would have no way to fill it in.
How to add configurable fields
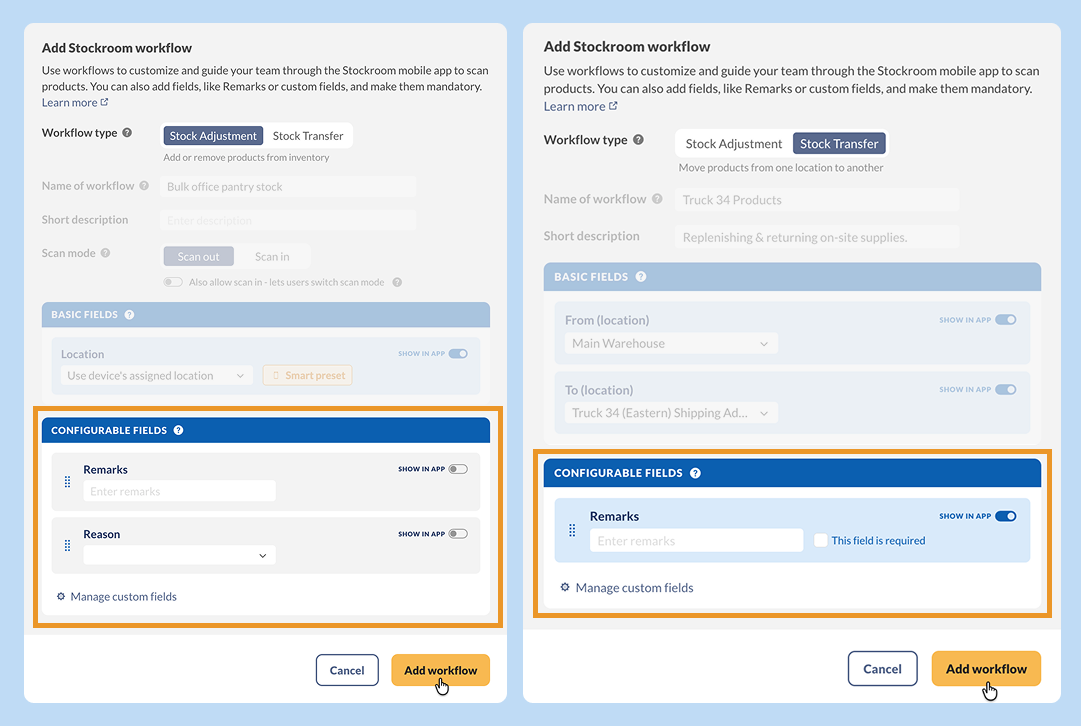
Configurable fields are the extra details your team fills in after they finish scanning. These include Remarks, Adjustment reason on stock adjustment workflows, and any custom fields you’ve already created for stock adjustments or stock transfers in your inFlow settings.
- Find the field you want in the Configurable fields section.
- Turn on Show in app, so your team sees it.
- Add a default value if most scans use the same answer.
- Turn on This field is required if your team must fill it in before they complete the workflow.
A field can’t be required unless it’s also shown in the app. To add a brand-new choice to the Adjustment reason list, click Manage options in that field’s drop-down.
Custom fields are a tidier way to capture things your team used to type into Remarks—job numbers, departments, or the site the stock is headed to. You can then filter and report on them later.
How to reorder, rename, or remove workflows
Your team sees workflows in the app in the same order you list them here, so put the one they use most at the top.
- Go to the Stockroom settings and find the Stockroom workflows tile.
- Hover over a workflow row to bring up its drag handle, then drag it up or down. inFlow saves the new order and your devices pick it up right away.
- Click a workflow to rename it, change its fields, or click Remove this workflow to take it out of the list.
What your team sees in the Stockroom app
Once you’ve saved your workflows, here’s the flow on the device:
- Your team opens the Stockroom app and identifies themselves by tapping their name or entering their PIN if you’ve enabled PIN authentication for a shared device.
- They tap the workflow they want from the list.
- They pick a location if the workflow asks for one.
- They scan products in or out, then tap Done.
- They fill in any fields you’ve shown, then confirm. inFlow creates the stock adjustment or stock transfer and returns them to the workflow list so they can start the next one.
If you’ve only set up one workflow, the app skips the list and goes straight into scanning.
When you turn on PIN authentication on a shared device, it affects all users. If someone doesn’t have a PIN, they will be hidden from the user list and won’t be able to scan until an admin assigns them one. Your Stockroom settings show which team members have a PIN and which ones still need one, making it easy to see who is missing.
Where to find Stockroom activity in inFlow
Scans made in the Stockroom app now show up in your regular lists and reports:
Stock adjustments & transfers
Open your Stock adjustment or Stock transfer list and navigate to the Stockroom tab. Alternatively, you can apply the From Stockroom filter while viewing other tabs.
Reports
Open the Stock Adjustment or Stock Transfer report and add the Stockroom User and Stockroom Device columns to see who scanned which item and on which device.
 Yes, thanks!
  Not really

0 Comments