How to import manufacturing operations to inFlow
Easily track your manufacturing progress and costs with inFlow. Import bulk operations using CSV files to simplify your process.
Import file

Please note: Importing manufacturing operations is only available on inFlow Manufacturing for Web.
Creating the CSV
To start, you’ll need to create a CSV import template. You can export a blank template from inFlow or manually add the headings to your spreadsheet.
How to export an operations CSV
- From the Main menu, hover over the Settings icon, then Export.
- In the Data type list, select Operations.
- Click Export and save the file to your computer.
- Open the CSV in the spreadsheet software of your choice.
Create the CSV manually
On a spreadsheet, add the following headings:
- ProductName
- OperationType
- OperationPerUnitCost
- OperationPerHourCost
- OperationEstimatedDurationSeconds
- OperationInstructions
- TrackTime
Note: You might have noticed that the headings don’t have any spaces. Leaving the headings like this will allow inFlow to read the information on the CSV faster.
Editing the operations CSV
Once you have a CSV file with the appropriate headings, fill in the rows and columns, starting with ProductName.
The product name field is required, meaning it must be filled out and cannot be left blank. This field also serves as a “unique identifier,” so the name must be different from other product names.

Import field breakdown
| Import field | Explanation |
| ProductName | This acts as a category for the operation. Operations can be added to the inFlow settings or included in the CSV template and created through import. |
| OperationType | This is to track the hourly rate for manufacturing a specific operation. For example, the hourly rate for labor and applicable fees. |
| OperationPerUnitCost | This is to track the hourly rate for manufacturing a specific operation. For example, the hourly rate for labor and applicable fees. |
| OperationPerHourCost | This field is where you can add written instructions for how to assemble the components in the bill of materials. This field also accepts HTML links. |
| OperationEstimatedDurationSeconds | Enter the time in seconds for how long this operation should take. This field holds up to 4 decimal points for precise time tracking. Estimated duration and Per-hour costs are used to calculate the cost for the specific operation. |
| OperationInstructions | This acts as a category for the operation. Operations can be added to the inFlow settings, included in the CSV template, and created through import. |
| TrackTime | This field determines whether the operation should track hourly labor. Enter TRUE to track labor or FALSE to use per-unit costs for the operation fee. |
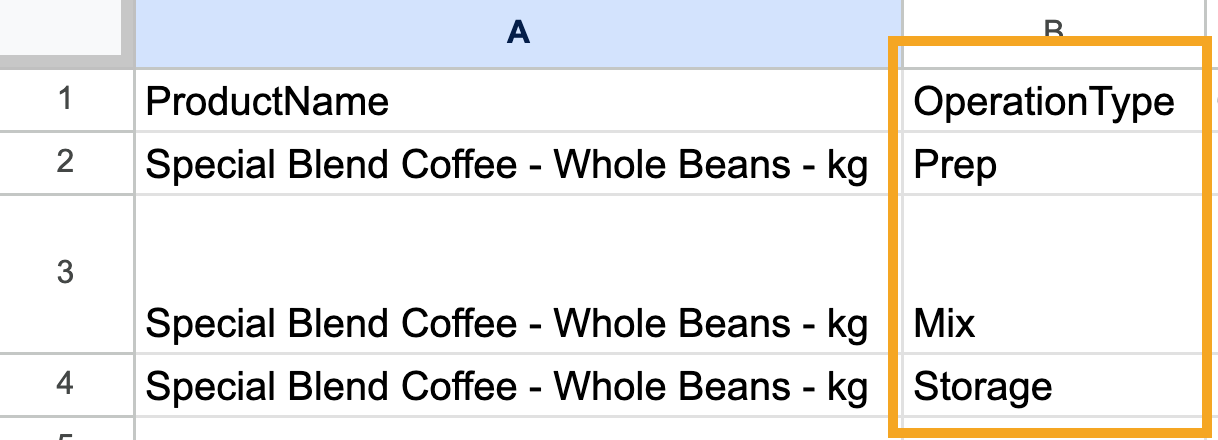
Adding multiple operations for a product
To add multiple operations, copy the product name to another row and complete the remaining columns for that row.
The operations listed in the CSV will be displayed in the same order as they appear in the Manufacturing tab of the product record.

At the moment, there isn’t an option to change the order of operations. You can reimport the CSV file to change the display order.
Import steps
Importing to inFlow
If you have your import file ready to go, read on for how to import your file into inFlow.
- From the Main menu, hover over the Settings icon, then Import.
- In the Data type drop-down menu, select Operations.
- Below, select the CSV file from your computer, then click Next.
- A preview of your import file will appear, showing the number of line items.
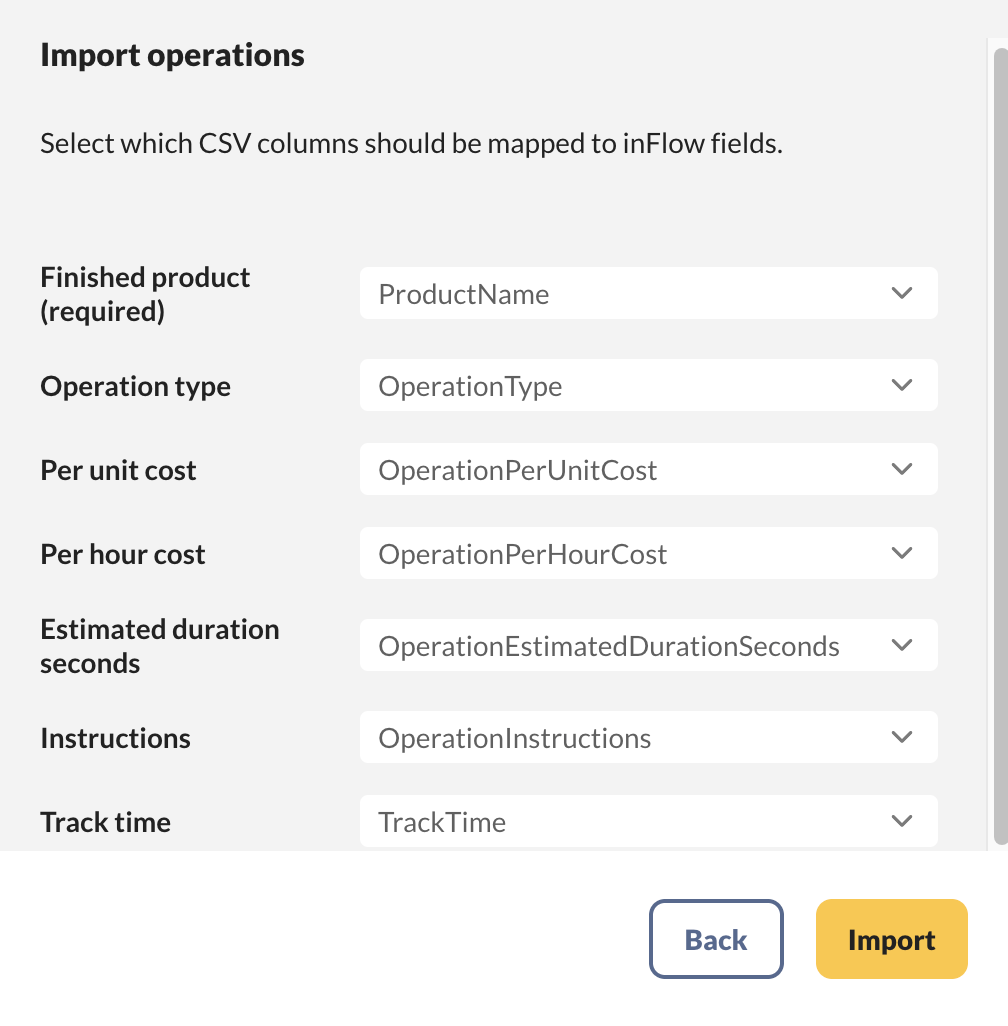
- To edit the mapping of CSV columns to inFlow fields, click on Edit data mapping.
- Match the inFlow fields on the left to the fields in your CSV file that are in the drop-down menus.
- Once you’re satisfied that all the necessary fields match, click Import.
- A confirmation message will appear, indicating that your import is in progress. You’ll be emailed the import results when it’s done.


0 Comments