How to track sublocations in inFlow (aisles, bins, etc.)
Sublocations make it easy to pinpoint the exact aisle or bin number for your products, giving you more control over where everything is stored. This way, you can always find what you need with a little less hassle!
Web

Sublocations settings in inFlow
By default, sublocations are enabled in inFlow and are available on select inFlow plans. If you don’t see them, follow the steps below to enable this feature.
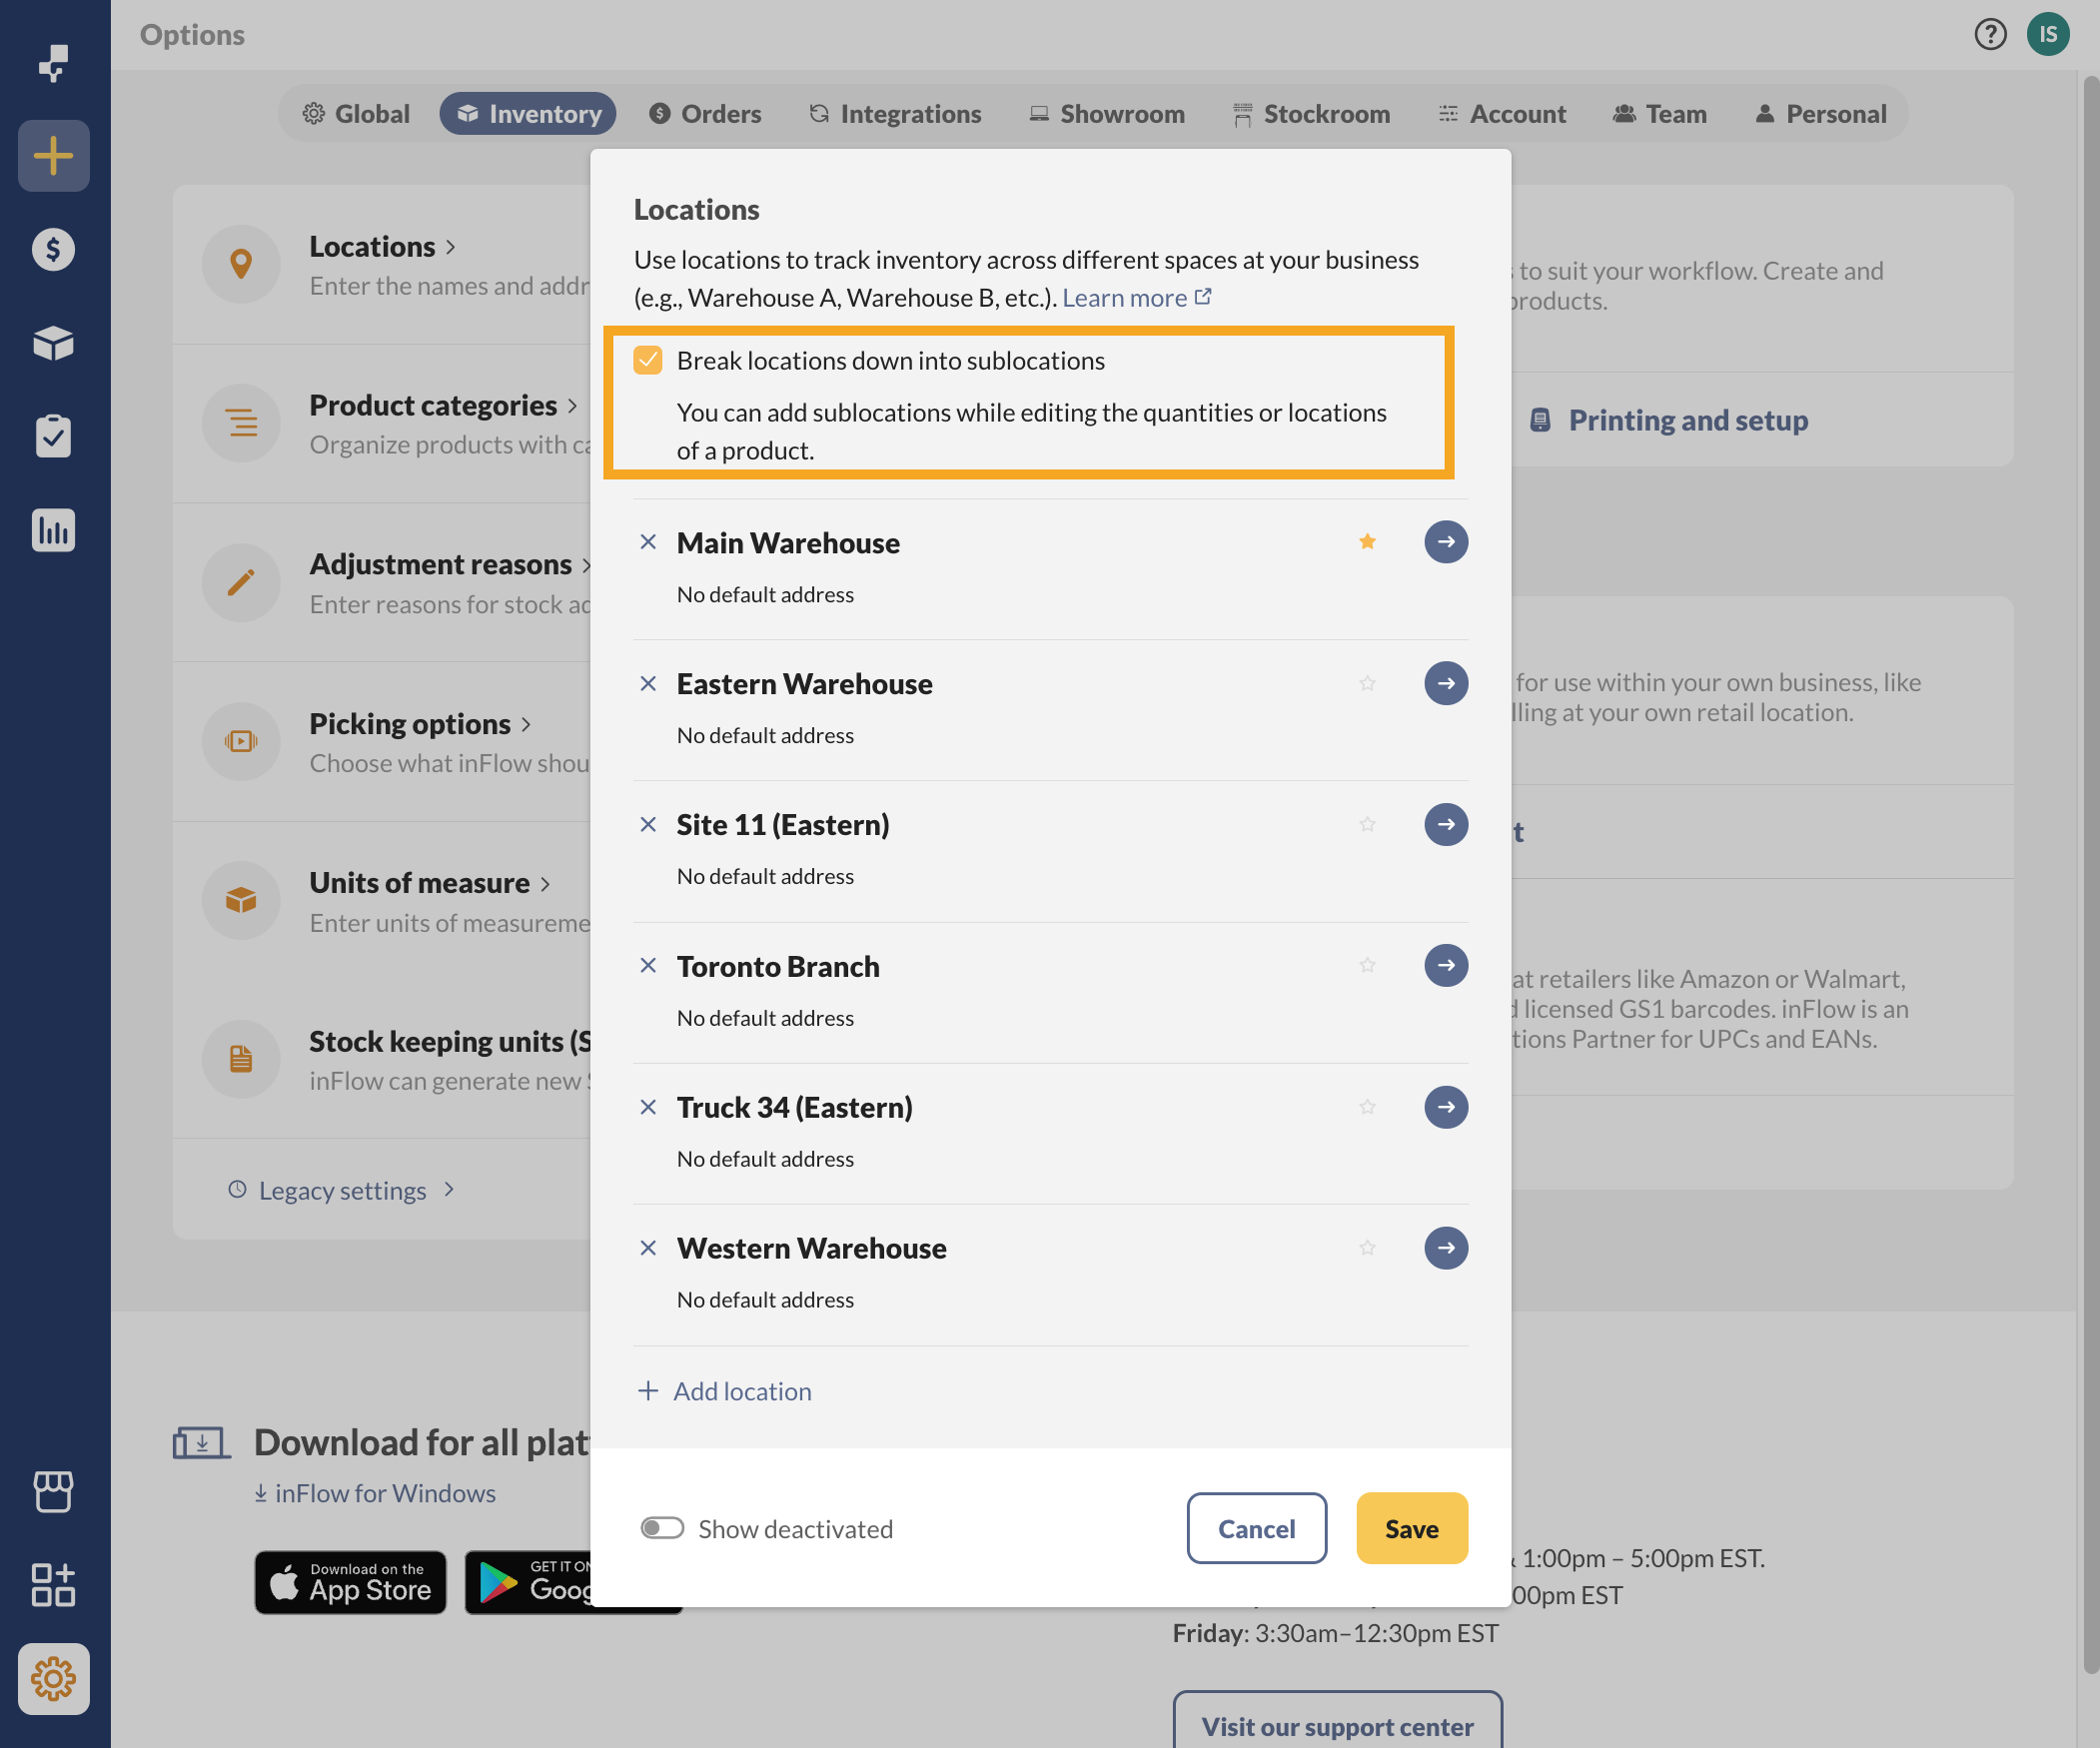
- Go to inFlow’s Inventory settings. (Click on the Settings button on the Main Menu>Inventory).
- Click on Locations.
- At the top, there will be a checkbox labeled Break locations down into sublocations. Place a check mark for this option.
- Click Save.
Adding sublocations to products
You can add sublocations directly to your products while editing the quantities or locations in the product record.
- To add or edit sublocations, click a location’s name in the product record’s quantity tile.
- If there are no existing sublocations, click on Add sublocation.
- Next, click on New sublocation and enter the name of the new sublocation.
- Once you’ve finished, click Create.
- As an option, you can click the star icon next to a sublocation to set it as the default sublocation.
Adding sublocations from purchase orders
Another option for creating or assigning a sublocation for products is when receiving products from a purchase order.
- Click the Receive tab.
- Select the Sublocation field to add a new or existing sublocation as the receiving location for the product.
- Select a sublocation from the list, or type in a new sublocation name and click “+” to add a new sublocation to inFlow.
- Follow the same steps for all the products you want to assign a sublocation to when you receive them.
- Save the purchase order
Removing sublocations
Sublocations won’t show up in the product record when there’s no stock available. You can remove them from view on the product record by setting the inventory level to zero.
Sublocations can only be deactivated on inFlow for Windows. Check out the “How to add or remove sublocations” section on the Windows tab of this article for all the details.
Windows
Setting up sublocations
- Go to Main Menu > Options > Settings.
- In the Company tab, look for the section labeled Track Inventory By.
- Check the Locations broken down into sublocations options.
- Click Save & Close.
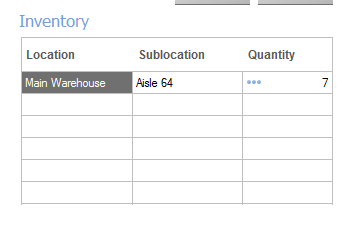
Now, you will see sublocations as an additional column in any location field (product records, receiving, picking, etc.). To specify a sublocation, simply click into the sublocation cell and type in its name (e.g., Aisle 64).
How to add/remove sublocations
- Go to Main Menu > Options > Settings, then click on Manage Inventory Locations.
- Select Edit Sublocations.
- Click on the plus or subtract buttons to add or remove sublocations.


Put in directions on how to add sublocations.
Include instructions on how to change a name of a subocation without having to go into each product to do so…. or add this feature. Very helpful for big stock changes and can be done with categories.
Why can I not save a sublocation? It lets me add it then when I press “SAVE” it goes away.
you dont always receive the whole PO to the same location – meaning i get 100 widgets, i may receive 25 of those widgets to bin 1-a and the rest to b-1. there is no way to split bin in the receiving process.