How to customize your documents with inFlow’s Document Designer
Unlock the power of inFlow’s Document Designer to take your documents to the next level. With our easy-to-follow guide, learn how to customize your documents and make them stand out.
Web
Document Designer video
Take a look at the video below for a visual guide on customizing documents using the Document Designer.
Please note that the inFlow menu has been updated since the release of the video above. From the Main Menu hover over the settings icon
, then Orders.
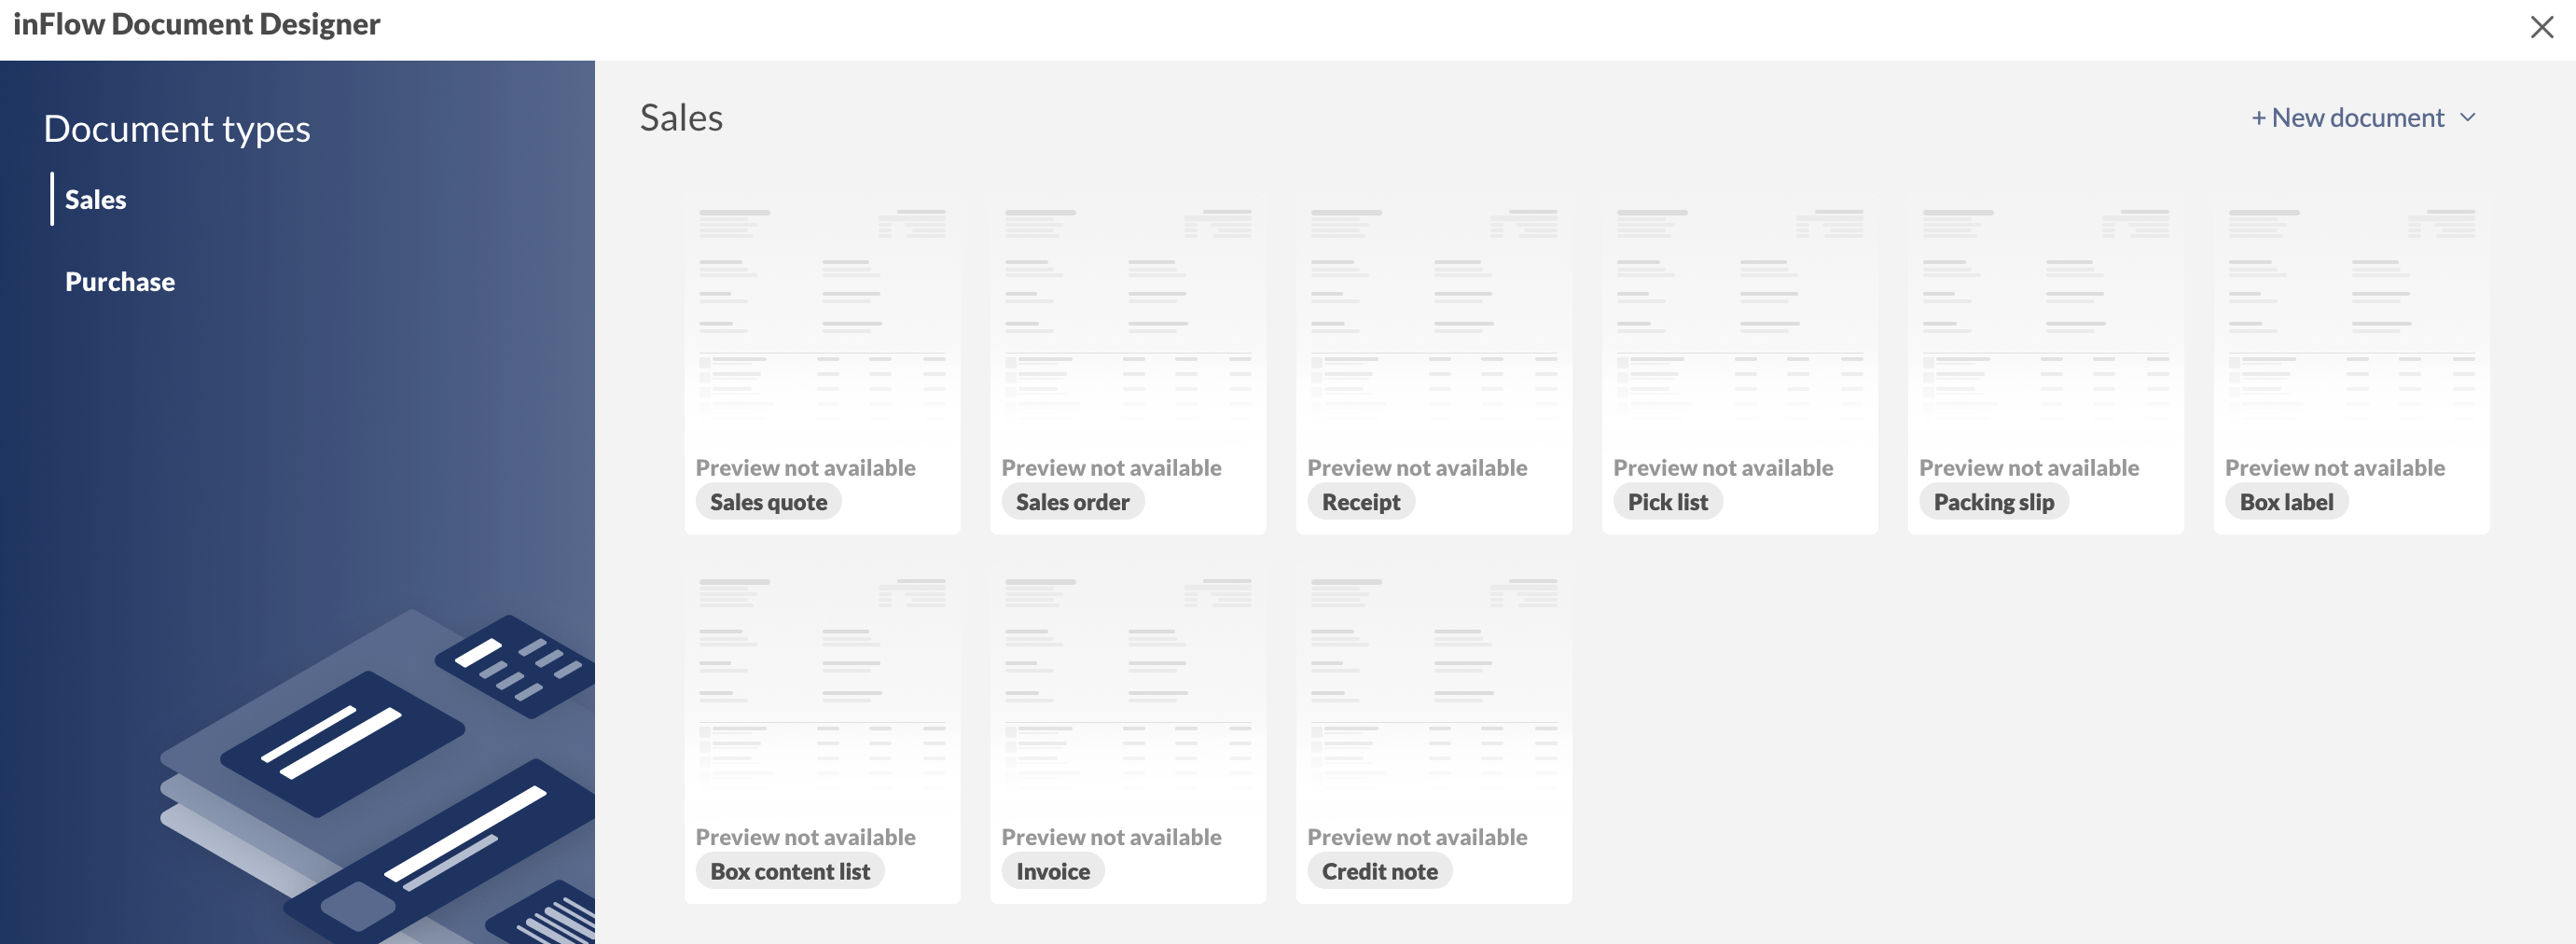
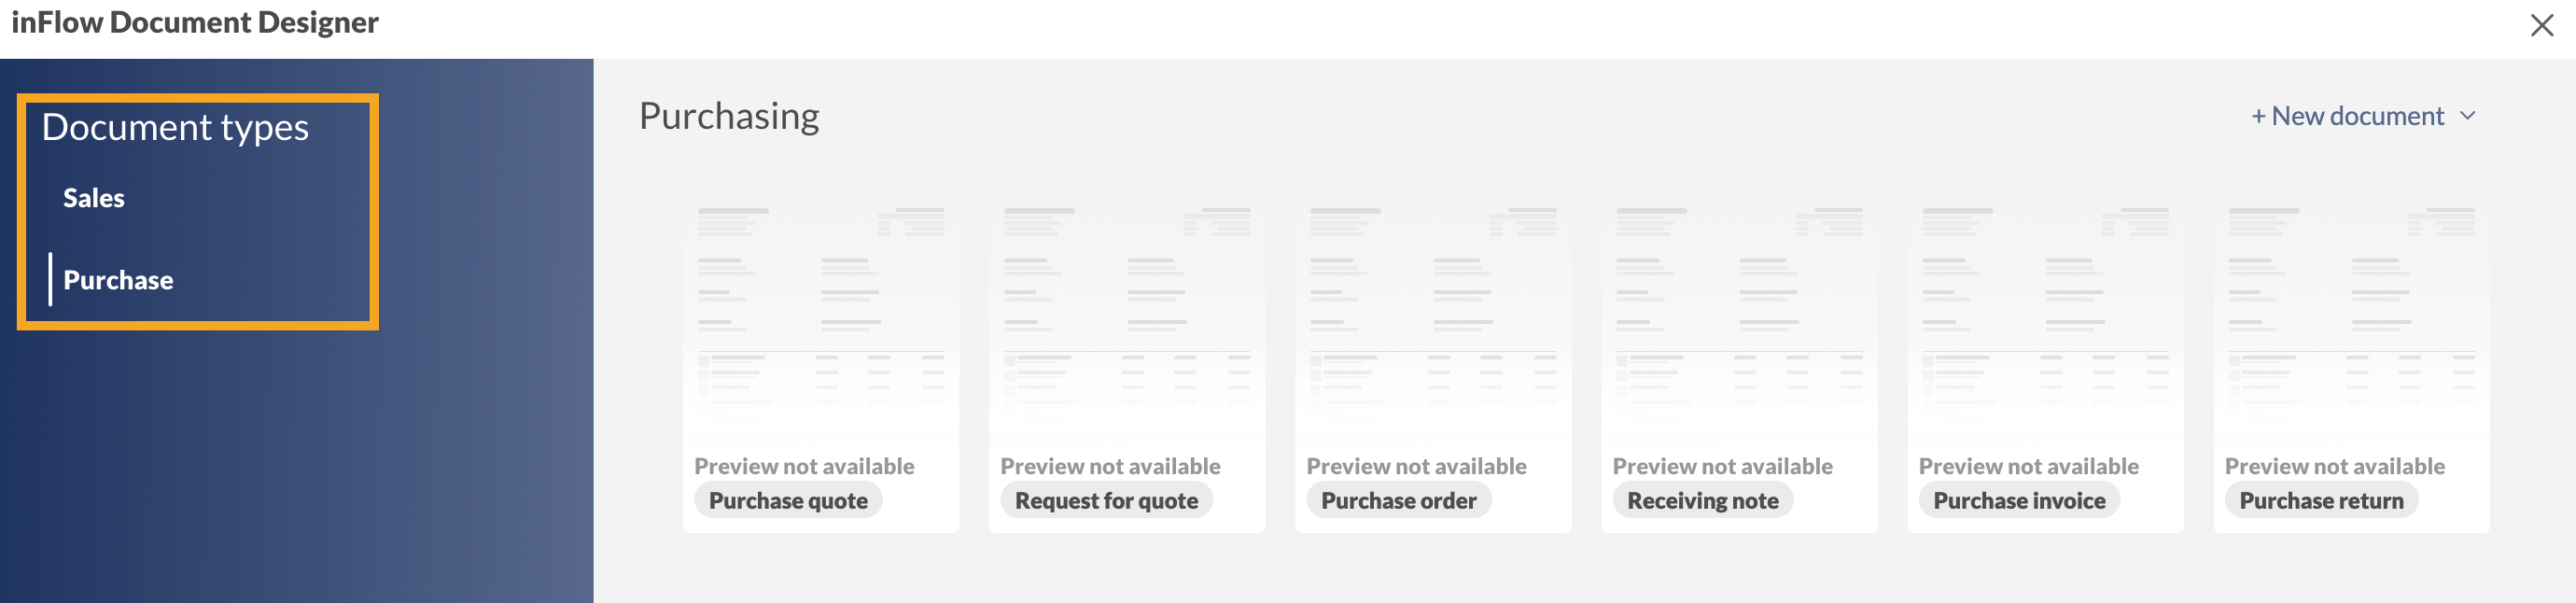
What types of documents can I make?
With inFlow’s Document Designer, you can easily create various sales and purchasing documents. Below is a list of available document types.
| Sales documents | Purchasing documents |
|---|---|
|
|
Getting started
Go to inFlow’s Order settings and select Documents. (From the Main Menu, hover over the settings icon ![]() > Orders.)
> Orders.)
Document types
On this screen, there are examples of documents you can create. You can toggle between making a sales or purchasing document.
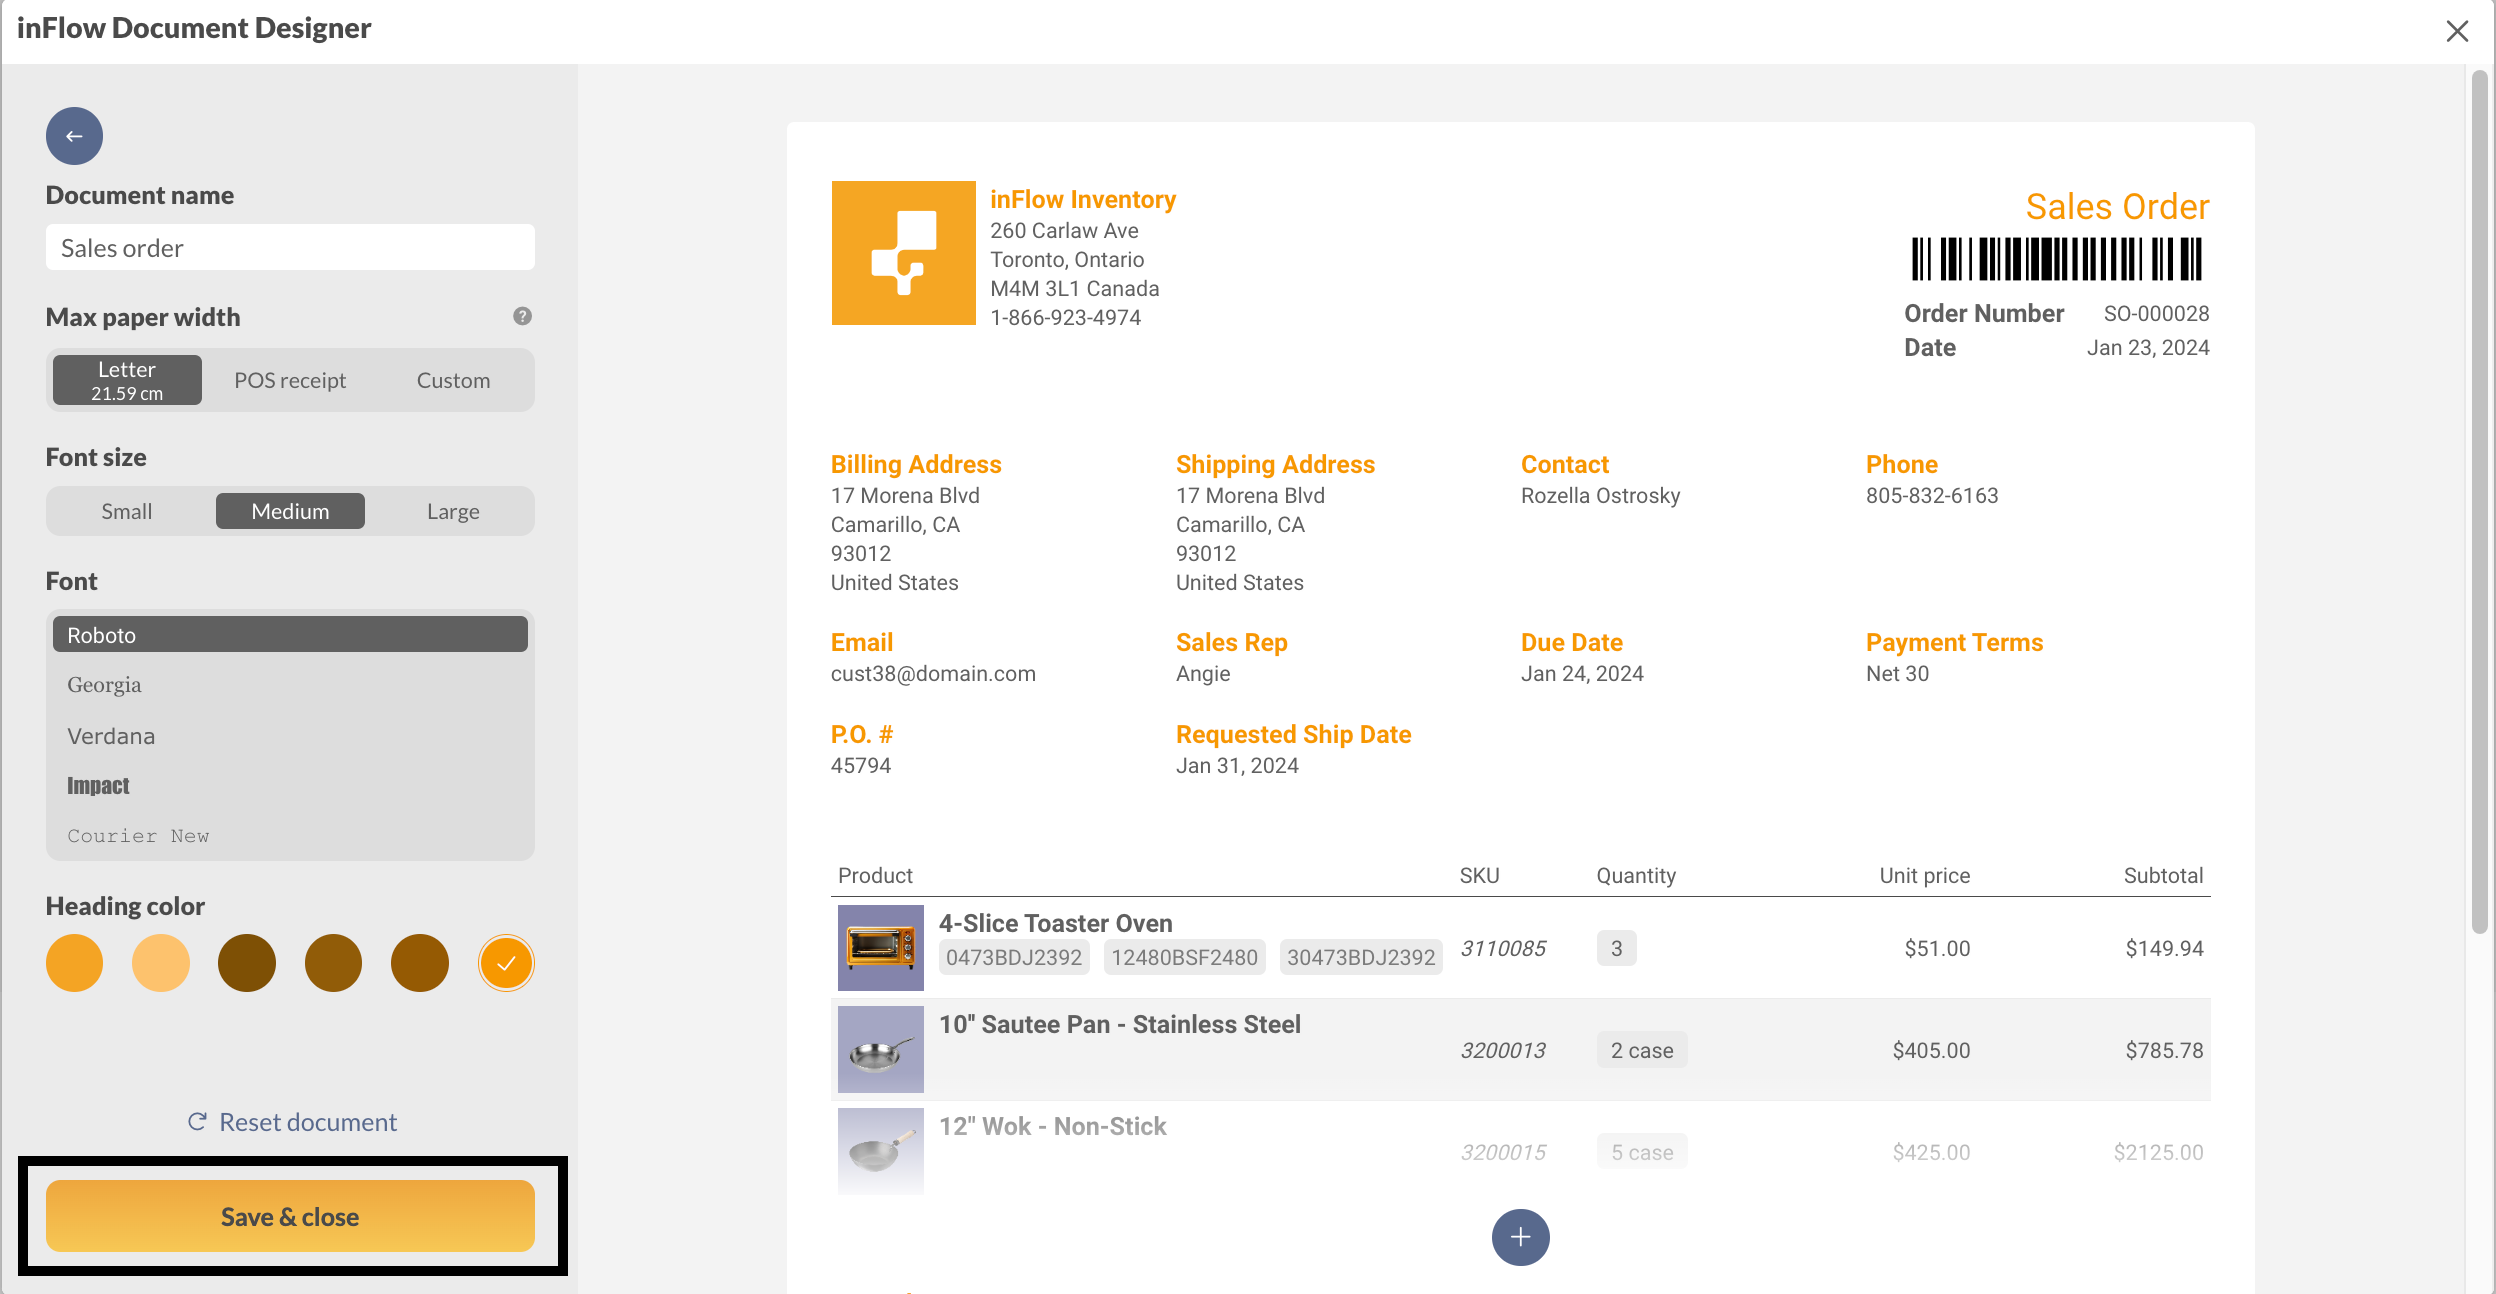
Document settings
This section of the document designer lets you set default letterhead and overall document styling options that apply to all documents.
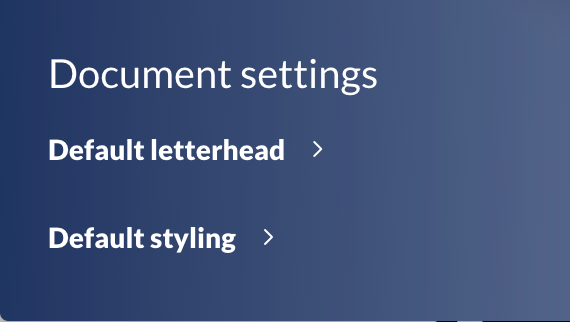
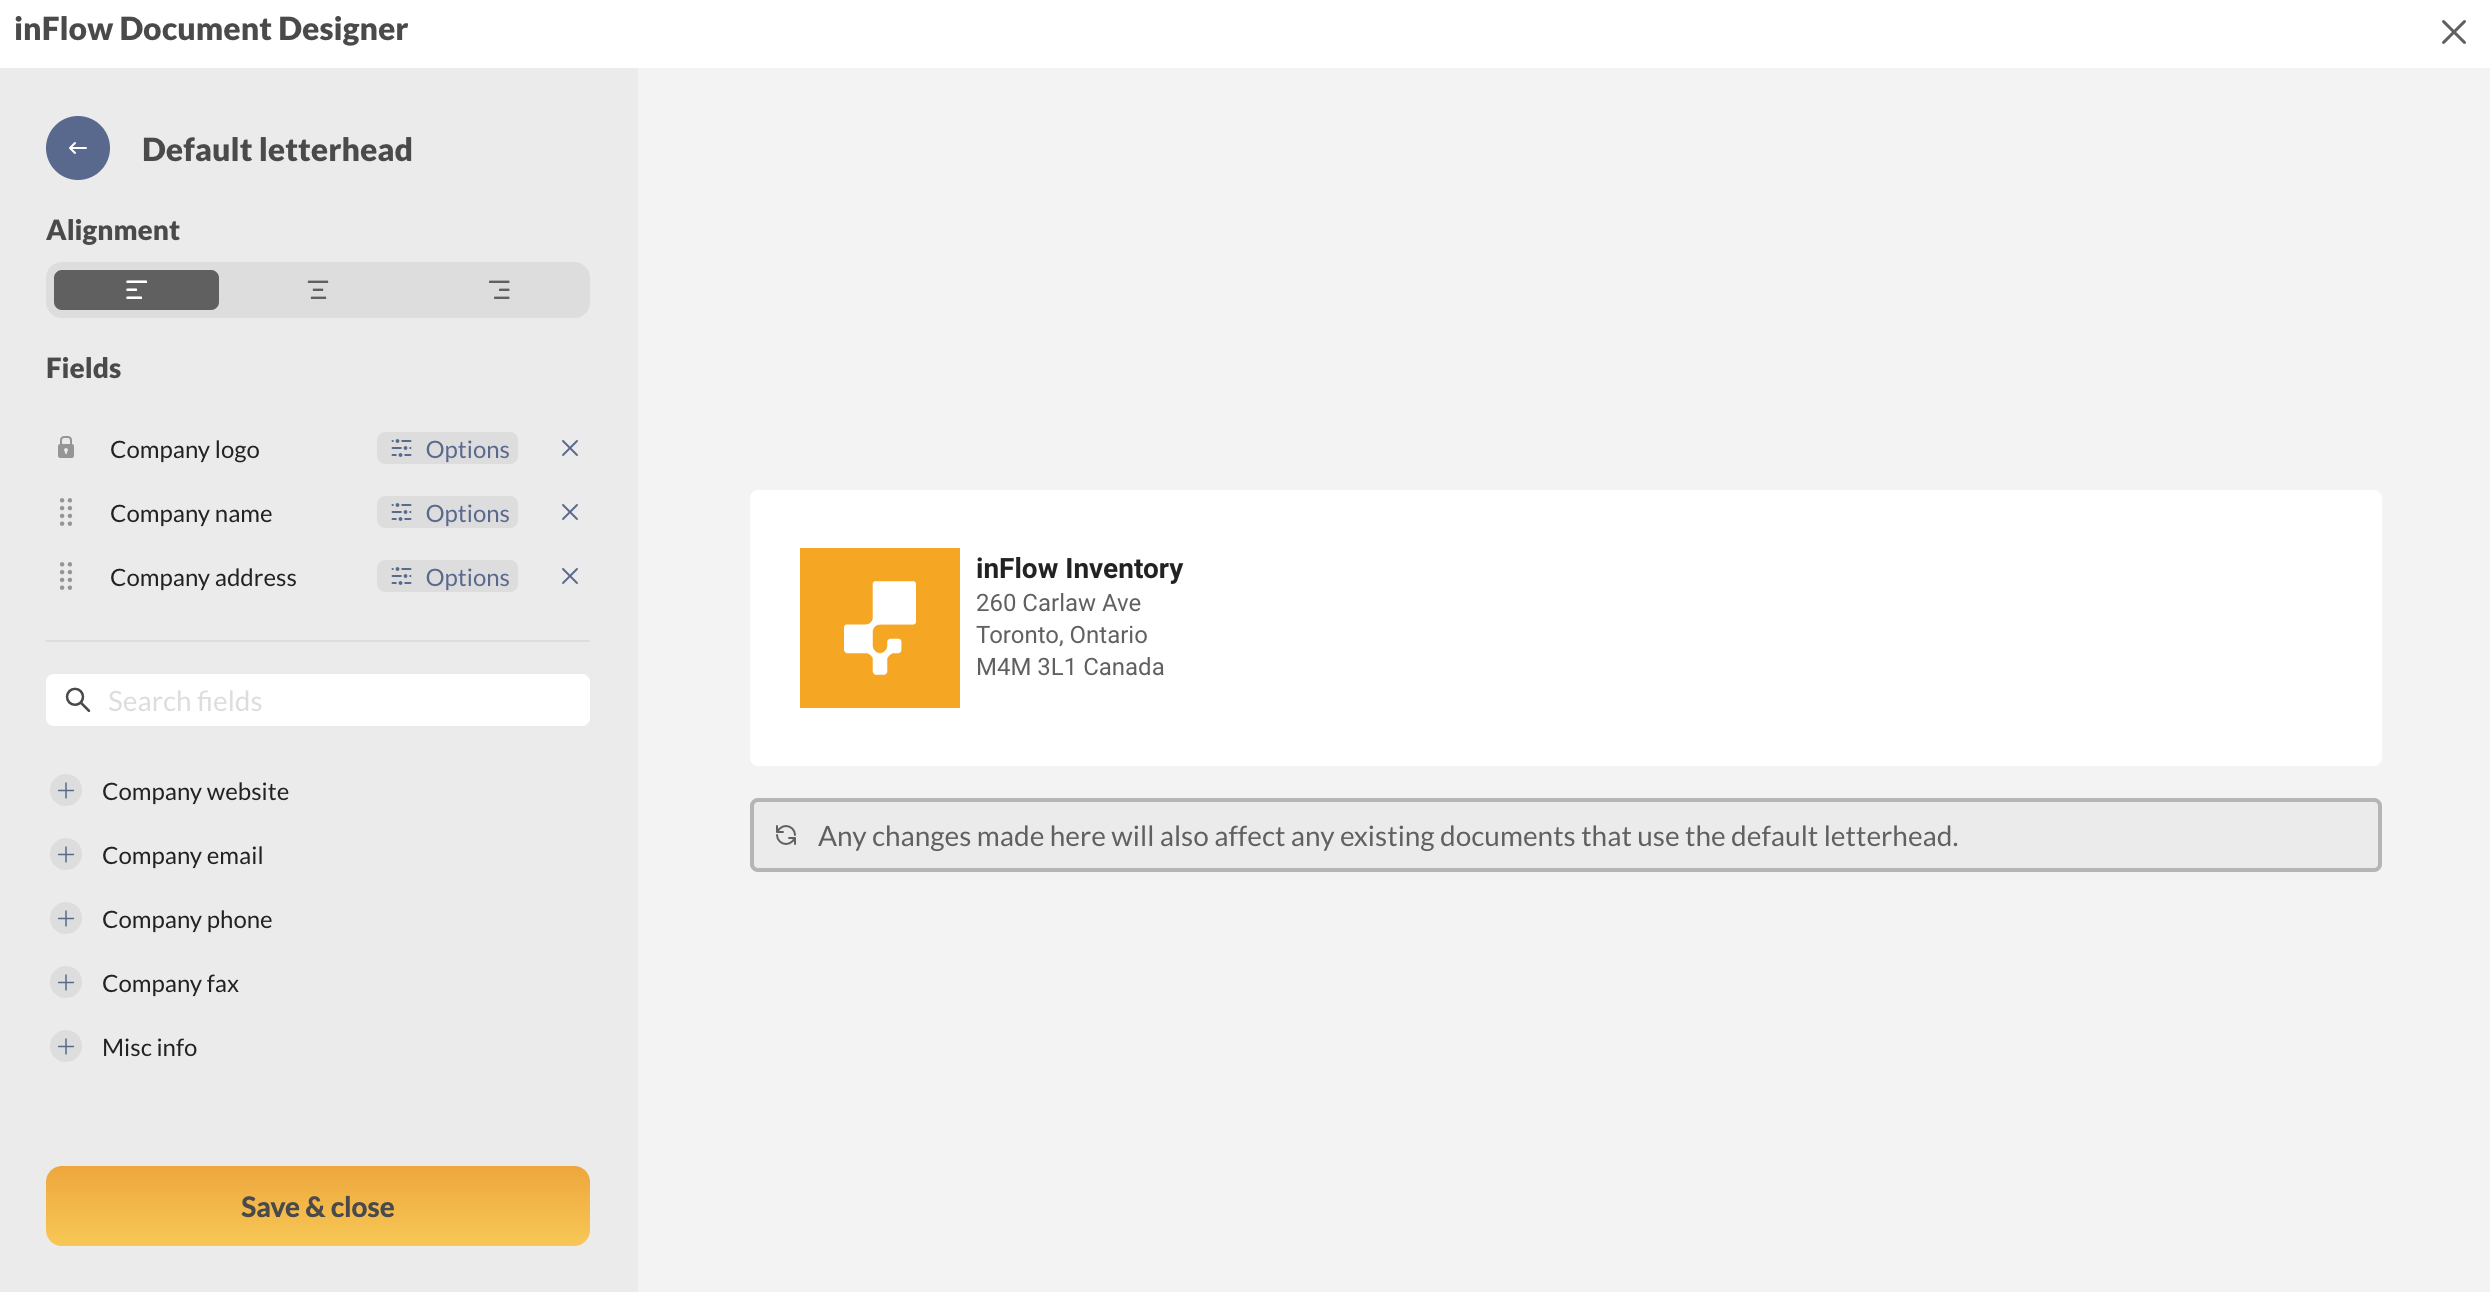
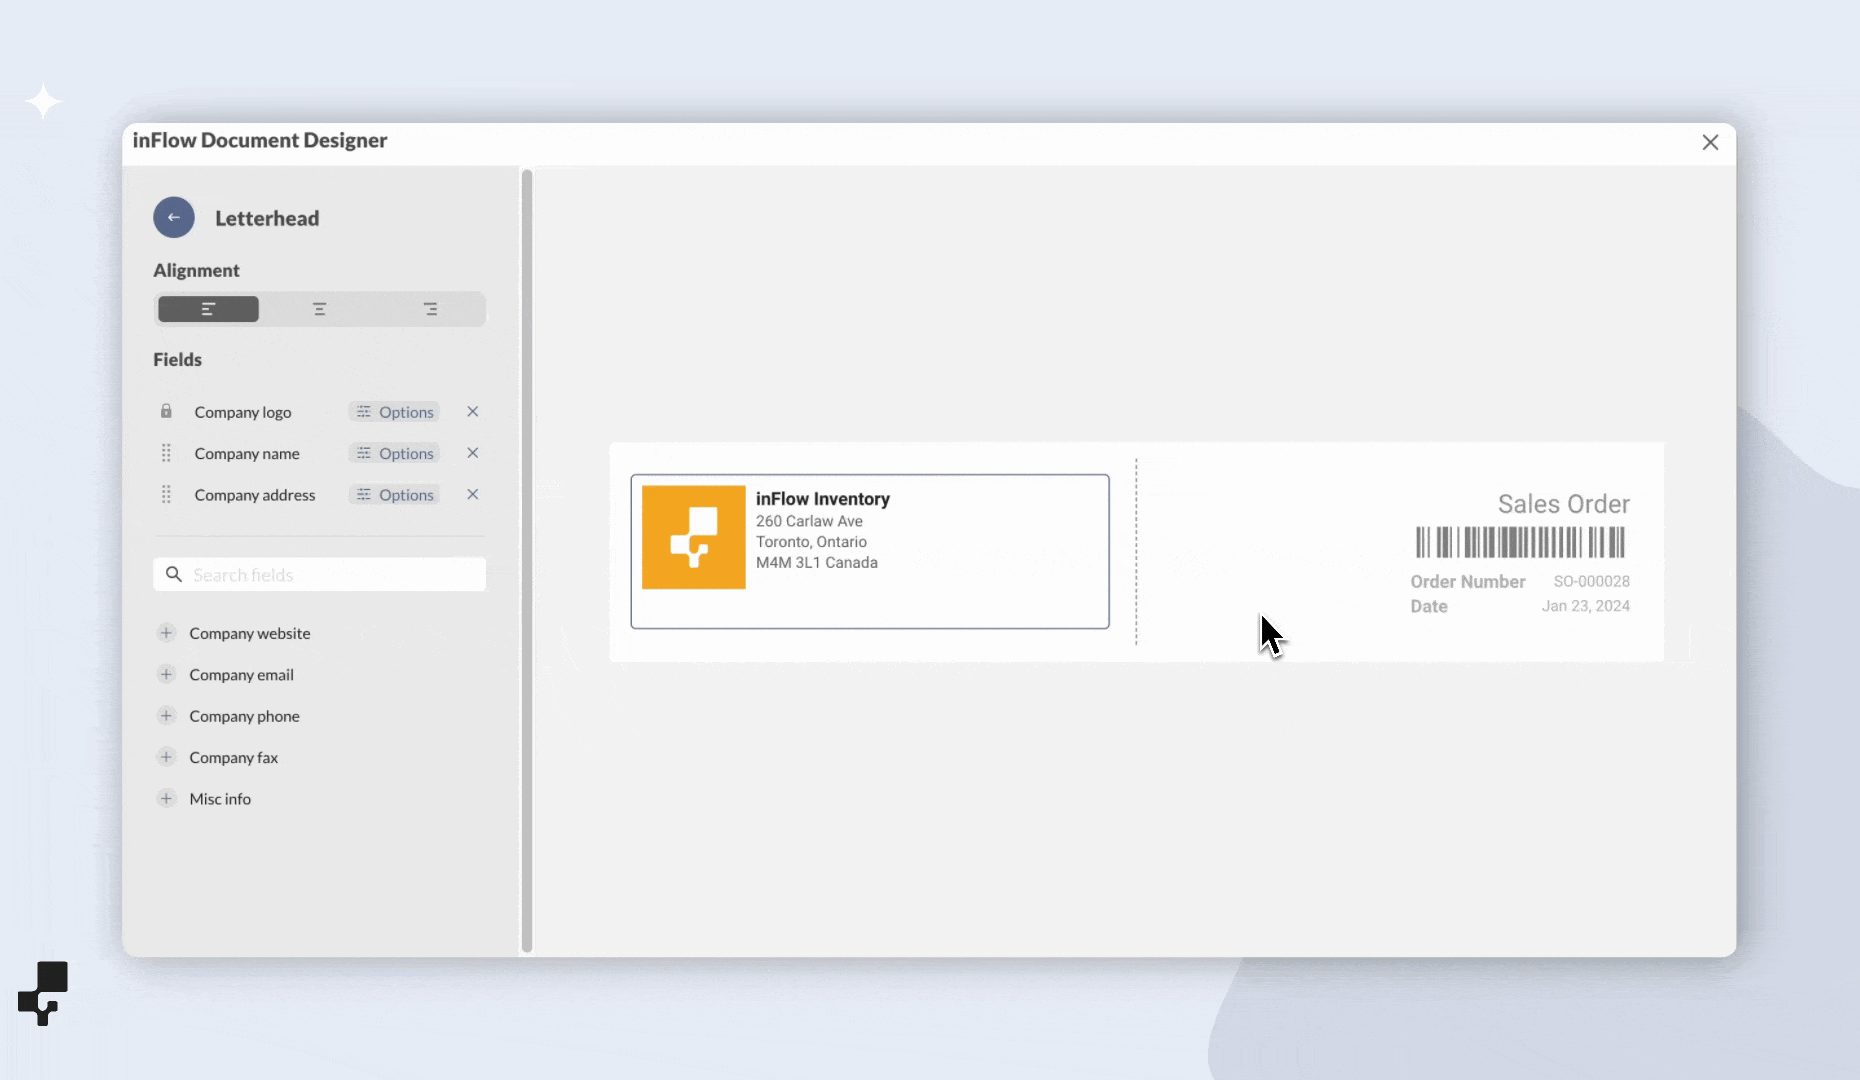
Default letterhead
Here, you can set the default letterhead styling for your documents. Think of this as setting a letterhead template.
Select Alignment, then select Fields to customize the details shown on the default letterhead.
| Alignment | This display option is to have the letterhead left-aligned, center, and right-aligned. |
| Fields | A list of available fields from inFlow’s company details. Select Options to modify active fields, X to remove, and + to add fields to the letterhead block. |
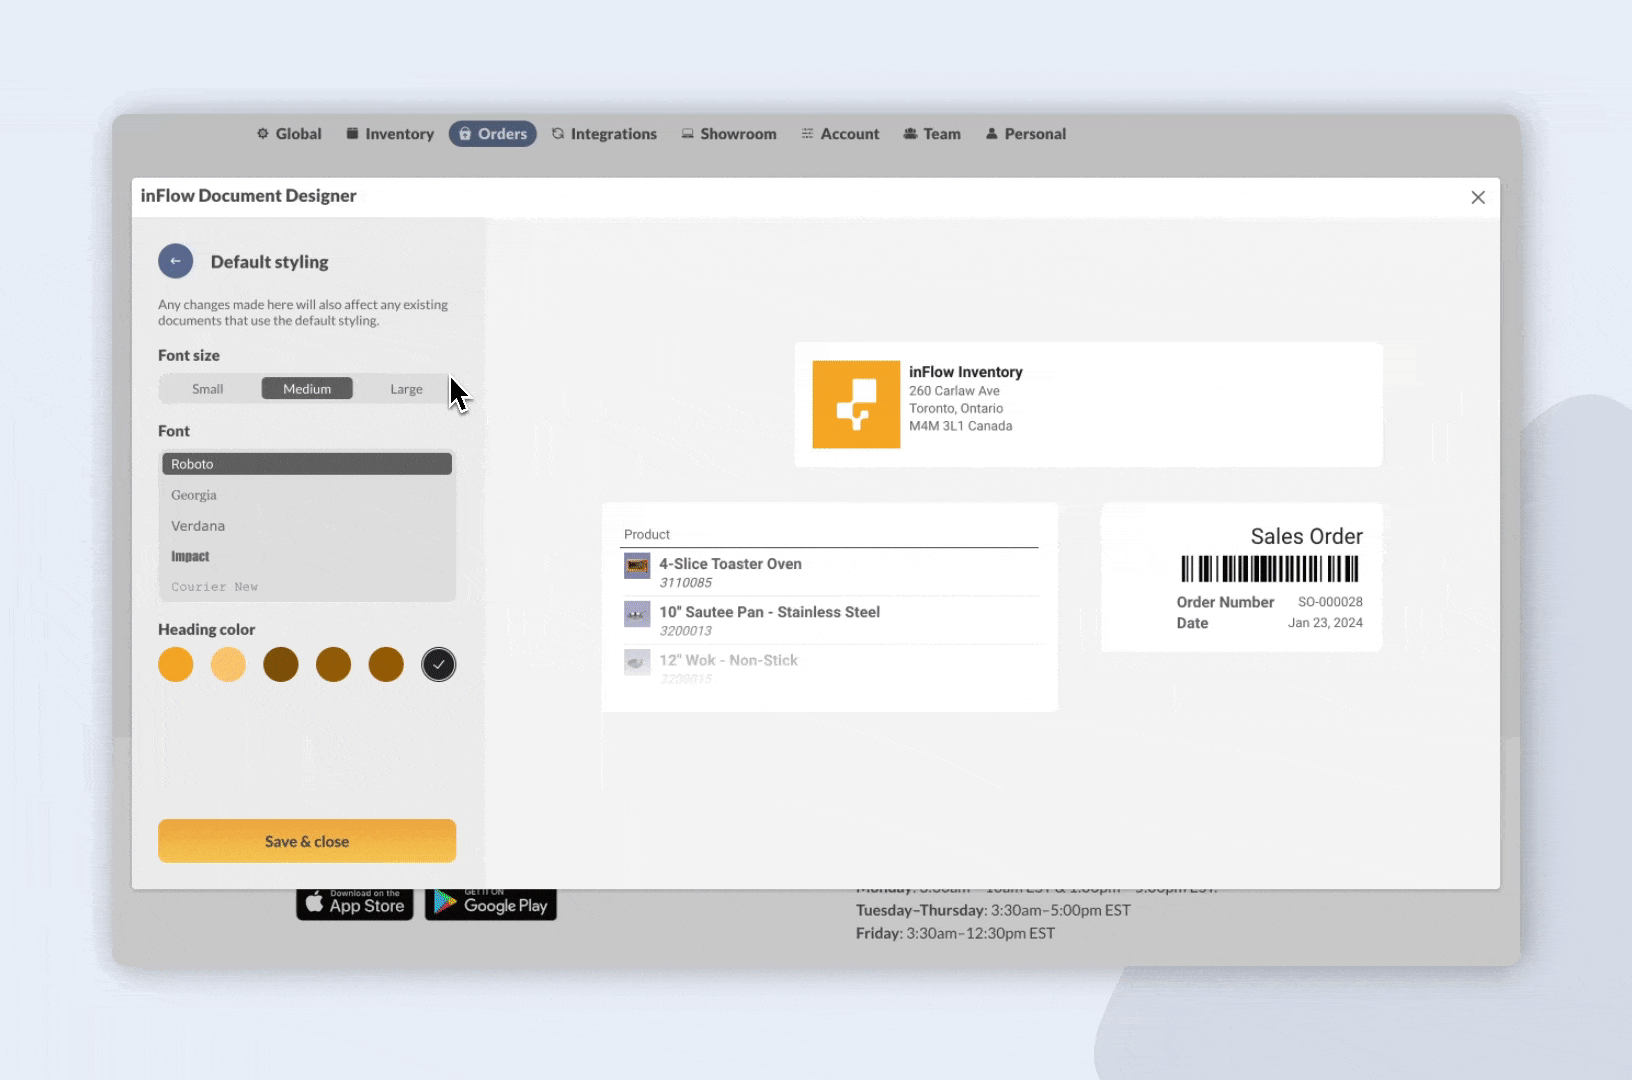
Default styling
Here, you can choose the document designer’s default font size, font type, and heading colors.
| Font size | You can choose the color of the document headings. The colors are from the color scheme of your company logo (if uploaded) Select the black pre-checked color to open the color picker. You can manually select a color or enter the HEX code. Click on the arrows to toggle between HEX code, HSL (Hue, Saturation, and Lightness), or RGB (Red, Green, Blue) to enter values. |
| Font | Choose which typeface/font style your documents should use. |
| Heading color | You can choose the color of the document headings. The colors are from the color scheme of your company logo (if uploaded.) Select the black pre-checked color to open the color picker. You can manually select a color or enter the HEX code. Click on the arrows to toggle between HEX code, HSL (Hue, Saturation, and Lightness), or RGB (Red, Green, Blue) to enter values. |
Selecting a document type & settings
Now that we have reviewed the basics, let’s create a new document.
Select a document template or New document from the top right-hand corner of the main Document Designer screen. For example, to create a new invoice document, choose Invoice.
Choosing the correct document type
When designing a document, you must select the proper document from the list of available documents (listed above). This is because inFlow triggers actions when some documents are printed or emailed.
The most notable example is the Invoice document. inFlow will set the status of any started or fulfilled sales order to Invoiced when you print or email an invoice.
The invoiced status will set the due date on the sales order (if you have payment terms), and inFlow will send the sales order to any connected accounting integrations.
You could trigger these status changes accidentally by creating a “Bill of Lading” from the Invoice document type.
Use the Generic document for documents that don’t fall under one of the sales or purchasing document types. These documents don’t trigger any changes to order status.
Getting to know the Document Designer
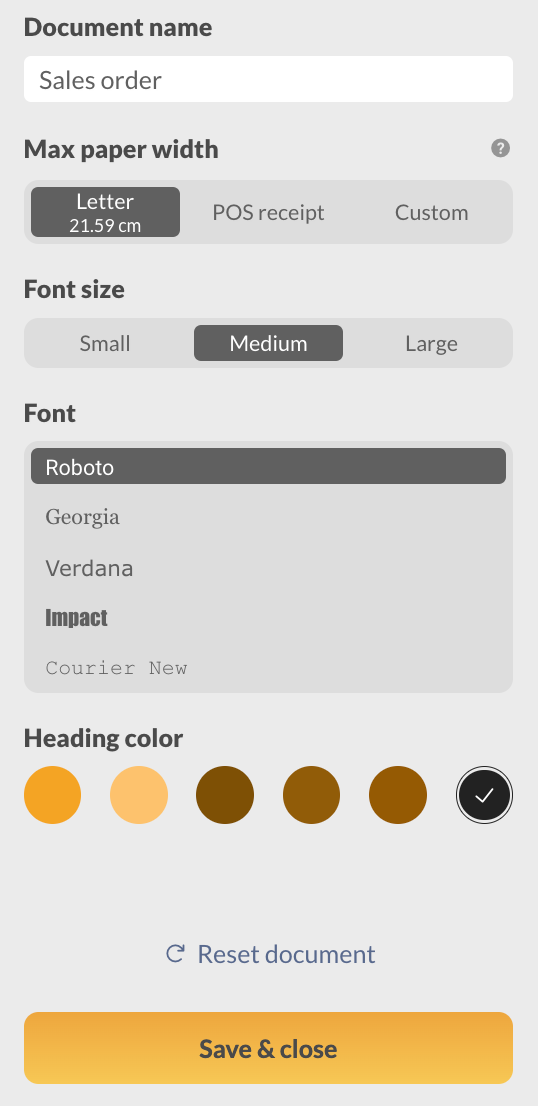
Once in the document on the left-hand pane, you make changes to the overall document before customizing the document blocks. Settings you can change include:
- Document name
- Max paper width
- Font size
- Font
- Heading color.
Here, you can select Reset document to restore the document to its original state.
If defaults have been set, documents will use the default styling first. You can override the defaults by selecting Use custom.
Document blocks
The Document designer consists of rows of blocks that group similar order-level information. You can hover your cursor over the document to view the available blocks.
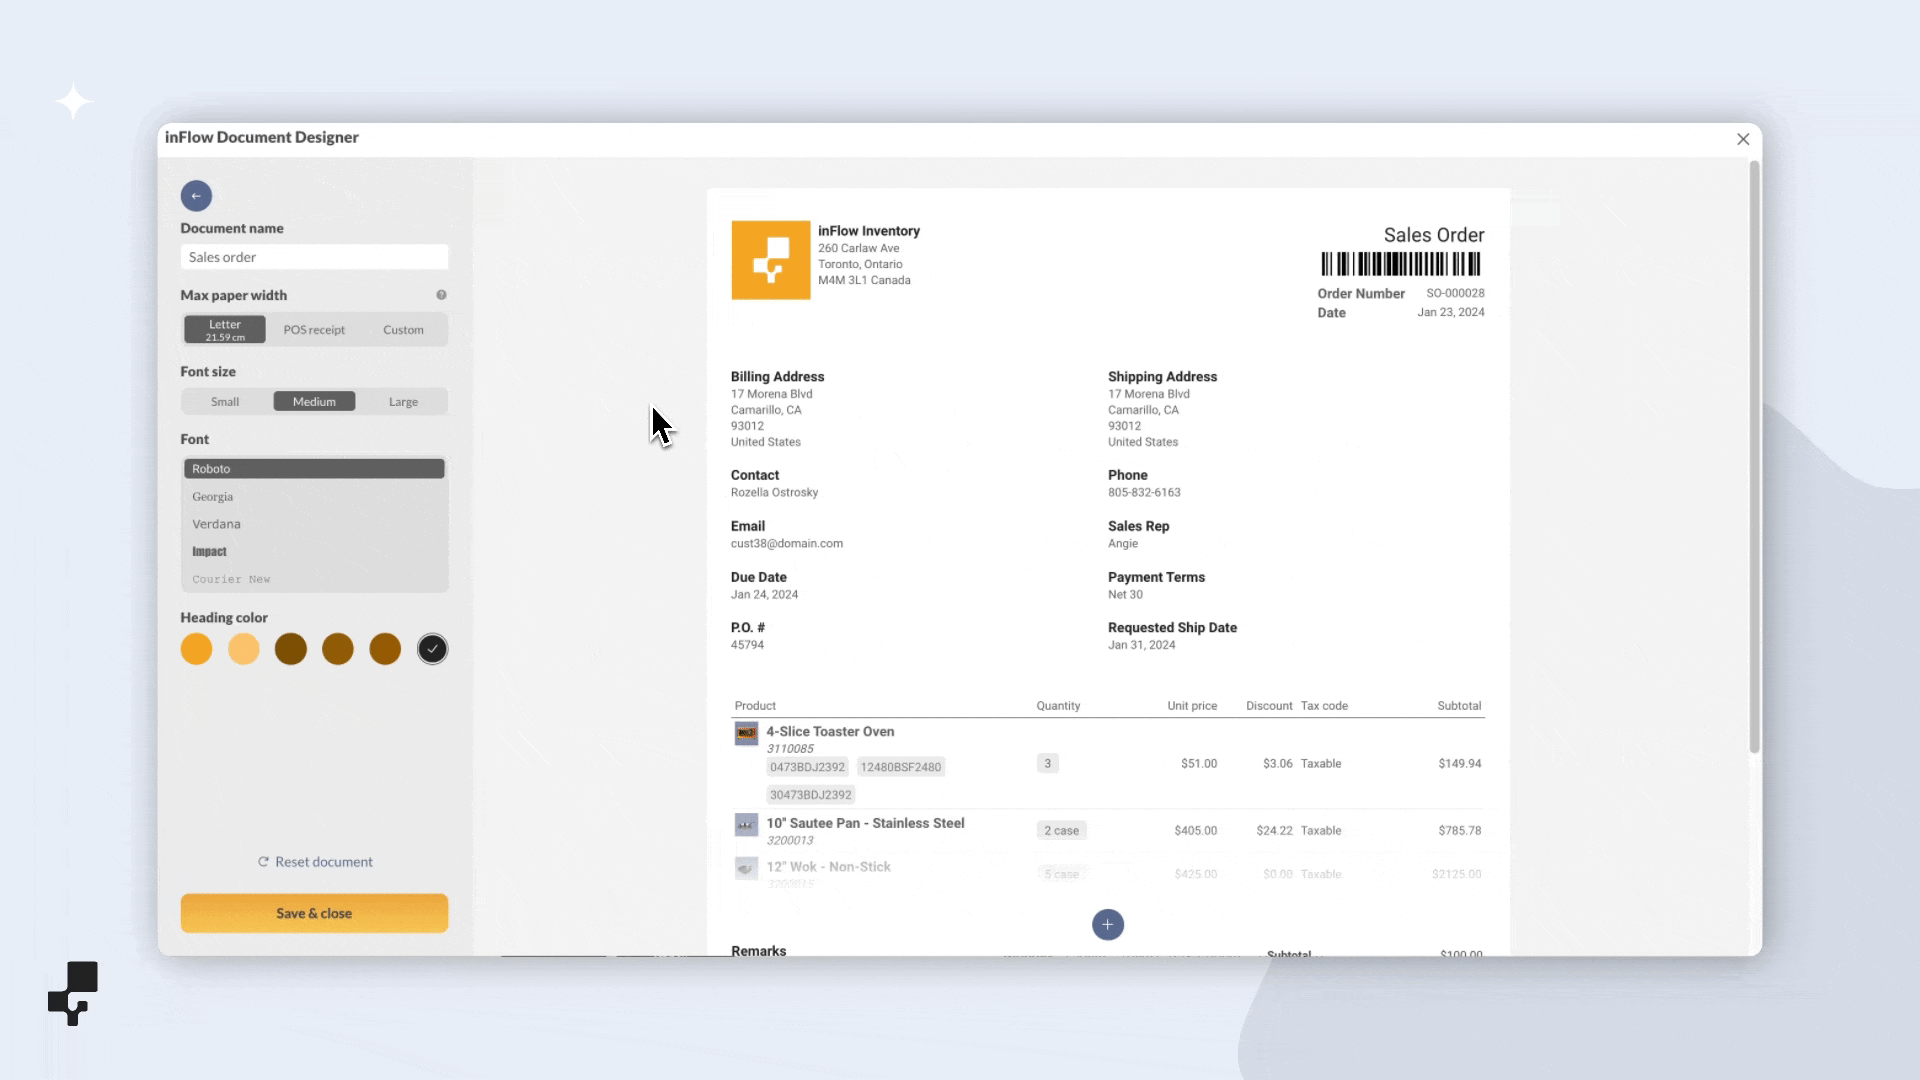
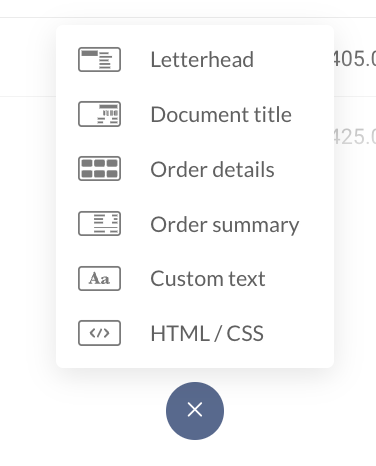
Click on the + icon at the bottom of the document to add a new block to your document.

Click and hold the drag handles to rearrange a block on the document.
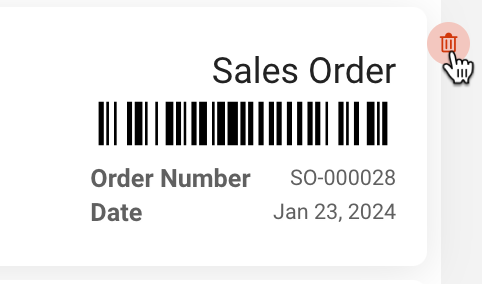
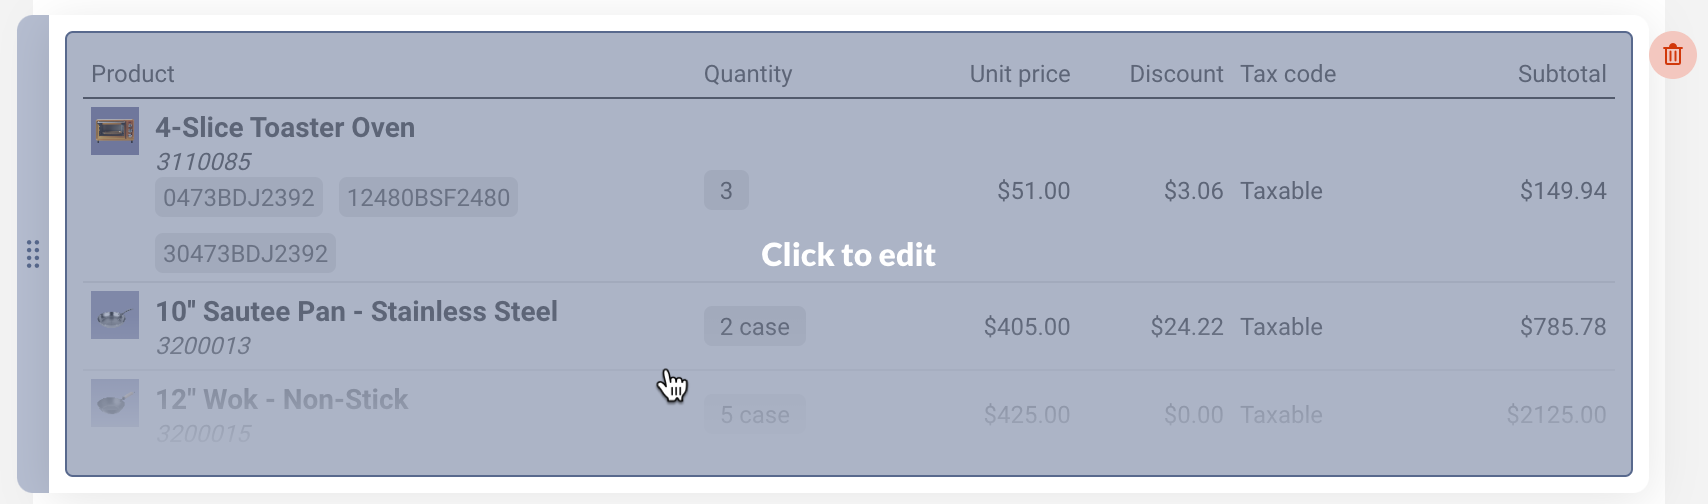
Hover over a block and select the trash can icon to remove it.
Document rows & changing blocks
As mentioned, document blocks are arranged in rows that span the entire width of the document. Rows can have a maximum of two blocks.

The only exception is the product table block, which spans the entire row width.
Changing blocks in a double-block row
You can remove any block in a double-block row to convert it to a single-block row.
To add another block, select the + icon.
Customizing blocks
When you’ve selected a block, you can customize its appearance and the fields shown.
Each block has specific fields that can be added and removed. Some fields can be further modified by selecting Options.
Adding fields to a block
Rearrange the fields by clicking and dragging them into the desired position.
Select the + icon next to each field below to add it to the block. Use the search bar to narrow results to blocks with many available fields.
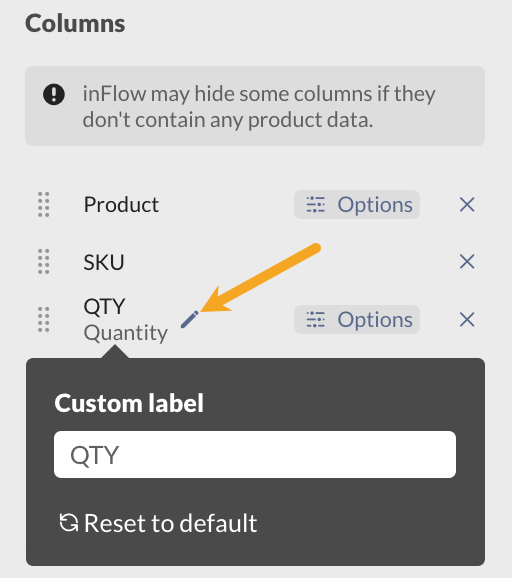
Renaming document fields
To change the name of a field on a block, click on the field name and select the pencil icon. Then, type the new name in the field below.
Adjusting block & product table column widths
As mentioned above, each document row can hold up to two blocks. You can adjust the width of the blocks by dragging the dotted block divider line to your desired placement.

For the product table, follow the above steps, click and drag on the column divider to the desired placement.
Document block overview
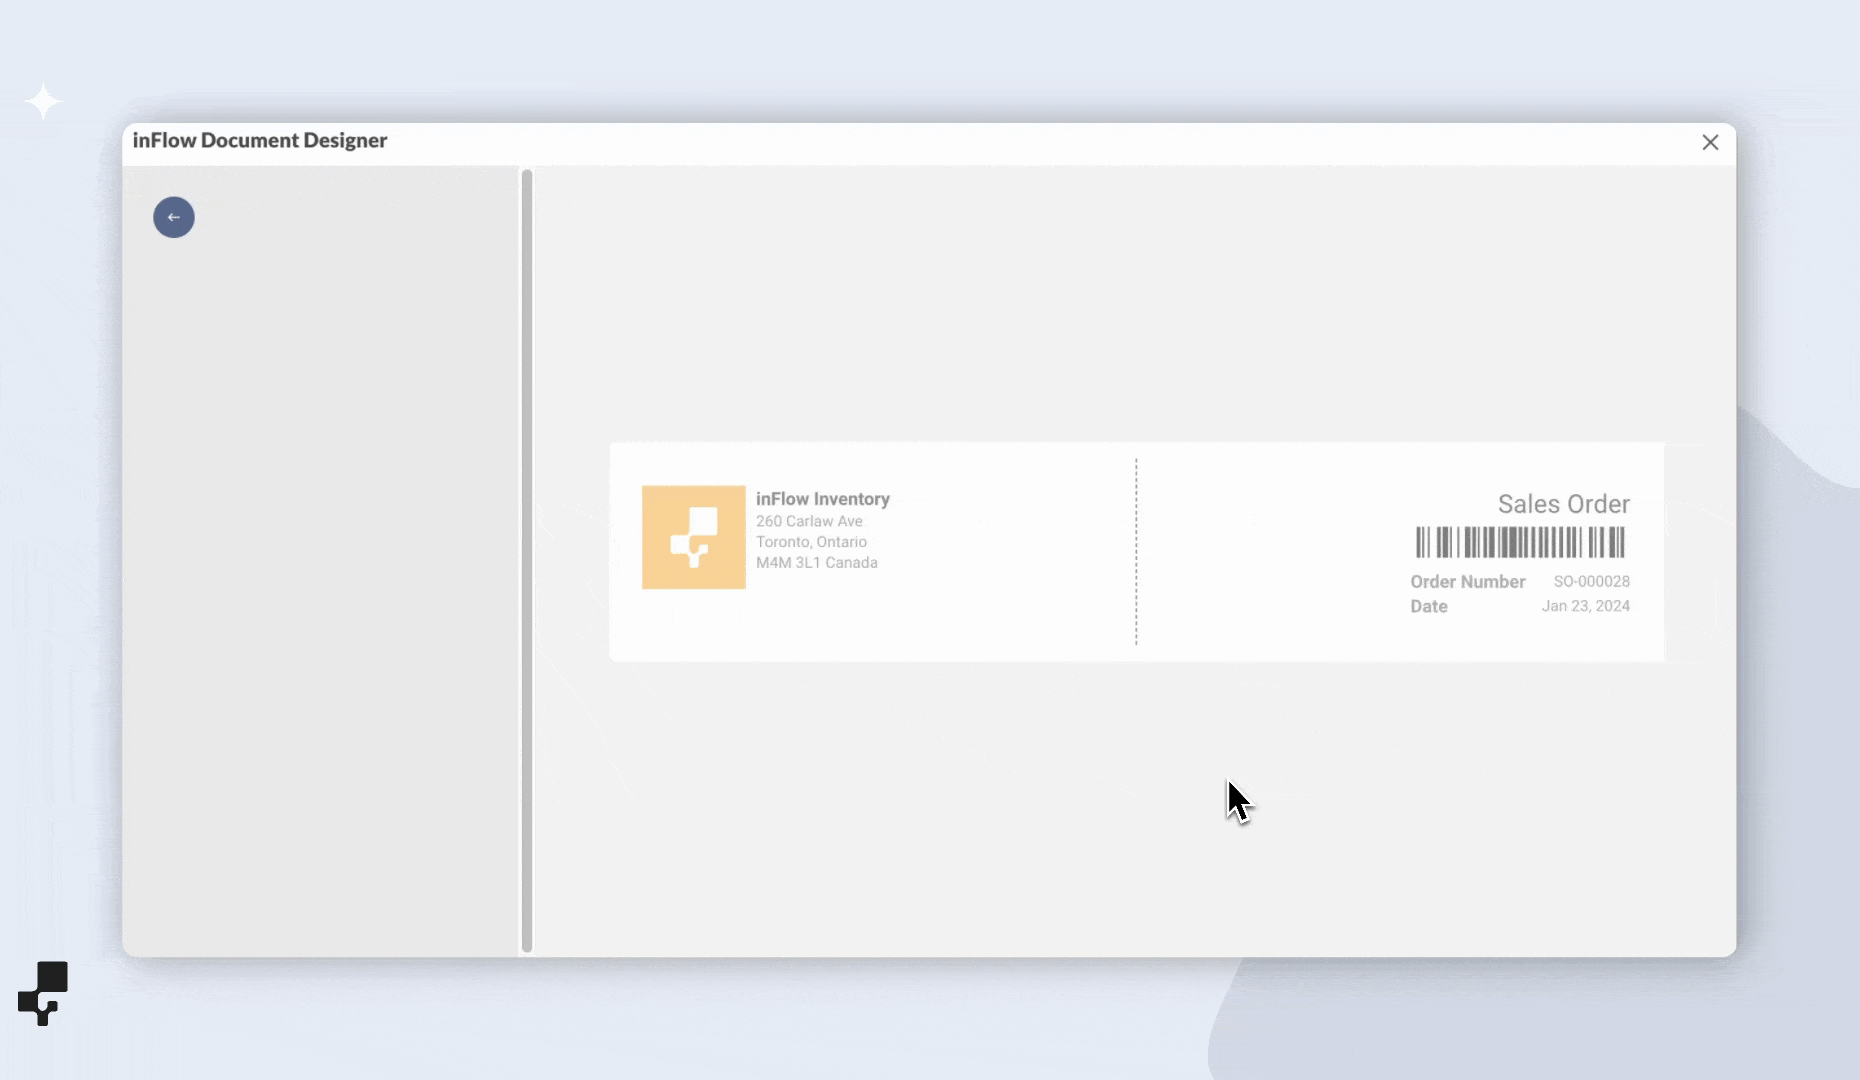
Letterhead
On this block, you can customize the letterhead for your document.
If a default letterhead has been set, documents will use the default styling first. You can override the defaults by selecting Use custom.
To reset the letterhead to the default settings, select Use default letterhead.
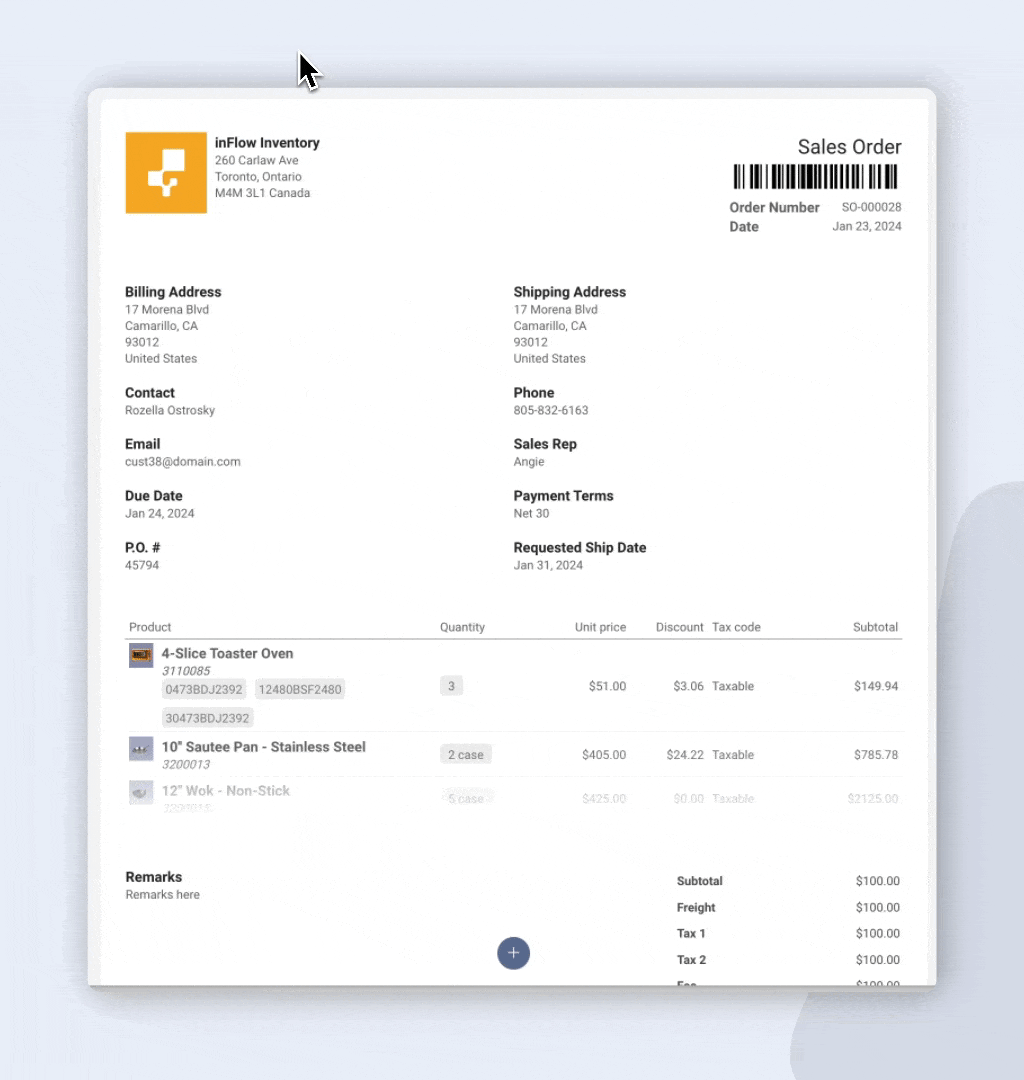
Document title
This block allows you to customize the document title, order number, order date, and more.
Order details
The order details block lets you edit order-level information, such as the customer name, shipping address, and payment terms.
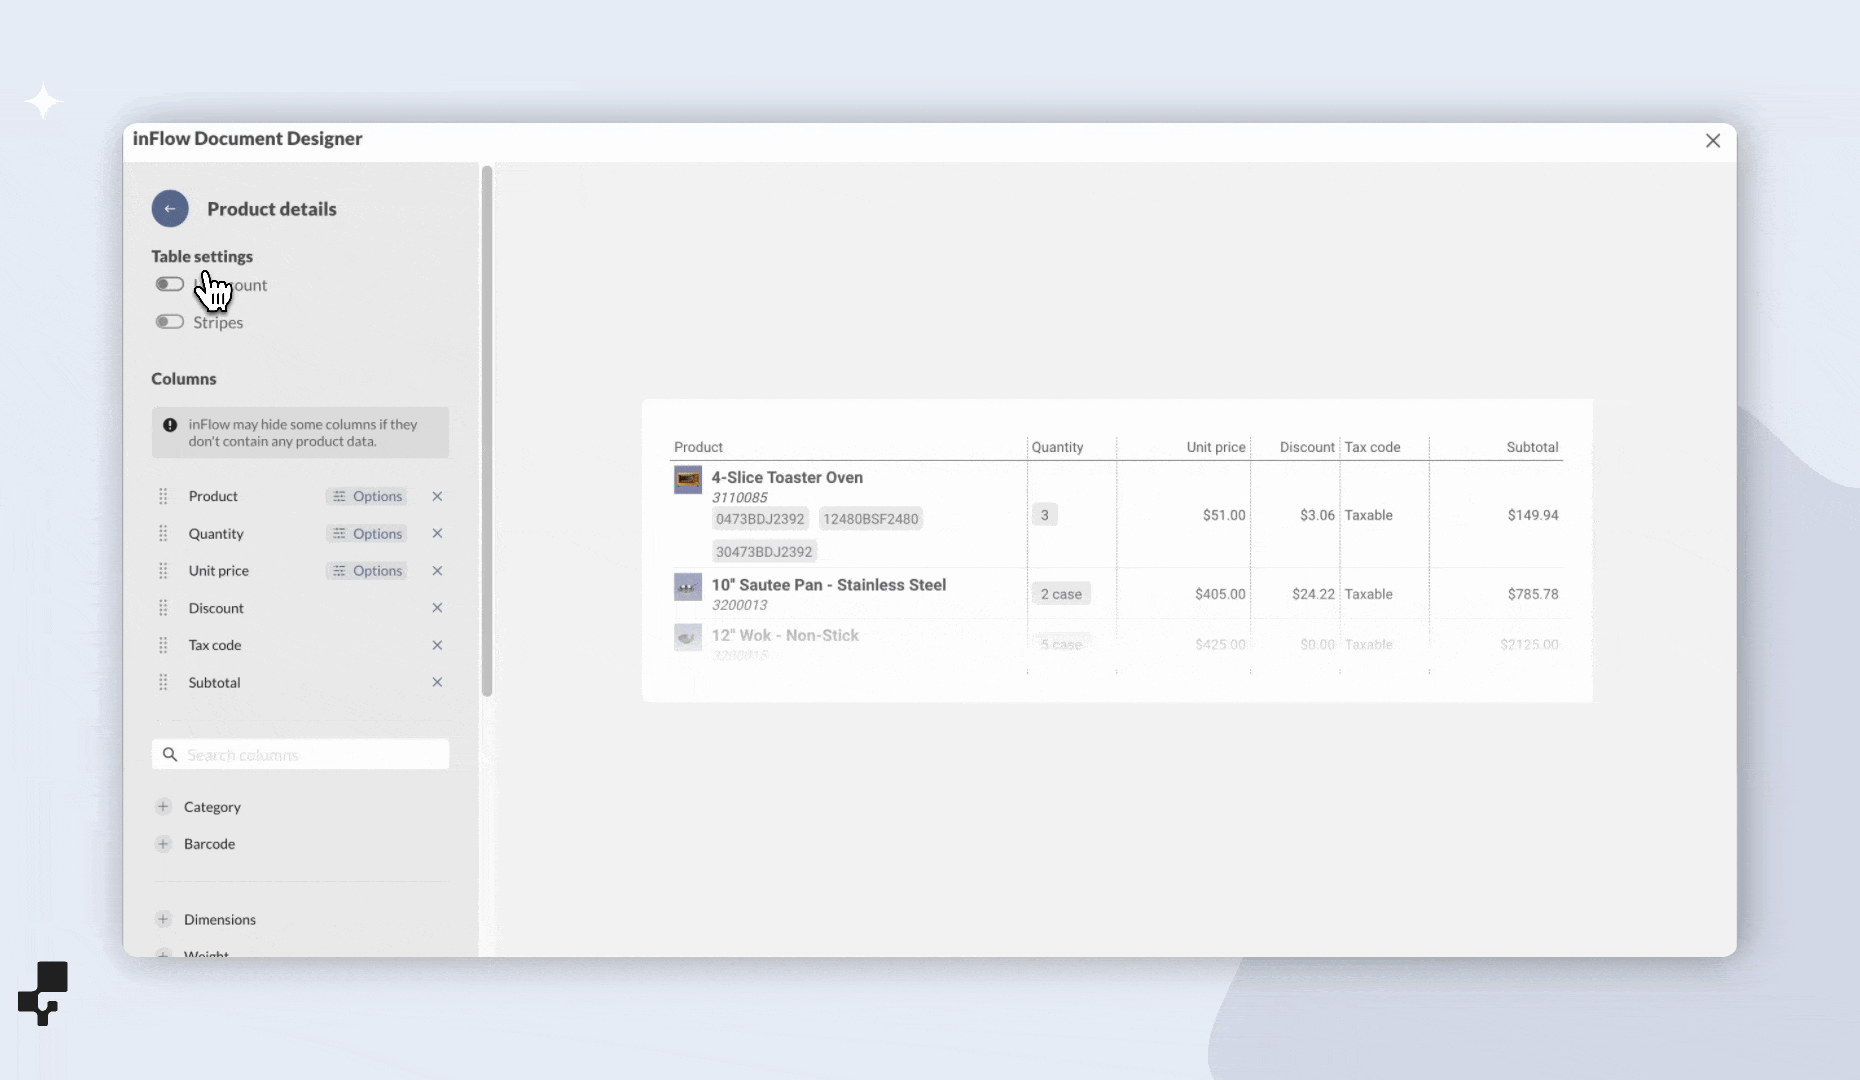
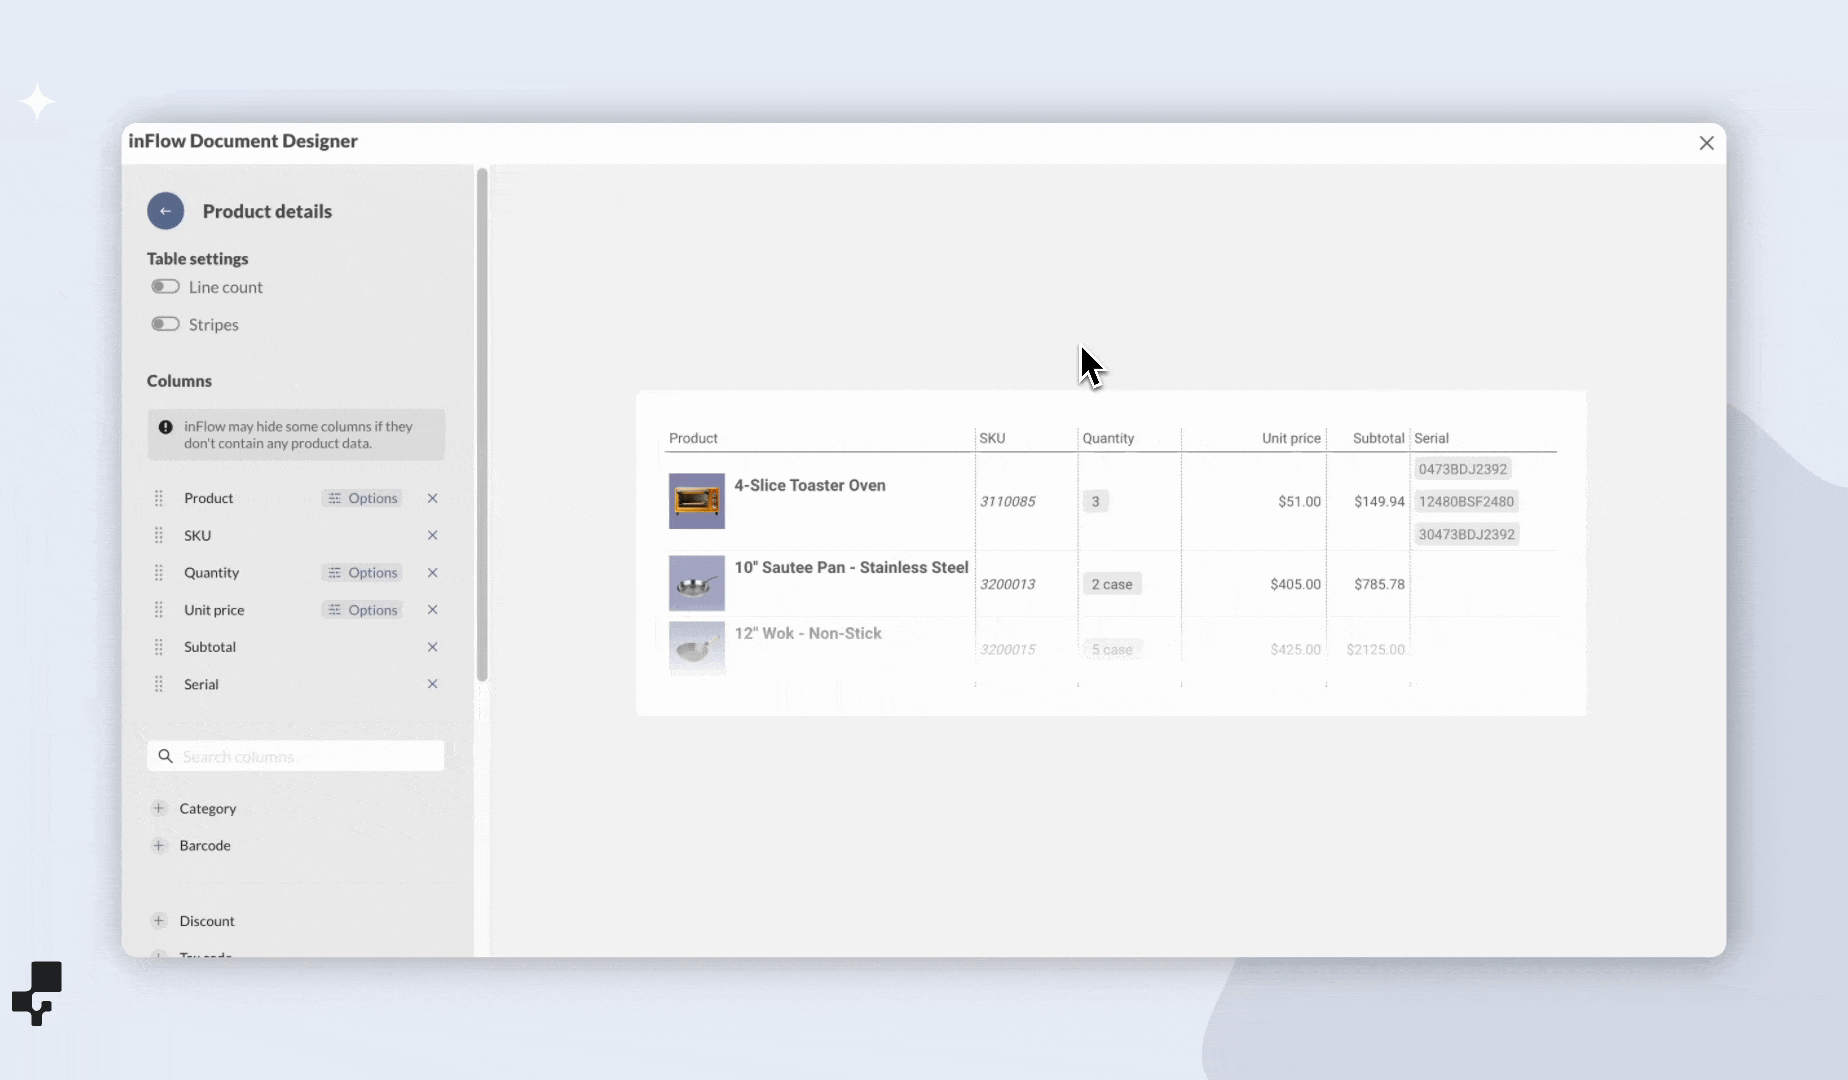
Product table
This document block lists the products on the order. To improve visibility, you can add line numbers and stripes to the table. You can add, remove, and rearrange the columns, and further customize them by selecting Options.
The product table block displays different information depending on the document type and the order tabs.
For example, the product table in a pick list document type displays information from the inFlow Pick tab, and the product table in an invoice document type displays information from the inFlow Sales Order tab.
Columns across order tabs cannot be combined into a single product table.
The Document Designer will use the default barcode of the product.
Order Summary
This block contains the order totals. To make this block stand out in the document, toggle on Highlight to fill in this section.
For regions that require QR codes on invoices, toggle on the QR code setting.
Custom text
This block is where you can add text to your document. Use this block to add terms and conditions or any text you don’t want to copy and paste into each order.
HTML/CSS
This block type will give you significant control and customization of the document. To learn more, see this guide.
At this time, page numbers, per-page headers, and footers aren’t available on the Document Designer, or via the HTML/CSS blocks.
Completing a designed document
After designing your document, click Save & close. From here, you can print, email, or create new documents.
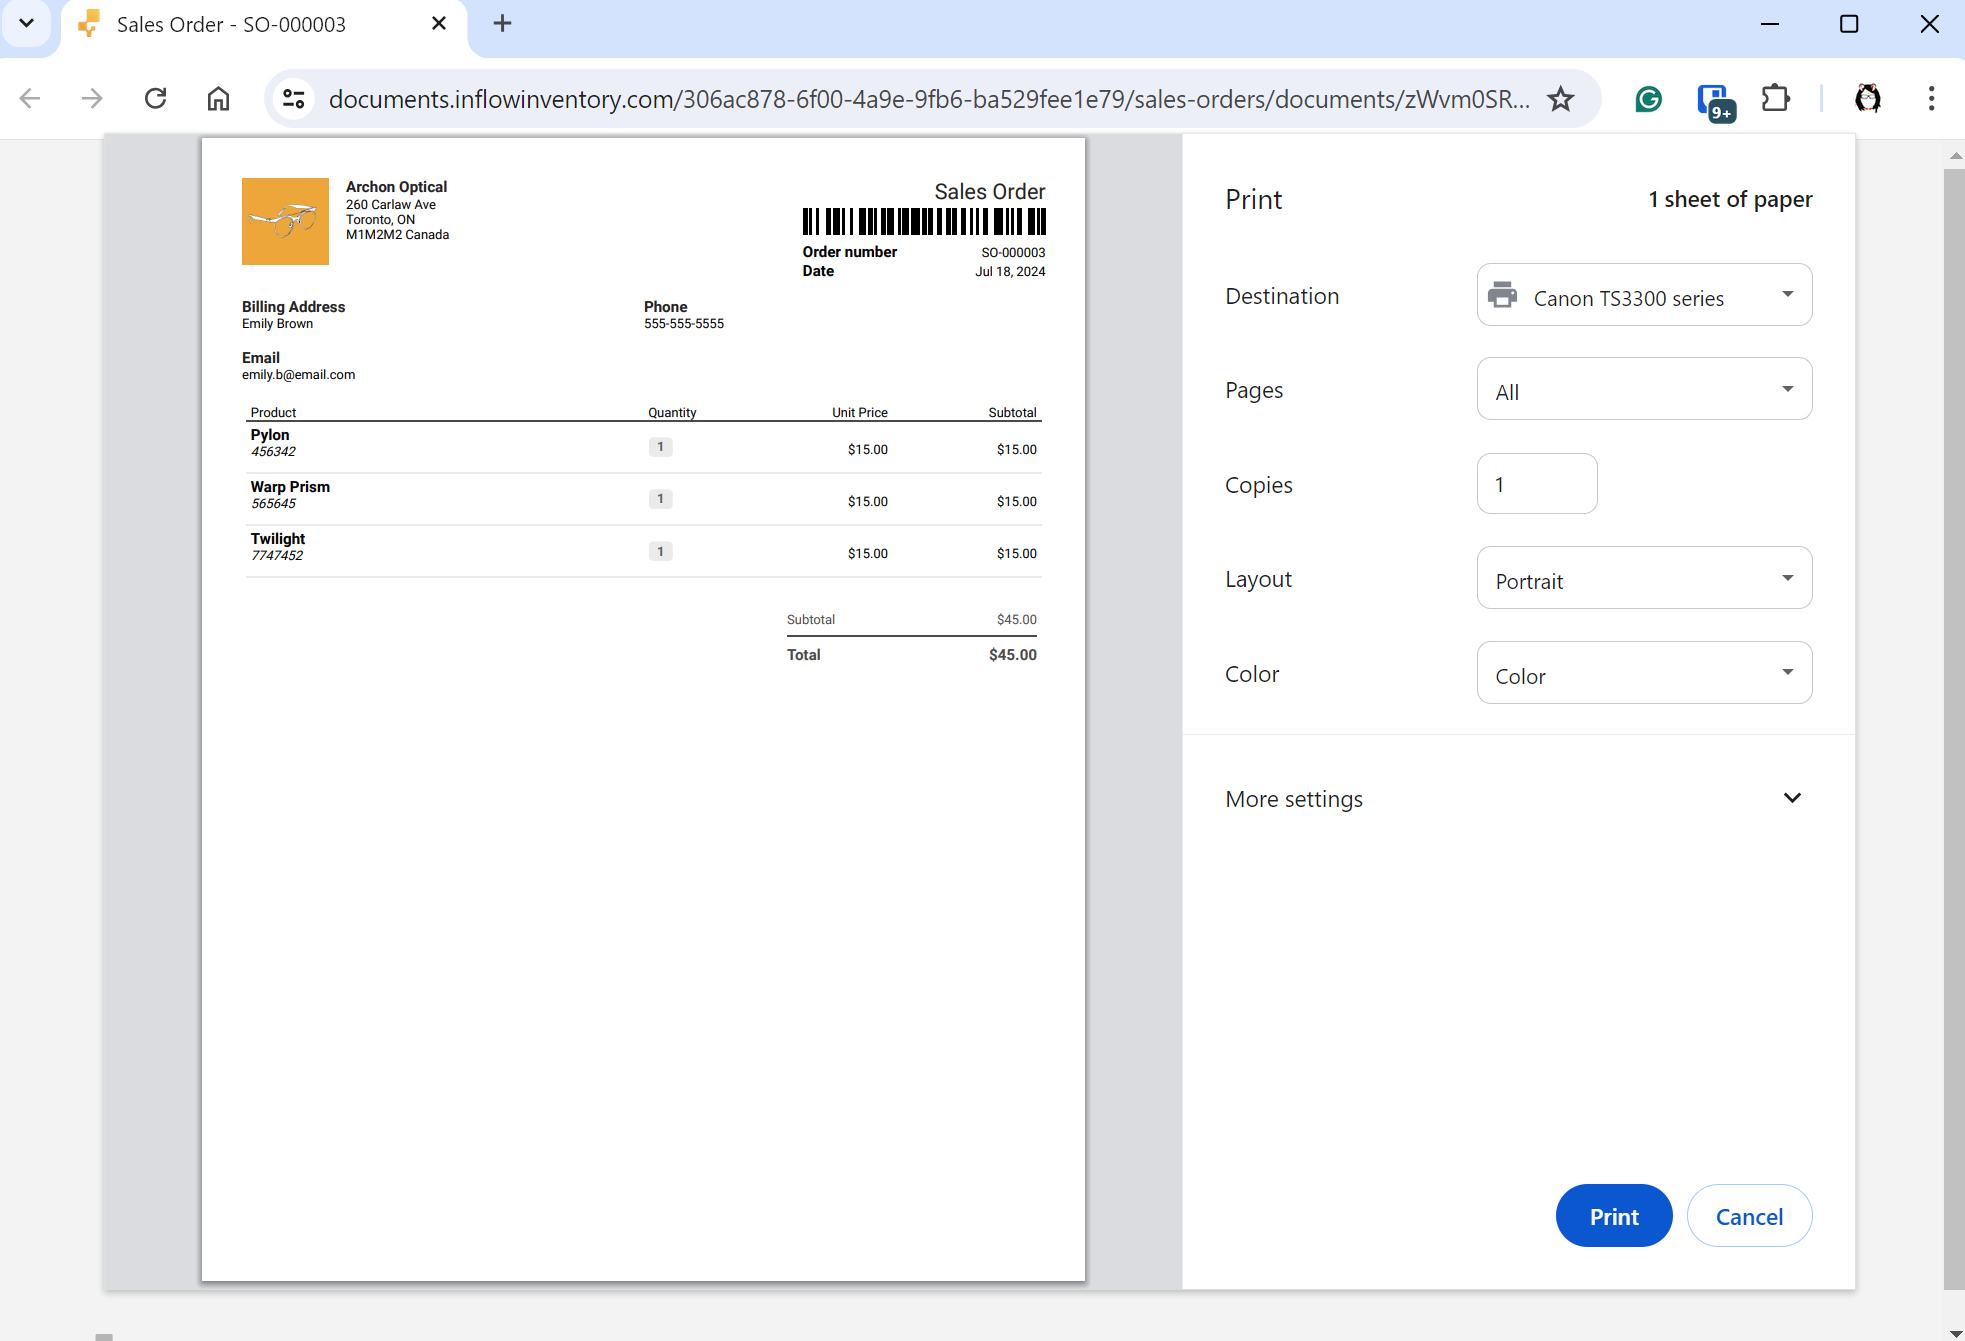
Printing a document
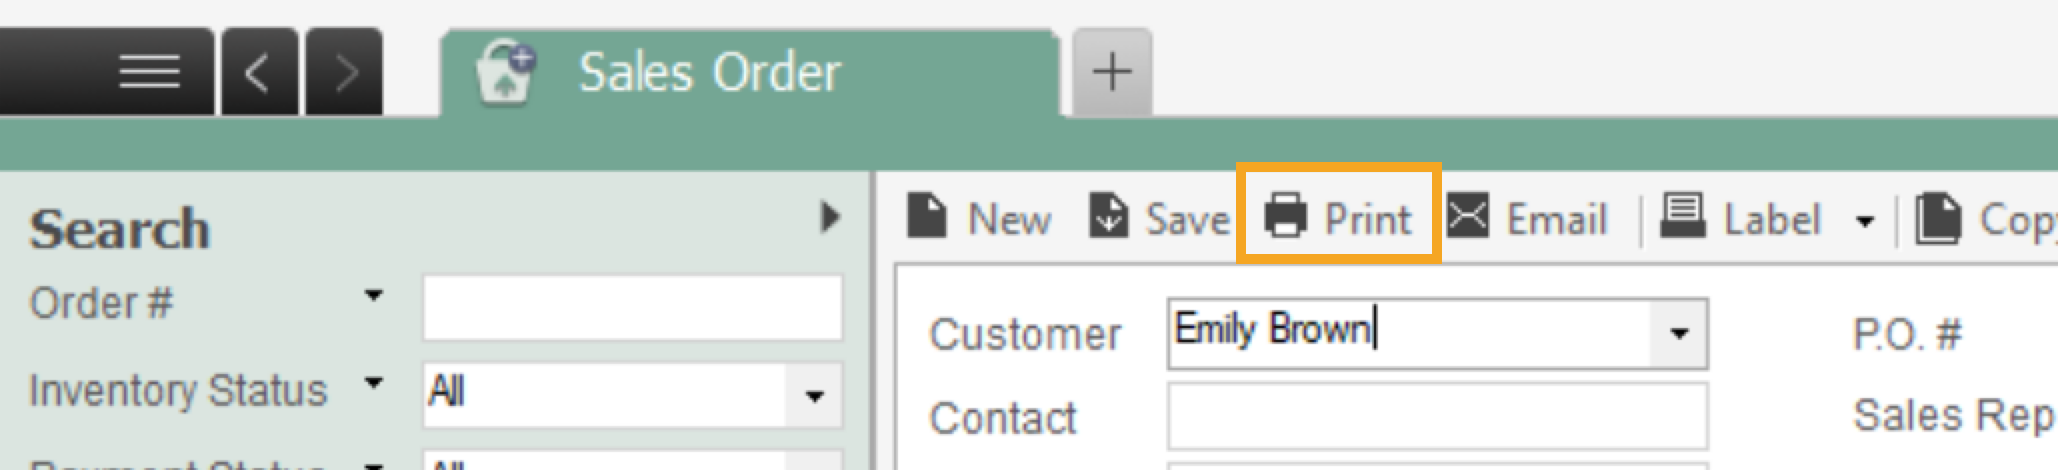
- Open a sales or purchase order.
- Click Print and select the document. If you have multiple documents of the same type, be sure to select the desired document.
- Continue through your browser’s print window to print the document. If you’d like to save a PDF copy to your computer, you can choose the Print to PDF printer.

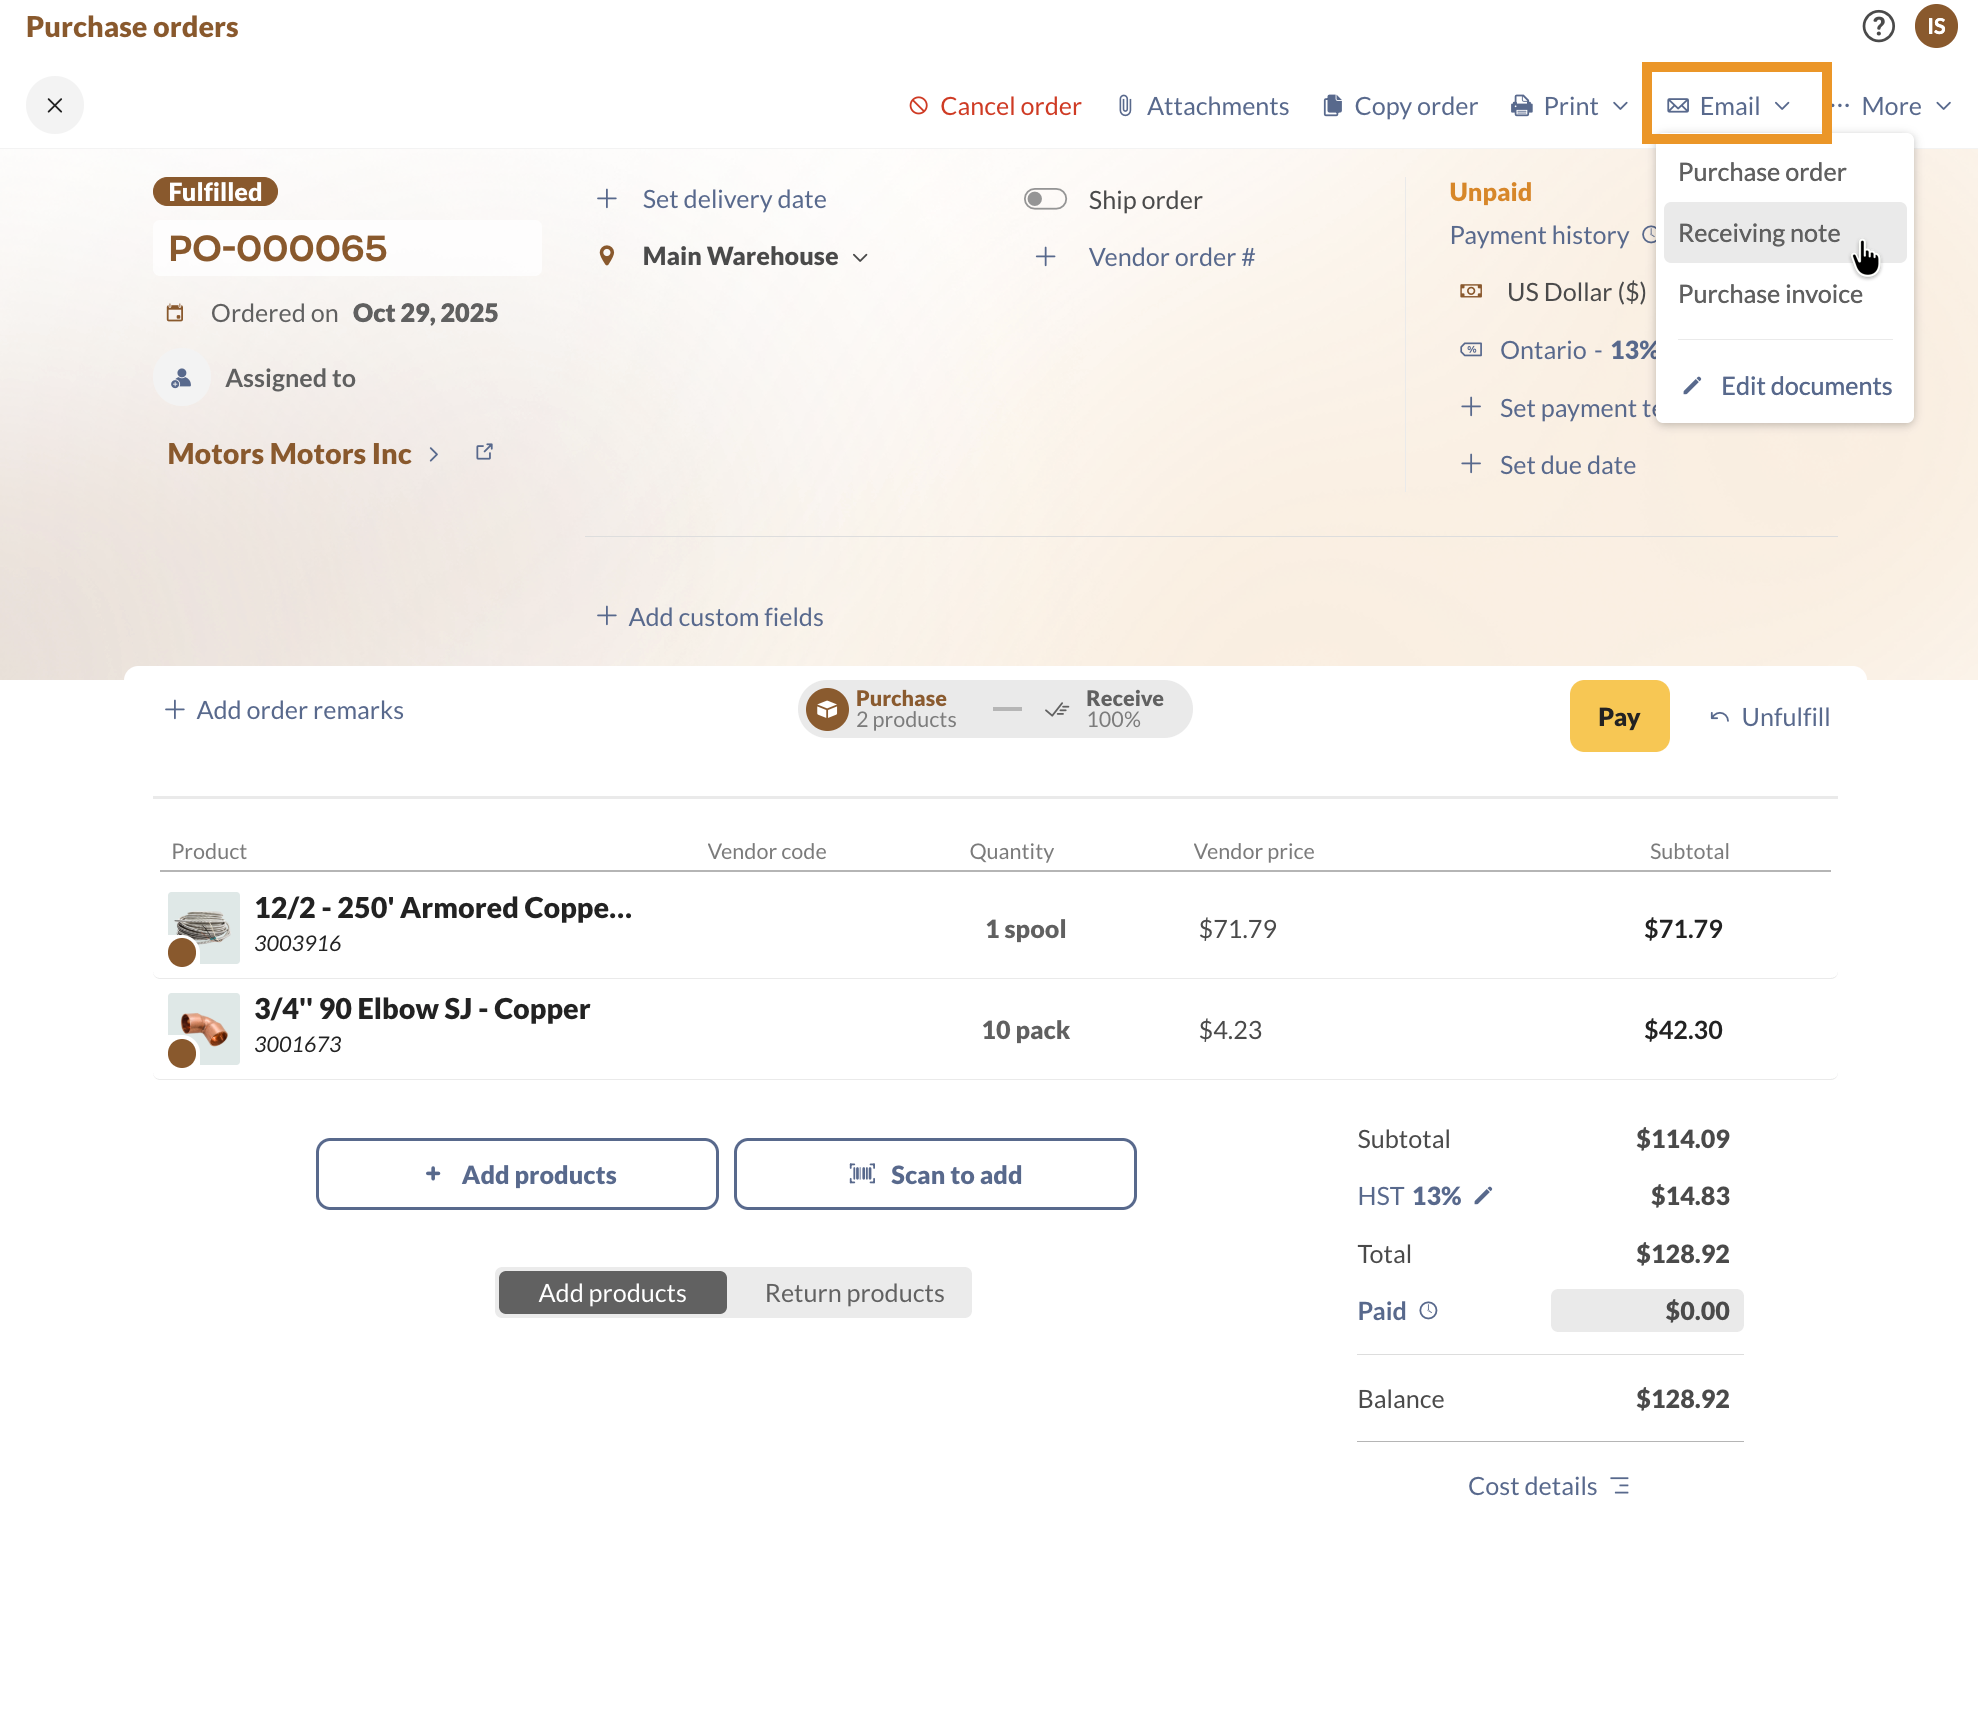
Emailing a document
- Open a sales or purchase order.
- Click Email and select the document.
- Fill out the email form, then click Send.
What else can I customize in inFlow?
In inFlow, you can customize different areas to meet your team’s needs.
Customizable inFlow features
- Rename fields: Rename most of inFlow’s fields to a term of your choice.
- Change order numbers: Change order prefixes.
- Custom fields: Track additional data.
- Label Designer: Create product labels to include the barcode, image, and product name.
- Document Designer: Create and customize sales and purchasing documents.
Windows
Switching to the Document & Email Designer
If you are using inFlow for Windows and want to send documents designed in the Document Designer, or have access to email templates, you can seamlessly switch to use these powerful features!
Before you start
Switching to inFlow’s Document & Email Designer means that some Windows app features will no longer be available, such as:
- Documents created in Microsoft Word can be redesigned in inFlow’s user-friendly Document Designer.
- inFlow Print Settings (document styles, document page numbers, and footers)
- Legacy email settings.
Other notable changes:
- Emails will be sent from noreply@inflowinventory.com.
- Documents will be sent as links instead of attachments.
- All document and email templates can only be modified on inFlow for Web.
If your team has been using inFlow before July 2024, the Email and Document Designer are optional and require inFlow Admins to opt in. We suggest previewing these features in inFlow for Web before making changes.
Once you’ve opted in, you won’t be able to switch back to using legacy email settings and the original documents from inFlow for Windows. Contact the inFlow team if you have any questions.
How to switch to inFlow’s Email and Document Designer
- To start, open an order in inFlow with an Admin account (sales, purchase order, etc.) > then click Print.
- In the print document screen, click Get the latest.
- Review the information on-screen, then click Update.
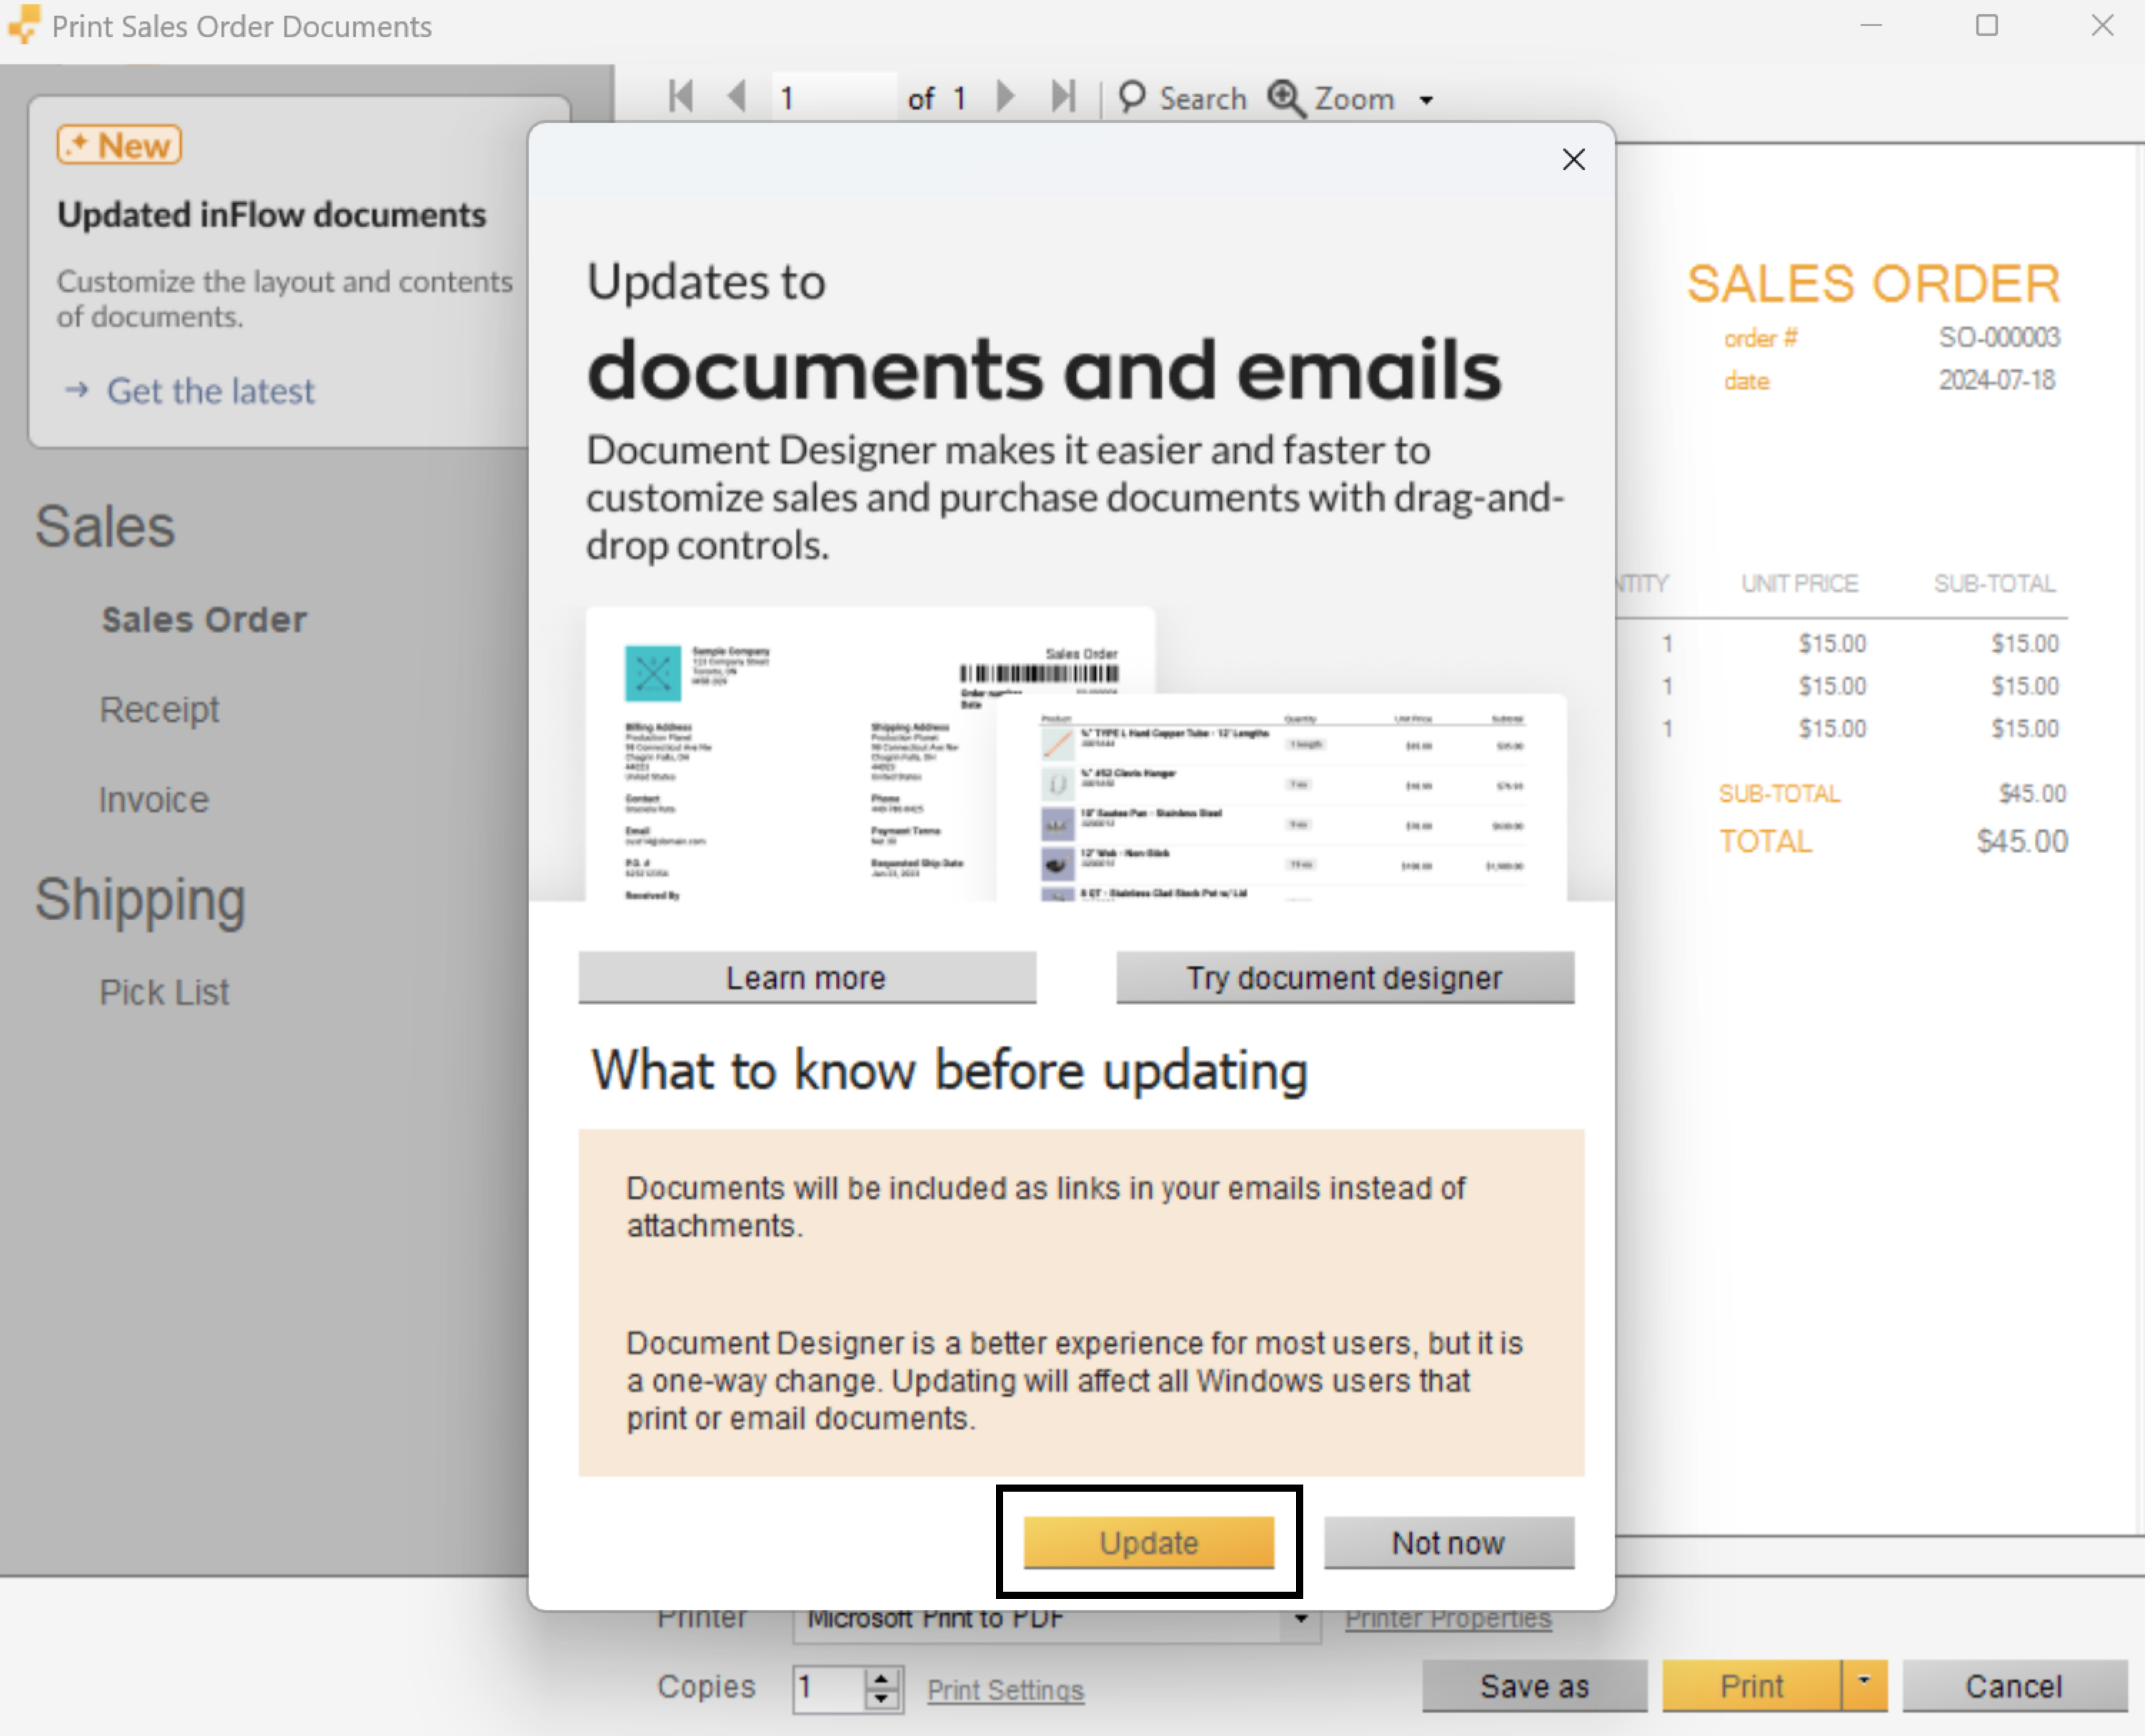
You’re all set! You’re all set! From now on, you’ll have access to the documents created by the Document Designer and can use the email templates created by the Email Designer.
Order printing with the Document Designer
Documents created with the Document Designer can only be edited with inFlow for Web, but you can still continue to use inFlow for Windows to print documents. See below for steps.
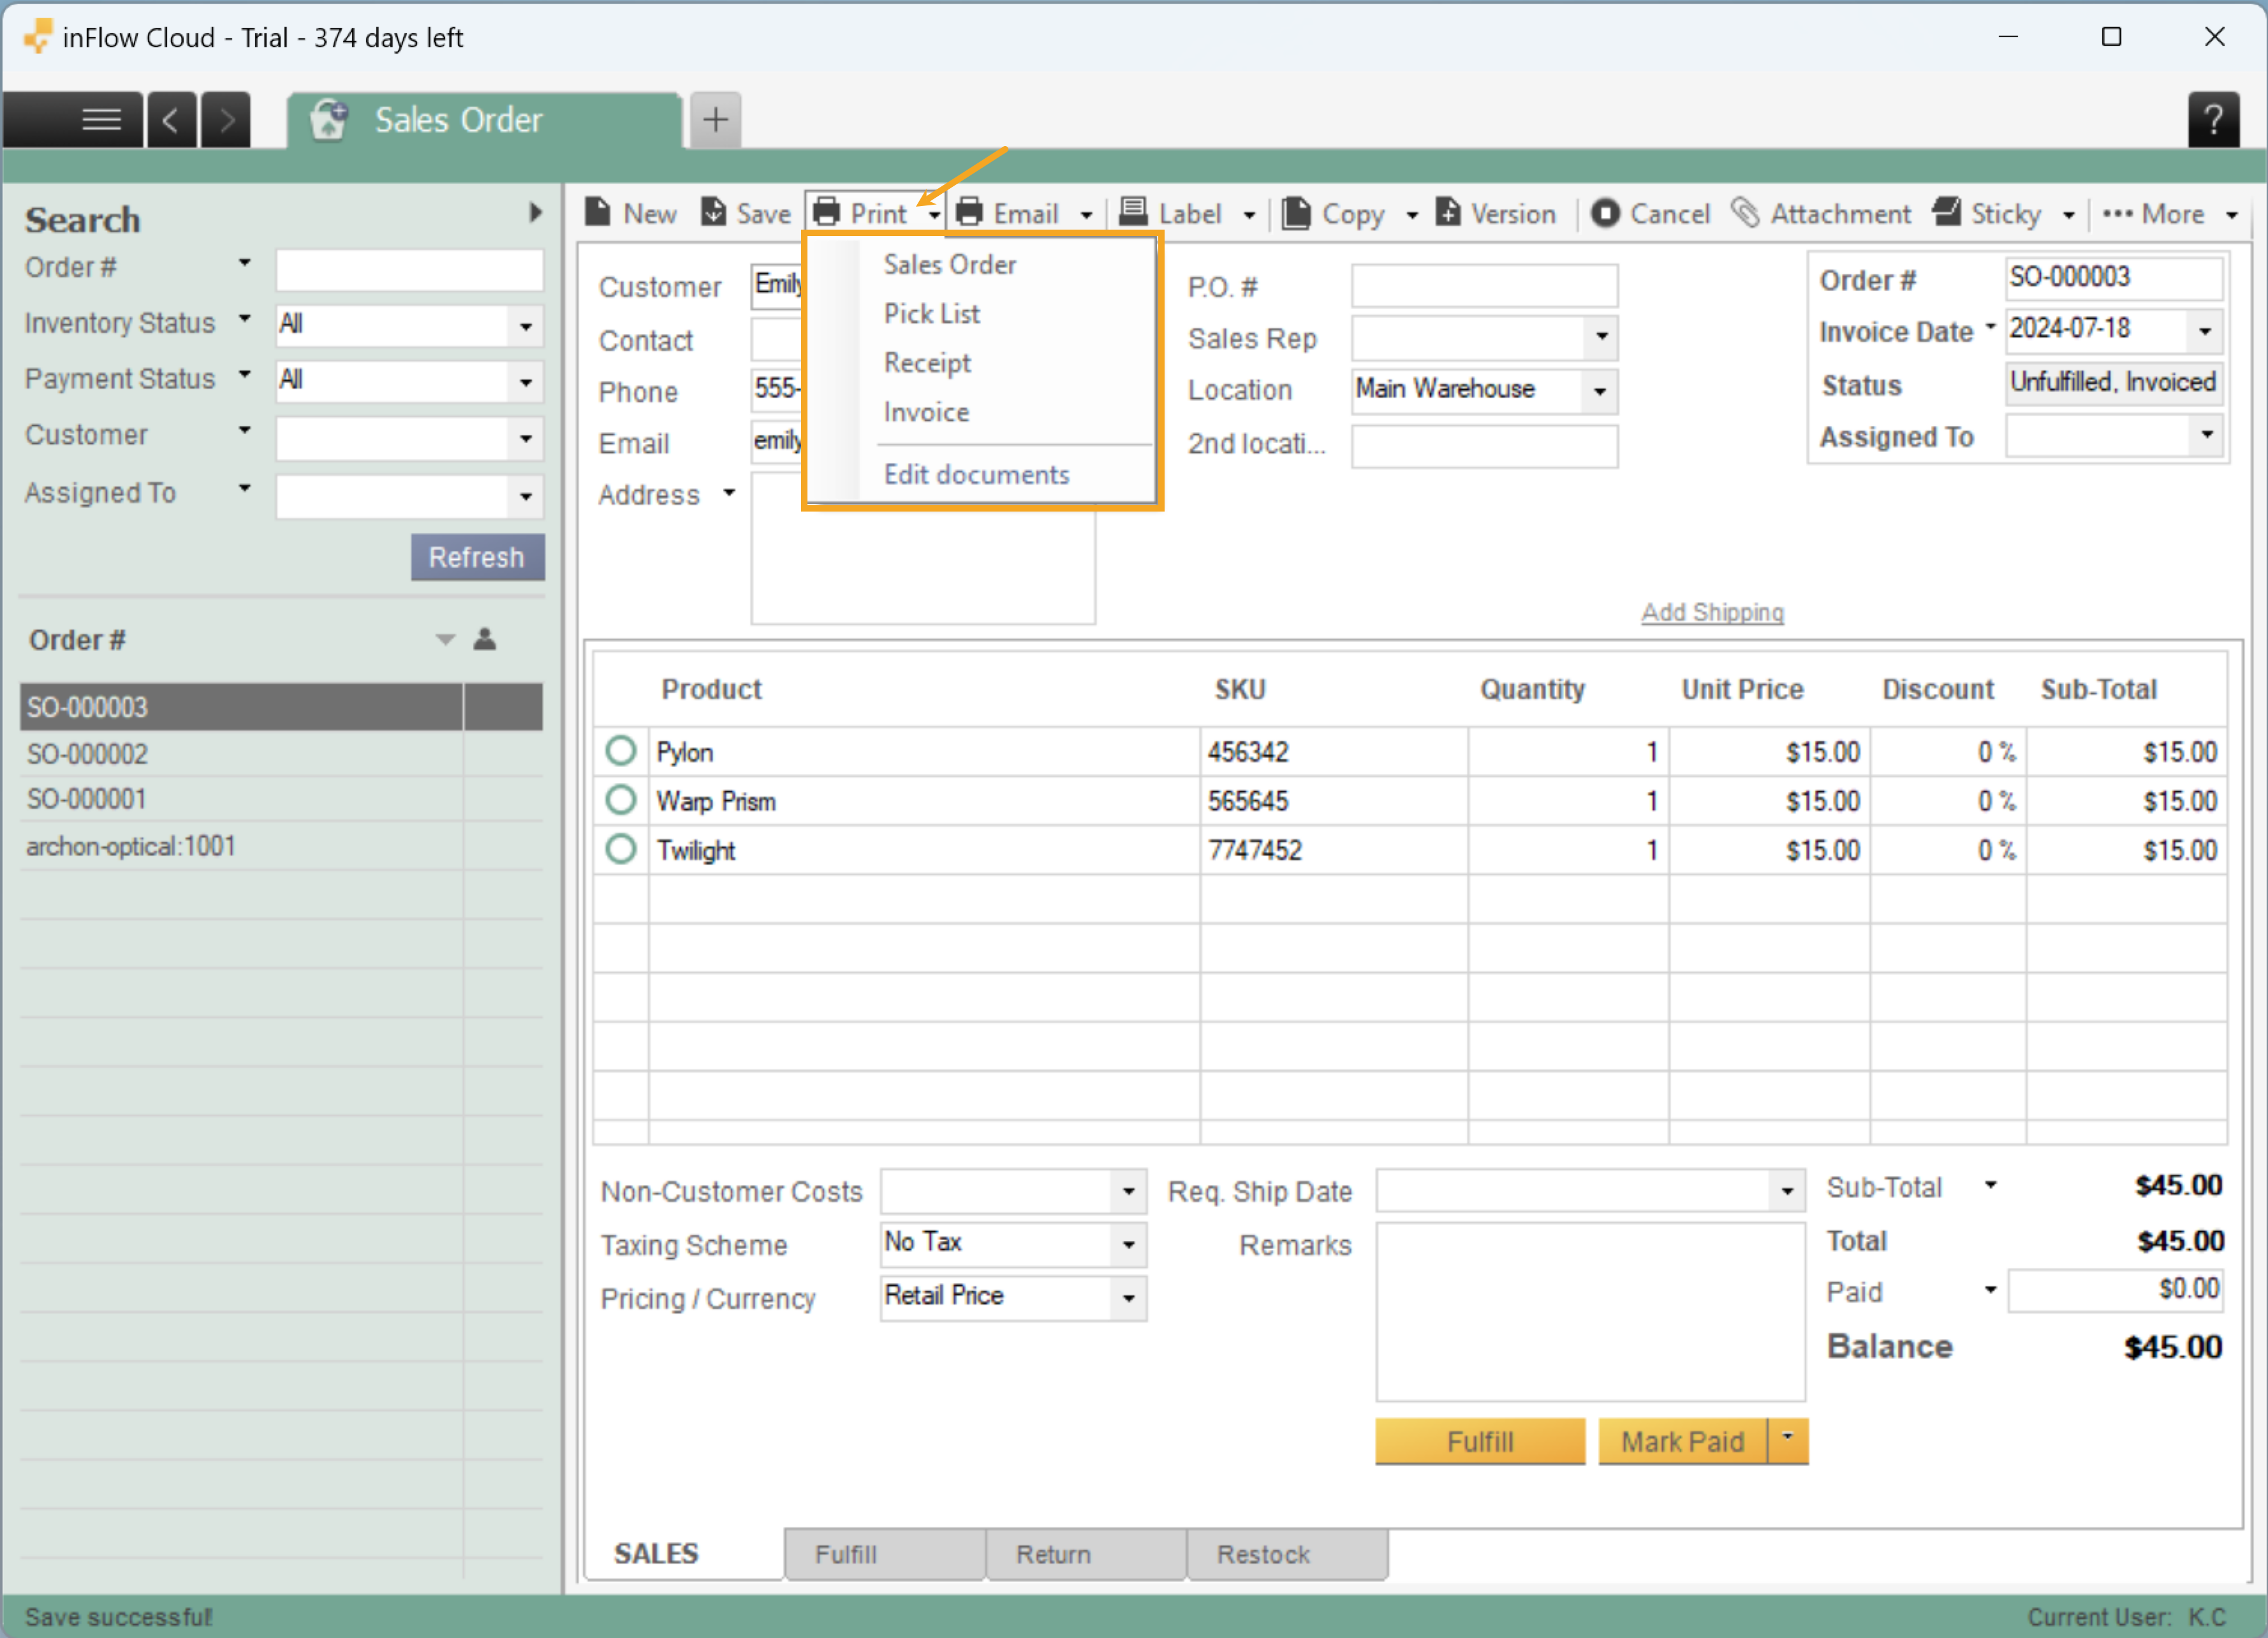
- Open any inFlow order in inFlow, then click Print, then select a document.
- A web browser window will open where you can select Print.


Hello, I have a problem with label printing.
The issue is in label orientation, I have a label of 50mm x 20mm size and in inflow there are no option to change the orientation to portrait except when the label is square like 50mm x 50mm so how to solve this issue ?
How to show
New balance
Previous balance
Total balance on the same invoice
Is there a function to be able to add an electronic approval signature to an PO?