How to process returns and issue credits
Customers may occasionally need to return products. You can easily process these returns and either issue a refund or provide credit for future purchases.
Web
Returning & issuing credits on existing orders
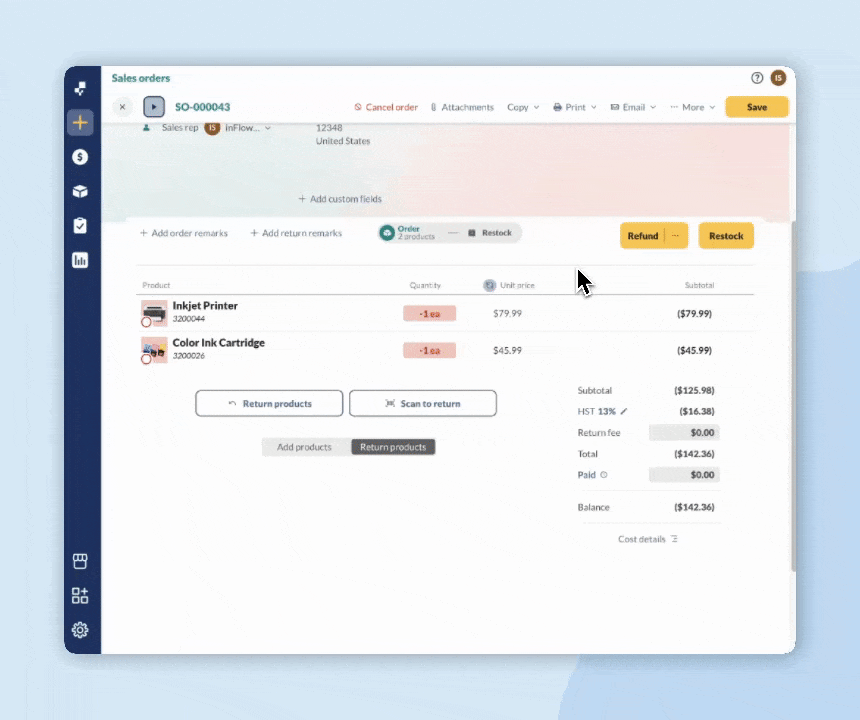
- In the product table, hover over the product and select the blue arrow to return to it.
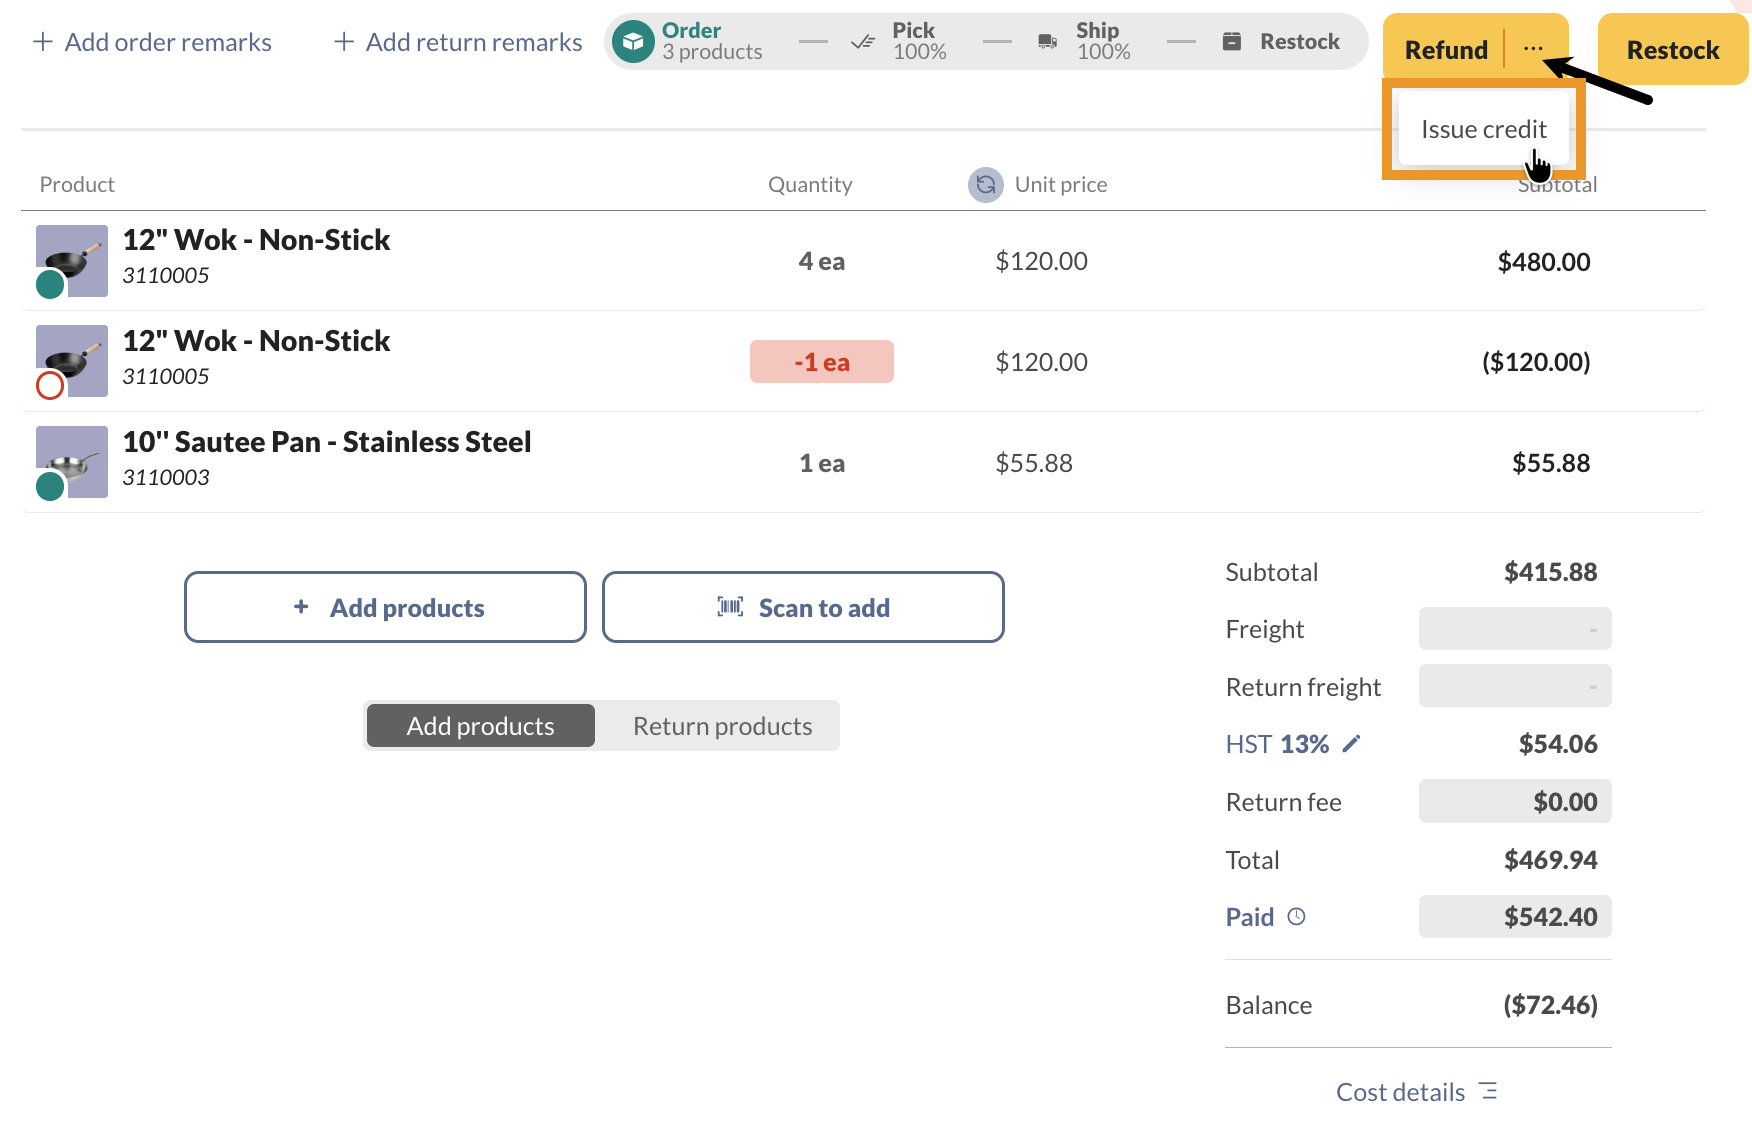
- The returned product will be added below with the same unit price and quantity that is on the order. Edit the quantity the customer is returning.
- Click on the ellipsis next to Refund, then click on Issue credit.
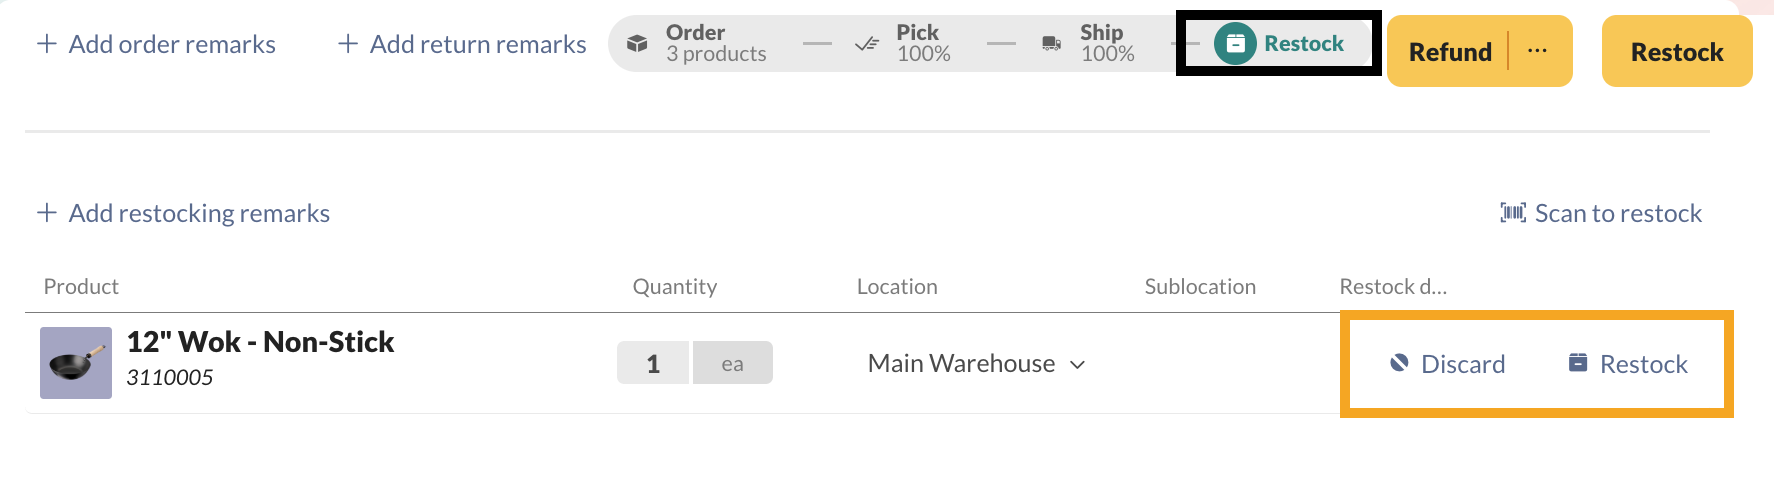
- From here, you can select the Restock tab to add the product back into your inventory or discard it.
- Save the order when done.
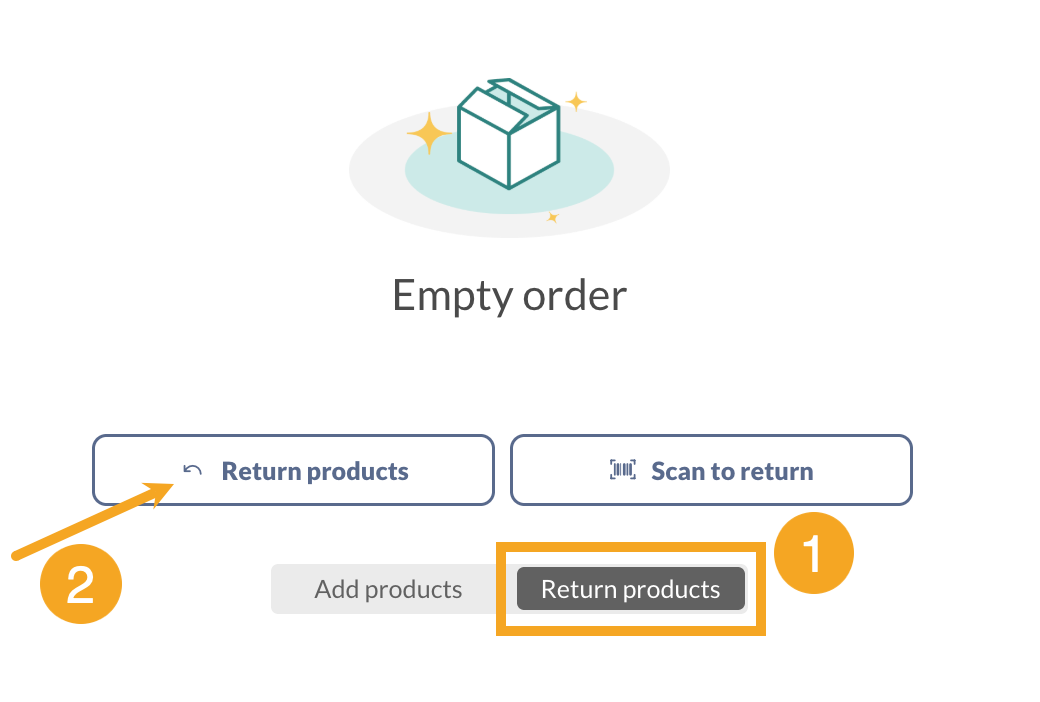
Returning & products on blank sales orders
- Click Return products, then select the Return products button to choose the products your customer is returning.
- Edit the quantity of the item your customer is returning.
- Click the Restock tab, then click the Restock button to add the returned products to your inventory. On this tab, you can also select the Discard button if the product(s) are no longer usable.
- Click the ellipsis next to Refund, then select Issue credit. Save the order when done.
Printing credit notes
If you have issued a credit, you can still print a credit note. However, if you have issued a full refund, that document will no longer appear in the list of available documents for printing (since you’ve completed the refund).
I don’t see the Refund/Issue credit button!
Don’t see a Refund/Issue Credit option? inFlow won’t show this if your customer hasn’t paid you in full; it’ll just deduct it from the order’s balance. You shouldn’t have to issue credit/refund for items that your customer hasn’t paid you for, after all!
Windows
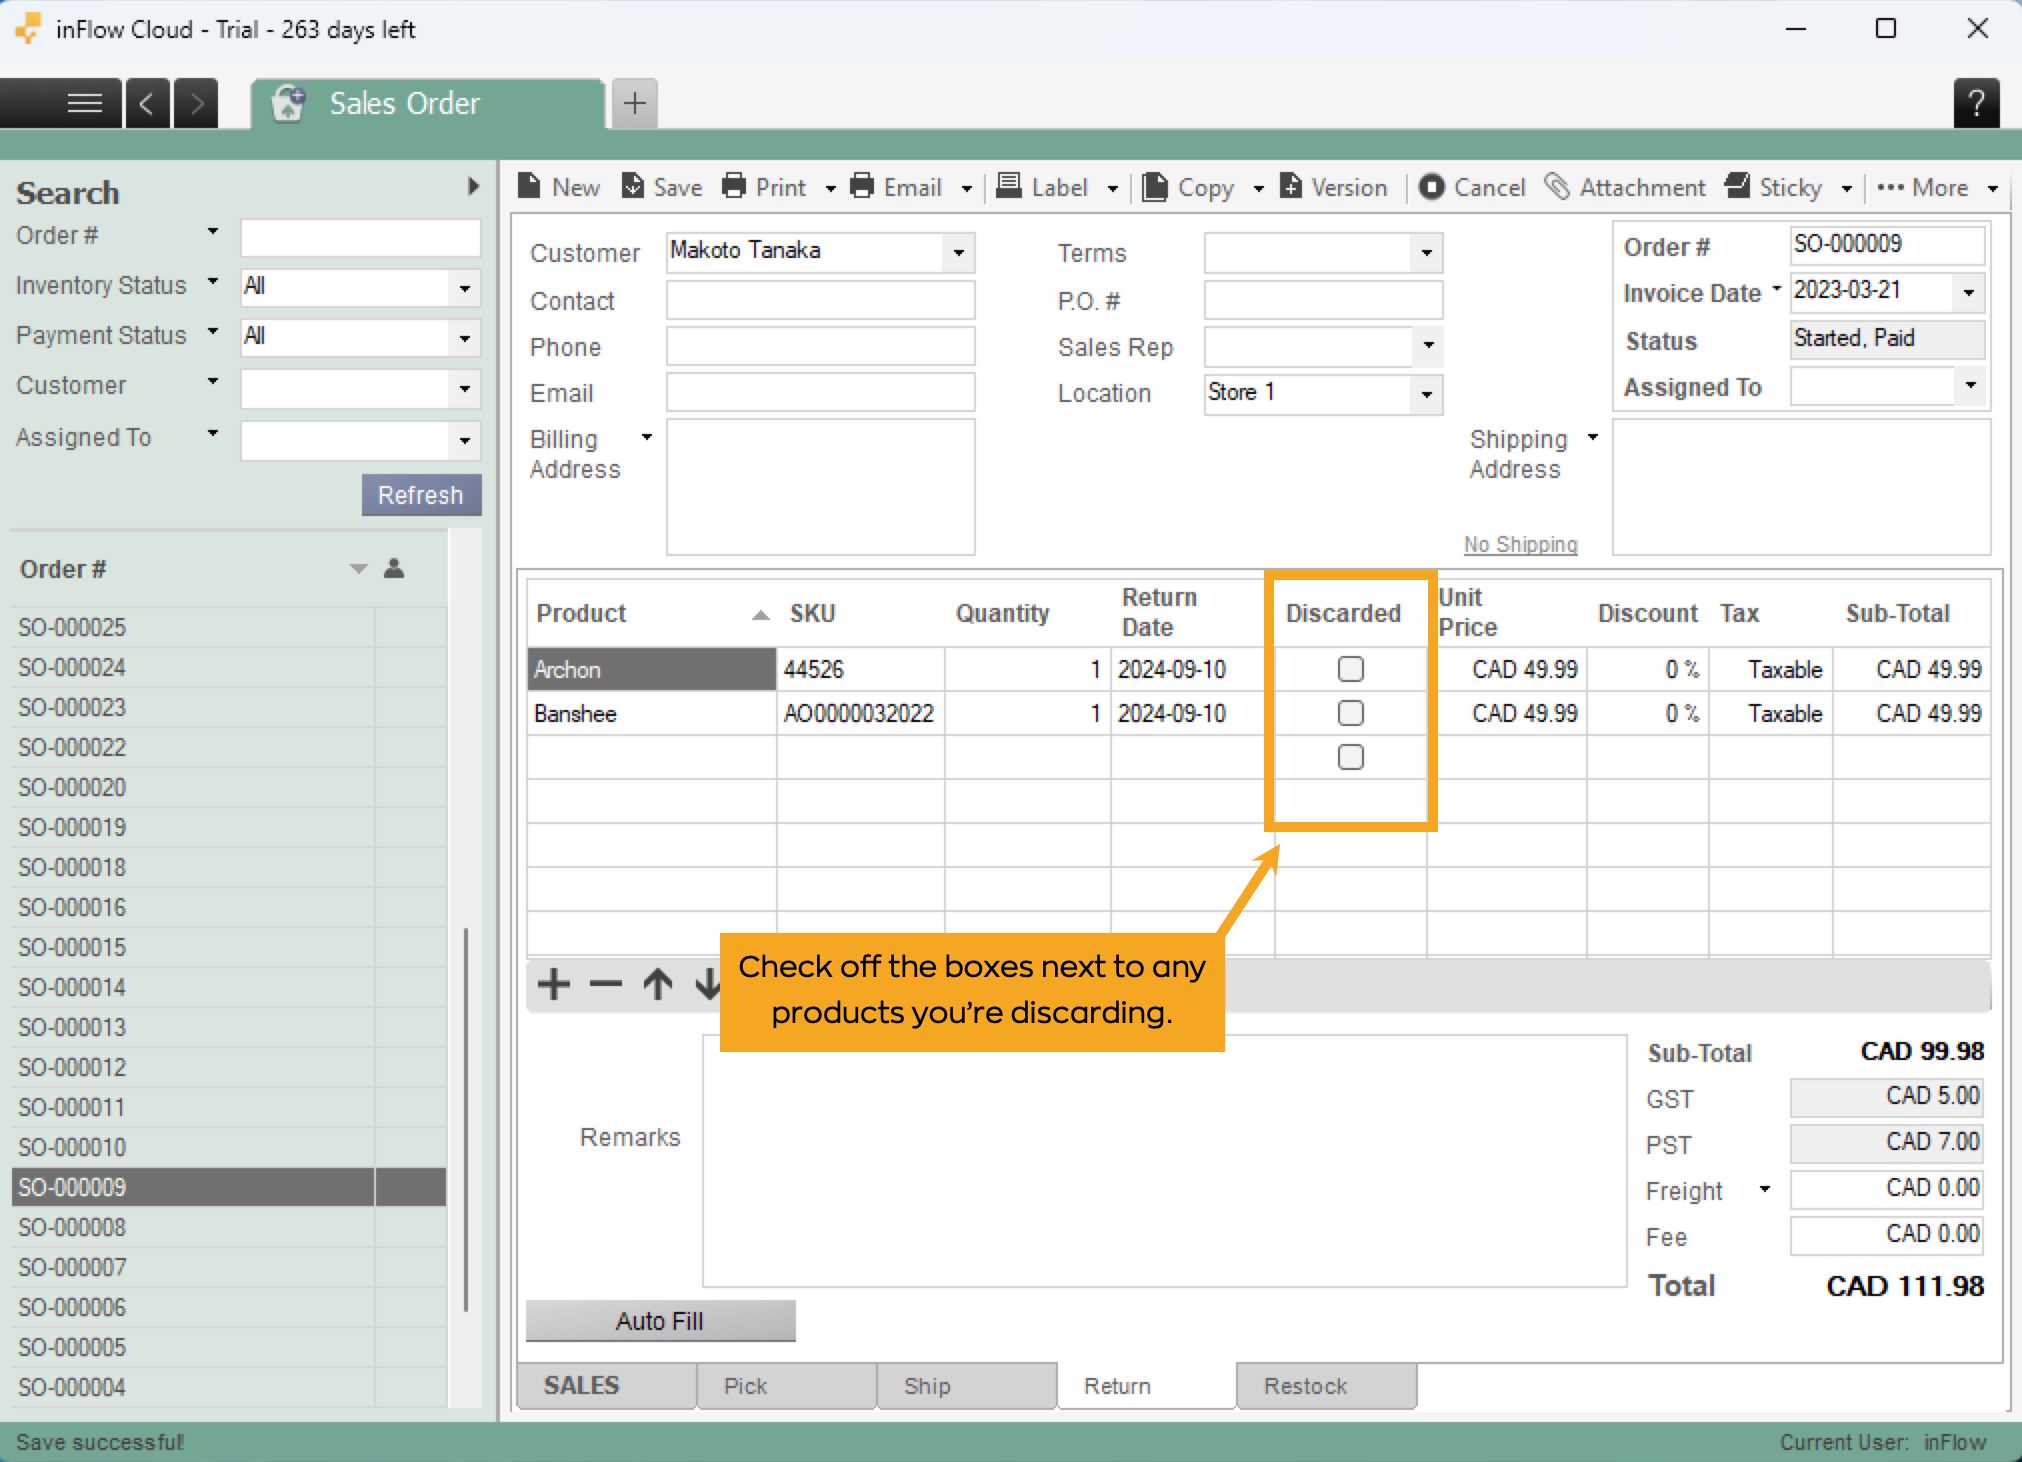
To process the return
- On the original sales order, click the Return tab at the bottom (see image below).
- Click Auto Fill to copy the contents of the original order into this tab.
- Remove any items from the list that are not being returned. When you’re finished, only the items you’re returning should be in this table.
- If any items are being discarded instead of going back into your inventory, check the box Discarded next to the item in question.
- At this stage, if the customer has already paid you, you can give a refund and print your credit note. To do so, click Print and select Credit Note.
- To complete the refund, click the SALES tab and click on Refund (at the bottom of the screen) to give your customer the refund.
How to issue credits
- If you are issuing credit instead, process the return using the steps above.
- Click the arrow button beside the Refund button and select Issue Credit.
- You can click the Restock button to restock your items.
If you have issued a credit, you will still be able to print a credit note. However, if you have issued a full refund, that document will no longer appear in the print window (since you’ve completed the refund).
The returned items will appear alongside the items that have been sent out, so you’ll see negative quantities on the sales order. This is normal, and a good indicator of which items were returned can be seen in the leftmost column of the sales order, marked in red.
Don’t see a Refund/Issue Credit option? inFlow won’t show this if your customer hasn’t paid you in full — it’s just going to deduct it from the balance of the order. You shouldn’t have to issue credit/refund for items that your customer hasn’t paid you for, after all!
Mobile
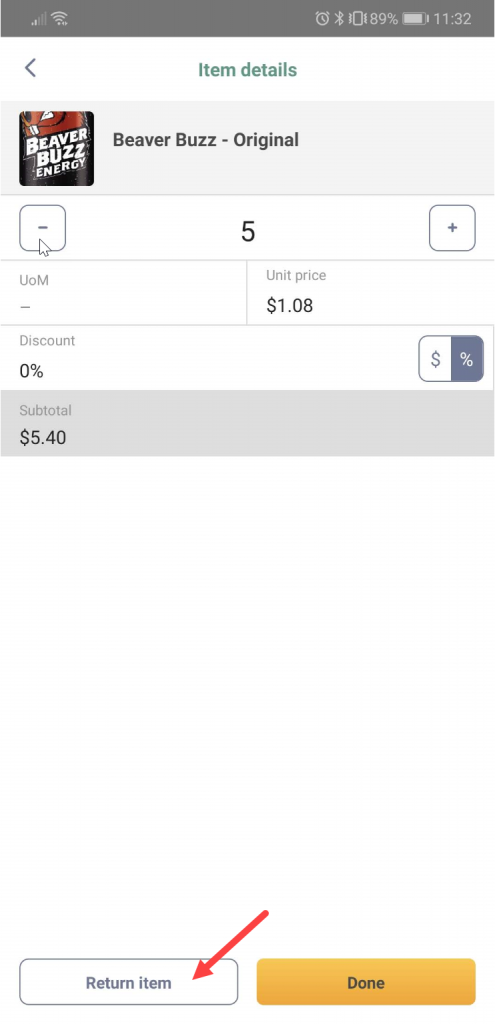
To process the return
- On the original sales order, click on an item being returned.
- Adjust the quantity of the item being returned (it defaults to all of them) and any other options, such as price or return date.
- Hit the Return button on the top right of the screen (you will now see this item with a negative quantity, indicating the returned items)
- Repeat steps 1 – 3 for each other product being returned.
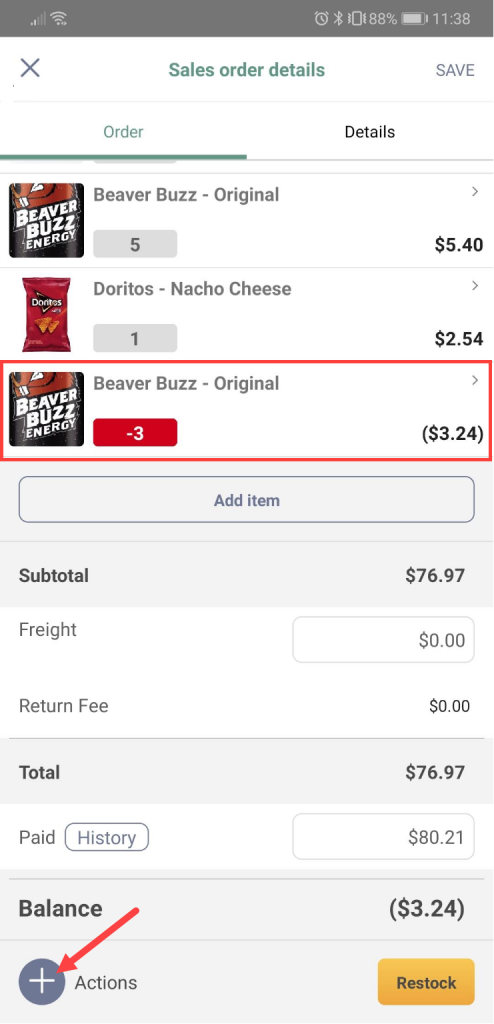
- Hit the Save button.
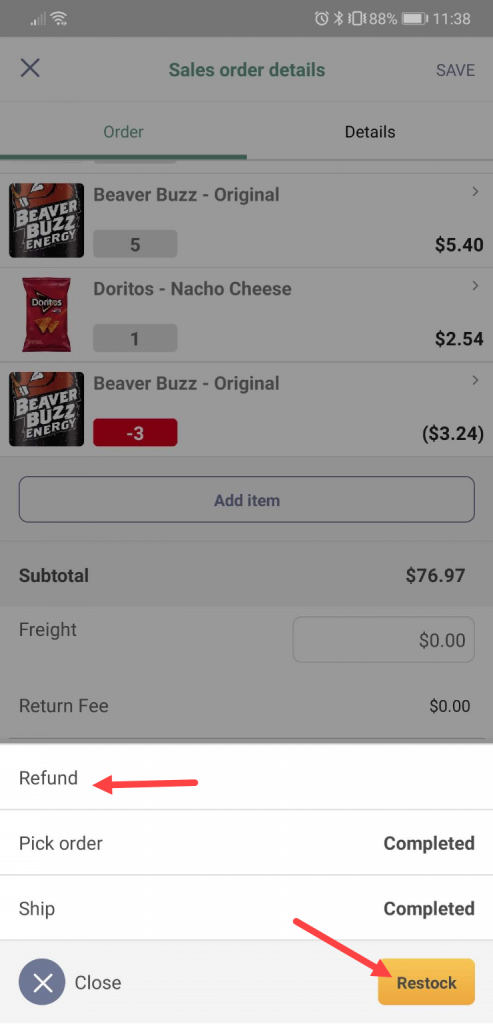
- To complete the refund, click the + Actions button at the bottom left, then select Refund to issue the refund to your customer.
- You can click the Restock button to restock your items.
Since you cannot print from inFlow Inventory Mobile yet, you will still be able to print a credit note or refund from inFlow Inventory for Windows or Web.
The returned items will show up along with the items that have been sent out, so you’ll see some negative quantities on the sales order. This is normal and a good indicator of which items were returned can be shown on the leftmost column of the sales order in a red circle.
Don’t see a Refund option? inFlow won’t show this if your customer hasn’t paid you in full — it’s just going to deduct it from the balance of the order. You shouldn’t have to issue credit/refund for items that your customer hasn’t paid you for, after all!


How can I apply a 15% restocking fee to order SO-001379, I also do not want to refund the shipping charges.
I can I adjust the credit amount to this account?
how do I do a size exchange!
This looks nothing like buy version of InFLow- there is no ‘return’ tab on the screen that I am seeing.