How to create and complete manufacture orders (Web)
In this fast-paced environment, traditional paper-based methods of managing inventory and production are no longer practical. That’s where inFlow’s Manufacture orders come in!
Setup
What are manufacture orders?
Manufacture orders (MOs) track raw materials/components that are assembled to create a new product.
There are two elements to manufacture products in inFlow:
- Bill of materials
- Manufacture orders
A bill of materials is a list of raw materials and instructions that are used to create a product. You can think of it as a recipe where the ingredients and steps are provided.
The manufacture order is where you track the tasks that need to be completed, such as:
- Product picking
- Reordering
- Manufacturing operations (Production management plan-add-on.)
Before getting started
Before assembling products, you’ll need a few things in inFlow.
- Have you added all products to inFlow? For inFlow to complete manufacture, we suggest that all products you’ll be working with are added to inFlow before starting a manufacture order. You can create products manually or import them in bulk.
- Do your products have costs? Along with adding products to inFlow, having the costs on the product records will help track manufacturing costs accurately. You can learn more about how inFlow calculates costs from this guide.
You can add a bill of materials to products manually or import it in bulk.
Manufacture orders webinar
Check out the webinar below for a detailed guide on inFlow’s manufacturing features.

Create MOs
How to create a manufacture order
- From the Main Menu, hover over the Create button (plus icon), then Manufacture order.
- Search or select a product to manufacture, then click Next.
- Confirm the location where you want to create the manufacture order. Or, select the blue arrow to choose a different location.
- In the quantity column, enter the number of how many you want to build. Then click Create.
How to create a blank manufacture order
- From the Main Menu, hover over the Create button (plus icon), then Manufacture order.
- Select Start from a blank order. This will open a new manufacture order with the location set to your personal default location.
- Select Add finished product to add the product you’ll be building.
On the MO, the information for the product you’re manufacturing will be in the order header, along with the following:
- Assignee field
- Location (this is where products will be picked & put away unless overridden)
- Order date
- Other costs
- Due date
- Custom fields (x10)
Note: For best performance, we recommend building one finished product per MO.
Start manufacturing
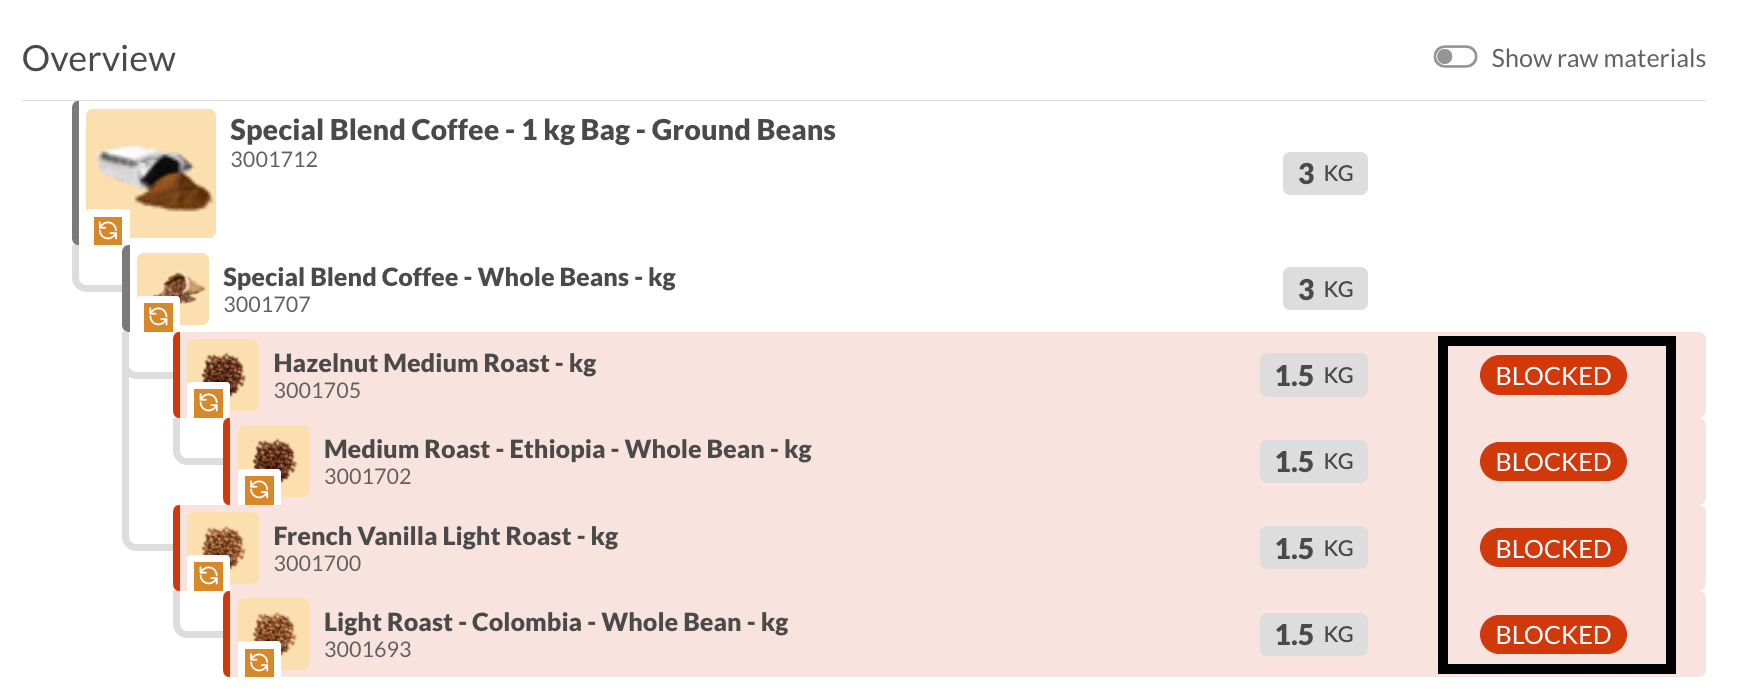
In the Overview table, raw materials and subassemblies are organized in a hierarchy to visualize which products need to be assembled first.
We suggest starting with the lowest level and working your way to the top of the MO. This is because the lowest sub-assembly is likely needed for the higher-level assemblies.
Click Start to begin manufacturing.
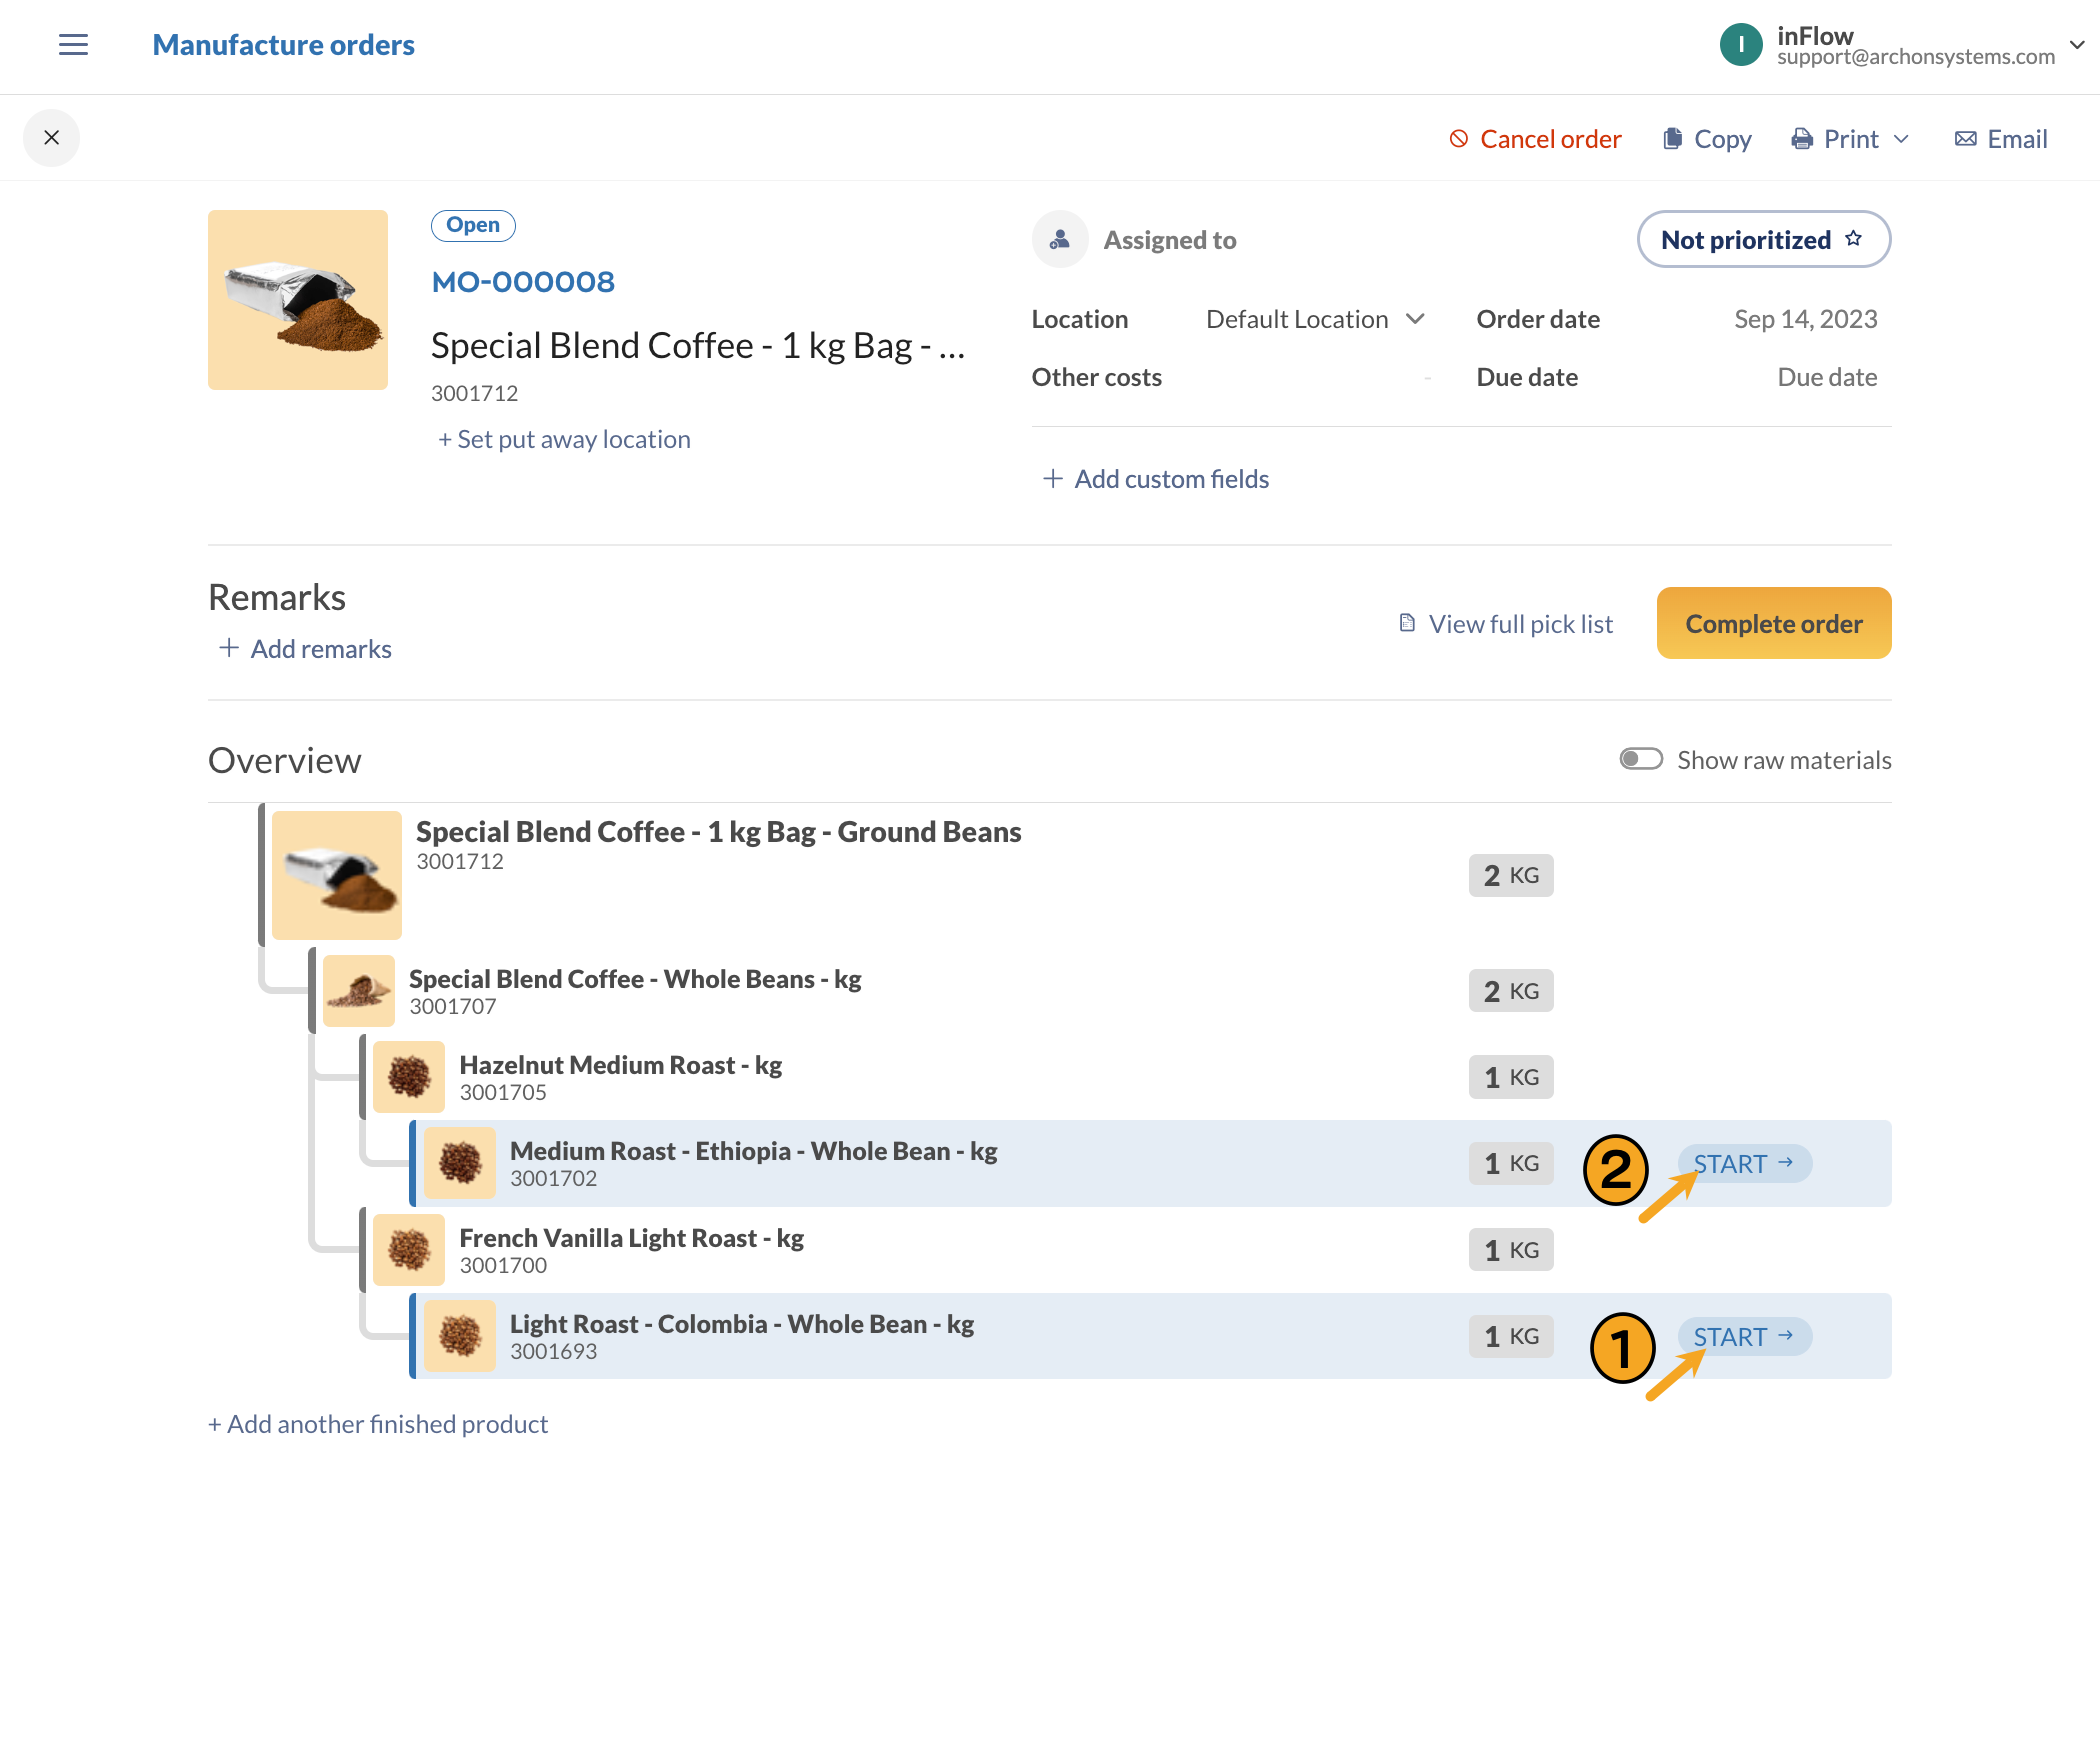
All components and raw materials needed to assemble the product are shown on-screen.
Picking
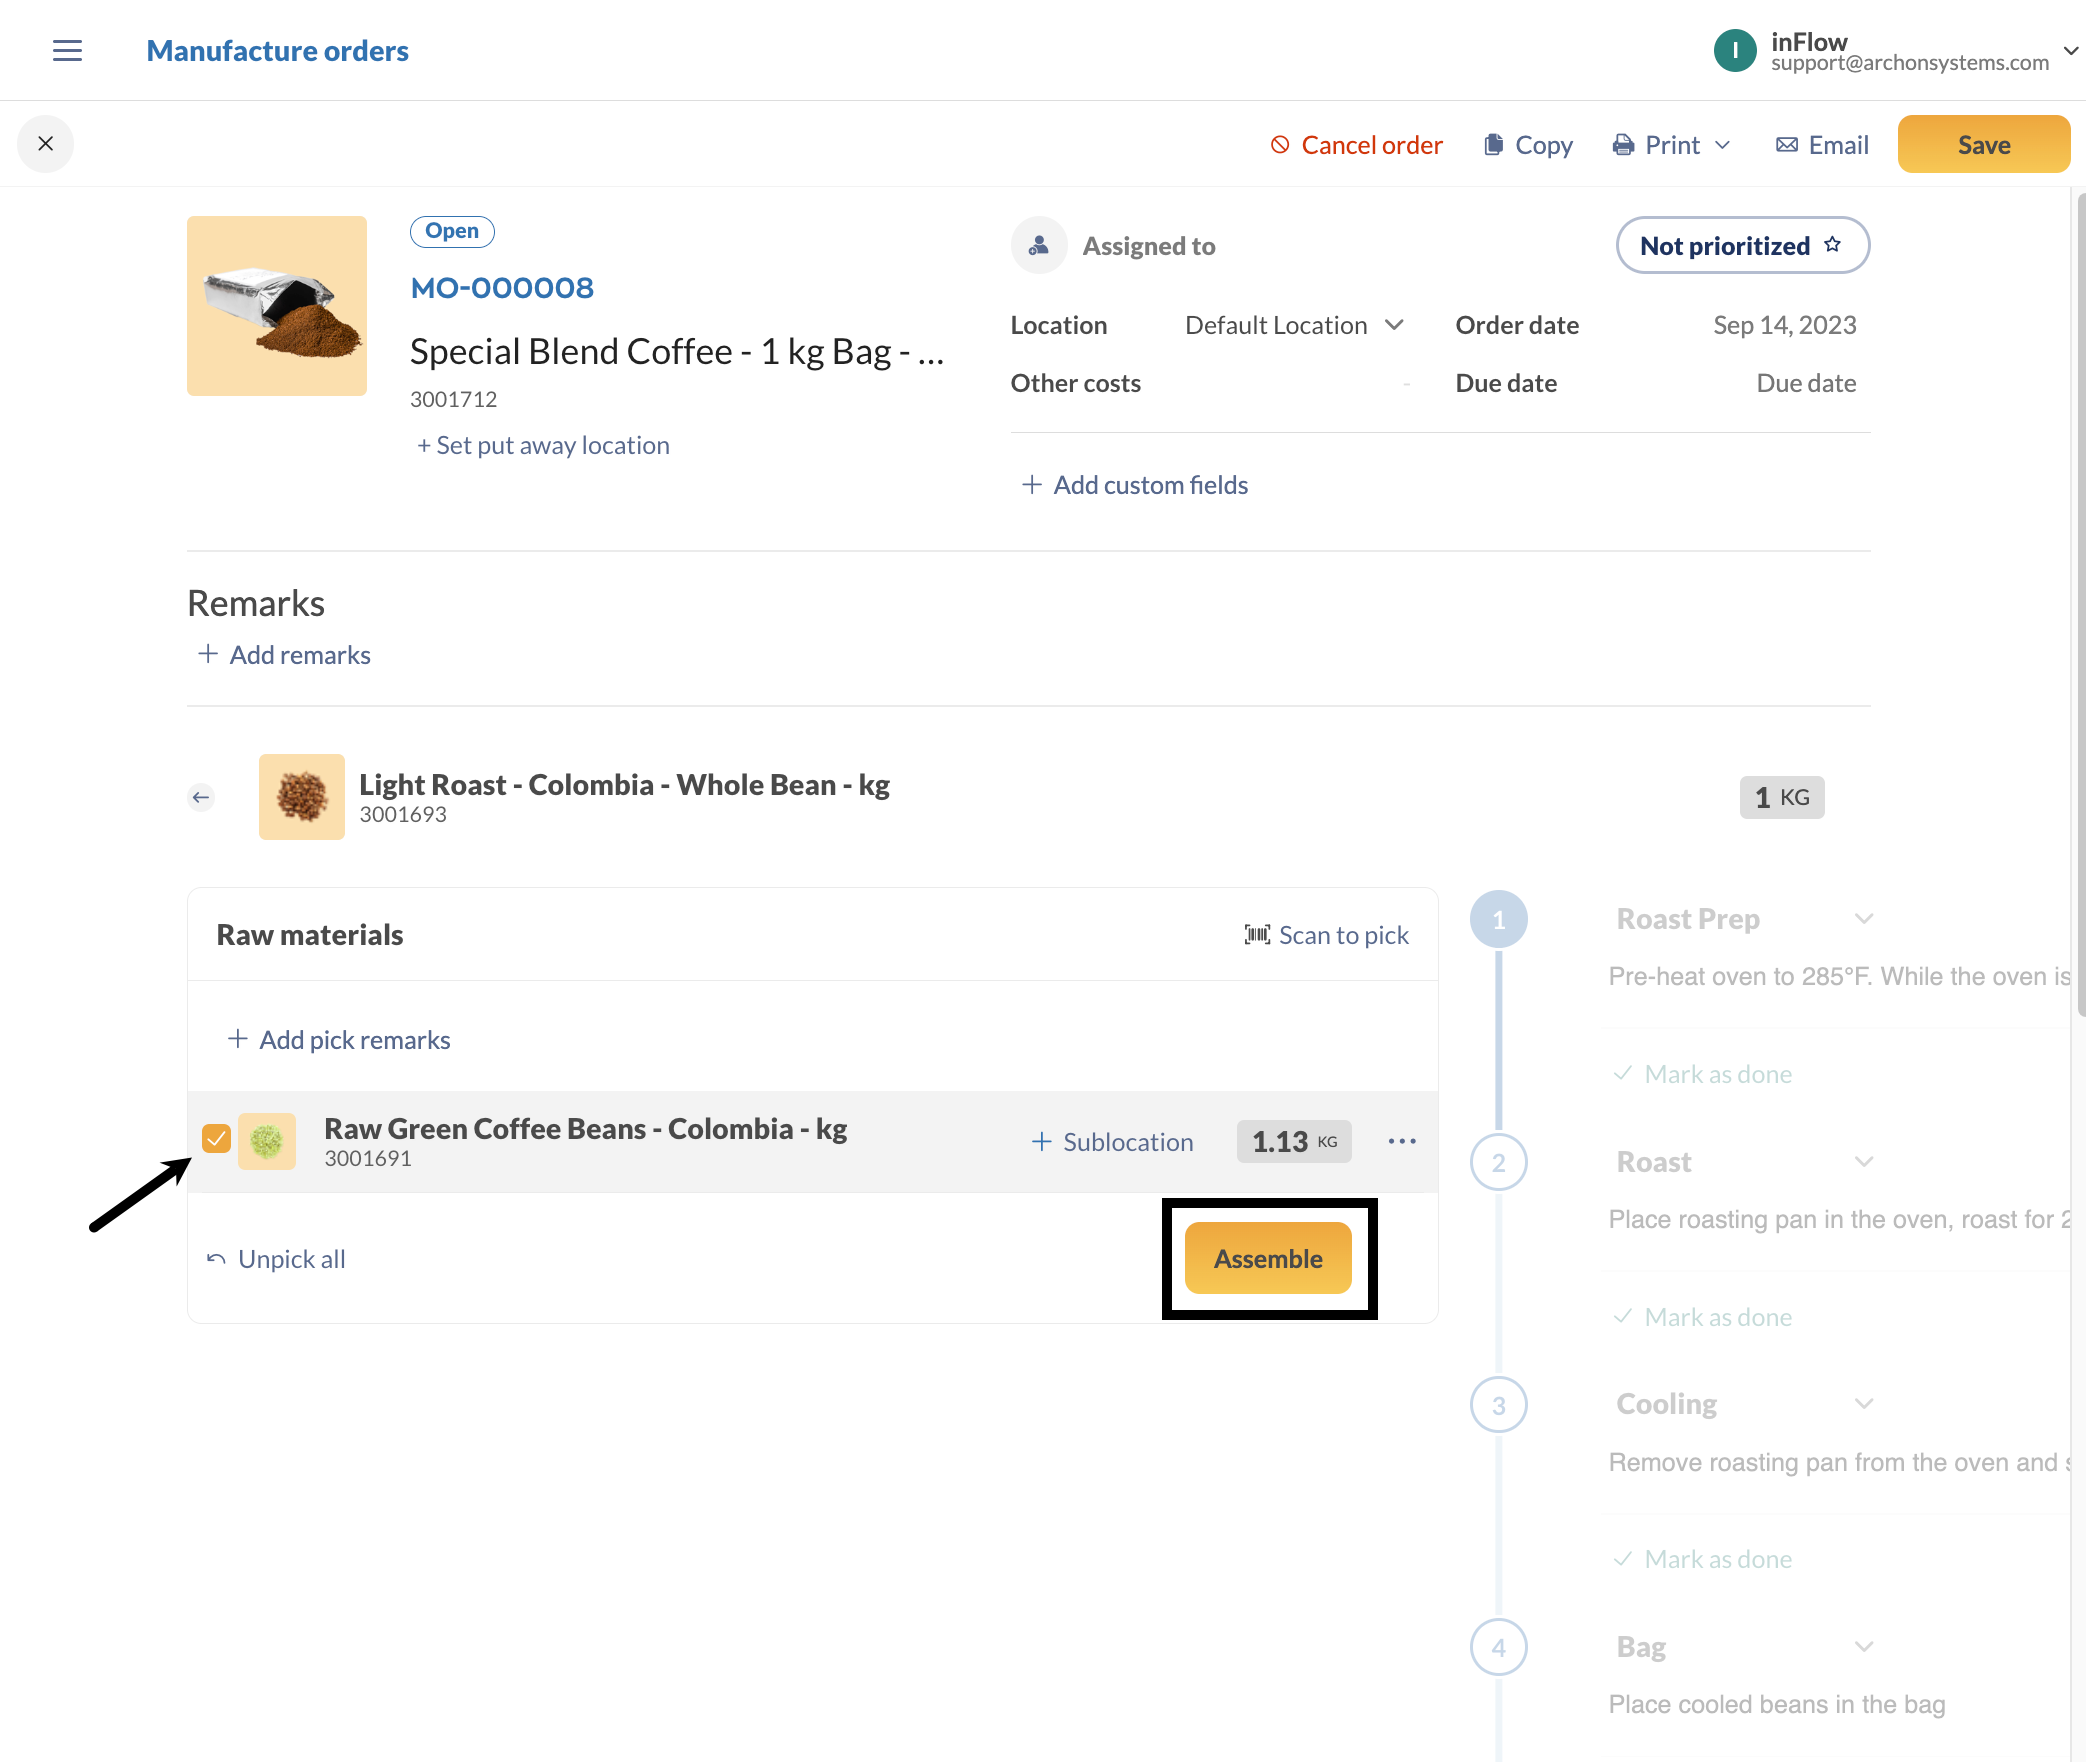
Pick per assembly
- On a subassembly line item, click Start to begin manufacture.
- On-screen, you’ll see a pick list of the raw materials in the subassembly.
- Place a check mark next to the raw materials you’ve picked. Or select Pick all or Scan to pick.
- When picking is complete, click the Assemble button. Take a look at the Operations section of this article to continue processing the MO.
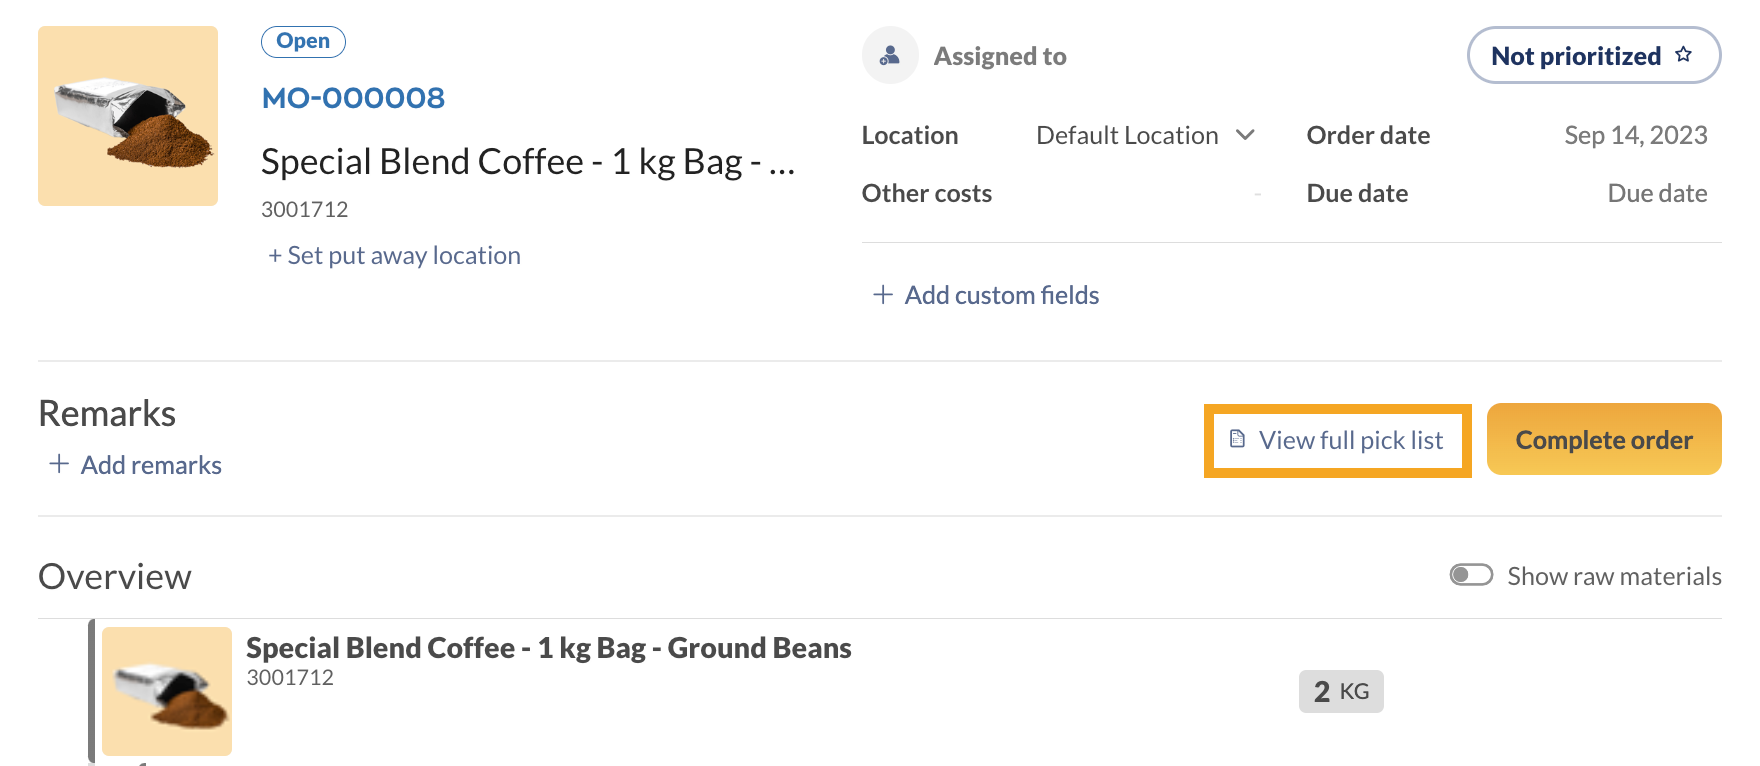
Full pick list
If you prefer to pick all raw materials regardless of subassemblies, you can do this from the Overview table.
- Above the Overview table, select View full pick list.
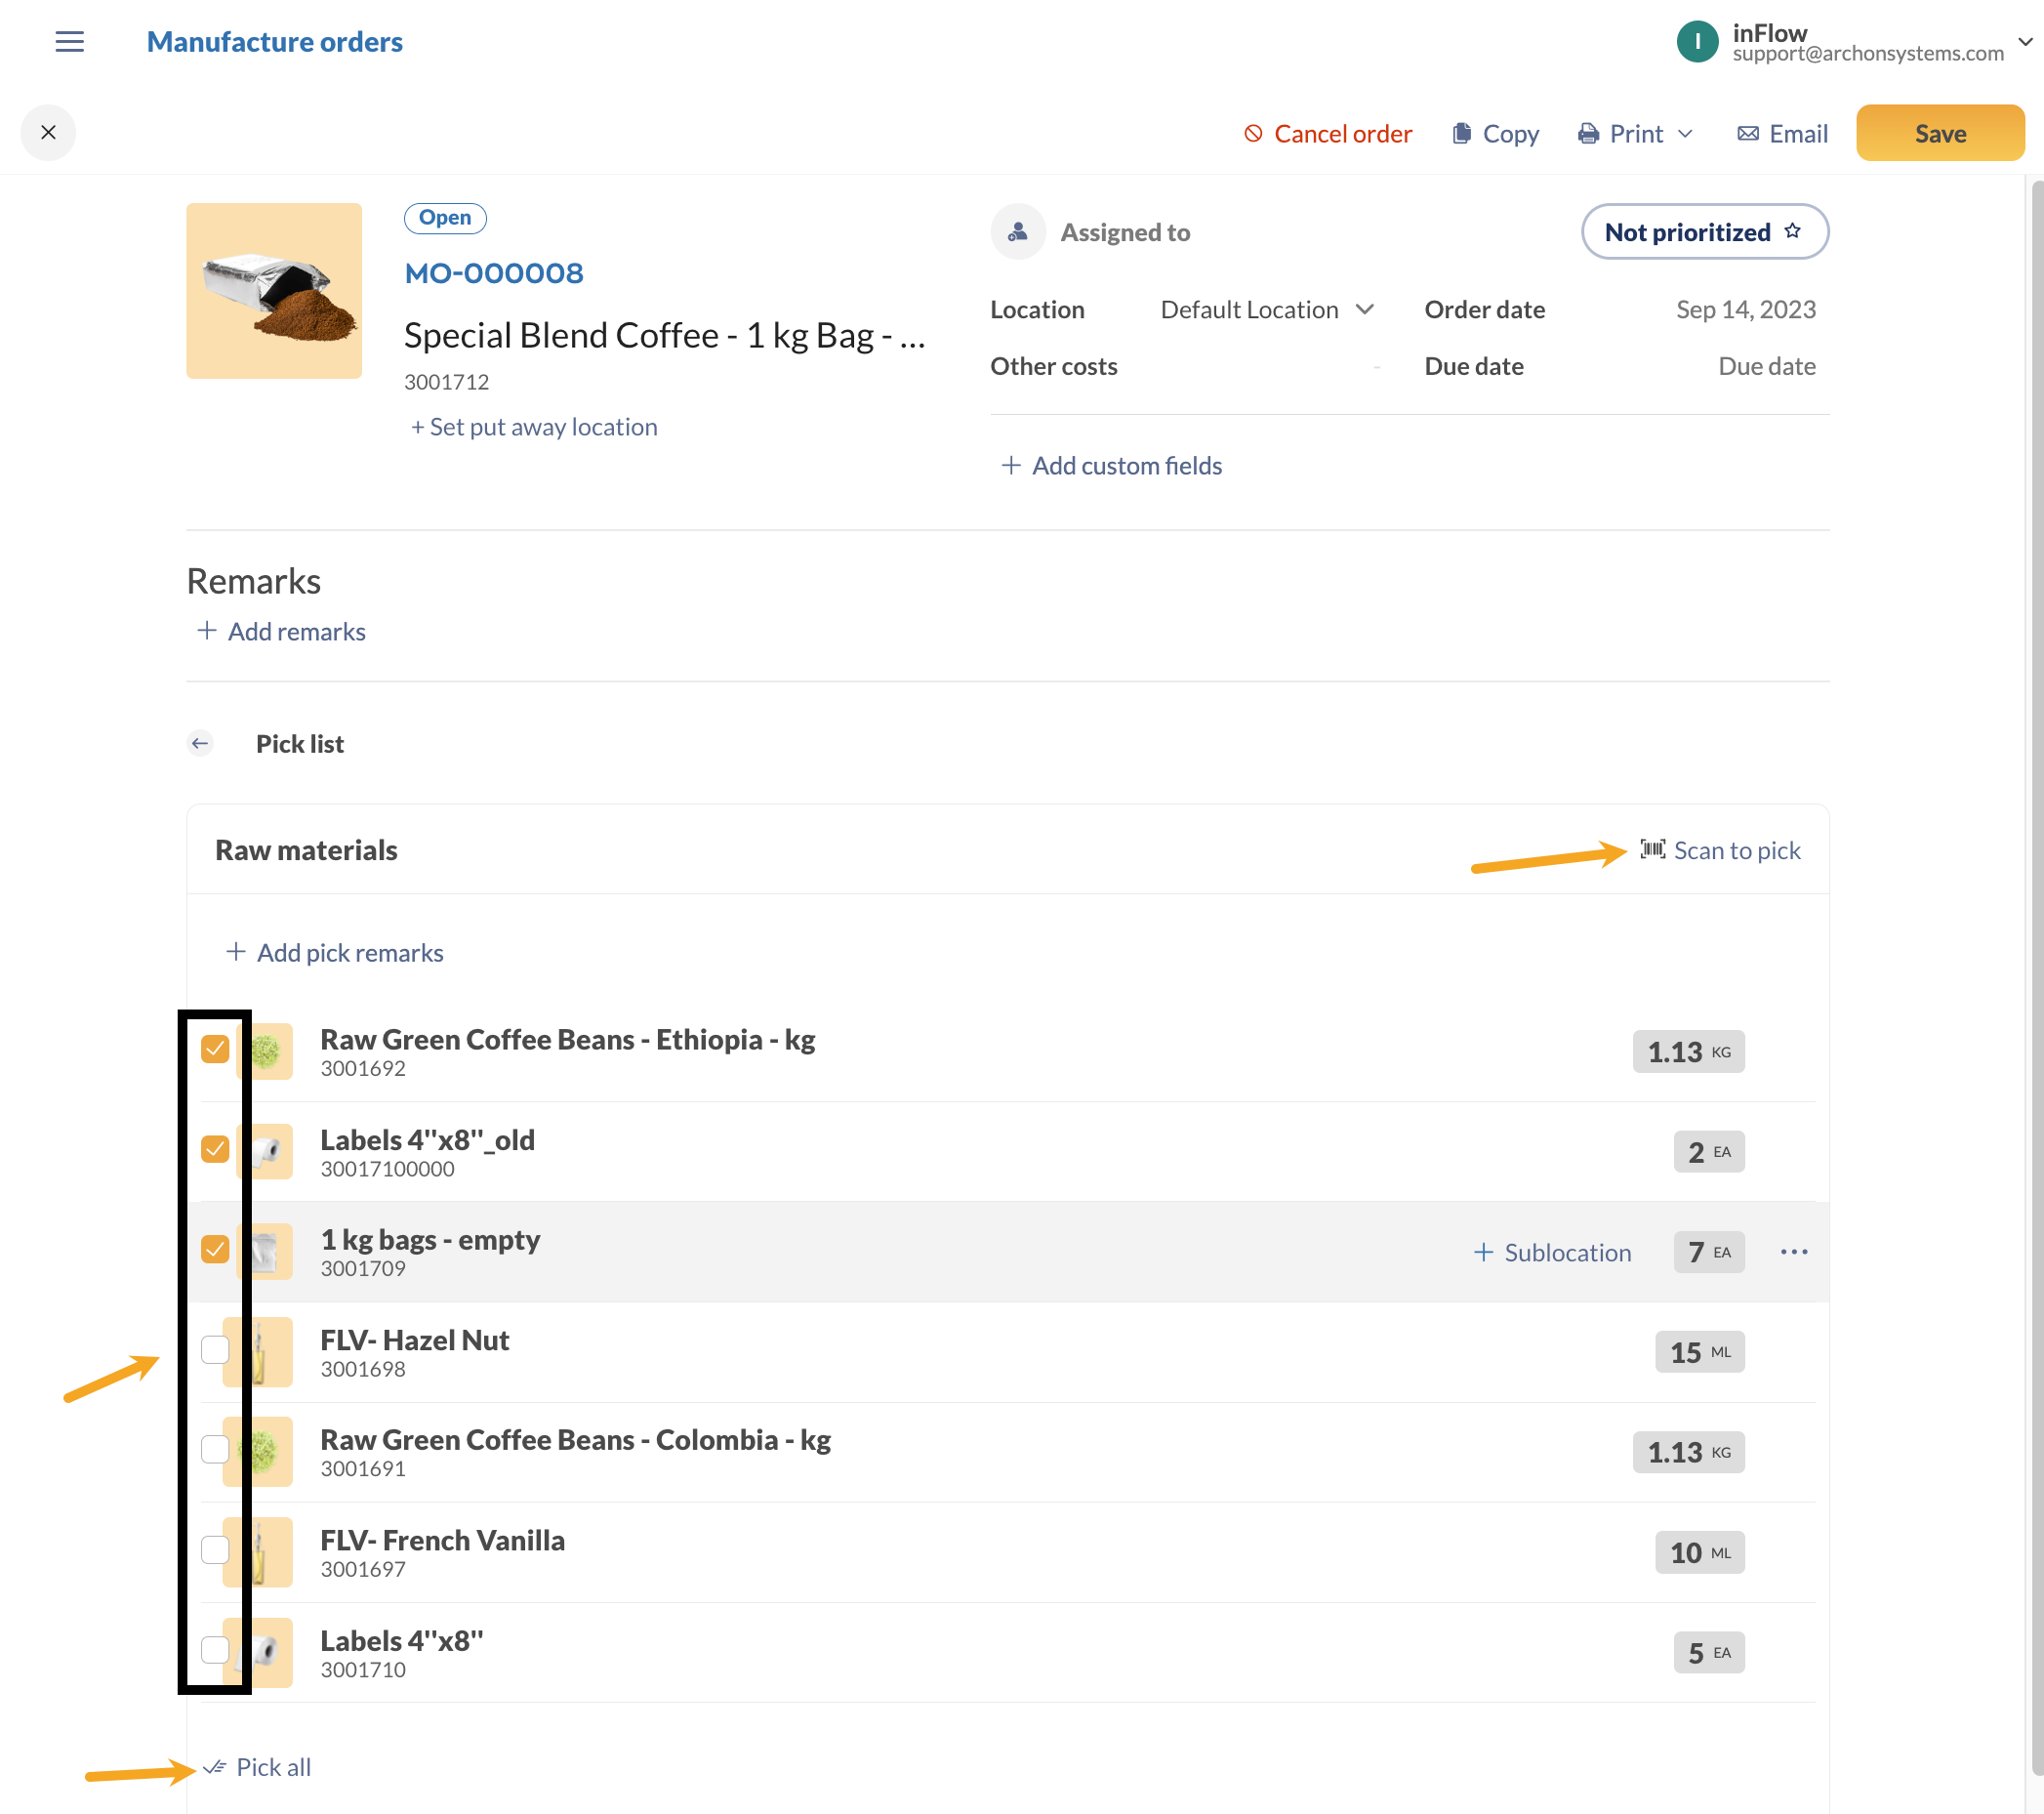
- This will give you a list of all raw materials regardless of subassemblies.
- Put a checkmark next to manually select what you’ve picked. Select Pick all if all of the raw materials have been picked, or Scan to pick to complete picking with a barcode scanner.
- When picking is complete, save the MO. Click on the back arrow to return to the Overview table. Take a look at the Operations section of this article to continue processing the MO.
Operations
MO operations are a series of tasks that need to be completed to assemble the finished product. Each operation represents a different stage in the manufacturing process.
We’d encourage you to add operations to the bill of materials before creating an MO, so all the steps are ready when it’s time to assemble. Take a look at this guide to learn more about adding operations to the bill of materials, or you can import operations.
MO operations track the following
- Operation type: A task category
- Costing: Track per-hour costs with the estimated duration field, or enter a flat rate in the Per-unit cost field to track third-party fees.
- Instructions: Complete each stage of the product’s manufacturing.
Note: If you previously used service-type products to track hourly rates/fees, you can use the costing fields in the operations instead.
- Once the raw materials are picked, click on Assemble.
- You’ll see a list of all of the operations for the assembly.
- To start recording work on an operation, click the Start timesheet button. A timer will start recording the work under your login. Multiple operators can start their own timesheets for the same operation, and they will be tracked separately.
- Clicking on “Stop timesheet” will stop your current timesheet. Use this for breaks or handing off to others. The progress is still recorded and can be viewed in the Details modal in the top-right corner.
- Click on Complete operation to mark the operation as completed. This will stop all ongoing timesheets for anyone else on the same operation in that manufacture order as well.
- When all operations are complete, click on Back to overview at the bottom of the page.
Completed operation timesheets can be adjusted. Take a look at this guide for details.
Subassemblies
If you pre-build components used in another assembly, inFlow will treat them as raw materials (stocked subassemblies). Stocked subassemblies on the MO will have a blue icon on the product image to identify them.
When your subassembly is in stock, the raw materials needed to build it won’t be displayed.

Out-of-stock subassemblies
If your subassembly is out of stock, inFlow can handle this in two ways.
- Reorder (assemble on a separate MO)
- Build from components.
Reorder (assemble on a separate MO)
To create a separate MO for your subassembly:
- On the Overview table, click on the inventory status (Not enough).
- The Reorder setting window will open. You can create the MO from here. If reorder settings haven’t been created, click on the yellow warning at the top of the page to set the product to be reordered by a Manufacture order.
Click Reorder when done, then open the new MO to start assembly.
Build from materials
To keep all assemblies in a single MO:
- Hover the subassembly and click on the ellipsis.
- Click on Build from components.
- Select Use current order.
On the MO, you’ll see the subassemblies and the raw materials needed to build.
Put away
In the MO header, you can set the Put away location to track the location of the manufactured products.
- In the MO header, click on Set put away location.

- The preselected location will match the location of the MO. You can keep this or select another location from the drop-down menu. You can select more than one location by clicking “+” next to the main location.
If your team uses sublocations, you can select it from the drop-down menu or create a new one by selecting Add put away sublocation. - Click on Put away when done.
Note: If a location or sublocation doesn’t exist in inFlow, start typing it in to create a new one.
Undo put away
After setting the put away location on the order, you can change or remove it at any time.
- Click on Edit put away location.
- To edit the location: select a new location or sublocation, then click the Put away button.
- Removing the location: Click on Clear put away.

Customizing the MO
We know that not everything goes according to plan. If you need to make changes to the MO while on the go, take a look at the customizing manufacture orders guide.
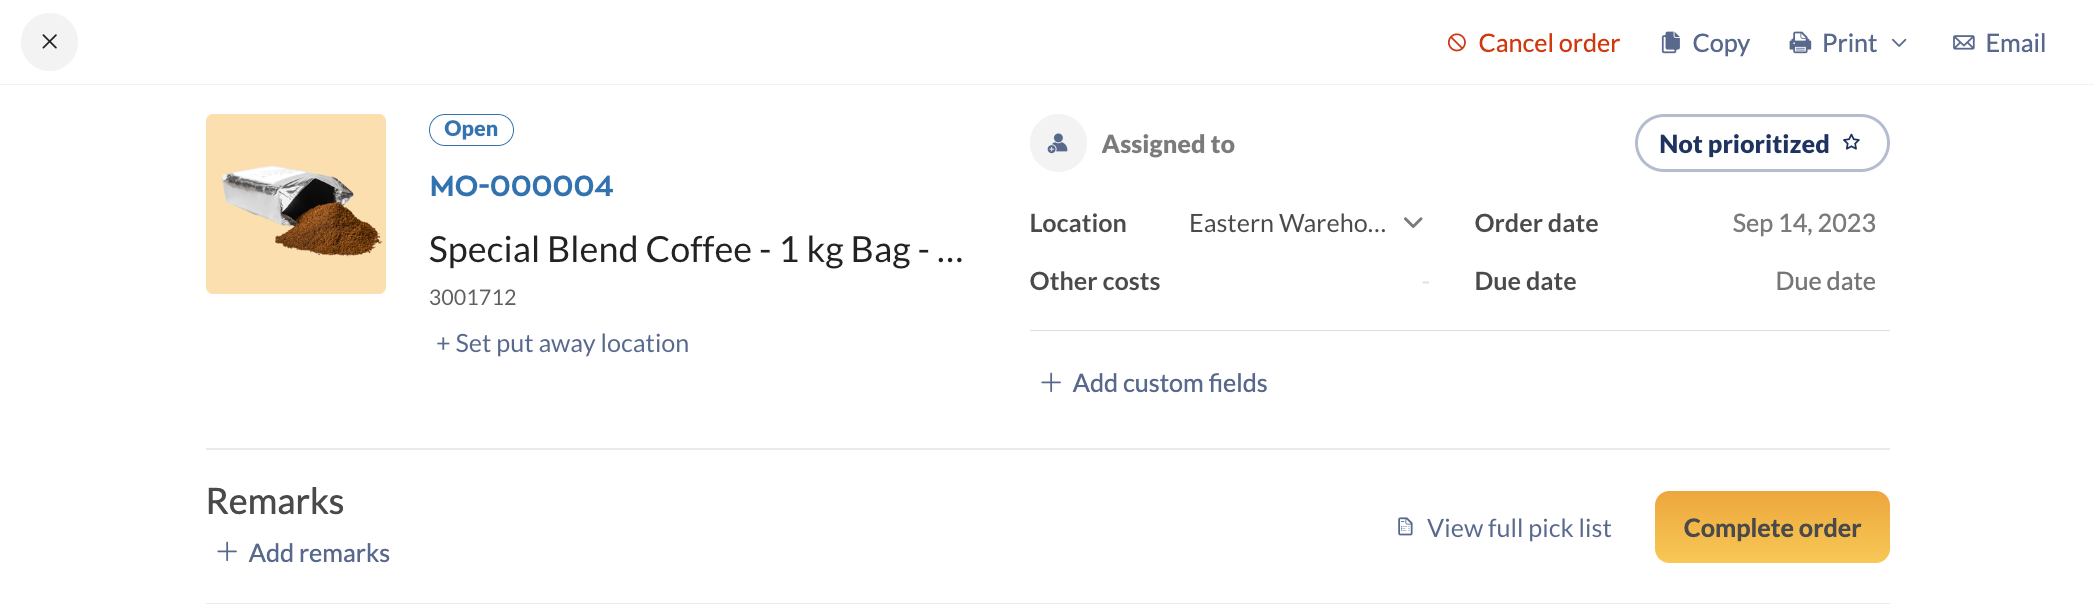
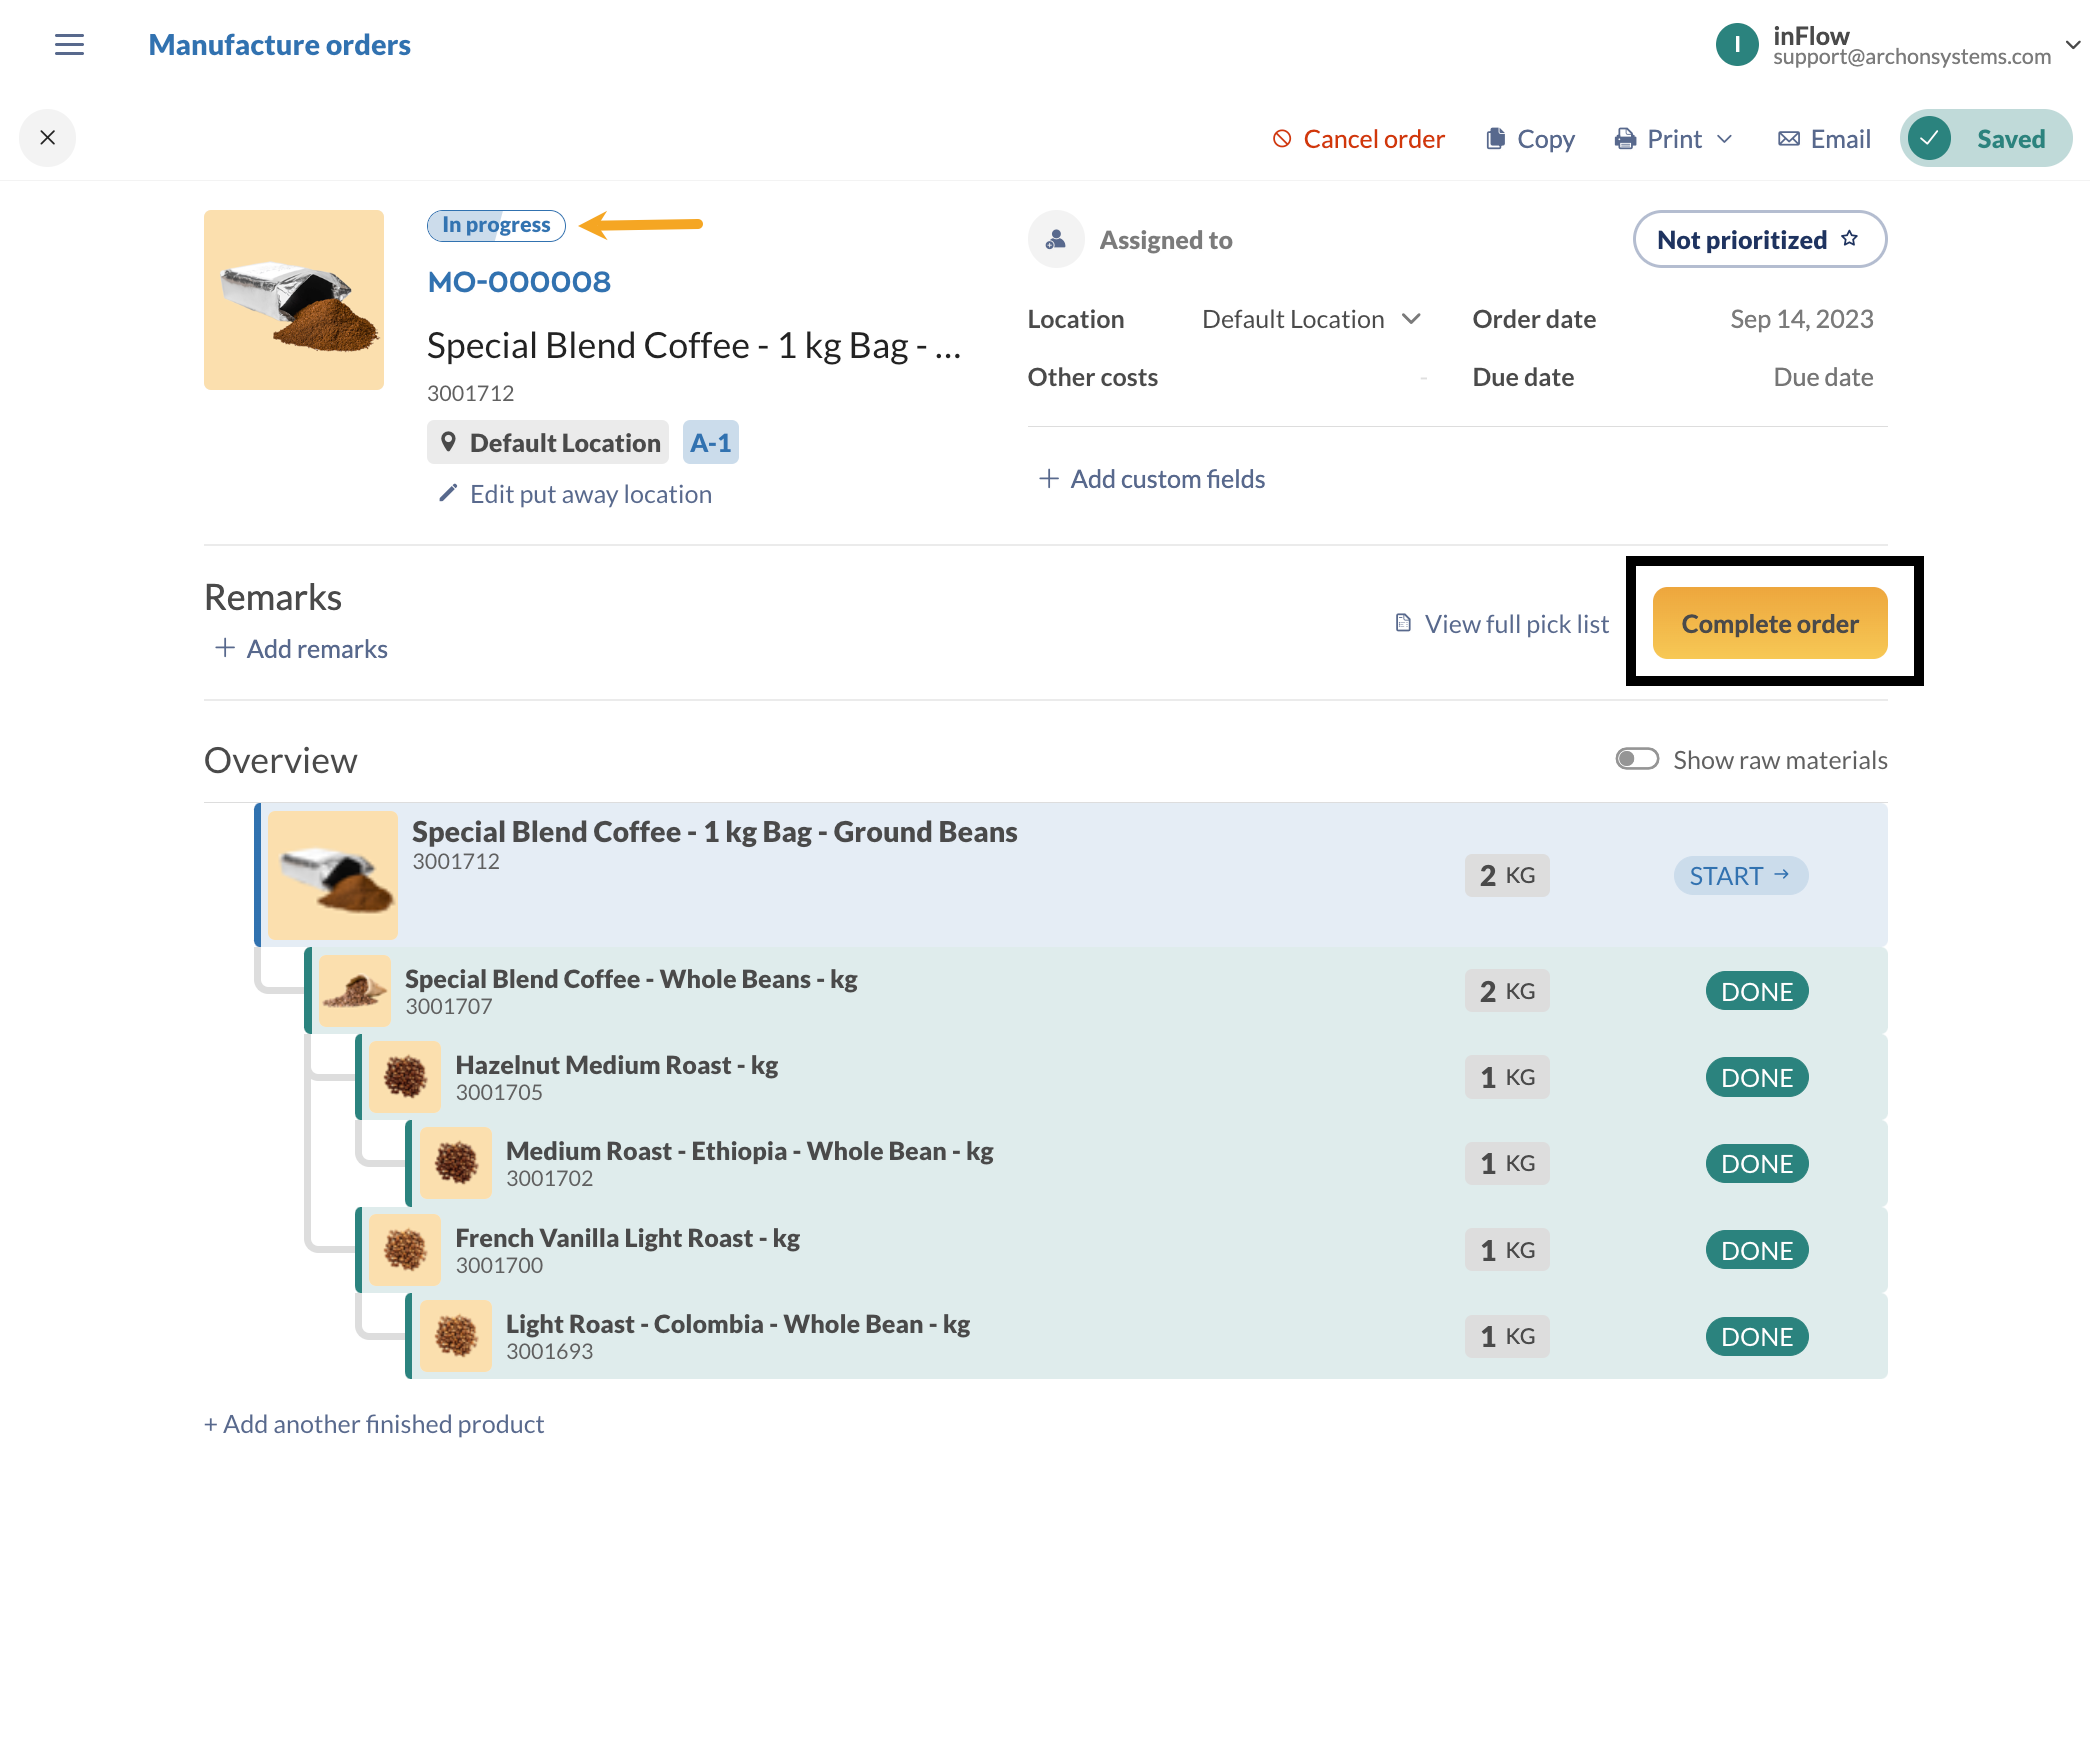
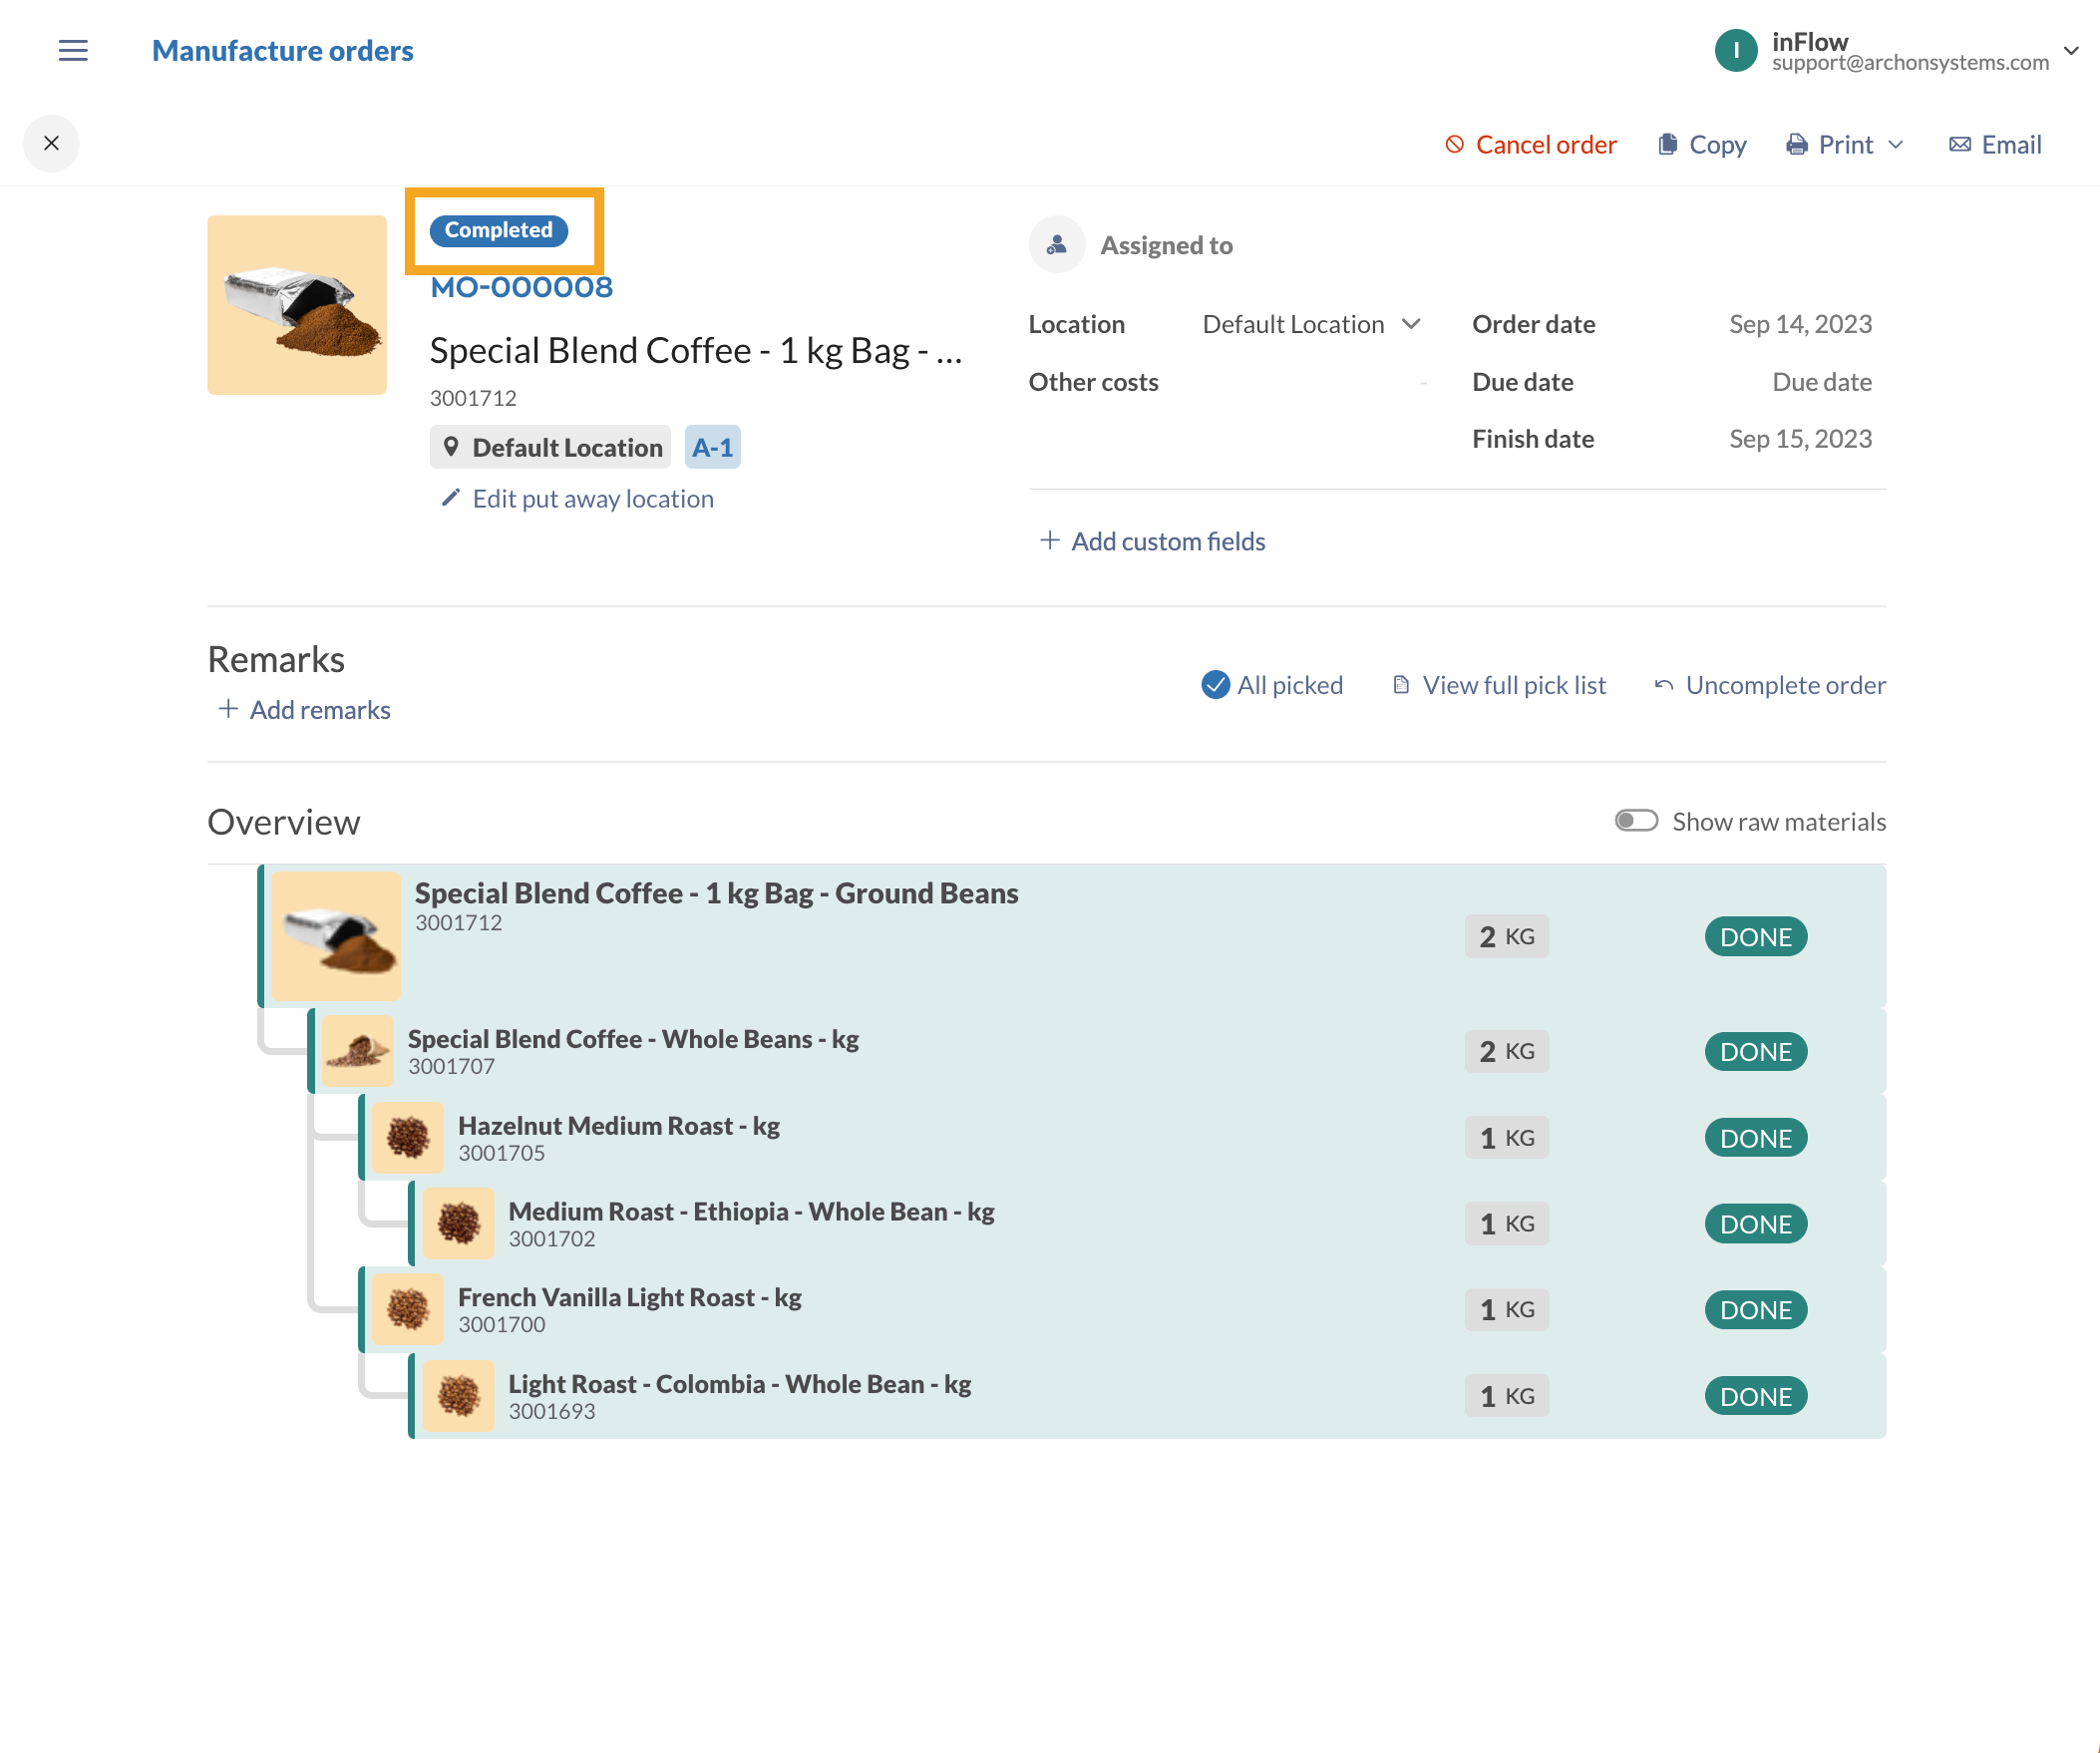
Completing a MO
When manufacturing is done, click the Complete button. This changes the MO status from In progress to Completed.
At this point, inventory levels and costs will be updated with the date the MO was marked complete.
Manufacturing with serialized products
If your assembly process involves serialized products, take a look at the following article to learn how you can work with them on manufacture orders.
Order and raw material statuses
Manufacture statuses
On a manufacture order, there are a few different statuses that you’ll see next to assemblies. Take a look below to learn about the different statues and the bullet points that explain why you’d see these statues on the MO.
Blocked
- This is shown at the top-level subassemblies when there aren’t enough raw materials in stock.
Start
- Subassemblies are ready to build.
- Prior subassemblies have been made, and they’re ready to be used in the next assembly.
- Raw materials/components are in stock and ready for picking and assembly.

Continue
- For assemblies in progress.
- Some of the raw materials have been picked.
- The assembly process has started but hasn’t been marked as done.

Assemble
- Subassemblies will have this status when there aren’t any raw materials left to pick.
- This stage means you have everything ready to start building.

Done
- When all raw materials have been picked, operations and subassemblies are completed.

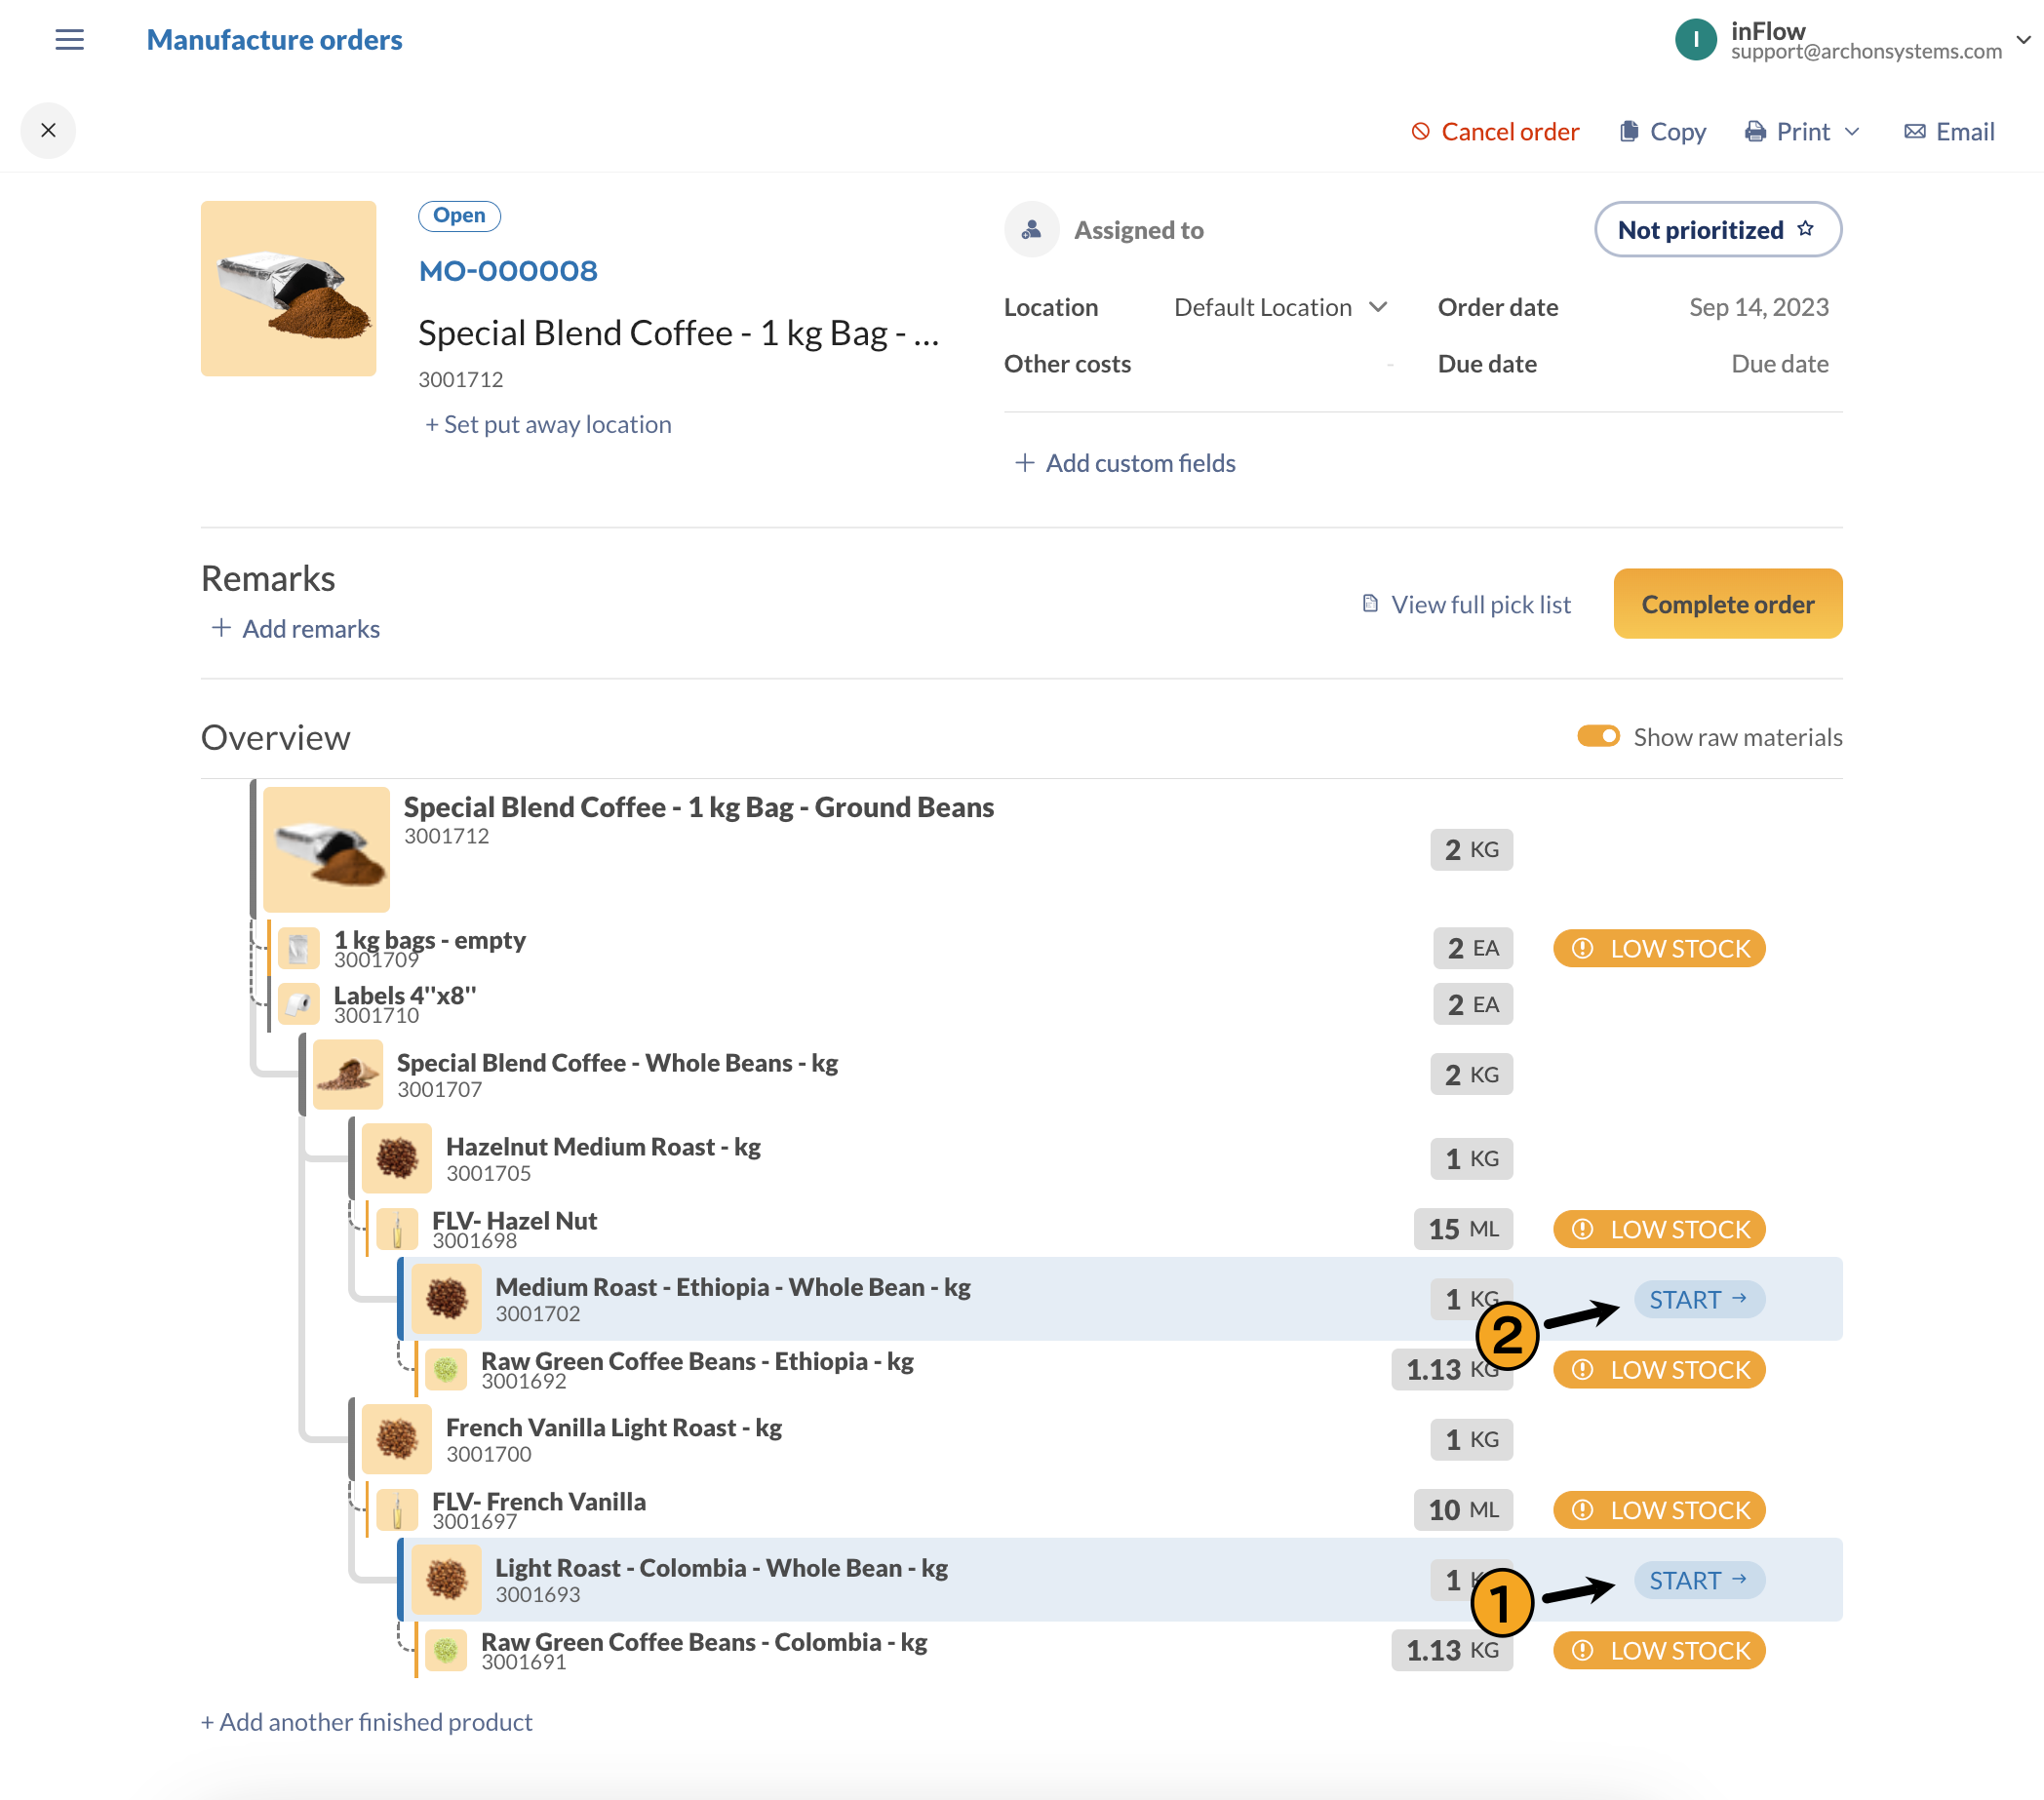
Raw material inventory level status
The overview table shows all raw materials and any subassemblies to build the product. If you enable the “Show raw materials” toggle, at some point, you’ll come across the following inventory status badges in the Overview tab:
Not enough
- This status is for raw materials that aren’t in stock.
- Click on Not enough to reorder stock.

Low stock
- This is shown for products that are on multiple orders, but there isn’t enough stock to complete/fulfill them all.
- Click on Low stock to reorder.

Waiting
- This status is for products you don’t have in stock but are waiting on an incoming order.
- Products can be reordered from a purchase order, stock transfer, or manufacture order.

MO options
As with all orders in inFlow, there are order options that can help make your workflow easier. Take a look below for details.
Viewing product records
If you want to view a product from the Overview table or pick lists, click on the three dots beside the product and select Visit details to open the product in a new tab.
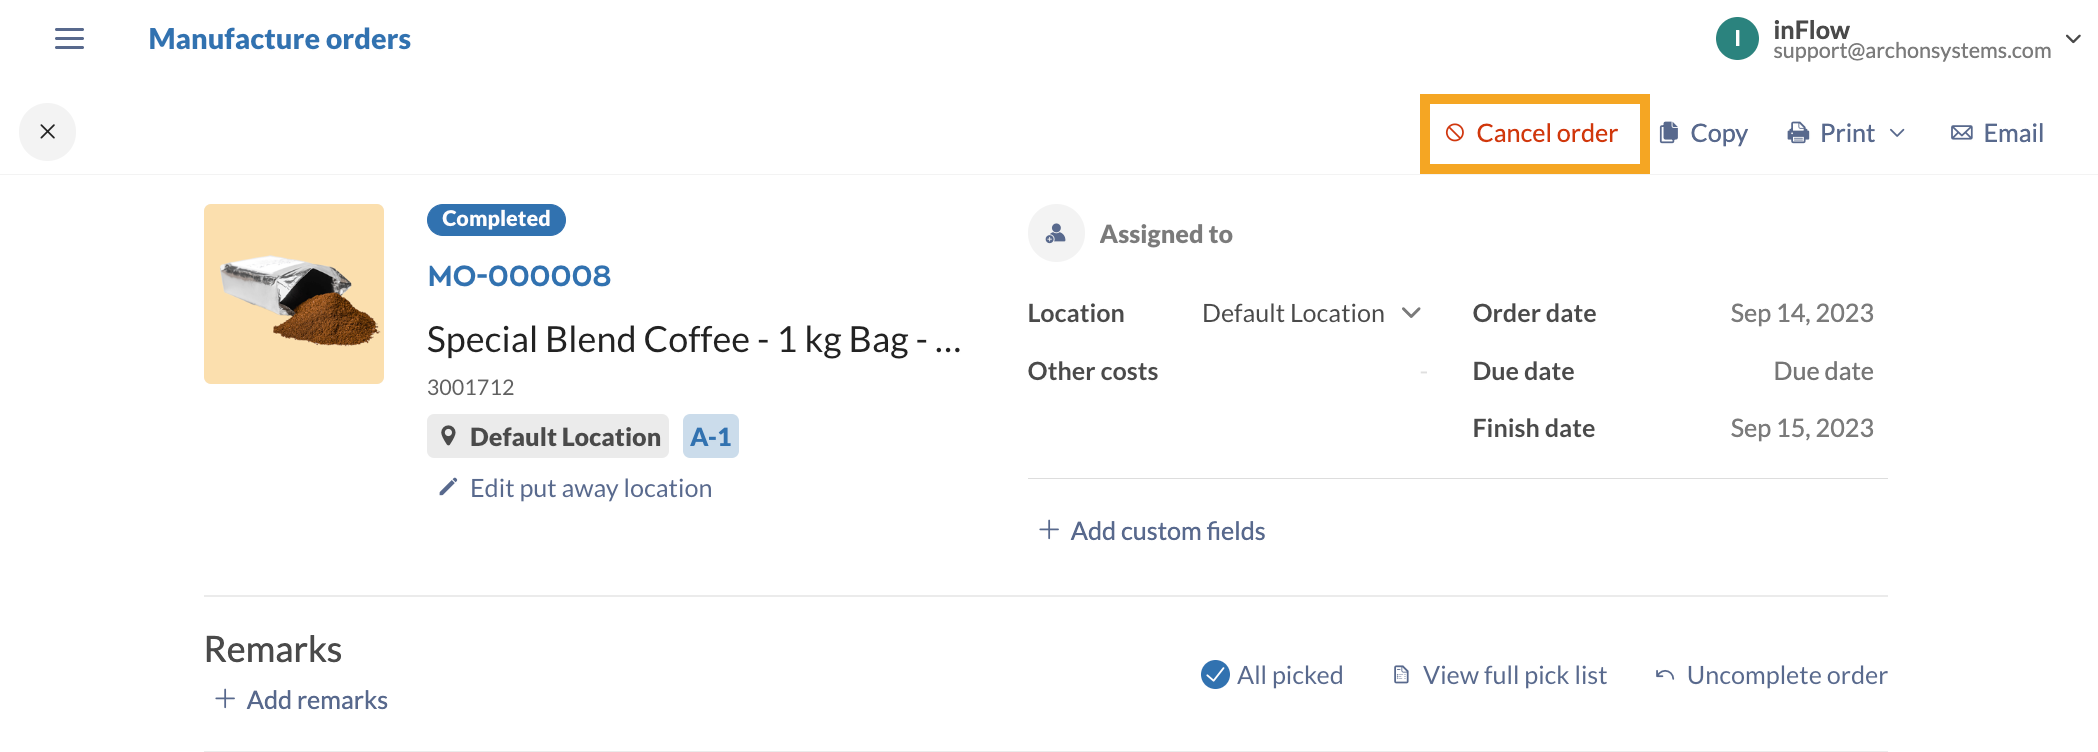
Canceling a Manufacture order
If you need to stop assembly, you can click the Cancel order button at the top right-hand corner of the screen. This will revert the quantities for all components and raw materials on the manufacture order.
When a MO is canceled, it’s not deleted from inFlow. If you need the MO later, you can find it on the Manufacture order list screen.
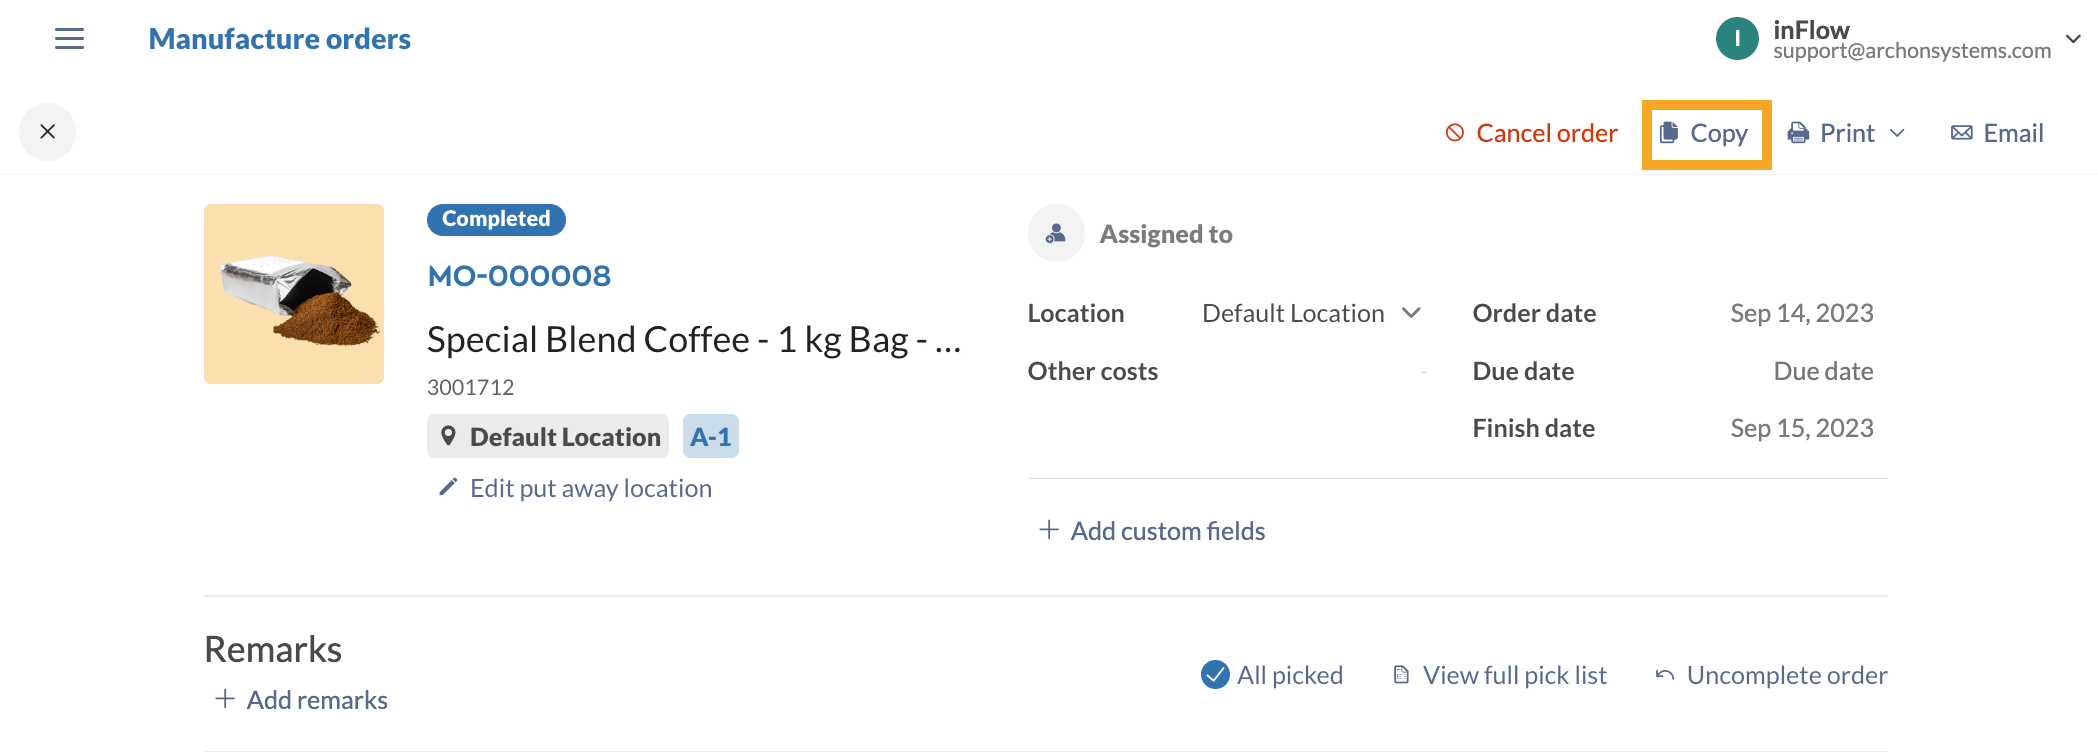
Copy
To duplicate a MO, click on the Copy button. This will copy all details from the original order, including the location and quantities.
The status of the new MO will be set to Open, and all products in the Overview table be unpicked.
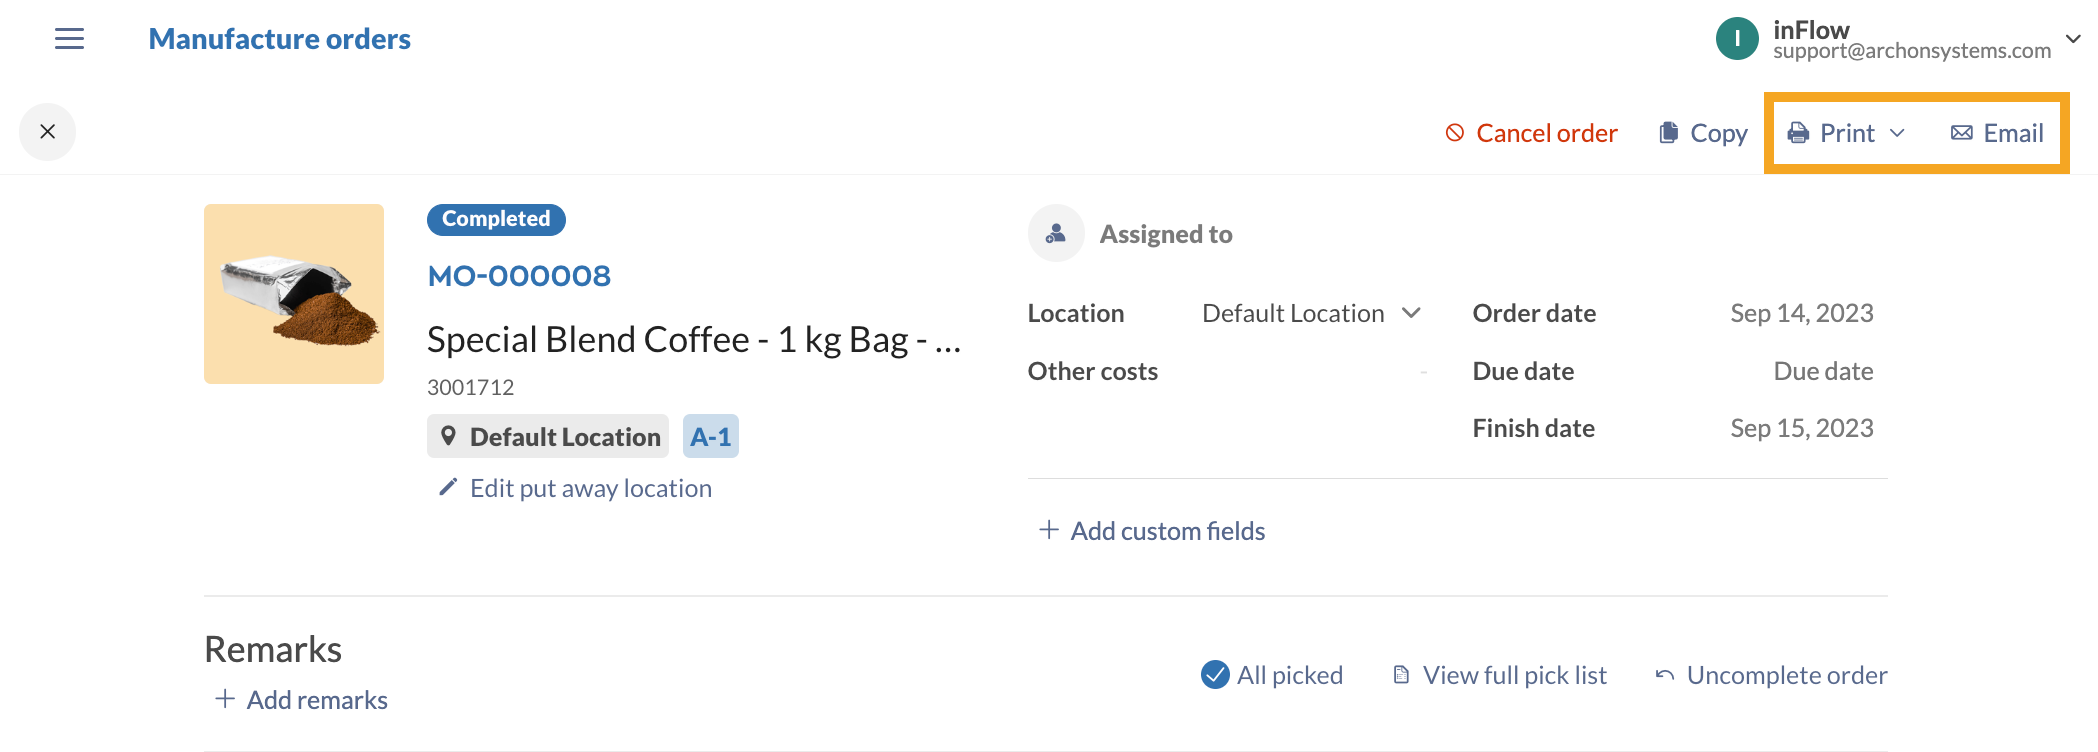
Emailing & printing/documents
If you need to send a copy of the manufacture order, you can click the Email button at the top right-hand of the order.
- The Reply-to field is pre-filled with your email address.
- Enter the recipient’s email address in the To field and Cc or Bcc if applicable.
- The subject line has the order number by default. You can edit the subject to further customize the email.
- If you have any details to add, enter them in the Message field.
- To view the document, click Preview document.
- Click Send when done.
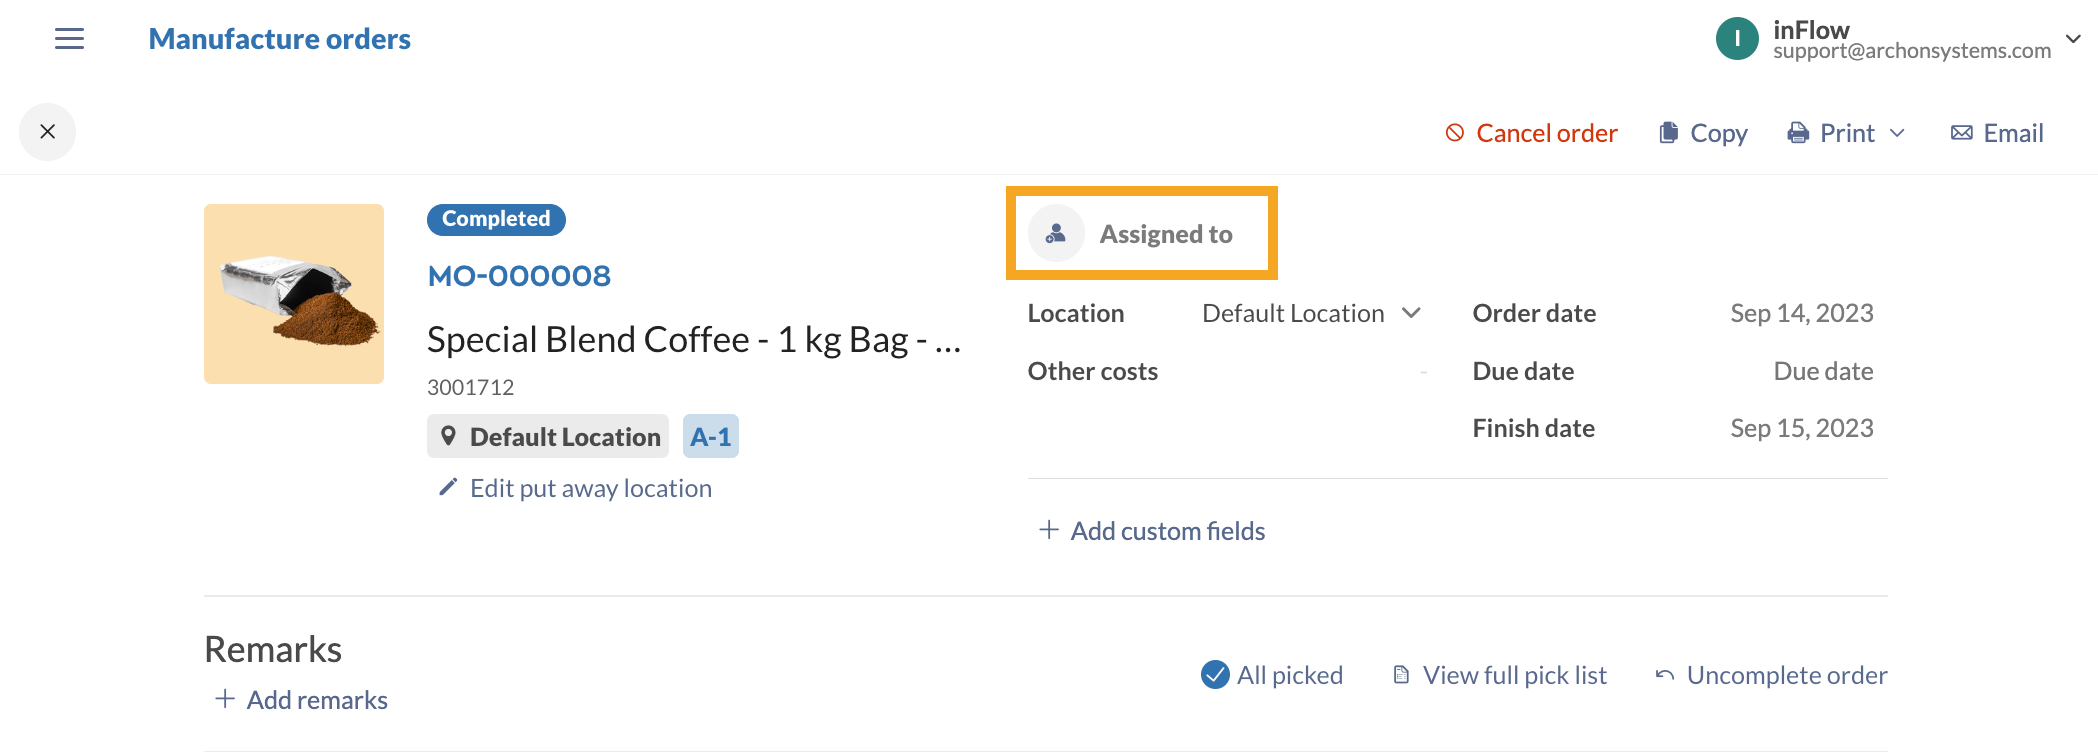
Assign to
Click on Assigned to button to add a team member to the manufacture order. When orders are assigned, the team member will get an email to let them know.
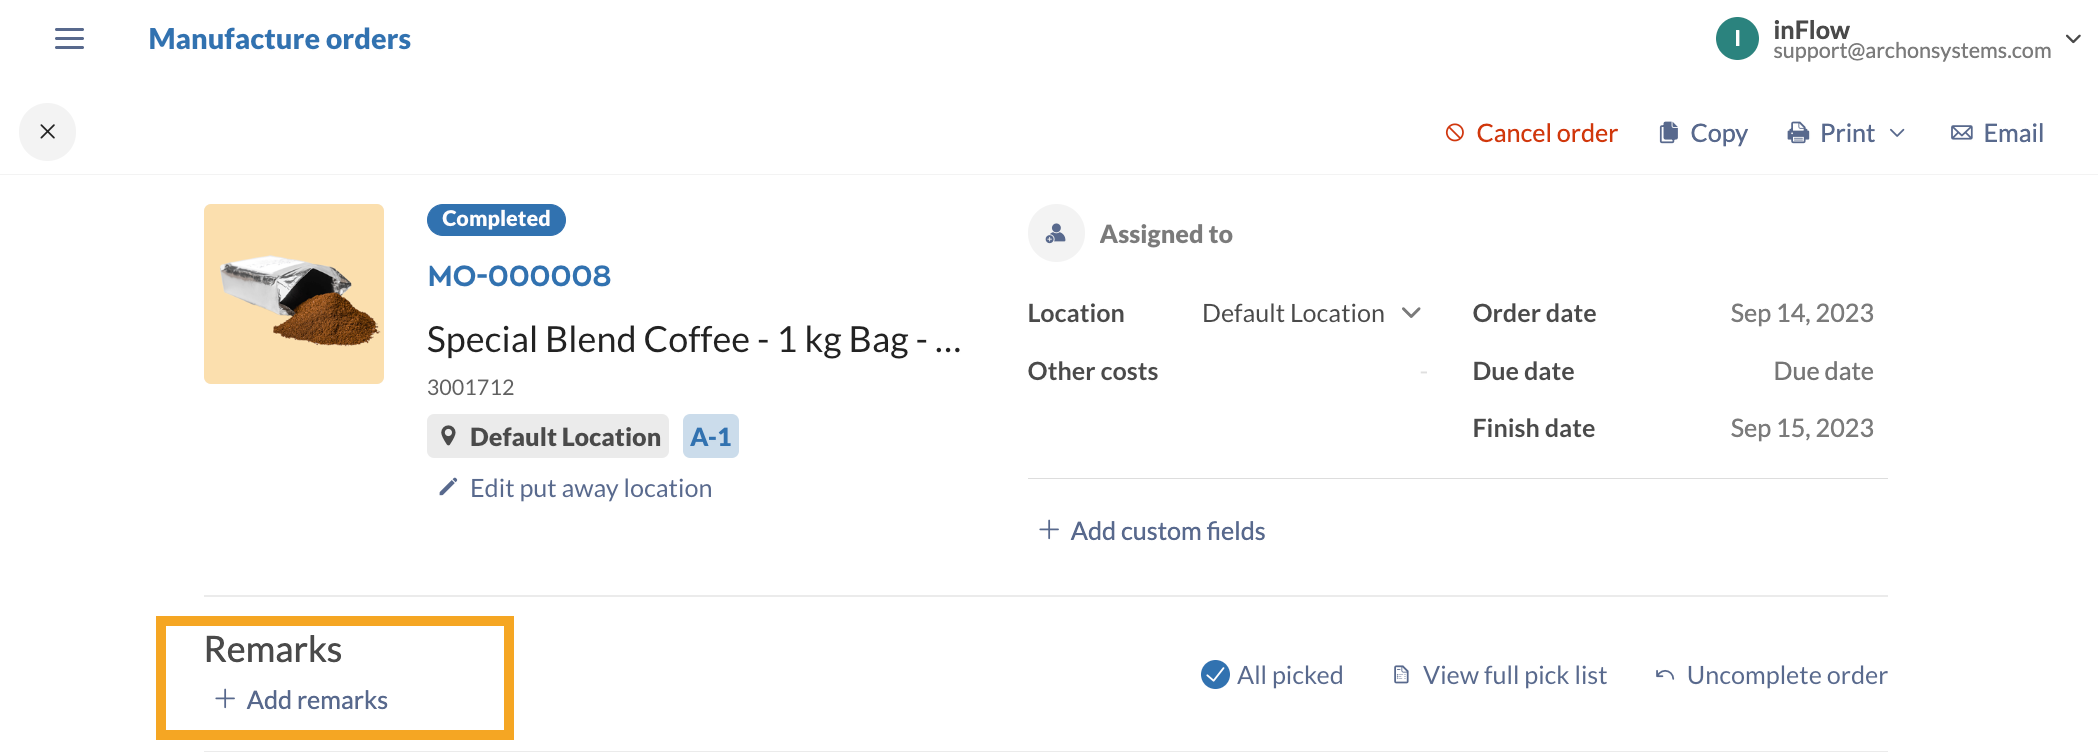
Remarks
If you want to leave notes on the MO, you use the Remarks field to enter any information that you need. This field is best notes related to the order as a whole rather than Operation instructions.
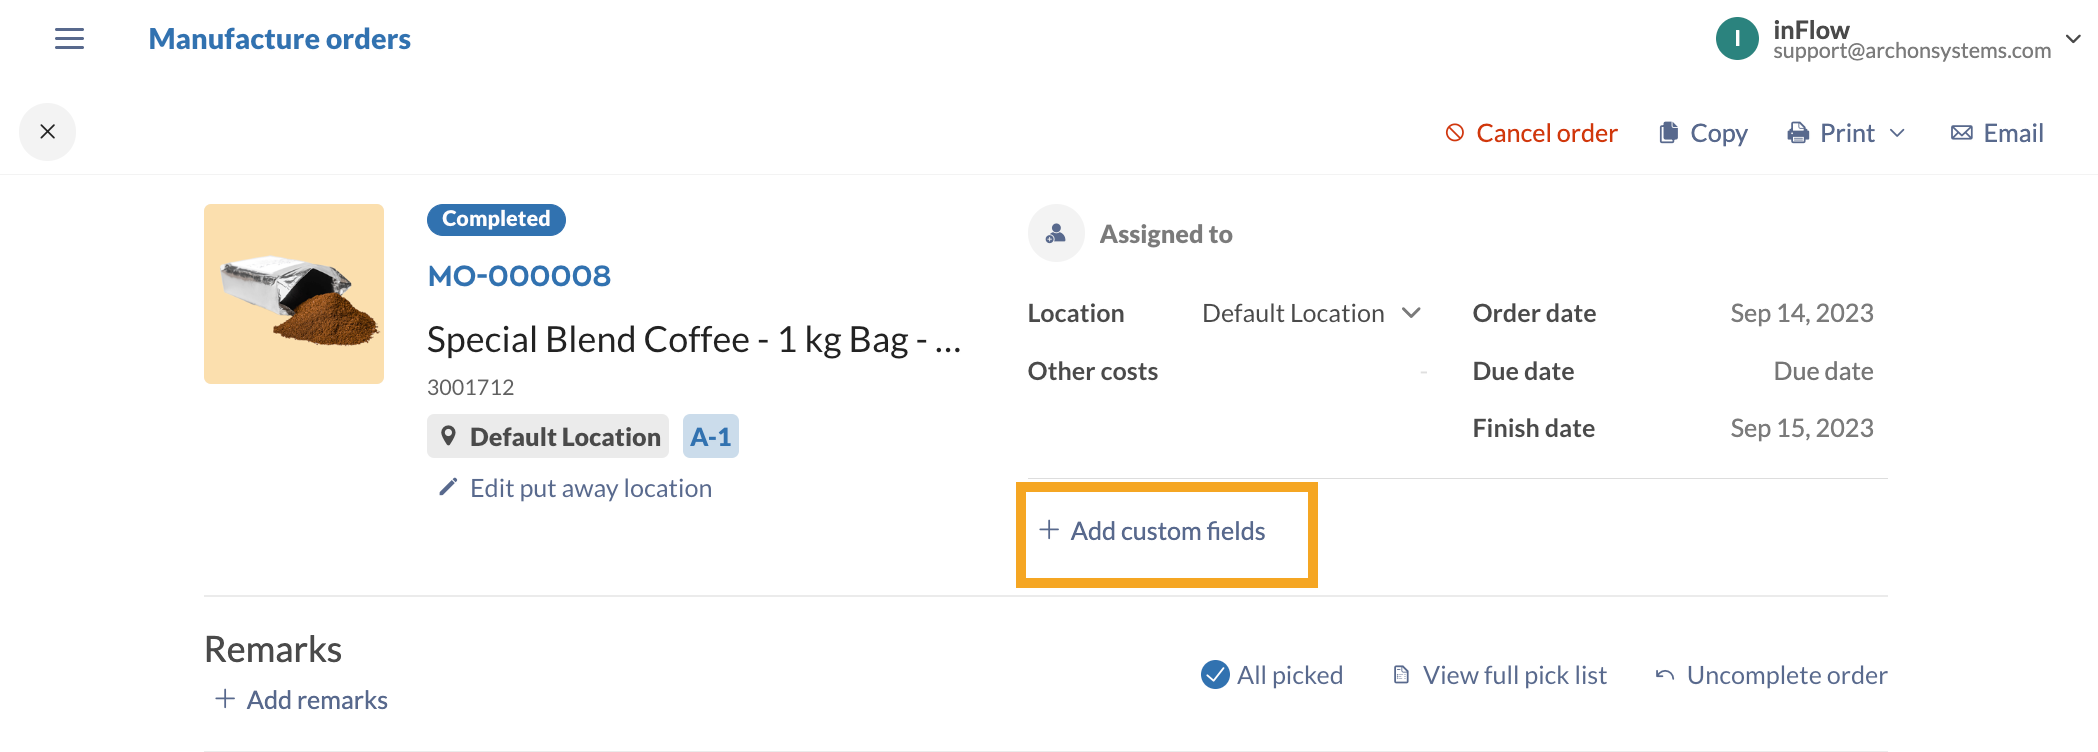
Custom fields
If you want to track additional information on the MO, you can use custom fields. There are 10 type-in fields that you can name and track any information you need.
Team member access rights
MO User access
Manufacture orders have two team member access rights settings.
Manufacture order user access:
- No access
- View only
- Full access
Manufacture order list prioritization:
- View Only
- Full access
| Access option | Explanation |
|---|---|
| No access | The team member won’t be able to view or access MOs |
| View only | Manufacture order: The team member can view MO in a read-only mode. Prioritization: The team member can view the MO list but doesn’t have access to changing the order priority status. |
| Full access | Manufacture order: The team member can view MO in a read-only mode. Prioritization: The team member can view the MO list, but doesn’t have access to changing the order priority status. |
Location-restricted access rights
Along with other features, manufacture orders will work for team members with location-restricted access rights.
This means:
- A team member who has access to all locations can view and access MOs in all locations.
- A team member with restricted location access can only view MOs in the locations they have access to.
Note: Currently, higher tier plans have access to the Restrict access by location add-on. Contact the inFlow team if you have any questions about this feature.
Manufacture order list
The manufacture order list lets you view all ongoing and completed orders.
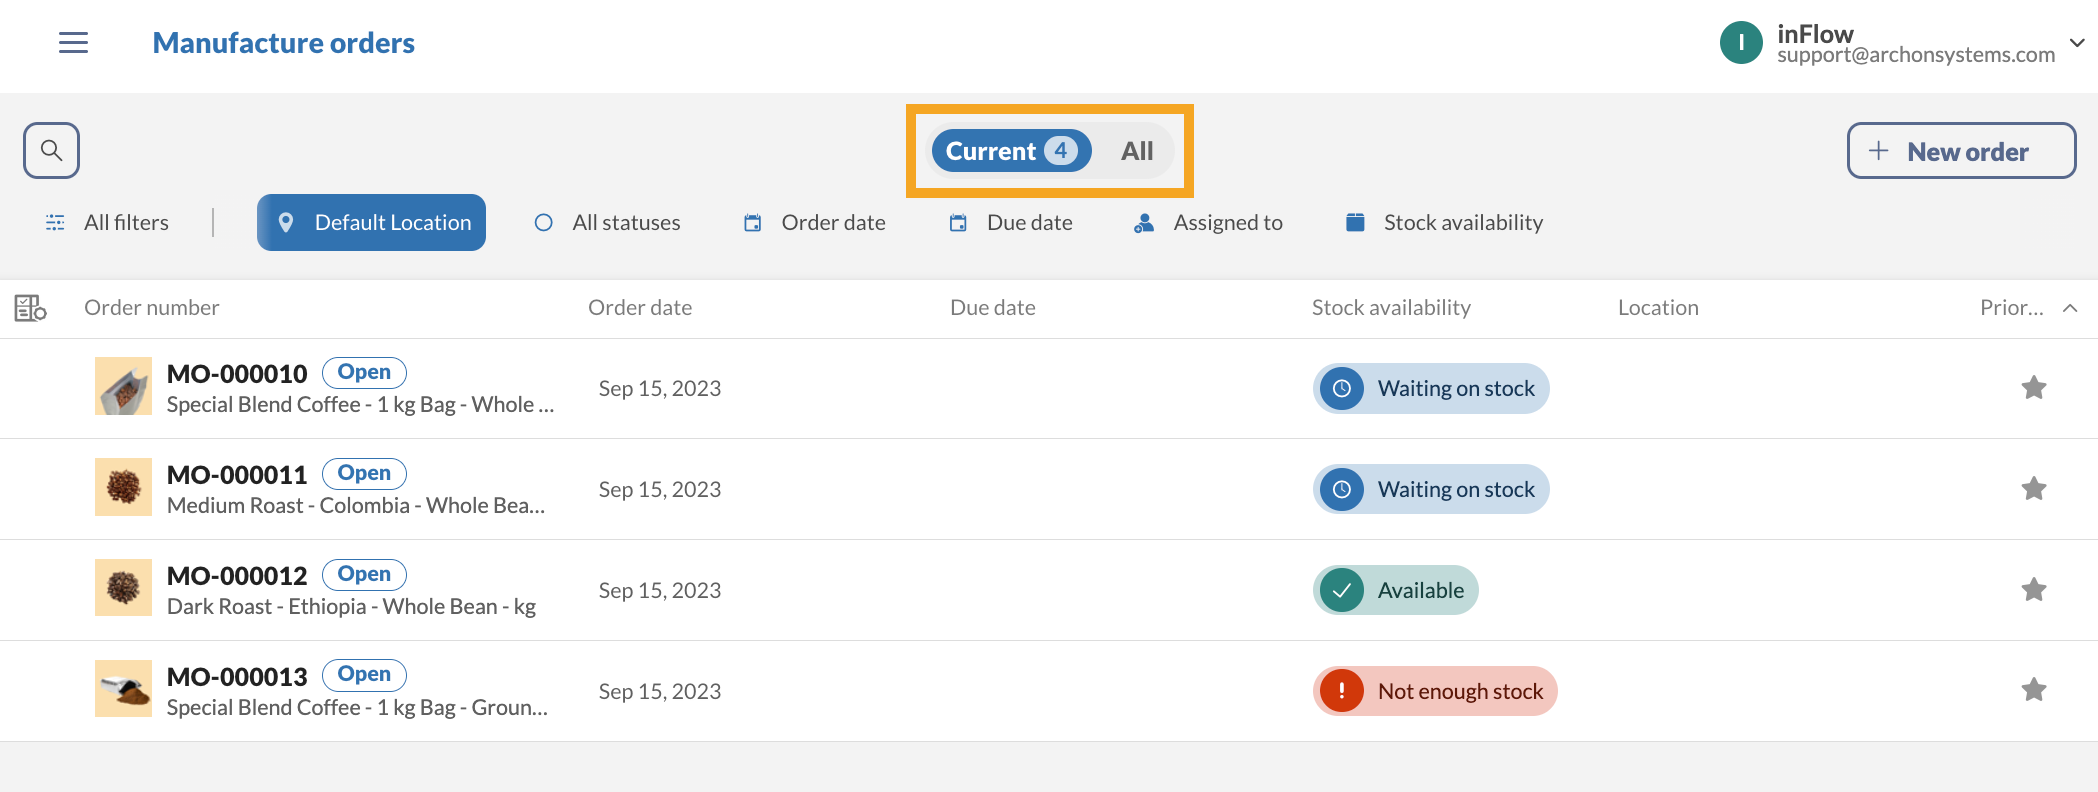
At the top of the screen, you’ll see two pre-made list views, Current and All.
- Current: all open and in-progress MOs.
- All: MOs that are open, in progress, or completed. Canceled MOs can be found in this view, too.
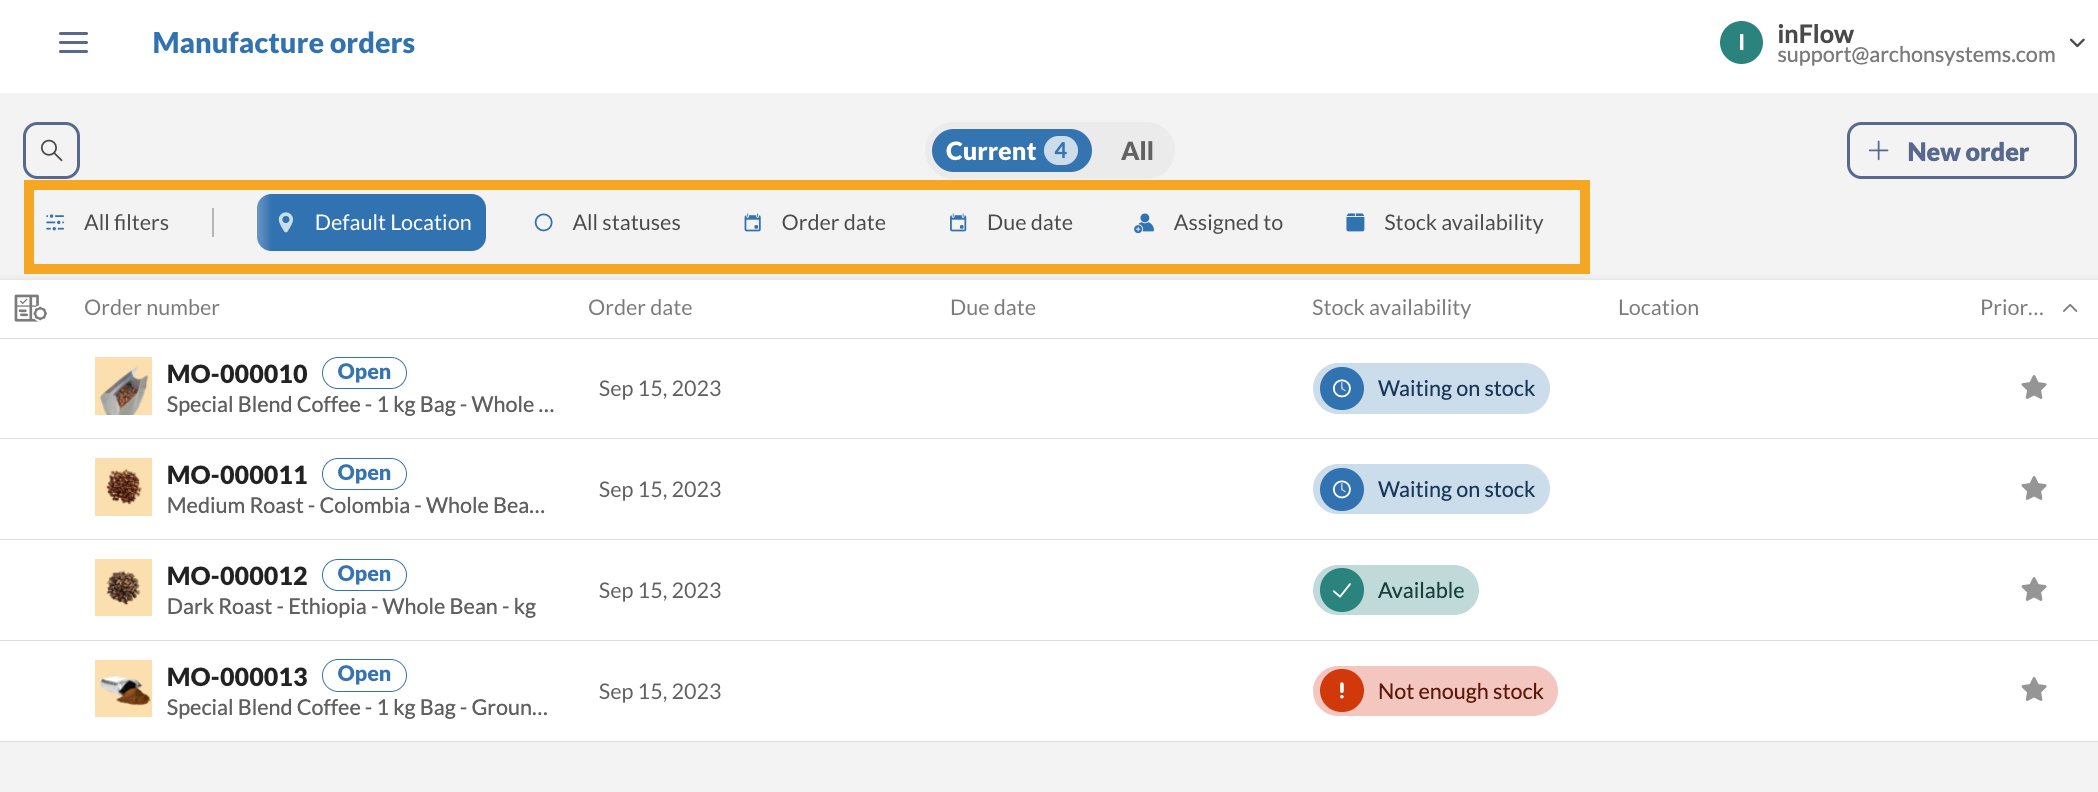
Below the order view, you can use additional filters to find the MOs you’re looking for.
- To change which filters are on the screen, click on All filters.
- Select or deselect the filters you want. When a new filter is added, it will open for you to use right away.
- To reset the filters, click on All filters, then select Reset filters.
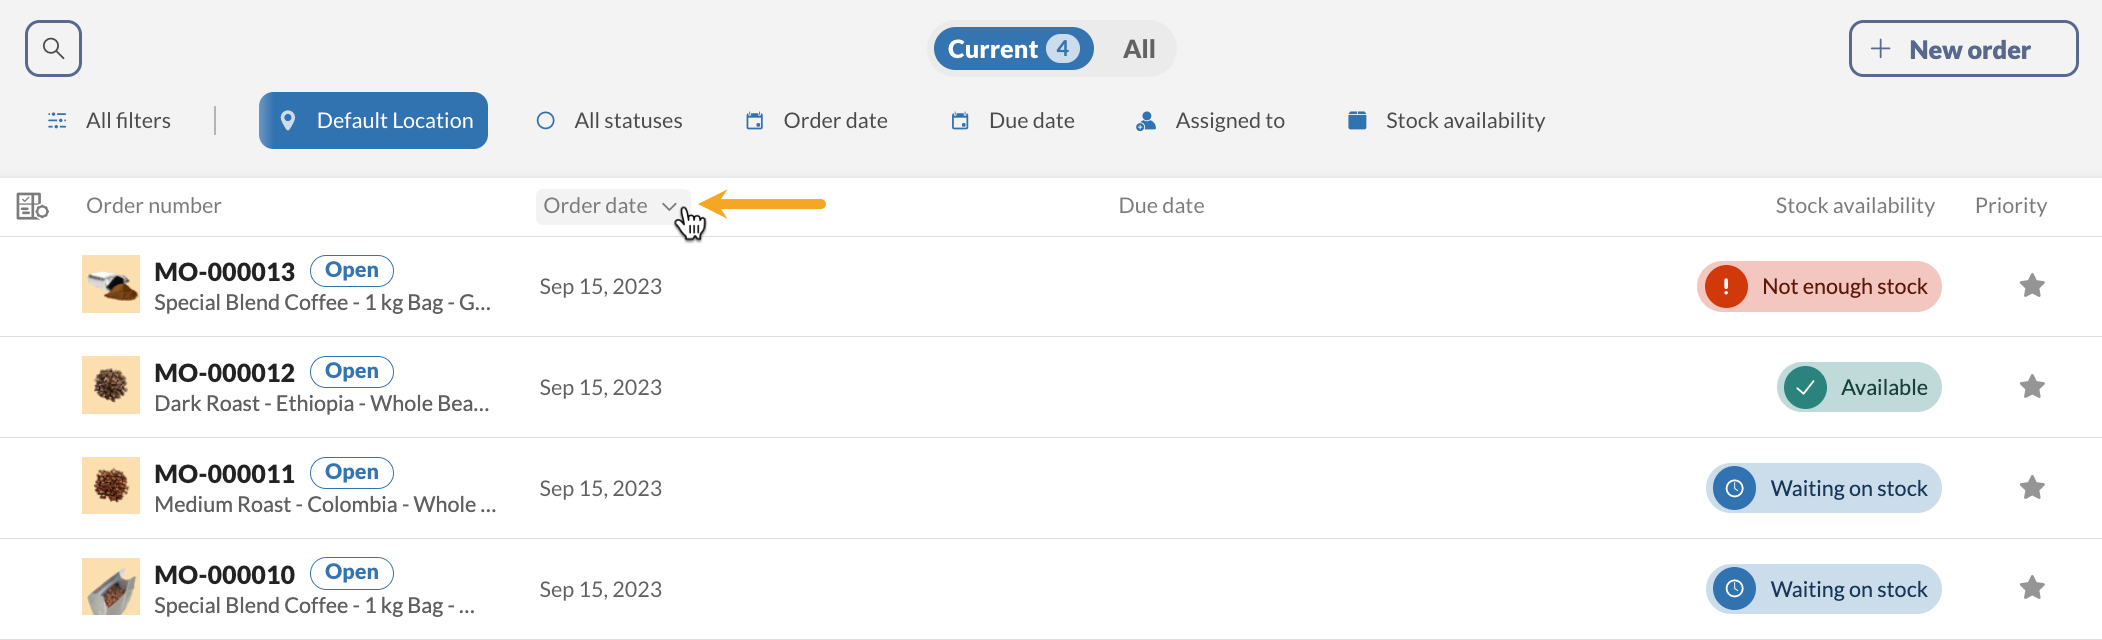
The order table has sortable headings. To sort the MOs, you can hover and click on
- Order number
- Order date
- Due date
- Priority
Manufacture order prioritization
You can click on the star icon to mark MO as a priority.
- Prioritized MOs will show up at the top when viewing Open orders.
- Prioritized MOs will have inventory
- You can drag and drop prioritized orders to quickly sort them.
If you sort the order list by clicking a column heading, the prioritized items may not remain at the top of the list. However, you can still identify prioritized orders because they’ll have an orange bar next to them.
If you’d like to restore the original sorting with priority at the top, click on the Priority column heading.
Blockquote: Note: You can set team member access rights for manufacture order prioritization to View only or Full access. Take a look at this guide for how to restrict team member access rights.
Stock availability & manufacture order prioritization
While viewing the Open list, you’ll notice that stock availability statuses are displayed for all orders. These are listed by the amount of inventory you have to fulfill the MO.
inFlow will reserve stock on the prioritized orders first. Within the priority list, inFlow will reserve stock from the MO at the top of the list to the bottom.
Rearranging the priority list will cause inFlow to recalculate stock levels based on each MO’s position on the list.
All other orders without a priority will be sorted by the Current list default:
- Due date
- Order date (oldest to newest)


Makes no sense for bundles that are only created when they are sold.
I need to know how to correct a manufacturing order if it’s complete but a part needs to be added