How to customize list view columns in inFlow
If you’d like to customize the columns on product lists and other screens, take a look below to learn more.
Web
Customizing list views
In this example, we’ll show how to make changes to the product list view. You can apply the same steps to the other list views in inFlow (sales/purchase orders, stock transfers, etc.)
- Go to the product list (in the Main menu, hover over the Inventory button, then select Products.
- To the left, select the Customize header symbol (wrench icon located below the search magnifying glass)
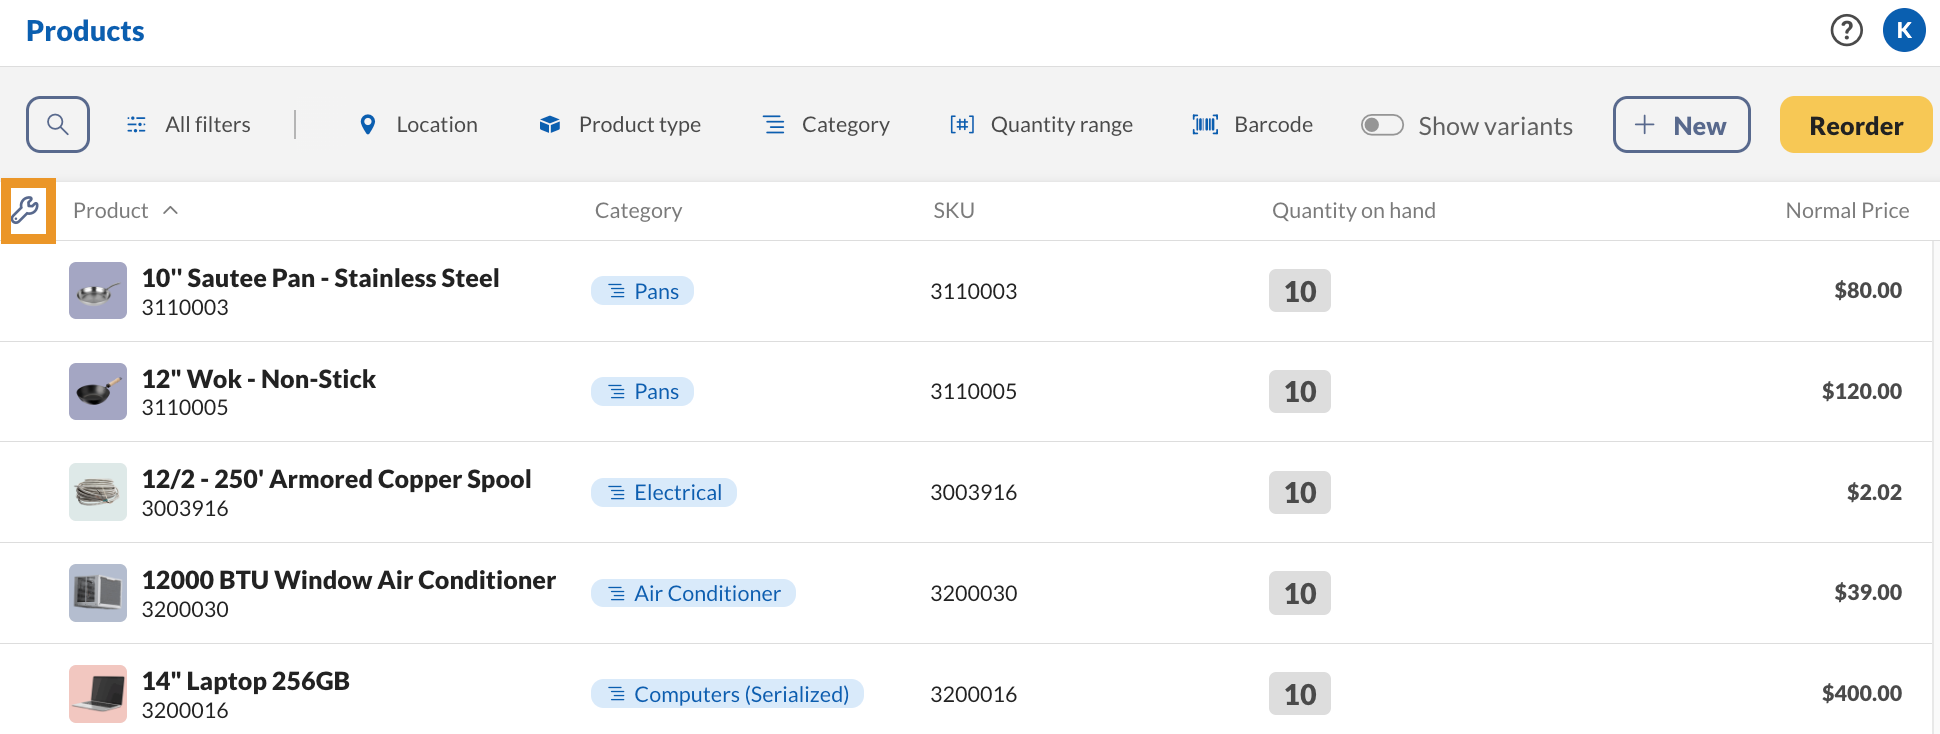
Each inFlow section can have its own custom list view. After you make changes, inFlow will remember the layout preferences for future visits (on a per-user basis)
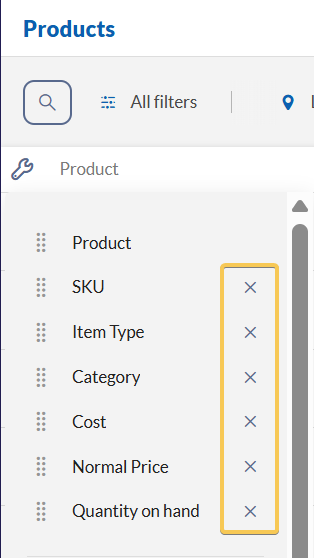
Removing columns
In the Customize header menu, click the X next to a column heading to remove it. Columns you remove are placed in the bottom part of the menu for you to select for future use.
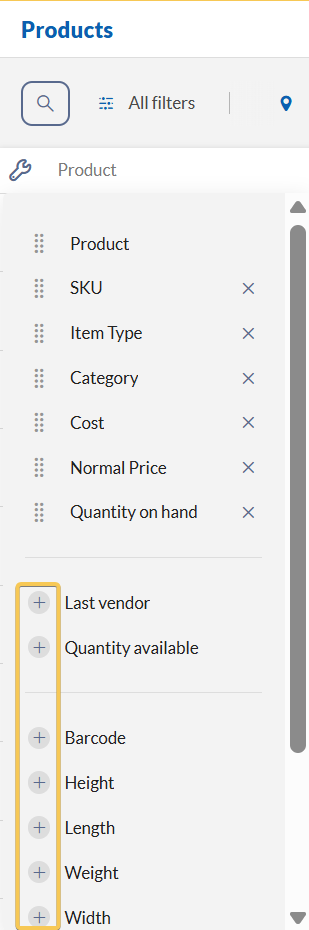
Add columns
Click the + icon next to a column header to add it to the product list.
Rearrange columns
In the Customize header menu, click and drag the grab handles to the desired order. The menu will update as you make changes.
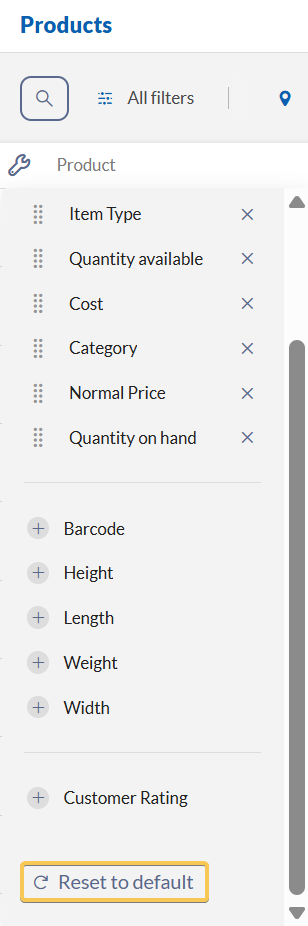
Resetting to defaults
If you want to start over, you can reset the column headings to the default view.
- Click on the Customize header symbol.
- Select Reset to default. The page will reset, and the original list view headings will be on-screen.
Windows
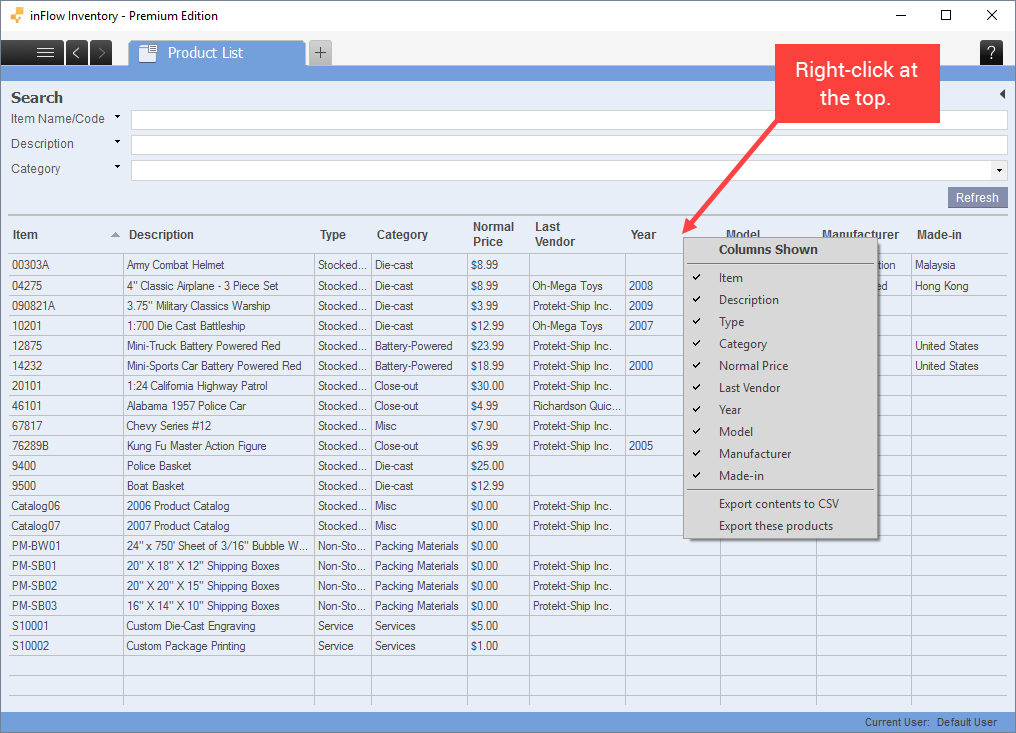
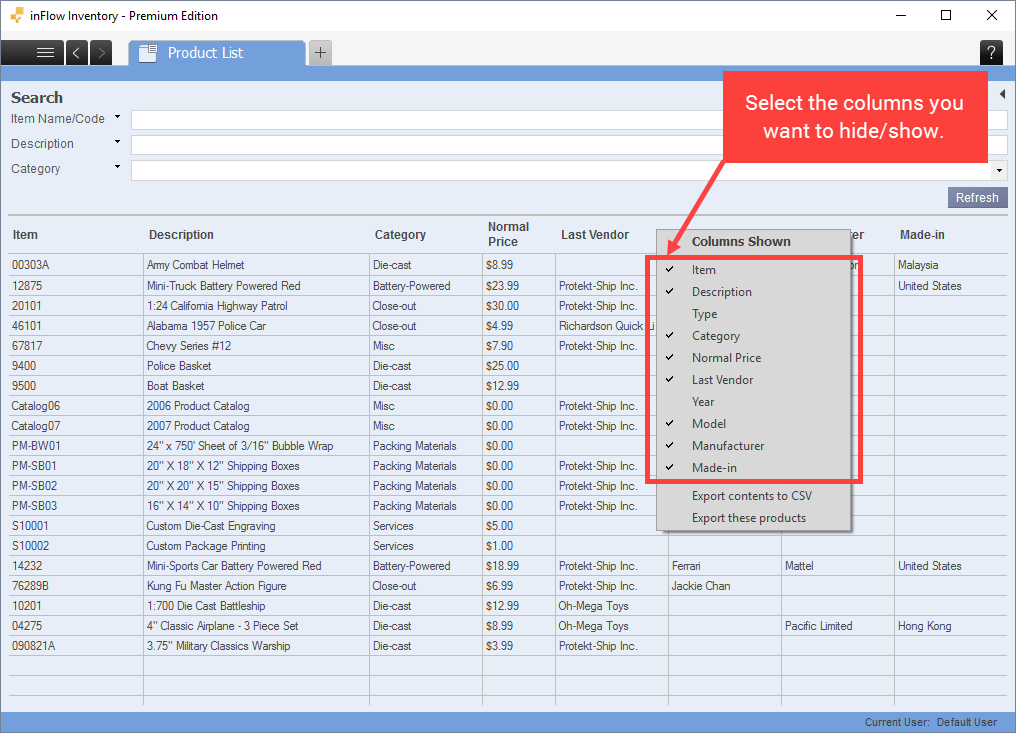
You can easily hide columns in the listing views (for example the product list or the sales order list).
Removing columns
- Navigate to the list you want to adjust.
- Click the top row of the table and select the column you want to remove from the resulting list.
- The column will now be hidden and there will no longer be a checkmark next to the column name.
Add columns
- Navigate to the list you want to adjust.
- Click the top row of the table and select the column you want to show in the resulting list.
- The column will now be shown and there will now be a checkmark next to the column name.


0 Comments