How to add starting inventory levels to inFlow with purchase orders
Set your starting inventory in inFlow by backdating purchase orders to add stock, update product details, and record accurate item costs.
Web
The easiest way to set your starting inventory is to create a purchase order for everything you currently have in stock and backdate it. This works so well because it lets you update many inventory details at once.
A backdated purchase order can update the following:
- Product names and descriptions
- Who you buy it from and how much you pay (if you create several purchase orders, one for each vendor)
- Item costs (this includes shipping and non-vendor info into your product cost)
It’s important to note that if you’re using FIFO or LIFO costing creating a purchase order is the only way to update your product costs
Creating a backdated purchase order
- Create a purchase order.
- Pay and fulfill the order, then save the order.
Change the purchase order date
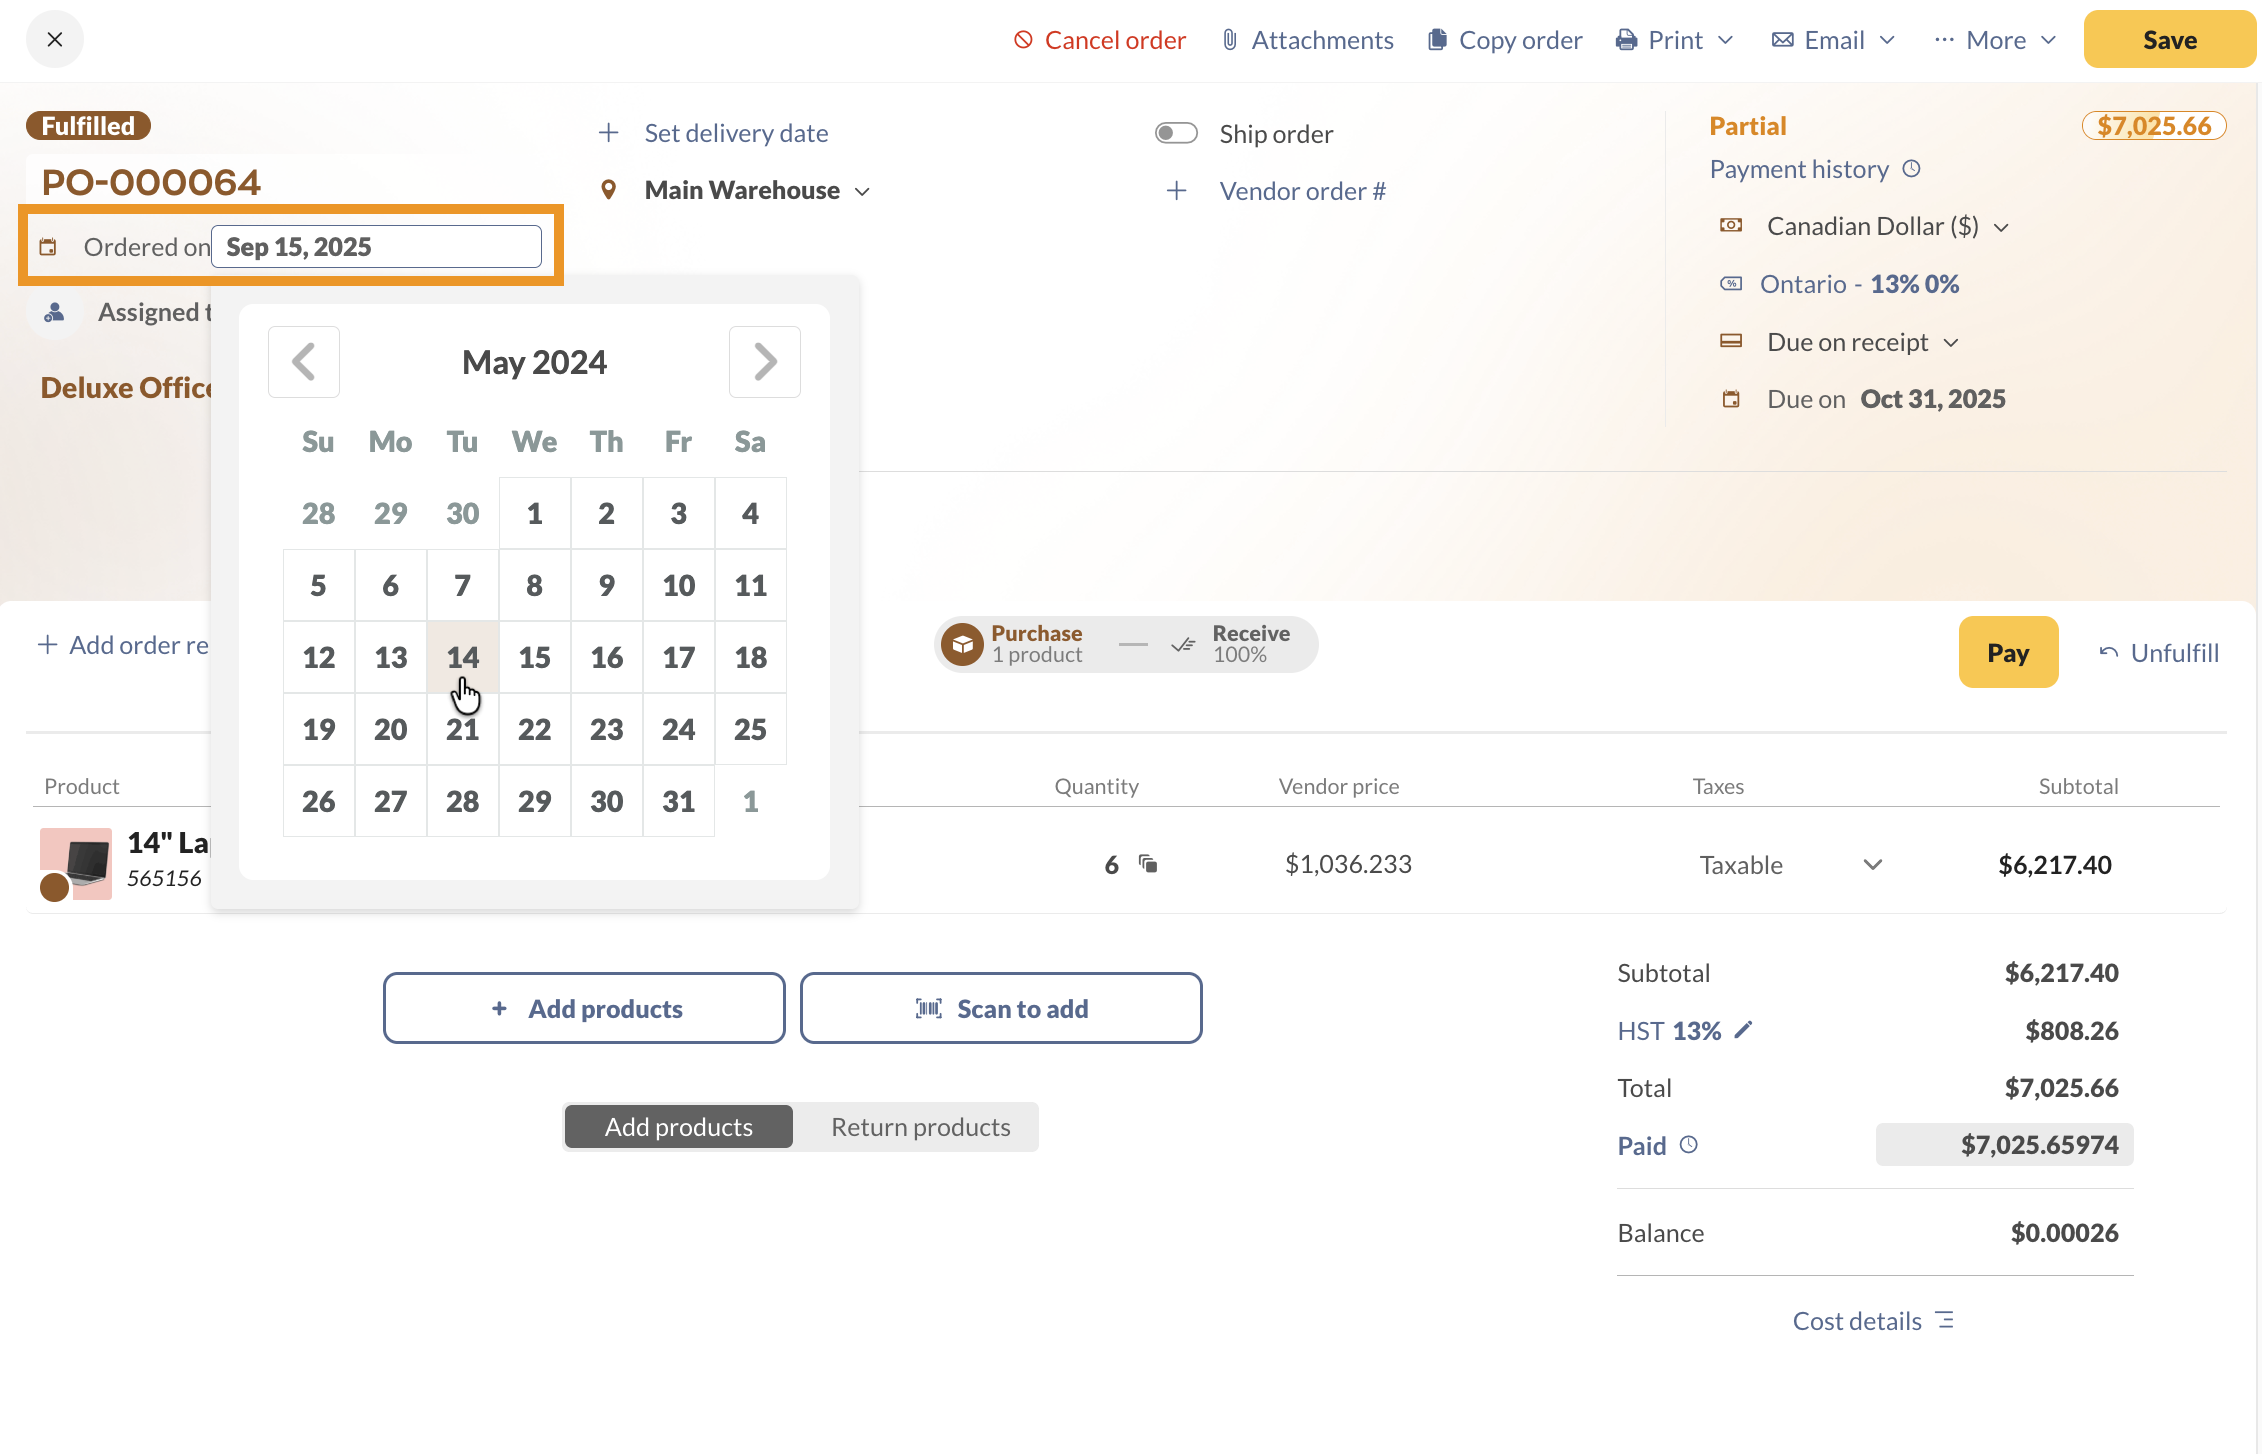
Next, you’ll need to change the order date in the top left-hand corner of the screen.
- Click the date field next to Ordered on, then select the desired date.
- Save the order.
Change the received date
By default, inFlow uses the current date when you click the Fulfill button on a purchase order. To backdate it, change the date to the day you received the products.
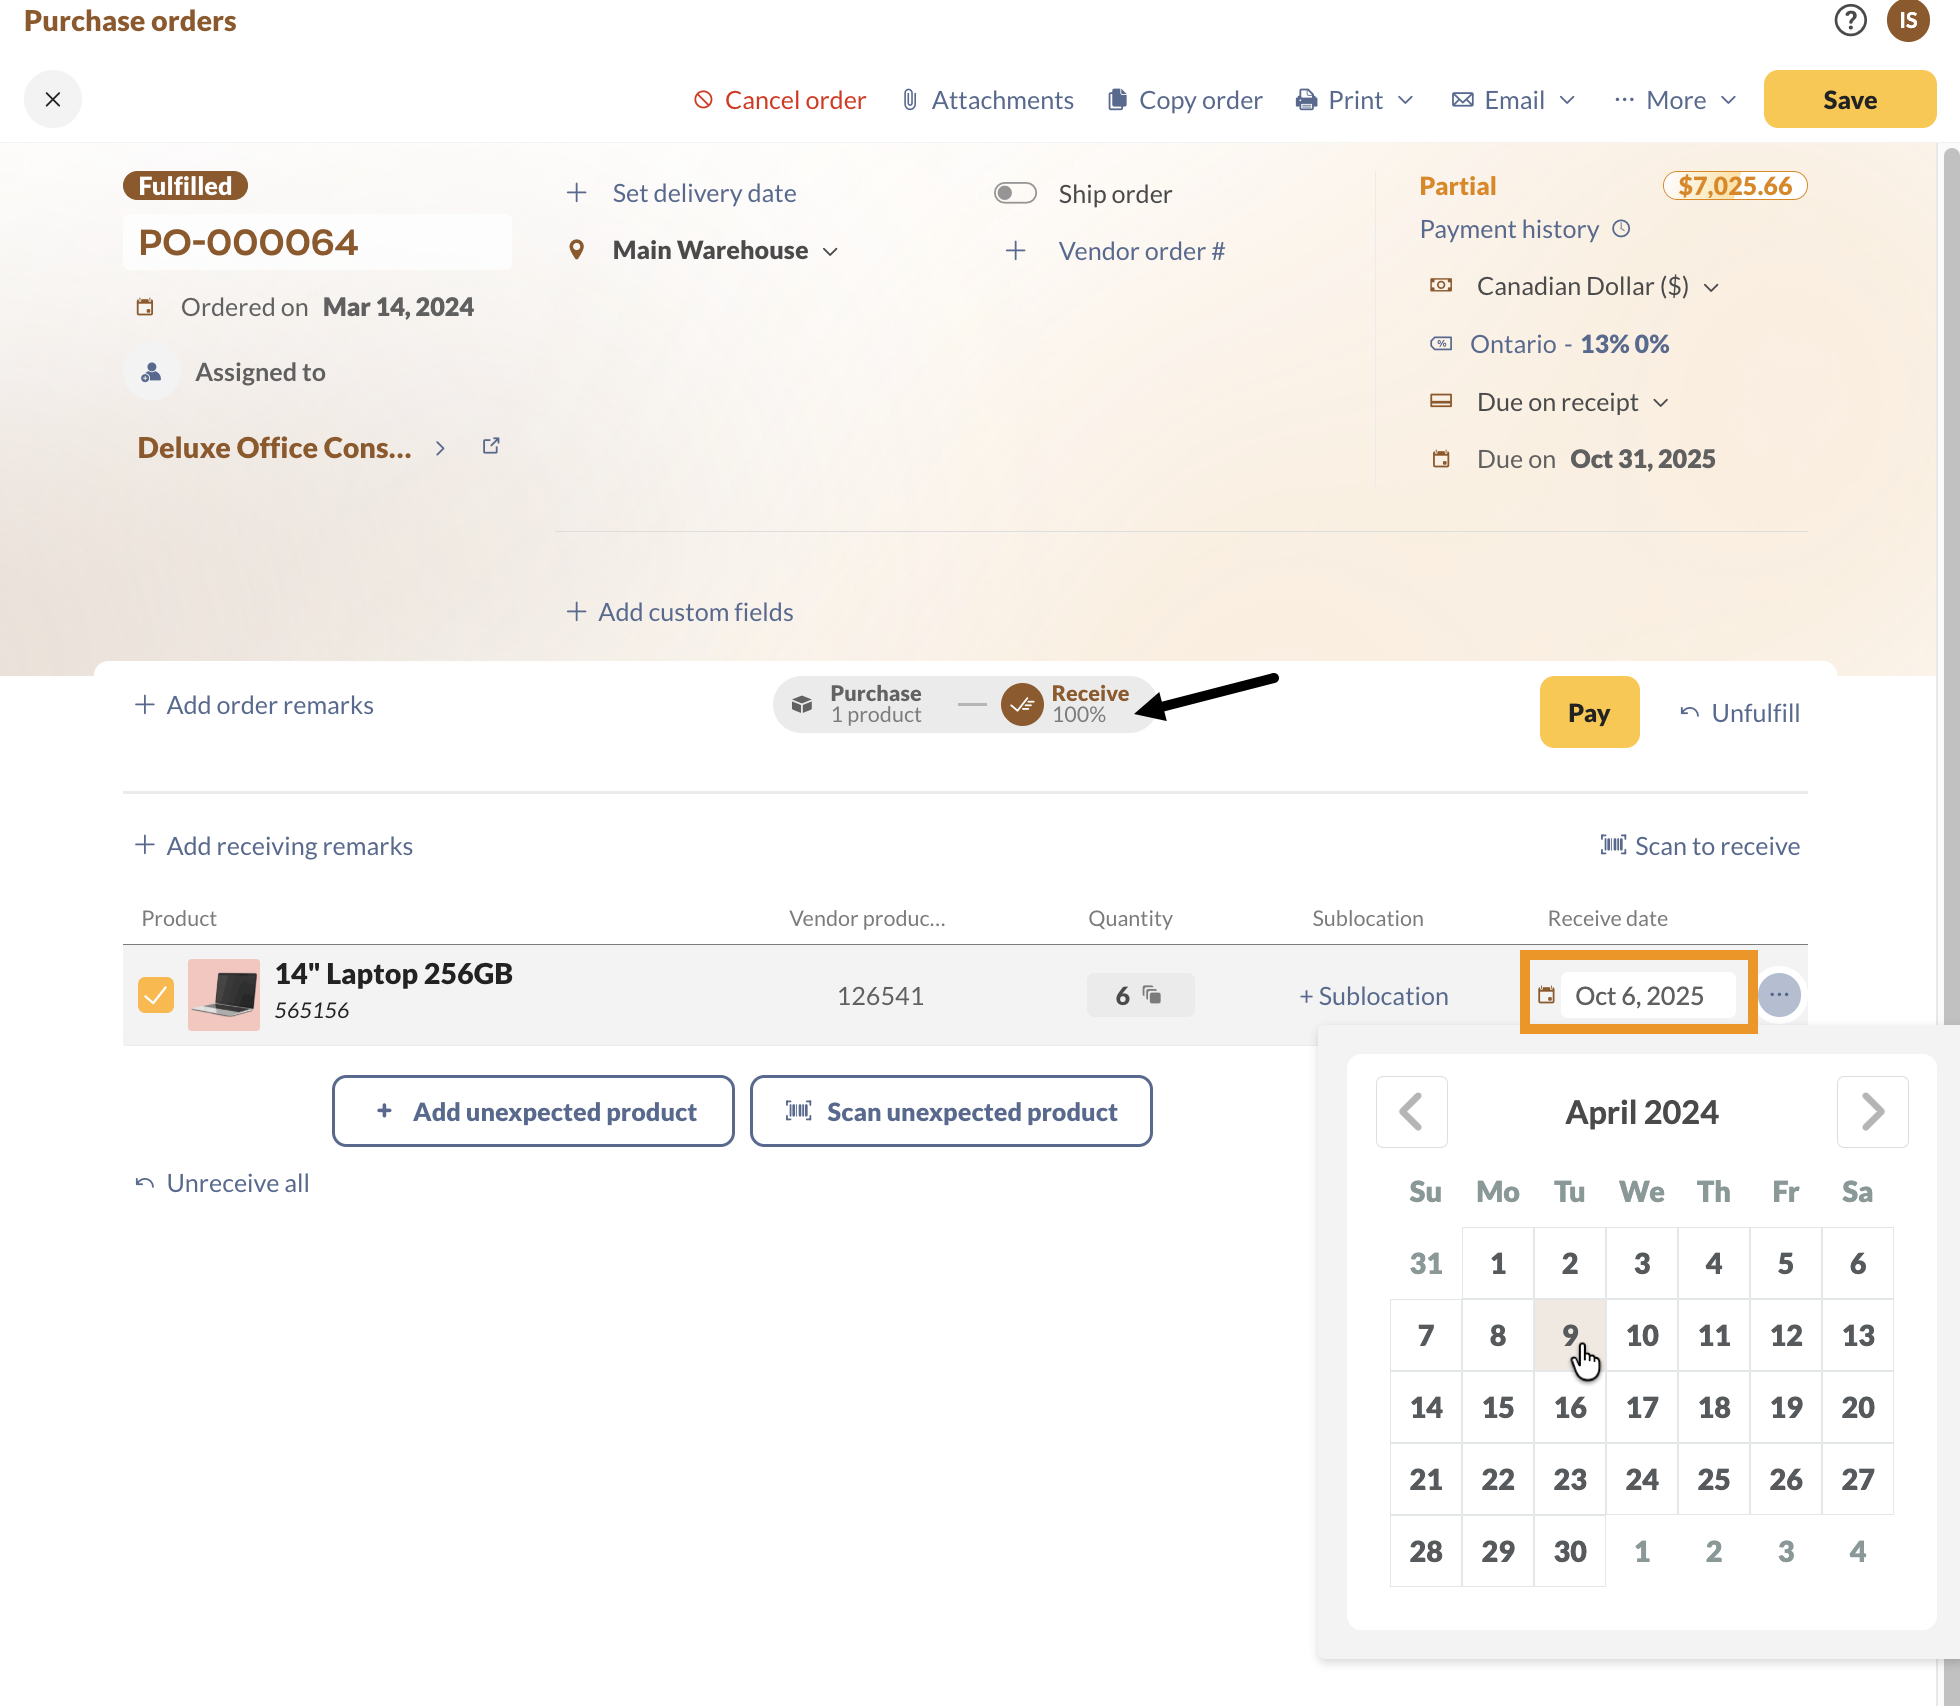
- Click on the Receive tab on your purchase order.
- Click on the Receive date for each product.
- Save the order.
Change the payment date
Next, edit the date that the purchase order was paid.
- Click on Payment history or Paid on the purchase order.
- Click on the date field, and select the date of payment (or separate payments) in this window.
- Click Update, then save the order.

If you’re creating purchase orders by vendor, repeat the steps above for each order. Once you’re done, all your items will be in stock, with their names and costs updated.
Windows
The easiest way to set your starting inventory is to create a purchase order for everything you have in stock right now and backdate it. The reason this works so well is that it can update many details about your inventory at once.
A purchase order can update the following:
- Product names and descriptions
- Who you buy it from and how much you pay (if you create several purchase orders, one for each vendor)
- Item costs (this includes shipping and non-vendor info into your product cost)
It’s important to note that if you’re using FIFO or LIFO costing creating a purchase order is the only way to update your product costs
Create your purchase order
To create a new Purchase Order in inFlow Inventory:
- Click Main Menu > Purchasing > New Purchase Order.
- Begin typing into the Vendor field; you should see your vendor’s name highlighted.
- If they’re not in your system yet, continue typing the vendor’s full name, then click Add New to create a new record for them.
- Continue filling in your vendor’s information.
- When you save this order, you can:
- Click the save icon next to the vendor details to save it back to their record (meaning you don’t need to re-enter the same information next time).
- Or ignore the save icon if you don’t want inFlow to save this information to the vendor record.
- Click on the item column and select an item from your list. Continue as necessary until you’ve selected all the items you would like to purchase.
- Click Fulfilled when your vendor has fulfilled the order to move the items into your inventory.
- Click Pay when you’ve paid your vendor. This will mark this order as paid.

Change the Order Date
Next, you’ll need to change the order date in the top right-hand corner of the screen.
- Click into the Date field and select the desired date
- Click Save.
Change the Received Date
This is the date the inventory was received into your stock.
To set the received date:
- Click on the Receive tab on your purchase order.
- Set the Receive date for each item.
If the receive date is the same for all the items, enter in the date on the first row, then right-click and select Fill Down to fill the same date down the column.
Change the Date Paid
This marks the date you received payment / paid your vendor.
To set the Date Paid:
- Click on the Paid button on the main Purchase tab.
- The Payment Details window will open up. Set the date of payment (or separate payments) in this window.
Now, if you’ve chosen to create your purchases individually by vendor, you’ll want to repeat the steps above with each of your orders. Once you’re done, you’ll have all your items in stock, with their names and costs updated.


0 Comments