Connecting inFlow to Zapier
Connecting Zapier to inFlow is an ideal solution for linking inFlow with software that doesn’t have a direct integration. Zapier can effectively facilitate this connection.
What’s Zapier?
Zapier is a handy tool that helps you automate repetitive tasks, allowing you to focus on the more essential aspects of your business.
You create “Zaps,” which are automations that tell Zapier what to do based on the conditions you set, known as triggers and actions.
- Triggers are the event that starts your Zap (such as saving a sales order).
- Actions are the tasks you want Zapier to complete when a trigger occurs (such as emailing your colleague a copy of the new sales order).
Hundreds of different apps can complete actions, so the possibilities are endless!
What can inFlow & Zapier do? (Example workflows)
- Automatic order routing: Update the sales order fulfillment location to match the zip code or postal code of your customer’s shipping address.
- Send an email via Gmail with the invoice link when it’s past due.
- Receive a Slack notification about an unconfirmed order and confirm it from within Slack.
- Connect inFlow to other solutions such as ShipStation and Salesforce.
Using Zapier
To use this integration, you will need a Zapier account. If you don’t already have one, you can sign up for an account while connecting to inFlow in the steps below.
Zapier offers several plans, ranging from lower-tier options with limitations to enterprise-level options. Take a look at Zapier’s plan to learn more.
Connecting inFlow to Zapier

- With an inFlow Admin account, go to inFlow’s integration settings (From the Main Menu, click on the Integrations icon at the bottom left-hand side of the screen).
- Click on the Zapier icon.
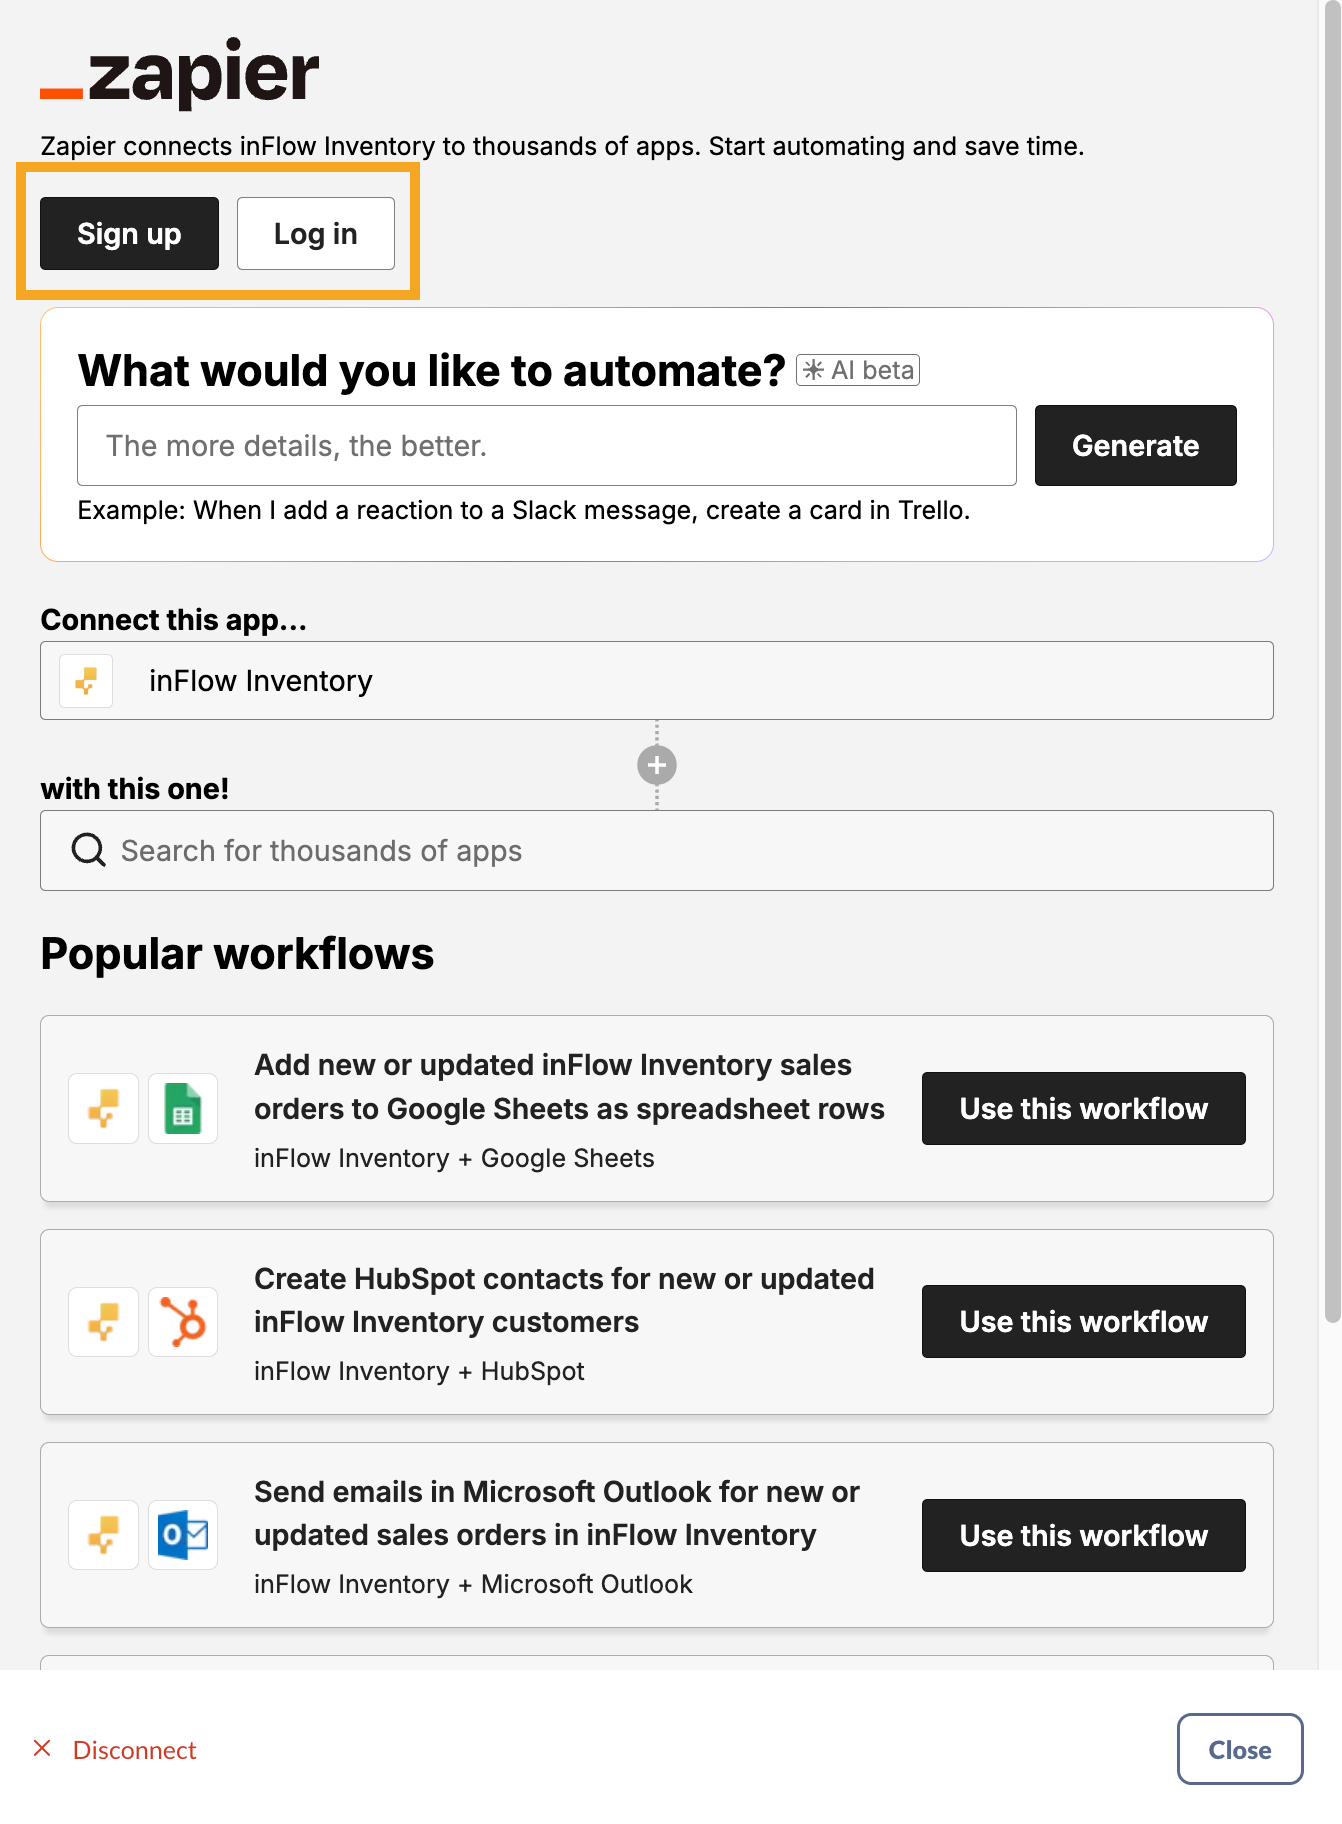
- If needed, sign up for an account or log in to continue.
- inFlow is already in the Connect this app field. Select the app you want to connect with by selecting it in the with this one field.
- If any of the sample workflows below work for you, select Use this workflow.
- Click Close when done.
Building Zaps
You can find a complete guide on building Zaps here.
Other helpful links:
Zapier templates for inFlow
We’ve put together a collection of ready-made Zaps to help you automate more tasks in your daily routine. Refer to the Zapier templates guide for further details.
Zapier templates for emailing saved reports
Gmail:
- Automatically email PDFs of inFlow Inventory saved reports using Gmail.
- Automatically email CSVs of inFlow Inventory saved reports using Gmail.
Outlook:
- Automatically email PDFs of inFlow Inventory saved reports using Outlook.
- Automatically email CSVs of inFlow Inventory saved reports using Outlook.
Available inFlow triggers (events)
In Zapier, a trigger is an “event” that will start a Zap. The following events are available to be used in your Zaps:
- New or updated sales orders
- New or updated sales quotes
- New or updated purchase orders
- New or updated purchase quotes
- New or updated manufacture orders
- New or updated stock transfers
- New or updated stockroom scans
- New or updated stock adjustment
- New or updated stock counts
- New or updated count sheets
- New or updated customers
- New or updated vendors
- New or updated products
Available actions
Create actions
Create actions allow you to push information from third-party apps to inFlow to create any of the following in inFlow:
- Creating sales orders
- Converting a sales quote to a sales order
- Creating purchase orders
- Convert a purchase quote to a purchase order
- Creating manufacture orders
- Creating stock transfers
- Creating stockroom scans
- Creating customers
- Creating vendors
- Creating products
- Creating stock adjustments
- Creating stock counts
- Creating count sheets
Update actions
Update actions are when a third-party app can update an existing order or product in inFlow.
- Update sales orders or sales quotes
- Update purchase orders or purchase quotes
- Update manufacture orders
- Update stock transfer
- Update stockroom scans
- Update customer
- Update vendor
- Update product
- Update stock adjustment
- Update stock counts
- Update Sheets (count sheets can’t be updated if it is completed or empty)
Find actions
Find any order or product that exists in inFlow, such as:
- Find sales orders or sales quotes
- Find purchase orders or purchase quotes
- Find manufacture orders
- Find stock transfers
- Find stockroom scans
- Find customers
- Find vendors
- Find products
Find or Create actions
- This option searches for an order or product; if it doesn’t find one, it creates it in inFlow.
- Find by productId, SKU, or name
- Find or create customers
- Find by customerId or name. If neither matches, then create a new record.
- Find or create vendors
- Find by vendorId or name
- Find or create products


It would be really helpful if I could report line items of a PO in the zap.