I switched to FIFO/LIFO costing, but now all my costs are incorrect. What do I do? (Windows)
inFlow Inventory’s First-in, First-out / Last-in, First-out (FIFO/LIFO) costing method calculates your cost strictly based on purchase orders. The steps to correct your costing depend on whether or not you already have purchase and sales orders in the system.
Please follow the steps based on your situation:
- A) I’ve only entered initial stock levels, but not purchase/sales orders
- B) I’ve already entered stock levels and purchase & sales orders
A) I’ve only entered initial stock levels, but not purchase/sales orders
If you’ve already entered your current stock levels and costs and then switched to FIFO/LIFO, you’ll find that the stock levels remain, but the costs are now $0. This is because the FIFO/LIFO costing options only calculates cost based on purchase orders. You’ll need to reset the stock levels and bring the initial cost and stock level into inFlow as a purchase order.
Here’s how to reset your stock levels:
- Go to the Main Menu > General > Export Data > and choose data type Stock Levels to export your data as a .csv file.
- Now, we need to reset your stock levels. Go to Main Menu > General > Import Data > and choose data type Stock Levels. Choose the file you created in step 1 and click Next.
- At the top of the next window, select Subtract it from existing inventory, then click Import.
Check inFlow’s Main Menu > Inventory > Current Stock. Your inventory should be at zero.
To import your initial cost and stock level into inFlow as a purchase order:
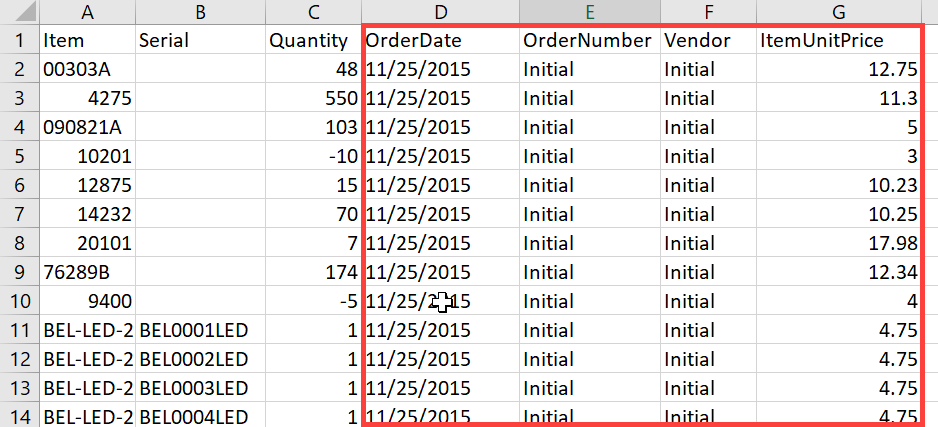
- Open the stock levels file from your steps above in Excel. We need to convert this to a Purchase Order import file. To do this, remove the “Location” and “Sublocation” columns. Then add four new columns named “OrderDate,” “OrderNumber,” “Vendor,” and “ItemUnitPrice”
- For the columns “OrderDate,” “OrderNumber,” and “Vendor,” set them all to be the same as in the example screenshot below. In the “ItemUnitPrice” column, enter your product cost for each item line:
- Click File > Save As, and in the file type selection box below make sure you’ve chosen CSV (Comma Delimited). Click “Yes” to all subsequent prompts about Excel formatting.
- Go to the Main Menu > General > Import Data > and choose the data type Purchase Order. Import from the PO file created above.
- In the import match screen, inFlow should have already pre-filled some of the columns for you, but you should check that they match.
Check your current stock levels. They should be back up to where they were before. Now check your products. There should be a cost in there now that there’s a purchase order in the system corresponding to it. In the future, your costs will only change through a purchase order.
B) I’ve already entered stock levels and orders
If you already have purchase orders and sales orders in inFlow and have decided to change your costing method to FIFO/LIFO, the steps to correct your costing will depend on how you entered your stock levels in the past:
- If your initial stock levels were imported into inFlow.
- If your initial stock levels were manually entered into inFlow.
If your initial stock levels were imported into inFlow
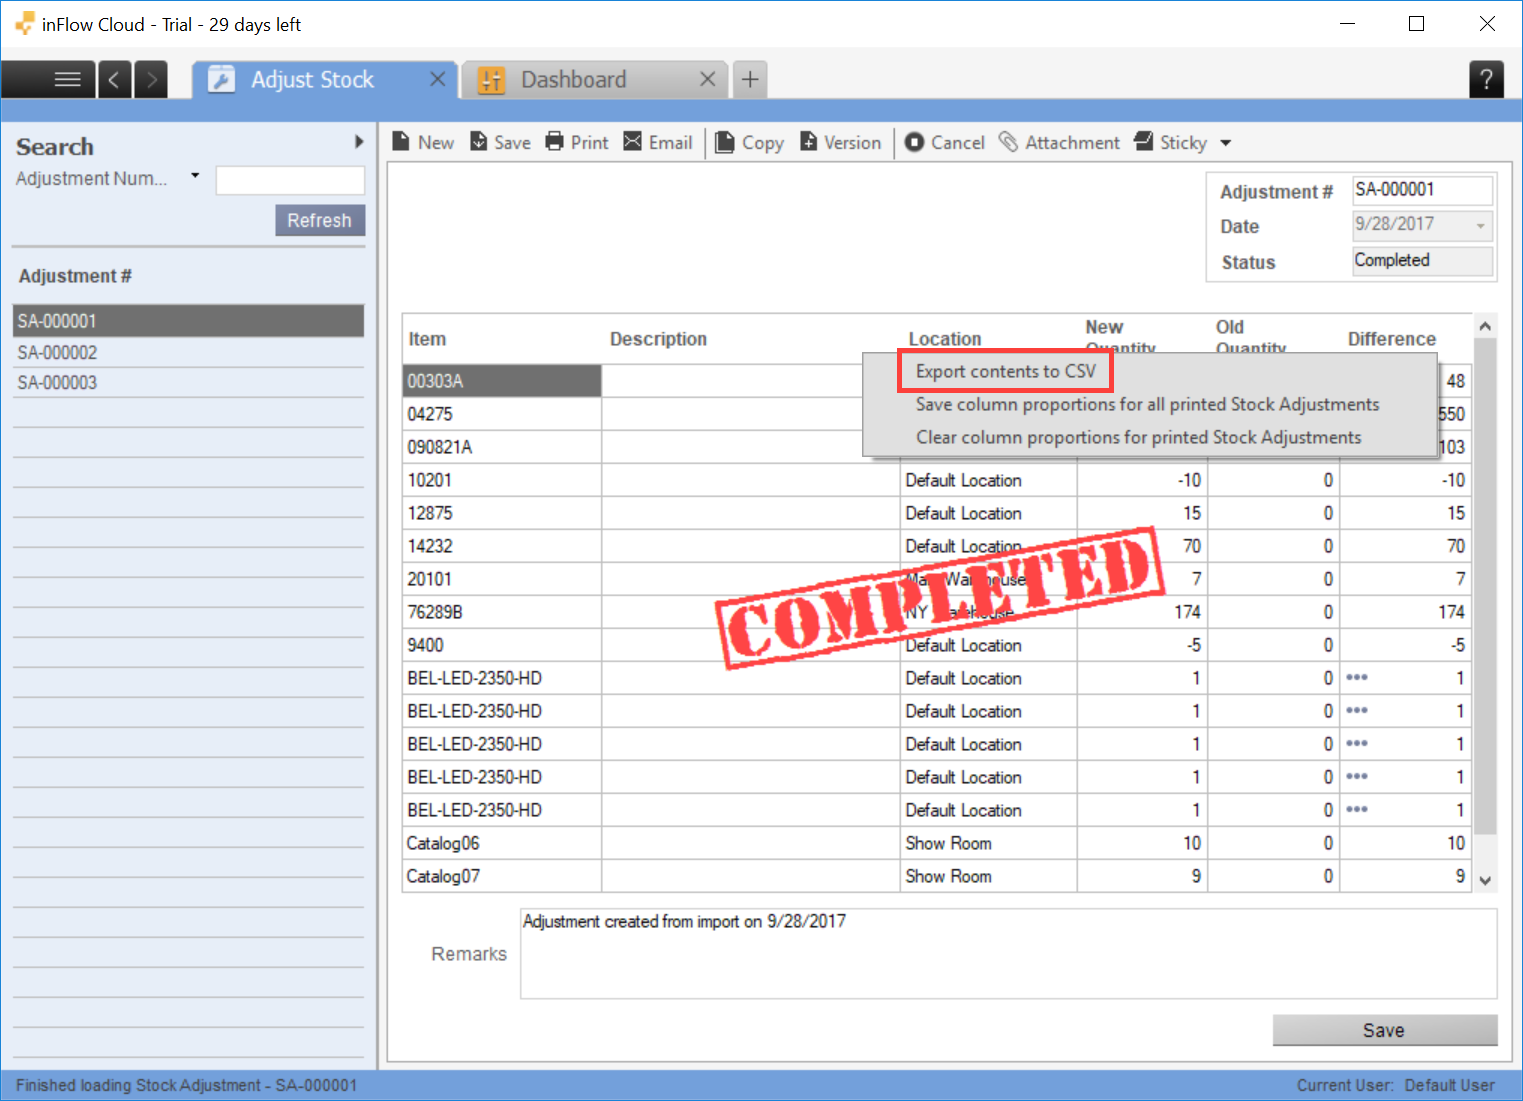
- Go to the Main Menu > Inventory > Adjust Stock and look for the earliest adjustment (it should include the remarks: “Adjustment created from import…”). Note the date of the adjustment, too.
- Right-click on the headers and click Export Contents to CSV. Then click the Cancel button to remove the adjustment.
- Open the CSV file from step 2. We need to convert this to a PO import file. To do this, remove the “Location.” “Sublocation,” “Old Quantity,” and “Difference” columns.
- Add four new columns named “OrderDate,” “OrderNumber,” “Vendor,” and “ItemUnitPrice.” Set the “OrderDate” to be the same as the date of the original stock adjustment. For the “OrderNumber” and “Vendor” columns, set them all to be the same as in the screenshot below. In the “ItemUnitPrice” column, enter your product cost for each item line:
- Click File > Save as, and in the file type selection box below, make sure you’ve chosen CSV (Comma Delimited). Click Yes to all subsequent prompts about Excel formatting.
- Go to the Main Menu > General > Import Data > Data type Purchase Order. Import from the PO file created in step 5.
- In the import match screen, inFlow should have already pre-filled some of the columns for you, but you should check that they match.
inFlow calculates the cost starting from the very first purchase order, so this should be the only thing that needs to be changed.
If your initial stock levels were manually entered into inFlow:
- First, we need to temporarily turn off item descriptions and go to Main Menu > Options > Settings > Show products by product name only.
- Go to the Main Menu > Reports > All Reports > Inventory Reports > Historical Inventory Report.
- Set the Target Date to the day you input all your initial stock levels.
- Click Save As and set the type to Microsoft Excel Data only (.xlsx).
- Now you’ll need to cancel the first stock adjustment for each item you have. This has to be done. Otherwise, the purchase order import in the next few steps will duplicate it, and you’ll end up with incorrect stock levels.
- Go to the Main Menu > Inventory > Adjust Stock and filter your stock adjustments by the date you input all your initial stock levels
- Cancel every stock adjustment that was made when you input your stock levels for the first time
Re-importing the XLSX file as a purchase order
Open up the .xlsx file created above. We need to convert this to a PO import file.
- Add the names of the columns in the first row. Add four new columns named “OrderDate,” “OrderNumber,” “Vendor,” and “ItemUnitPrice.” Set the “OrderDate” to be the same as the date of the original stock adjustment. For the “OrderNumber” and “Vendor” columns, set them both to be the same as in the screenshot below. In the “ItemUnitPrice” column, enter your product cost for each item line:
- Click File > Save As, and in the file type selection box below, make sure you’ve chosen CSV (Comma Delimited). Click Yes to all subsequent prompts about Excel formatting.
- Go to the Main Menu > General > Import Data > Data Type Purchase Order. Import from the PO file created in step 3.
- In the import match screen, inFlow should have already pre-filled some of the columns for you, but you should check that they match.
If you are having trouble with any of the steps above, please contact the inFlow team.

0 Comments