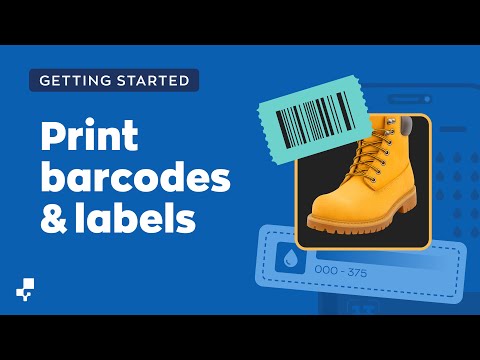
Creating & printing labels in Stockroom
Adding labels to your products makes scanning a breeze with inFlow Stockroom! In this guide, we’ll show you how easy it is to create your own label templates and print labels so you can keep your inventory organized and simple to manage.
Creating label templates
We’d encourage your products to have barcodes for the label templates. If you need to create/add barcodes, take a look at this guide.
- Go to Stockroom’s Inventory settings (Main Menu>Settings>Inventory).
- Click the Create or Manage labels button.
- You’ll be directed to the inFlow Label Designer. Select one of the available templates to edit. Take a look at this guide for in-depth details on the inFlow Label Designer.
inFlow Label Designer overview
To the left of the screen, you’ll see Elements. These are fields from the product record that you can add to the label.
You can also adjust the label’s size and margins. The margins serve as a guide for the printer’s “safe zone,” ensuring that information isn’t cut off. You can hide the margins by deselecting the Show margins option.
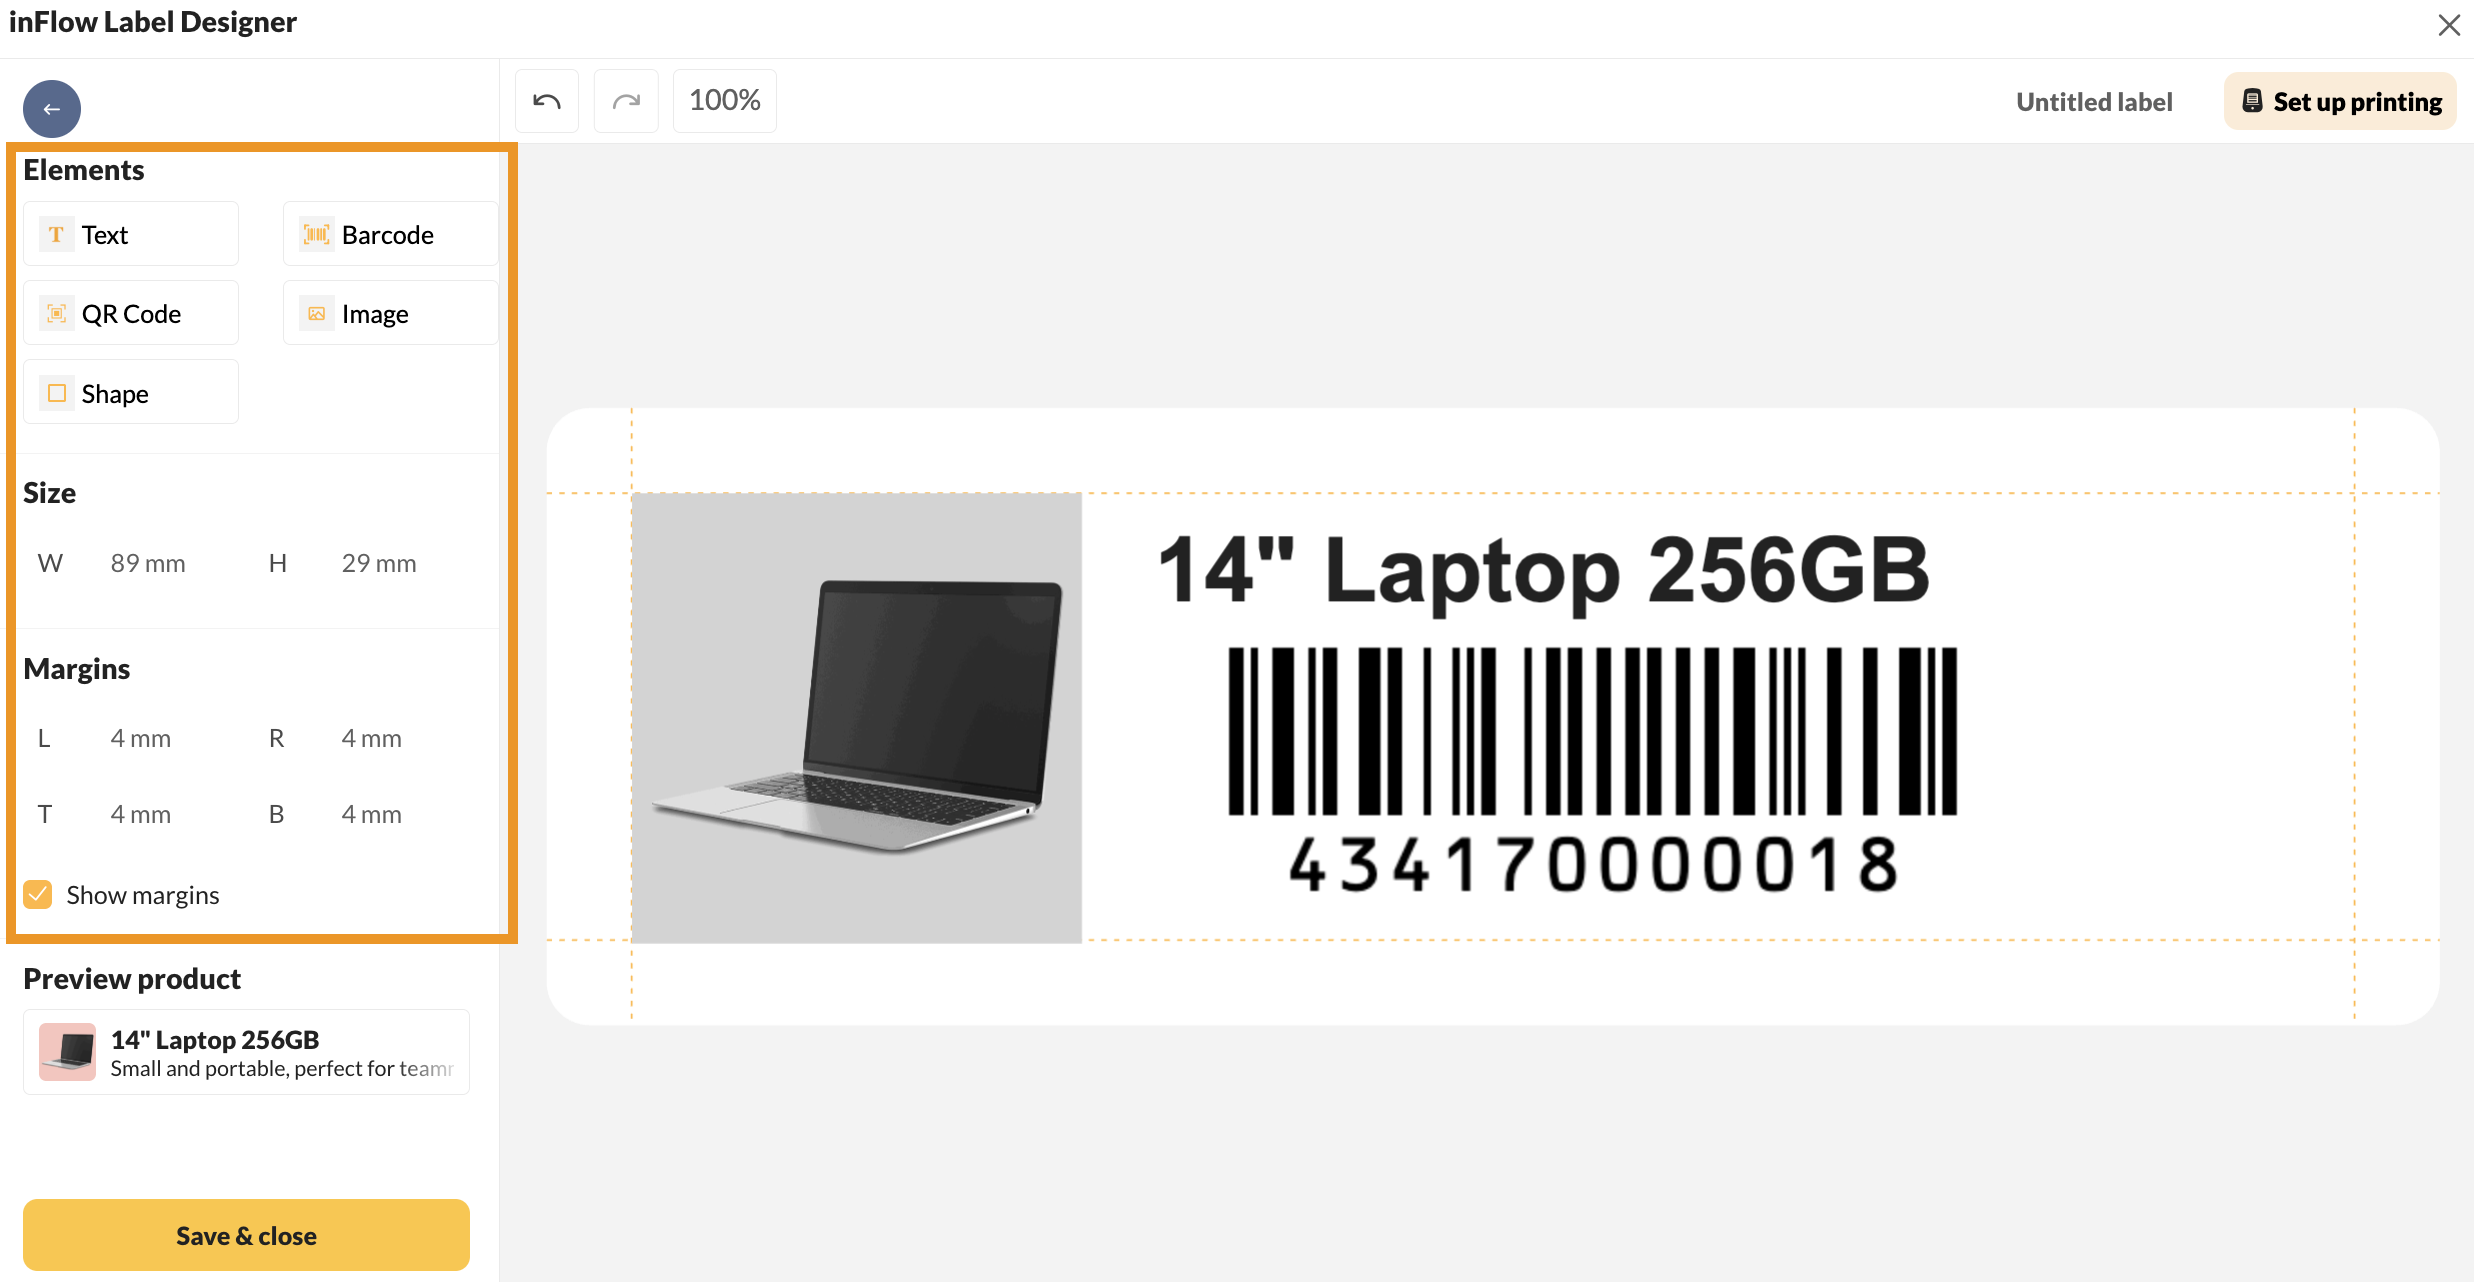
The menu bar at the top will update based on your selection. This menu generally includes font options, alignment choices, and undo and redo buttons. As you pick different elements, hover over the buttons to see the available options.
When you’ve finished designing your template, name the label, then click on Set up printing.
Installing inFlow Print Helper (IPH)
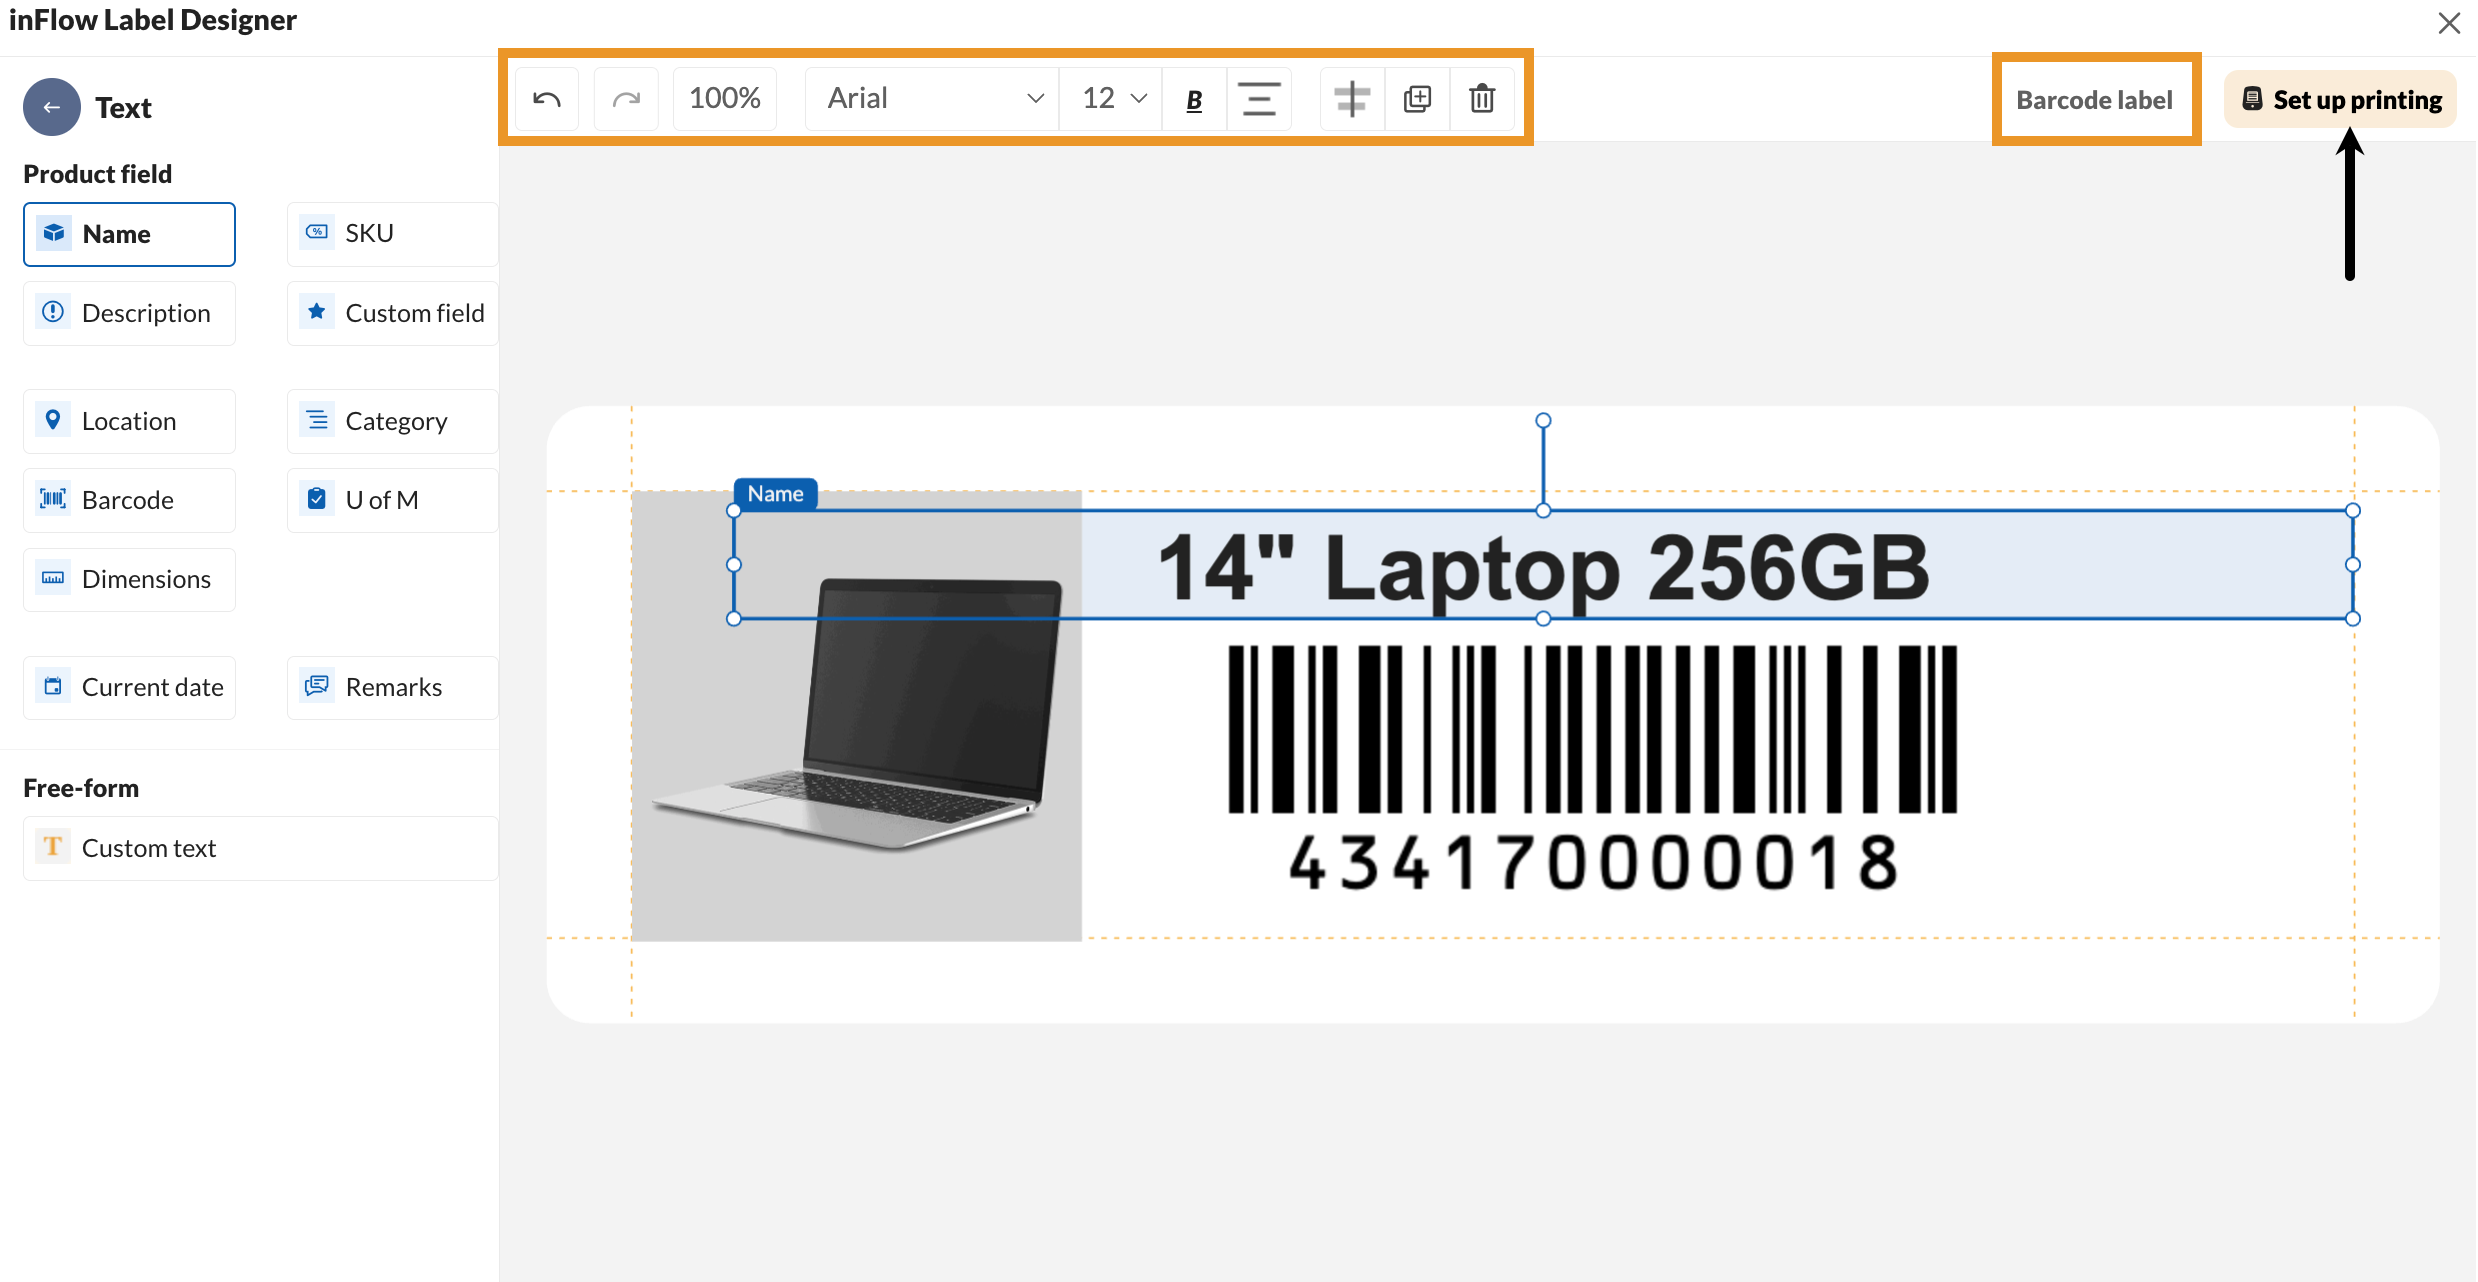
Now it’s time to install the inFlow Print Helper to allow Stockroom to print labels for any label printer.
- Continuing from the inFlow Label Designer, click Set up printing.
- Select the Setup tab, and download the inFlow Print Helper for your operating system.
- After downloading, open the installer to install the inFlow Print Helper.
Looking for a label printer that you can carry with you on the go? Then check out the inFlow Portable Printer from the inFlow Shop.
IPH Windows instructions
- Select “Download for Windows” to save the file to your computer. Or click here to download the Windows IPH installer.
- Double-click on the file to open the install wizard.
- Follow the on-screen instructions to complete the installation. You might need a Windows administrator password; if so, contact your IT department for assistance. When done, click “Finish.”
- The inFlow Print Helper runs in the background. Look for the orange inFlow icon in your Windows taskbar system tray; you might need to click the arrow to show hidden icons.
- Right-click on the inFlow icon and select “Log in.” You may be prompted to re-enter your Stockroom username and password. If not, a “Logged in successfully” message will open in a new browser tab, and now you’re ready to print labels. Close this tab and return to Stockroom.
IPH Mac instructions
- Select “Download for Mac” to save the file to your computer, or click here to download the Mac IPH installer.
- Double-click on the downloaded file.
- Drag the “inFlow Print Helper” to your “Applications” folder.
- Open your Applications folder and double-click on the “inFlow Print Helper” file. If you get a warning asking if you want to open the program, select “Open.”
- The inFlow Print Helper runs in the background. Look for the inFlow icon in your Mac’s menu bar at the top of your screen.
- Click the inFlow icon, then select Log in. You may be prompted to re-enter your inFlow username and password. If not, a Logged in successfully message will appear on the next screen. This means setup is complete, and you can close the tab and return to Stockroom.
Printing labels from Stockroom
Now we can start printing labels from Stockroom. Take a look below for the different options.
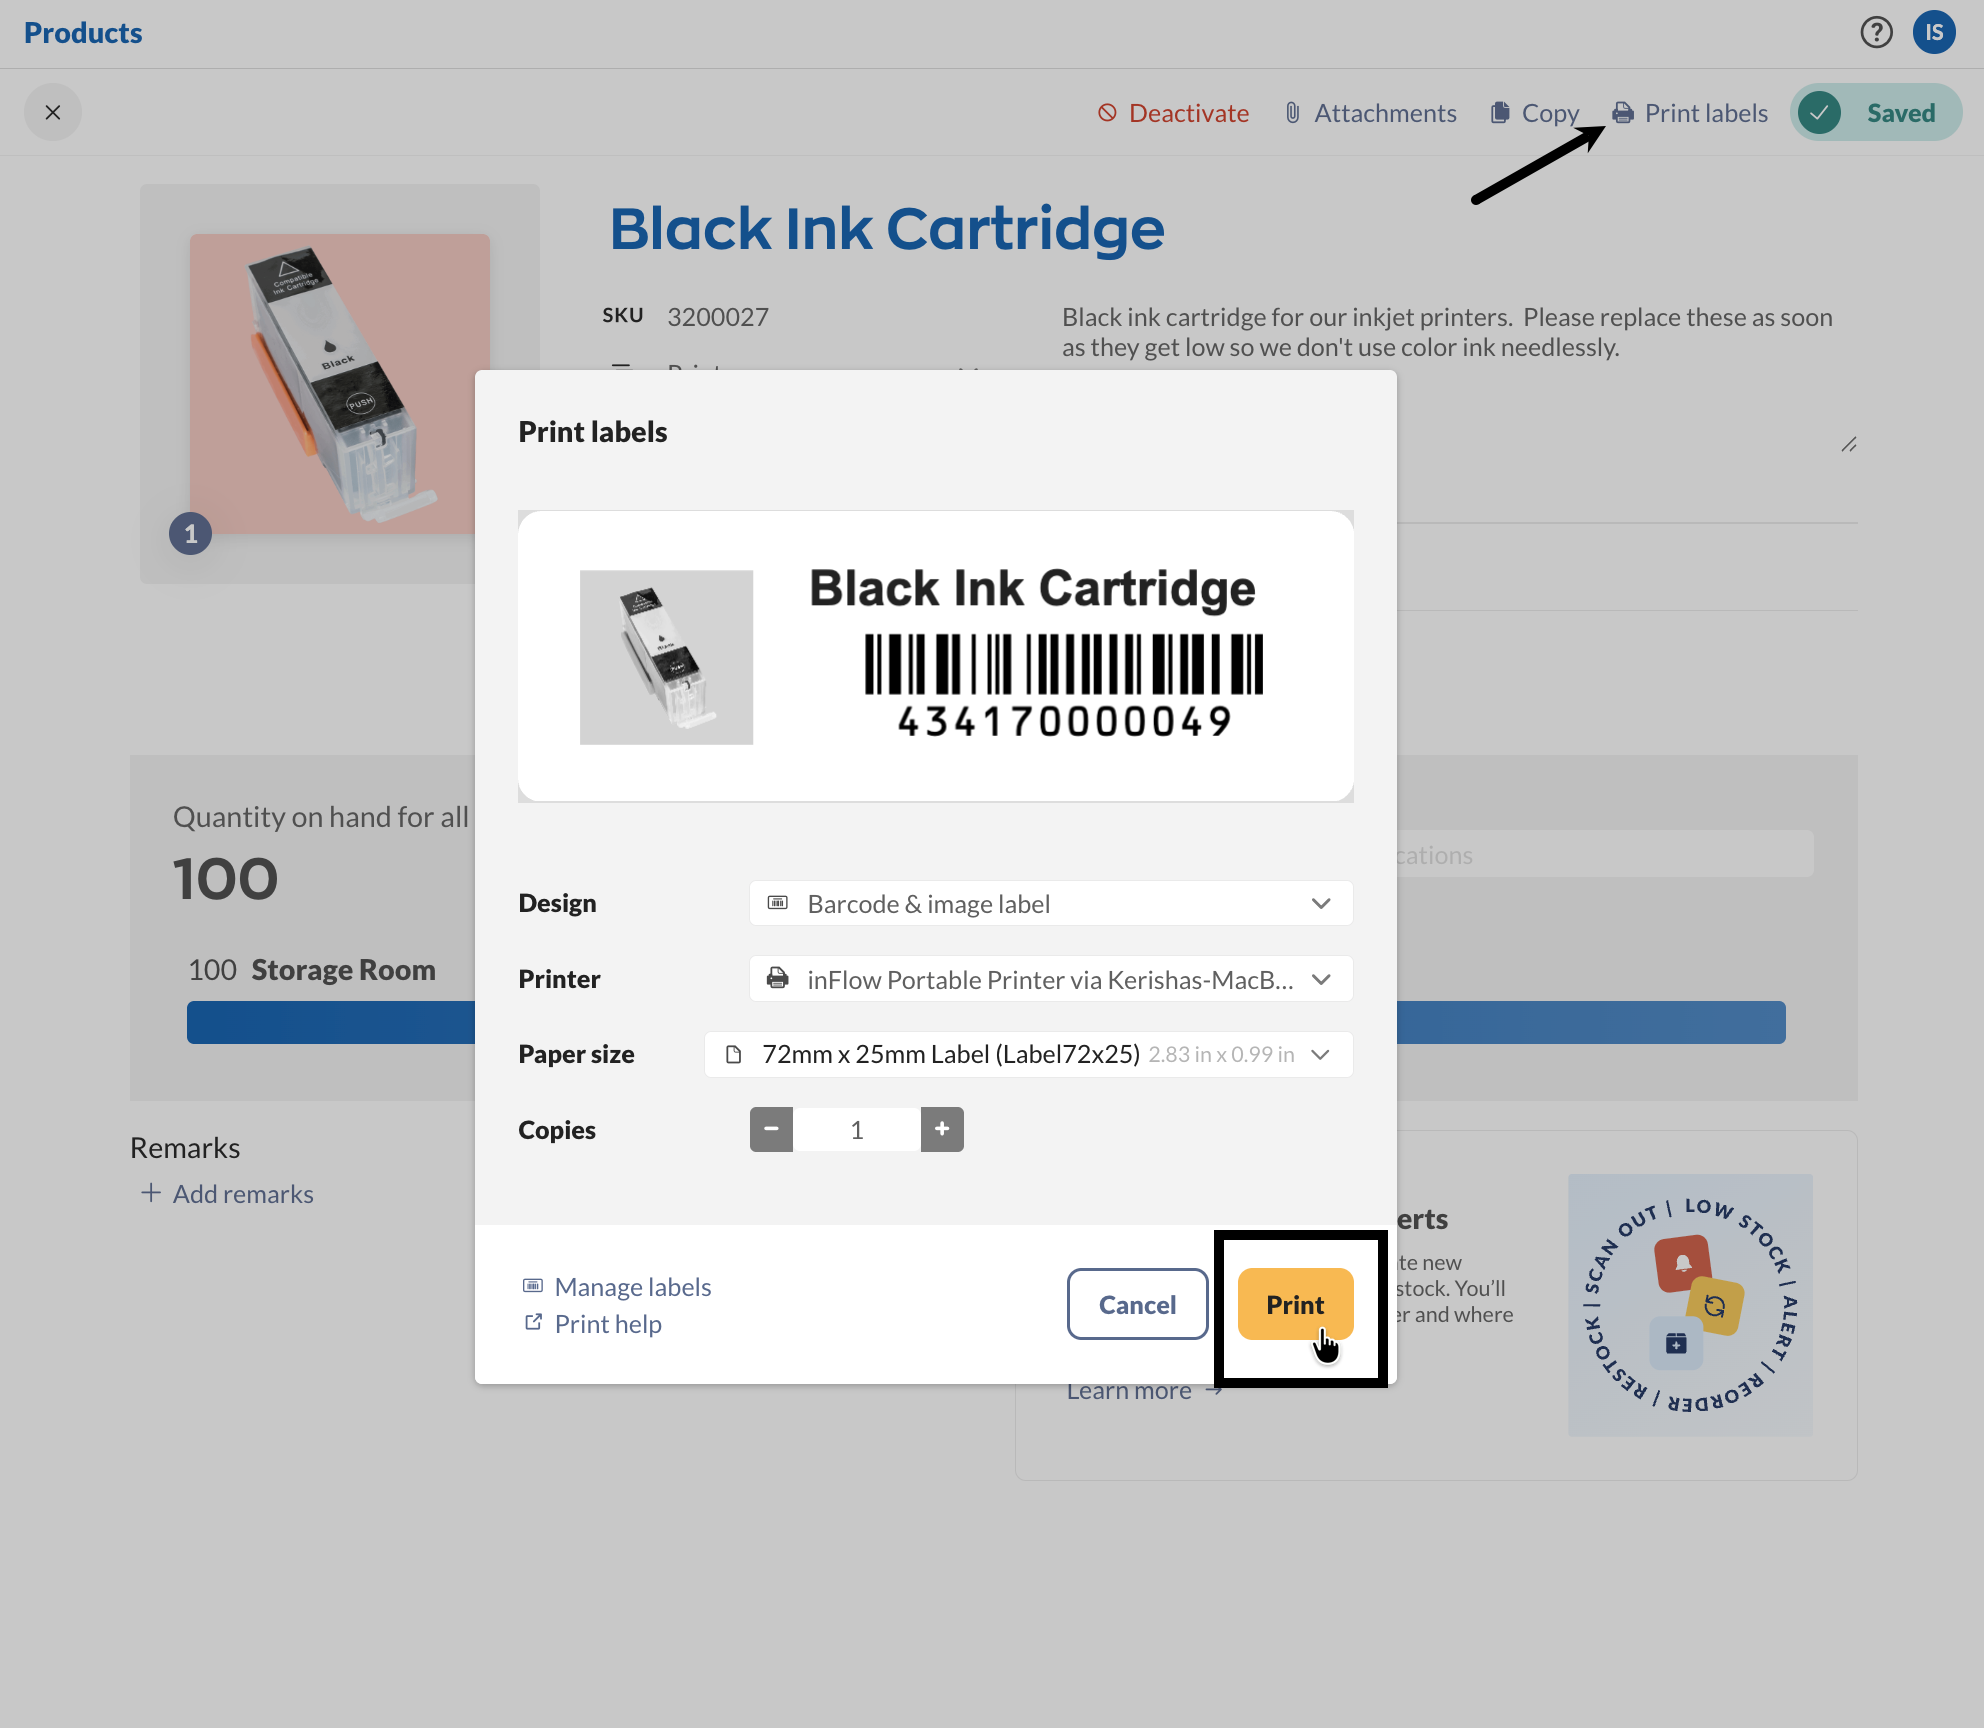
Printing labels from Stockroom product records
- In Showroom for web, open a product.
- Then click on Print labels.
- Choose the label design, printer, paper size, and the number of copies you’d like to print.
- Then click Print.
Printing labels from Current stock
This screen provides a clear, real-time view of all products you physically have in stock (quantity on hand). This feature is a great option for printing labels for multiple products at once.
- From the main menu, hover over the inventory icon, then select Current stock.
- In the top-right corner of the screen, select Print labels.
- Choose the label design, printer, & paper size.
- Below, select the desired label quantity, then click Print.

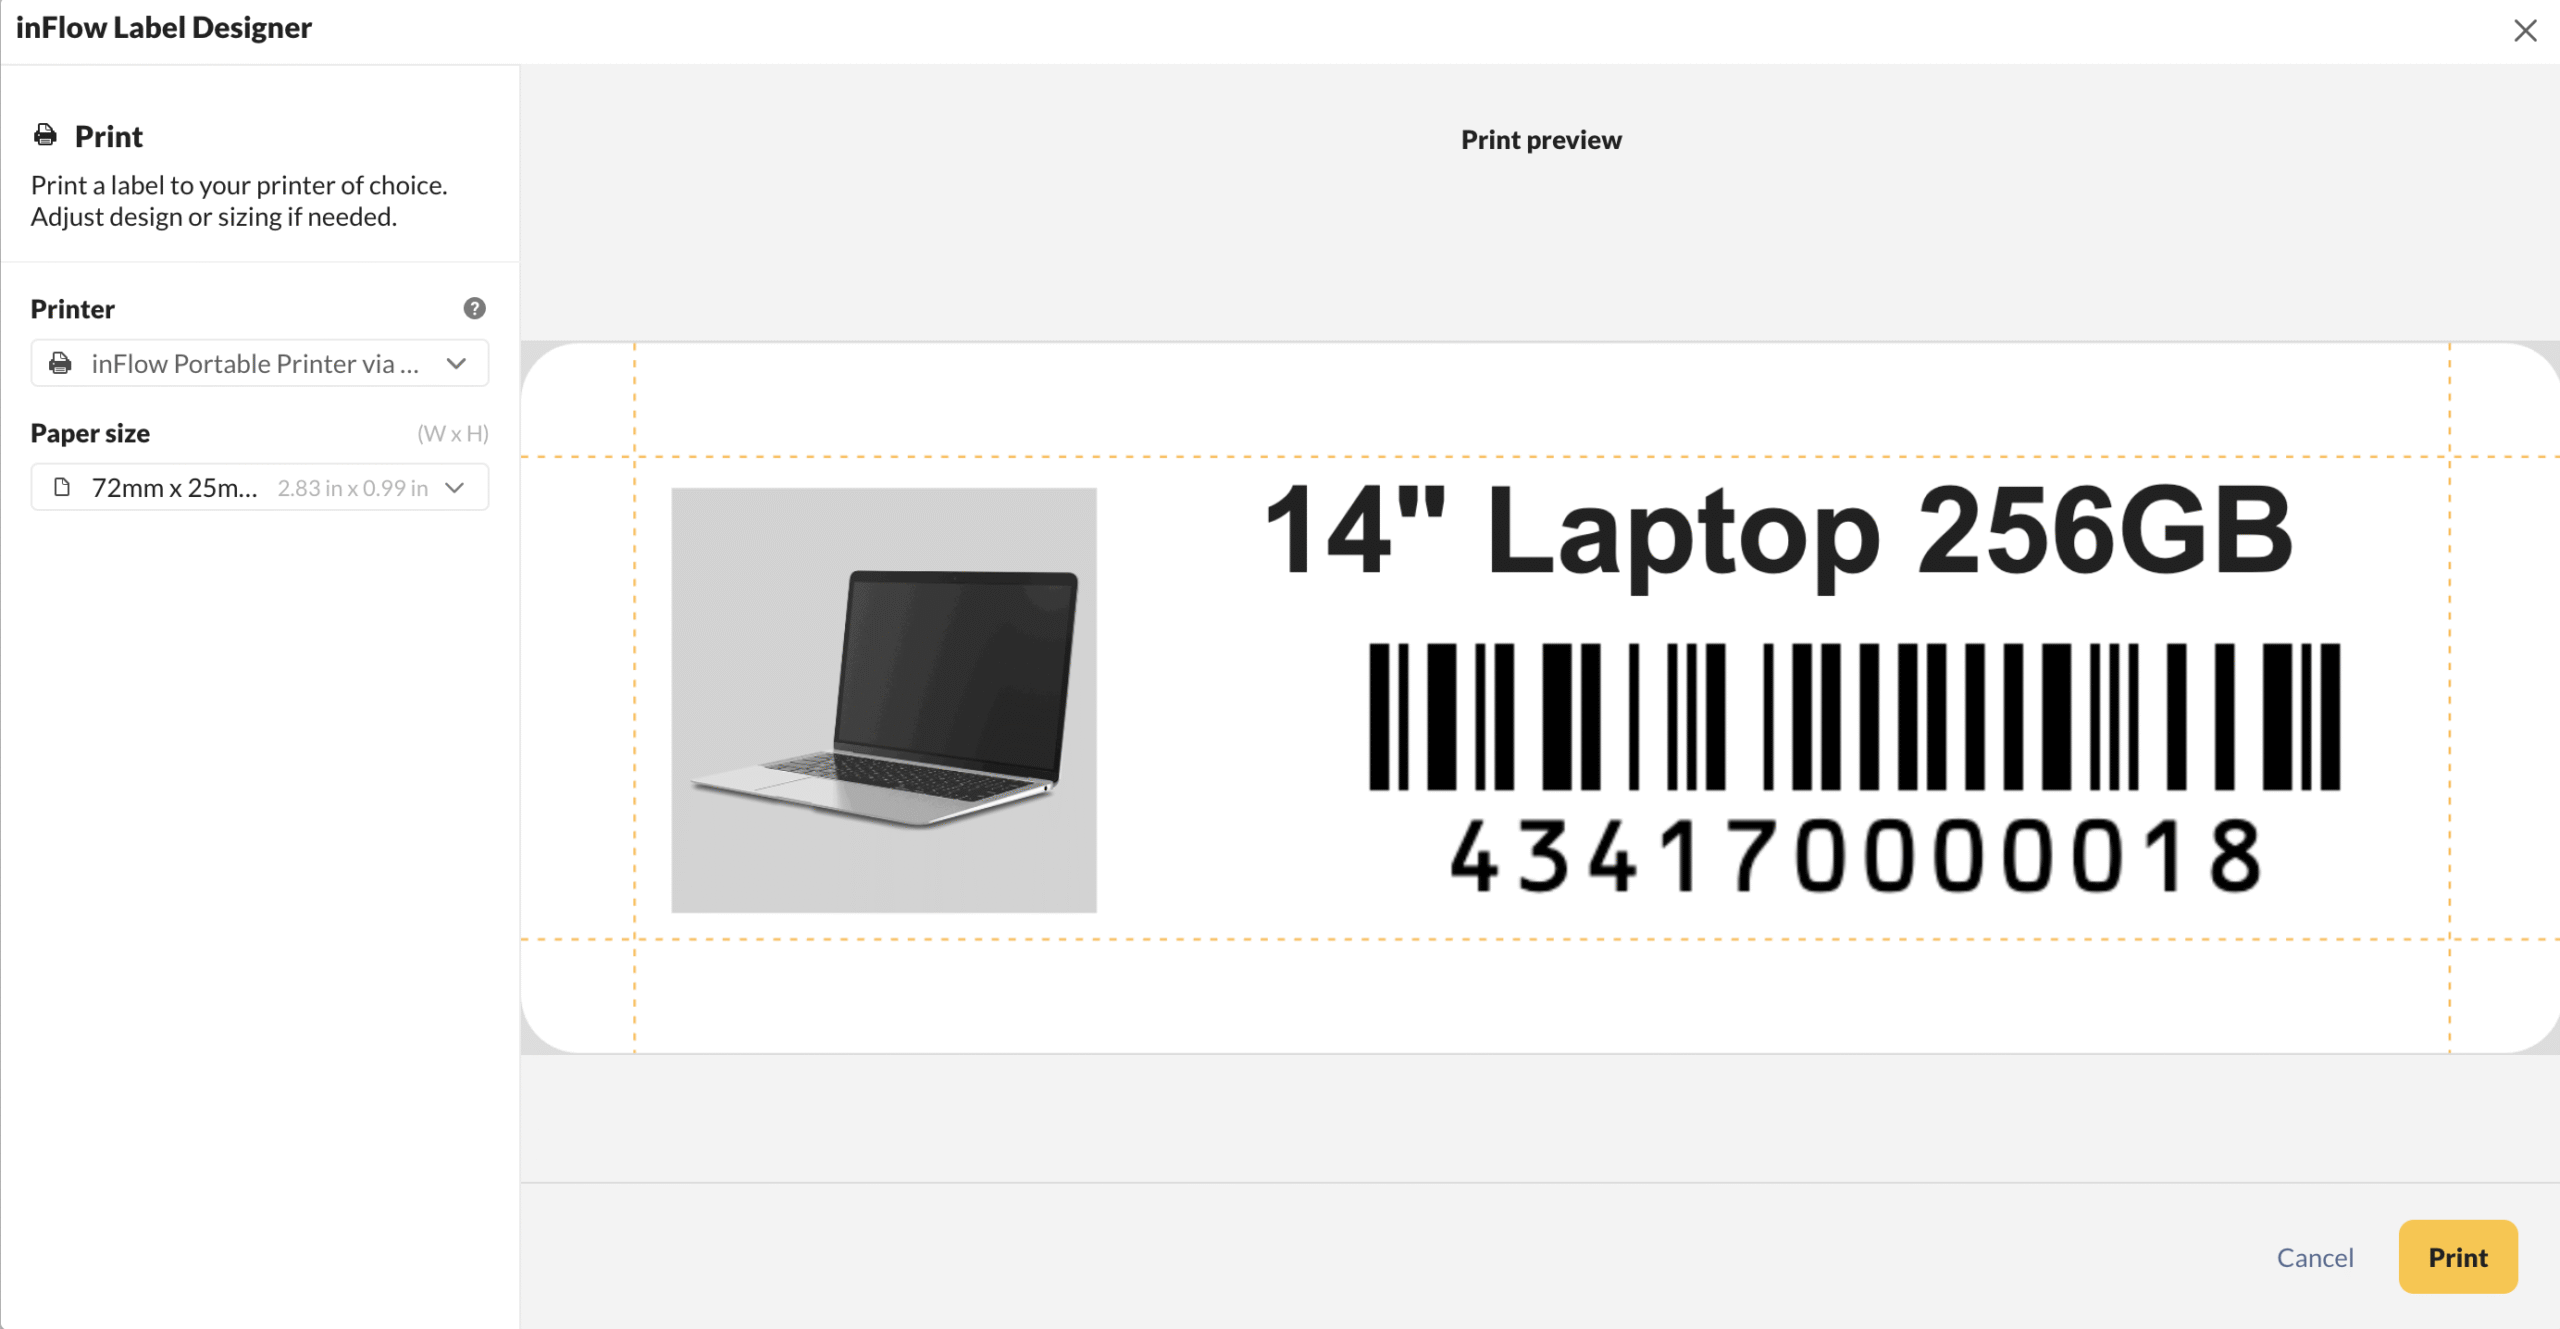
Printing labels from the inFlow Label designer
Printing from the Label Designer is great for testing out new label templates. You can also cycle through different products using the Preview product drop-down menu to ensure your template fits with product names of varying lengths.
- Hover over the settings icon, then Inventory.
- Click on Manage labels, then select a template.
- Click Print. You can select the printer and paper size on the left side of the label designer, then click the Print button at the bottom right of the screen. The Label Designer will show a message confirming your label has been sent to the printer.


0 Comments