Adding barcodes to your Stockroom products
Adding barcodes to your products is essential for quick scanning. This step-by-step guide will show you how to generate and manage barcodes for your products in Stockroom.
Generating barcodes
If your products don’t have barcodes, Stockroom can create them for you. In this step, we’ll go over how to generate barcodes.
- From the Main Menu, hover over the Settings icon, then click Inventory.
- Under Barcode types, select Generate.
- Toggle on Auto-generate internal barcodes for current and future products.
- Then click Generate. Now you’re all set to create and print your barcode labels!

Adding barcodes in bulk with a CSV import
To add barcodes for multiple products at once, you can import them using a CSV file.
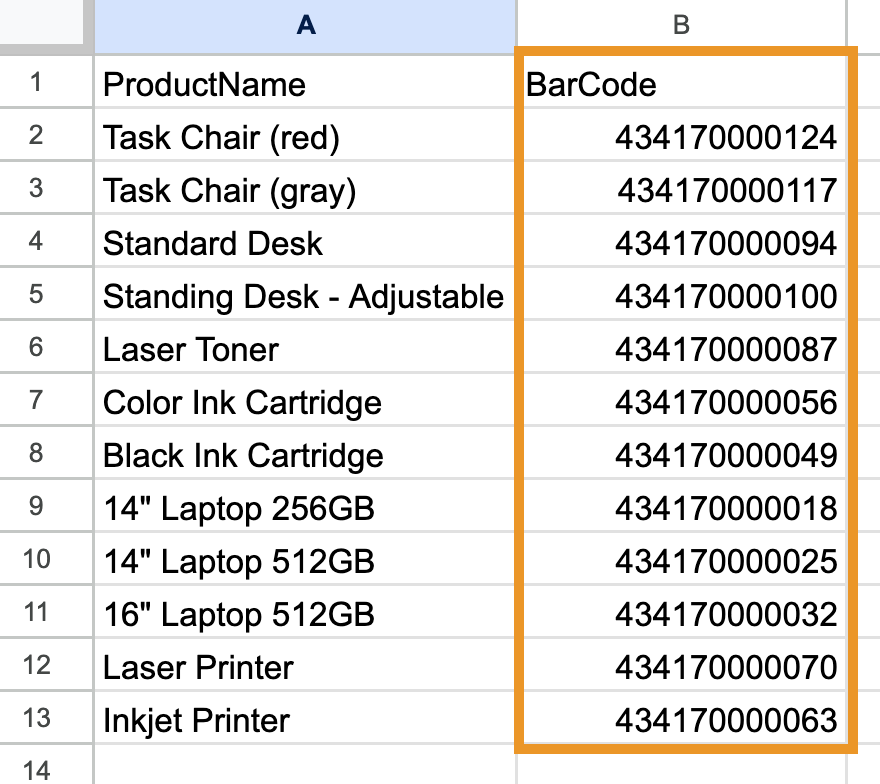
Exporting a product list CSV from Stockroom
If you don’t have a product list, you can export one from Stockroom.
- Hover over the settings button in the Main Menu>Export
- Set the data type to Product details, then click Export.
Editing the CSV file
For importing barcodes, only the Product Name and Barcode columns need to be filled out. Open the CSV file and fill in the Barcode column. If you’re creating a new product list, be sure to add a column called Barcode.
The product names on the CSV must exactly match those in Stockroom; otherwise, a new product will be created during the import.
When done, save your spreadsheet as a CSV file and return to Stockroom.
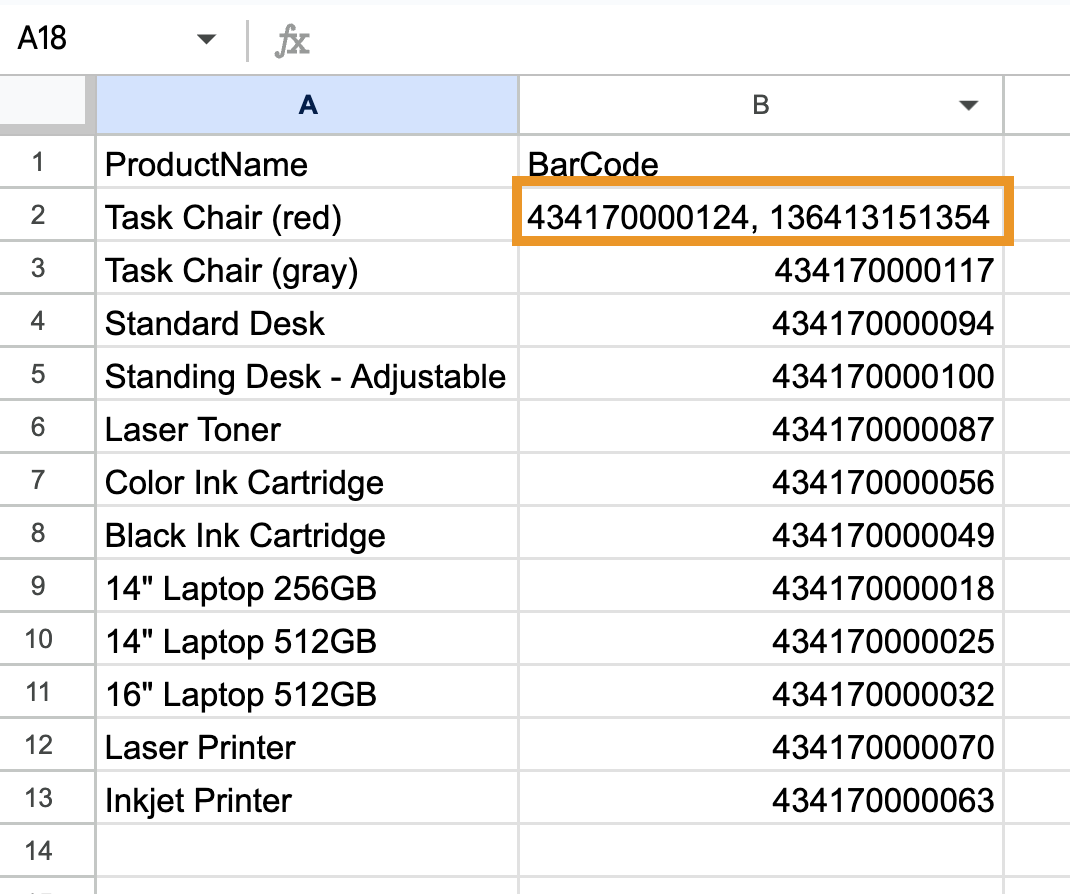
For products with multiple barcodes, you can add them to the same cell, separated by a comma.
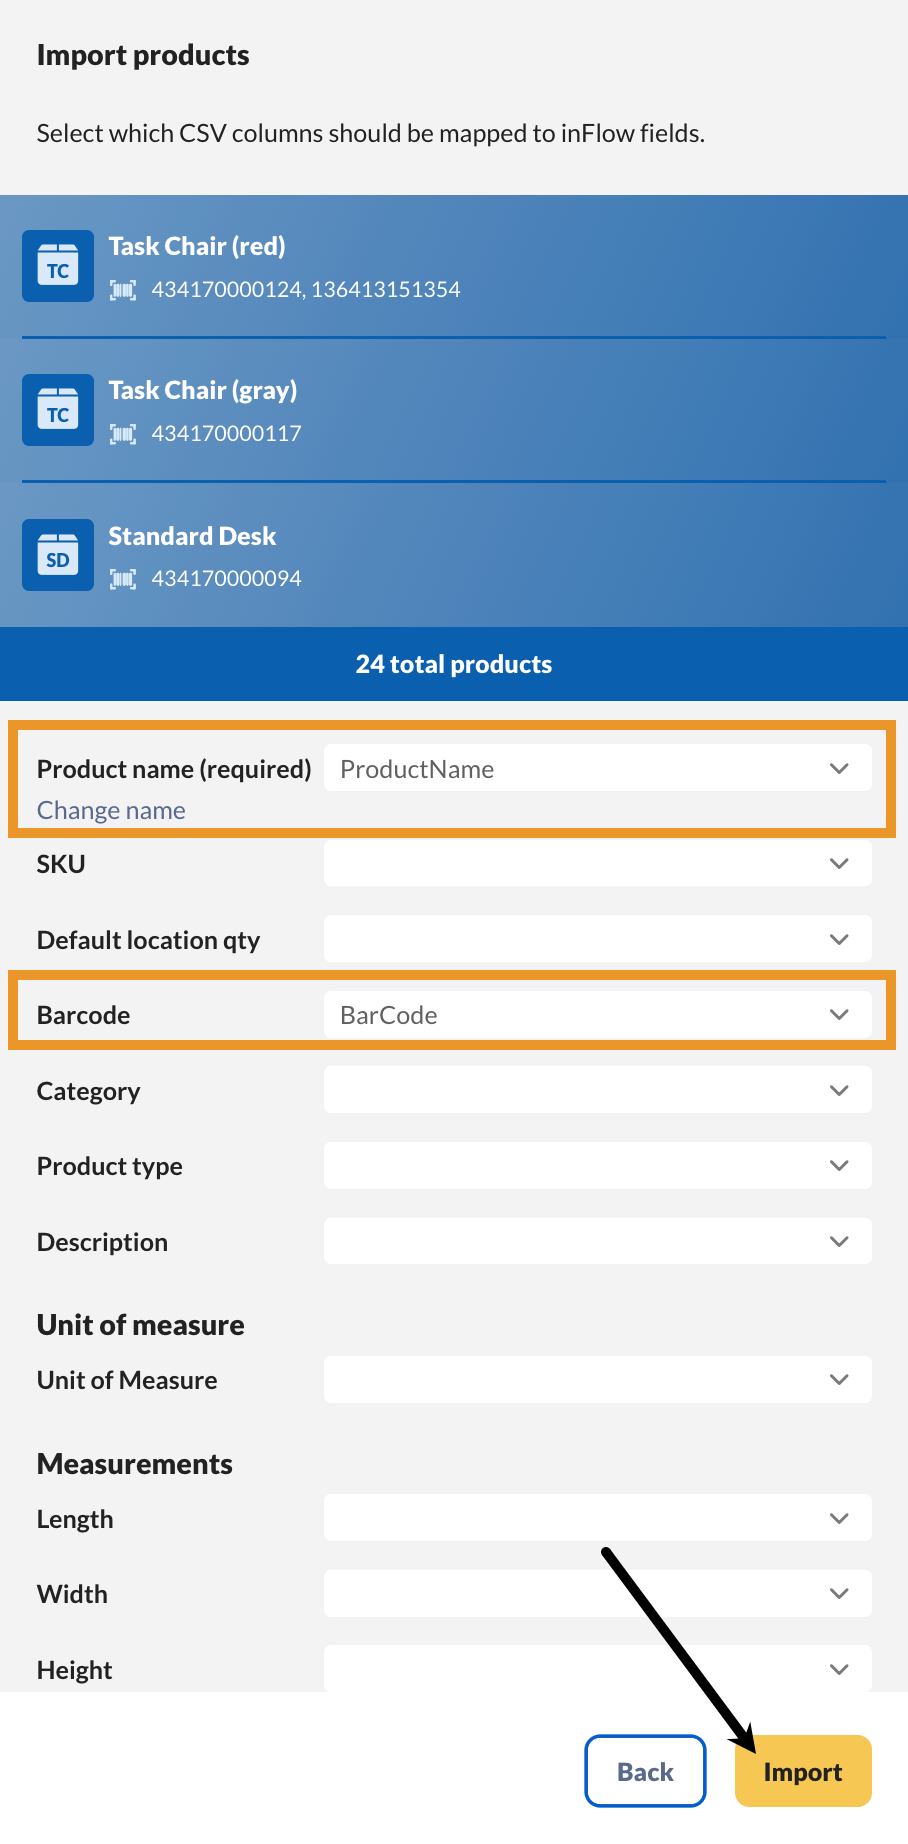
Importing the CSV file to Stockroom
- To start importing, hover over the settings button, then select Import.
- For the data type, select Product details from the drop-down menu.
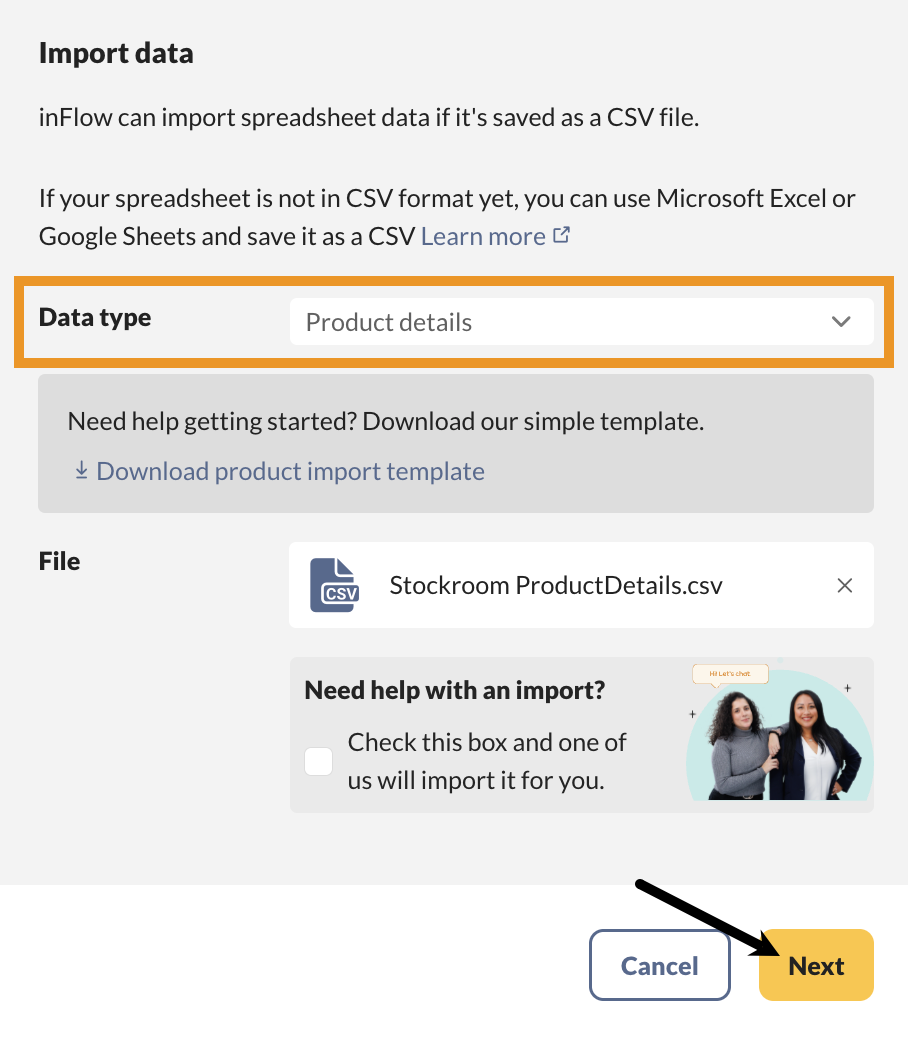
- Below, upload your CSV file, then click Next.
- Match the Product name and Barcode fields on the left with the same fields in the drop-down menus.
- When ready, click Import. You’ll receive an email once the import is complete, and your products will have barcodes.
Adding individual barcodes
Barcodes can also be added directly to Showroom for Web. This method is perfect for one-time updates or when adding only a few barcodes.
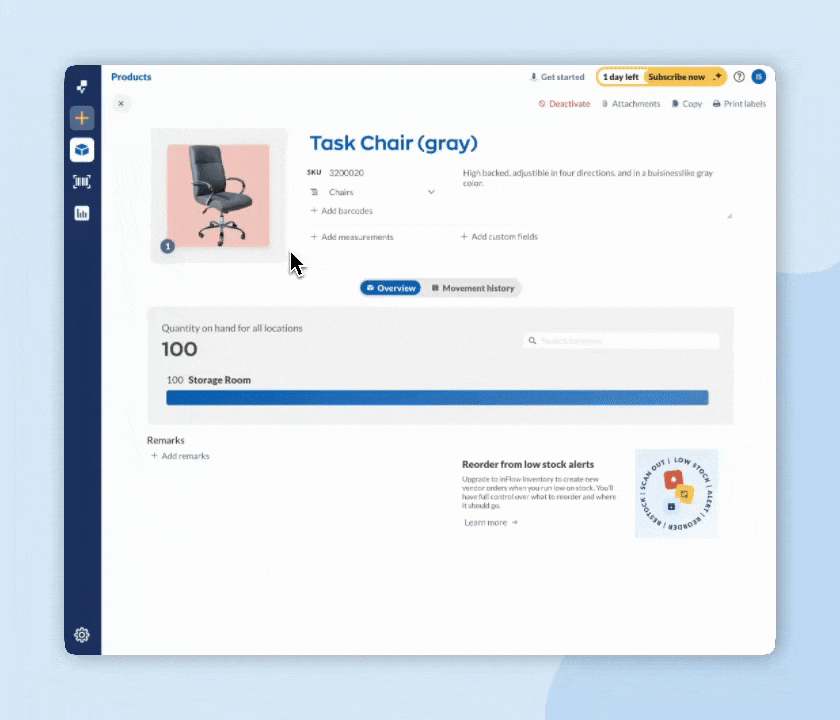
- From the Main menu, hover over the Inventory button, then select Product.
- Select one of the products from the list.
- Click on Add barcodes, then type or scan the product into the field.
- To add another barcode, select Add barcode below to add another field.
- If you have multiple barcodes, click the star next to the barcode you want to set as the default.
- When you’re finished, click Update and then Save on the product record to finalize your changes.


0 Comments