Transitioning to inFlow’s new lot & expiry date tracking (beta)
If you’ve been using inFlow’s legacy lot number tracking—which involves using sublocations or including lot details in product names—this article will guide you through the process of switching your products to dedicated lot-tracking products.
If you’re interested in trying the beta lot numbers feature, reach out to the inFlow team.
Export product information (optional)
Before making any changes to your products, we recommend exporting a product details CSV from inFlow.
This is an optional step that can be helpful in case you want to reference product information after making changes.
- Go to Main Menu>Settings>Export.
- Select Product details from the Data type list.
- When your CSV is ready, a window will pop up asking where you want to save it on your computer. Click Save.
Editing & deactivating legacy lot products
The simplest way to switch the old lot products to lot tracking is to deactivate them when their stock levels reach zero, then recreate the product with the correct product type.
Before deactivating a product, you will need to edit or remove the data from the following product fields.
| Product field | Suggested action |
|---|---|
| Quantities | If there are any remaining stock levels these should be changed to 0. |
| Reorder settings (Manage reordering) | To make sure your team discontinues use of the old lot product, open the reorder settings and turn them off. |
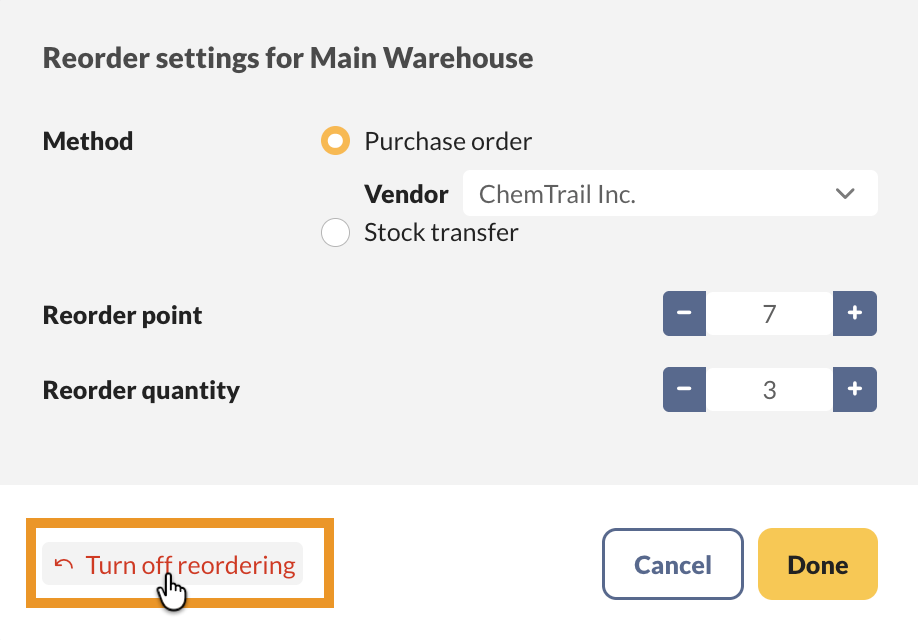
Turning off reordering
- On the product, select a location, then click on Manage reordering.
- Click on Turn off reordering, then click Done.
Creating lot-tracked products from an existing product record
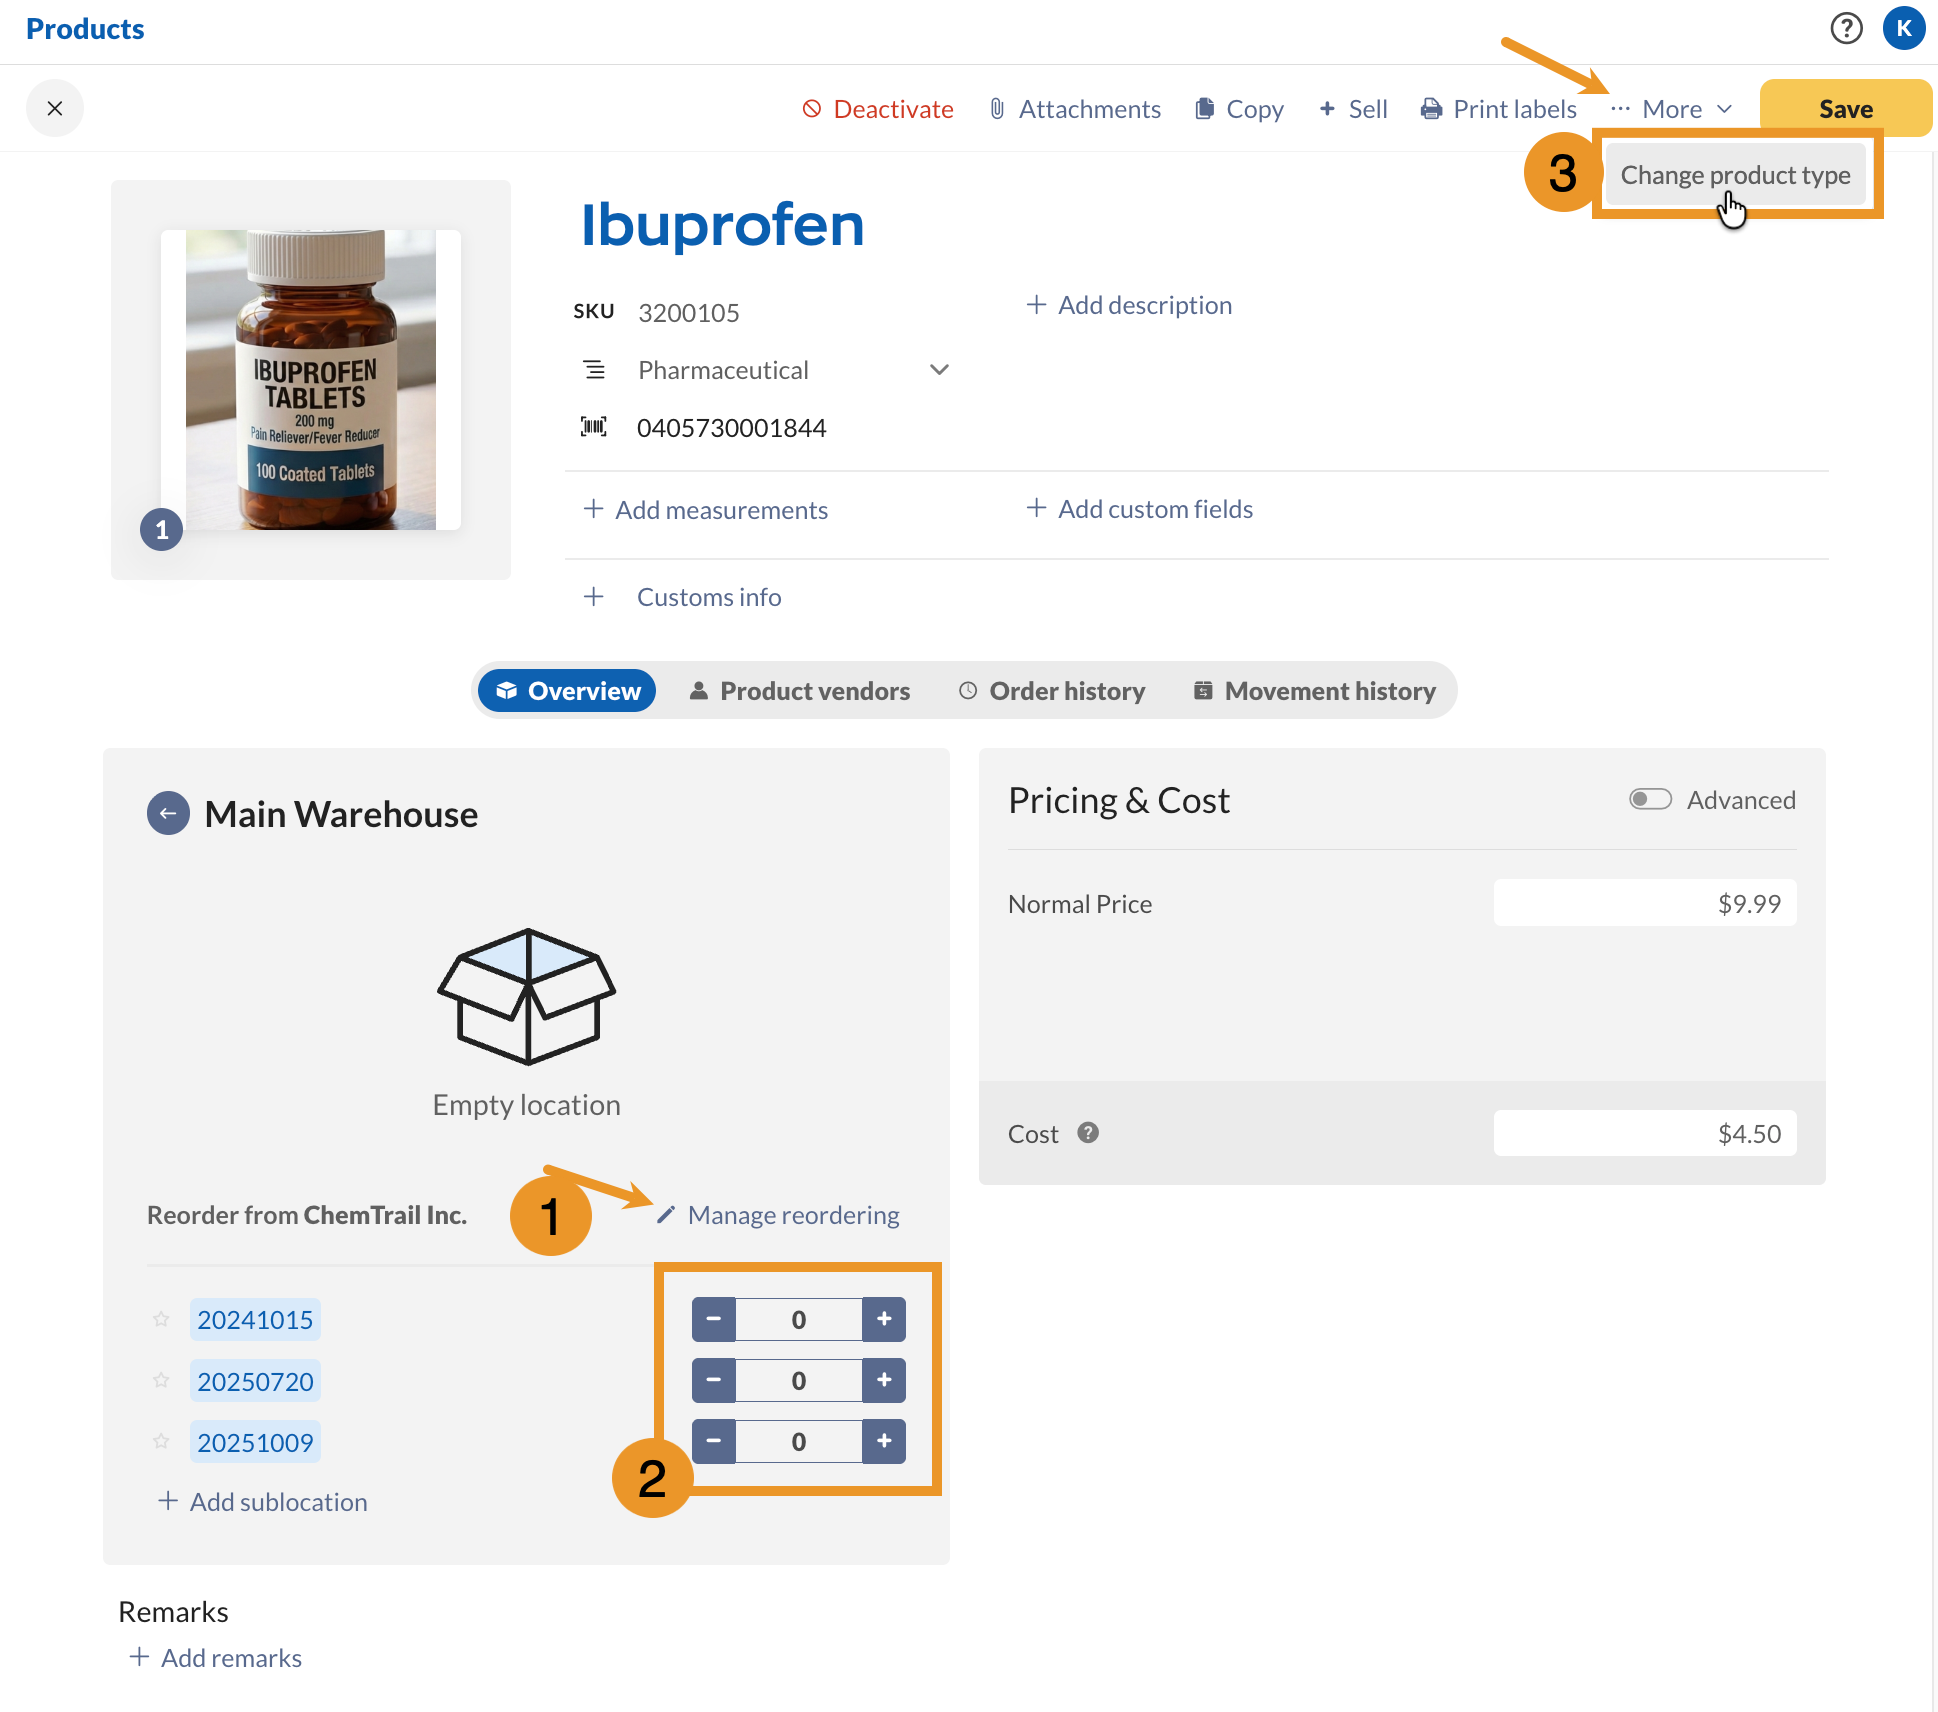
- In the product record Action menu, click More then Change product type.
Be sure not to click the Copy button, as this will create another stocked product that doesn’t track lot/expiry dates.
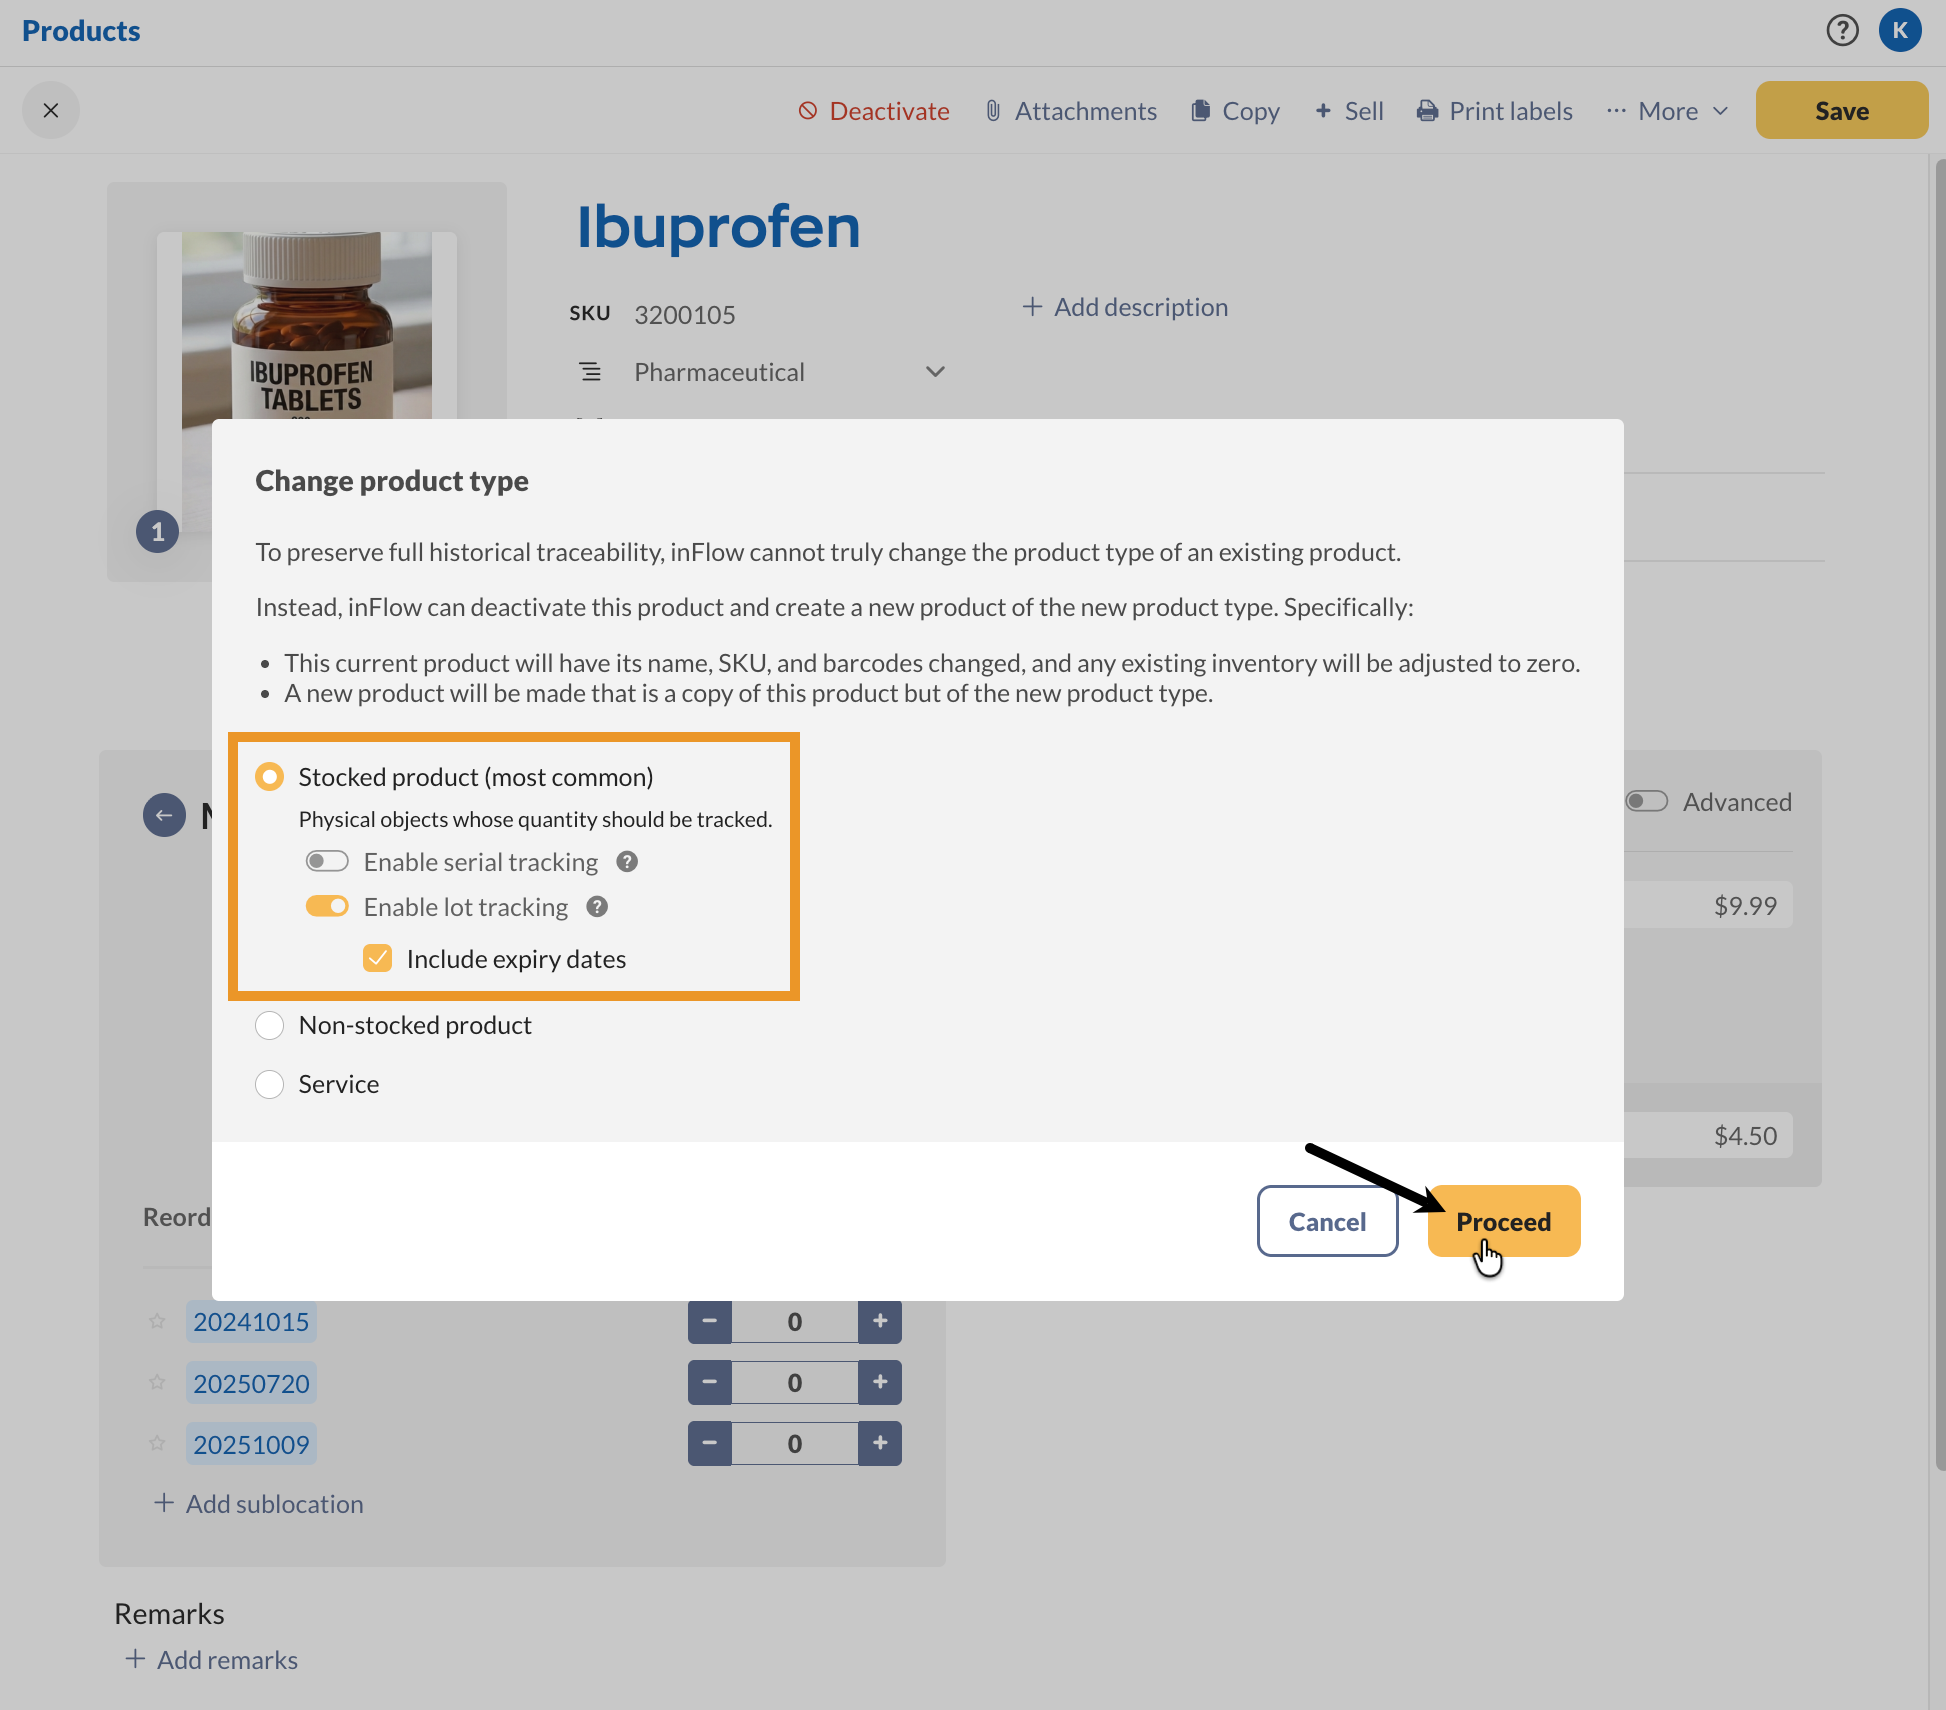
Note the warning in the prompt. inFlow cannot change the product type, but can help you re-create it as a new product quickly while keeping the same name, SKU, and barcode. All previous quantities, order history, and movement history will stay with the deactivated product.
- Select Stocked product, then toggle on Enable lot tracking and, optionally, Include expiry dates.
- Click Proceed inFlow will deactivate the old product, and you will now see the record for the new product that replaced it.
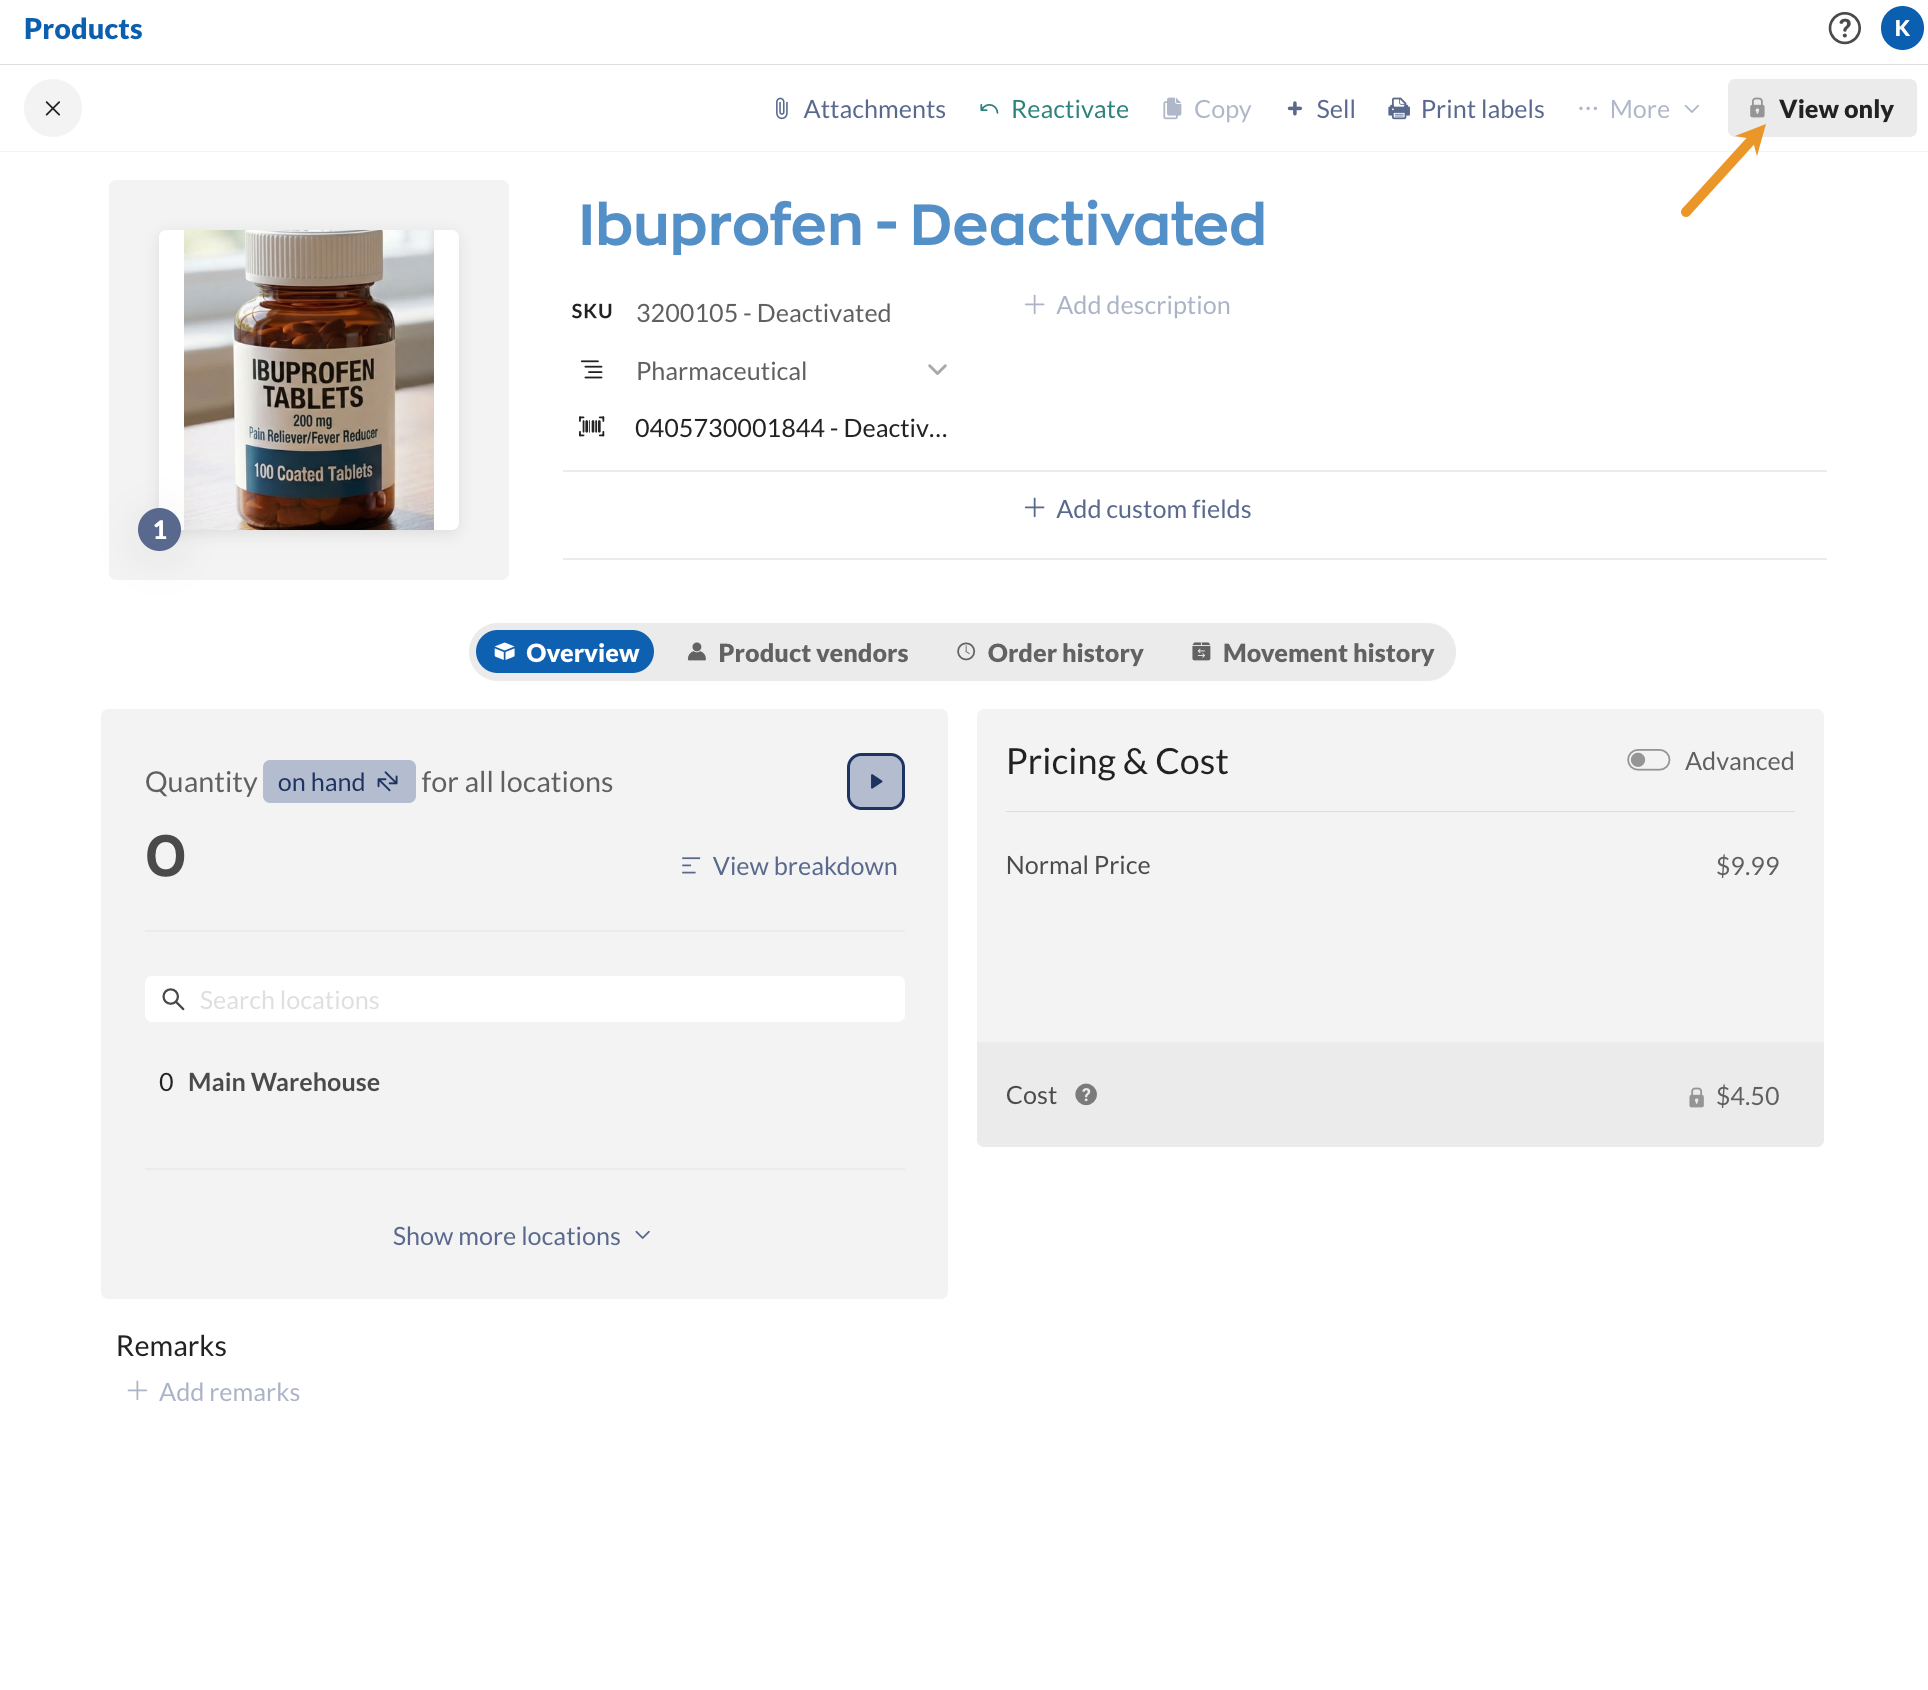
Deactivated product via the change product type setting
The original product record will show Deactivated next to the product name, SKU, and barcode fields. To view the deactivated product, follow the steps in this guide.
Creating a new lot tracked product
You can now create a product in inFlow that tracks lot numbers and expiry dates. These products are stocked items (i.e., physical products), and you can set them to track serial numbers if needed.
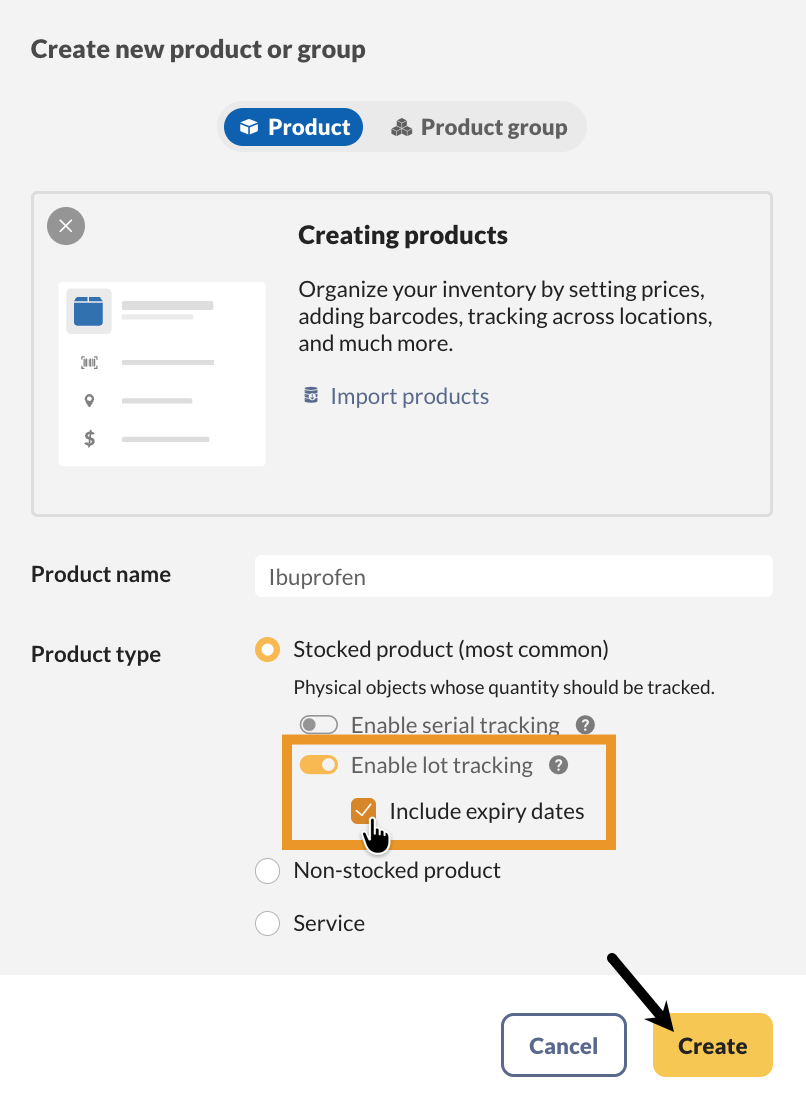
Creating a new product
- From the Main Menu, hover over the Create button (plus icon), then select Products.
- Fill out the Product name field.
- Stocked products are the default product type when creating a new product. Below, toggle on Enable lot tracking, and Include expiry dates if needed.
- Click Create.
Creating a new lot-tracked product on a purchase order
- On a purchase order, click on Add products.
- Fill out the Product name field, toggle on Enable lot tracking, and, if needed, toggle on Include expiry dates.
- Select Create new product.


0 Comments