
How to set up custom fields in inFlow
Custom fields are a flexible way to record information that inFlow doesn’t track.
These fields can hold any information that you want to analyze or reference later. They are searchable and can be displayed as columns in your reports.
Web

Check the 1:14 mark of the video for a guide on setting up custom fields.
Custom field options
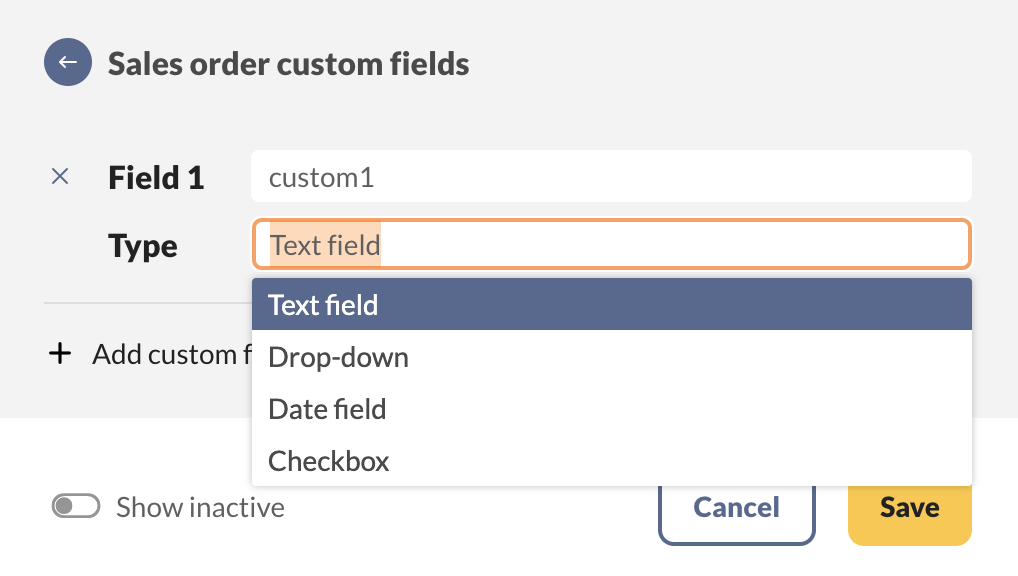
All of inFlow’s products and orders/transactions have the option to have ten custom fields. Creating custom fields in inFlow for Web gives you the ability to add them in the following formats:
- Text field
- Drop-down menu
- Date field
- Checkbox.
How to set up custom fields from the inFlow settings
- Go to inFlow’s Global settings (Main Menu > Settings > Global.)
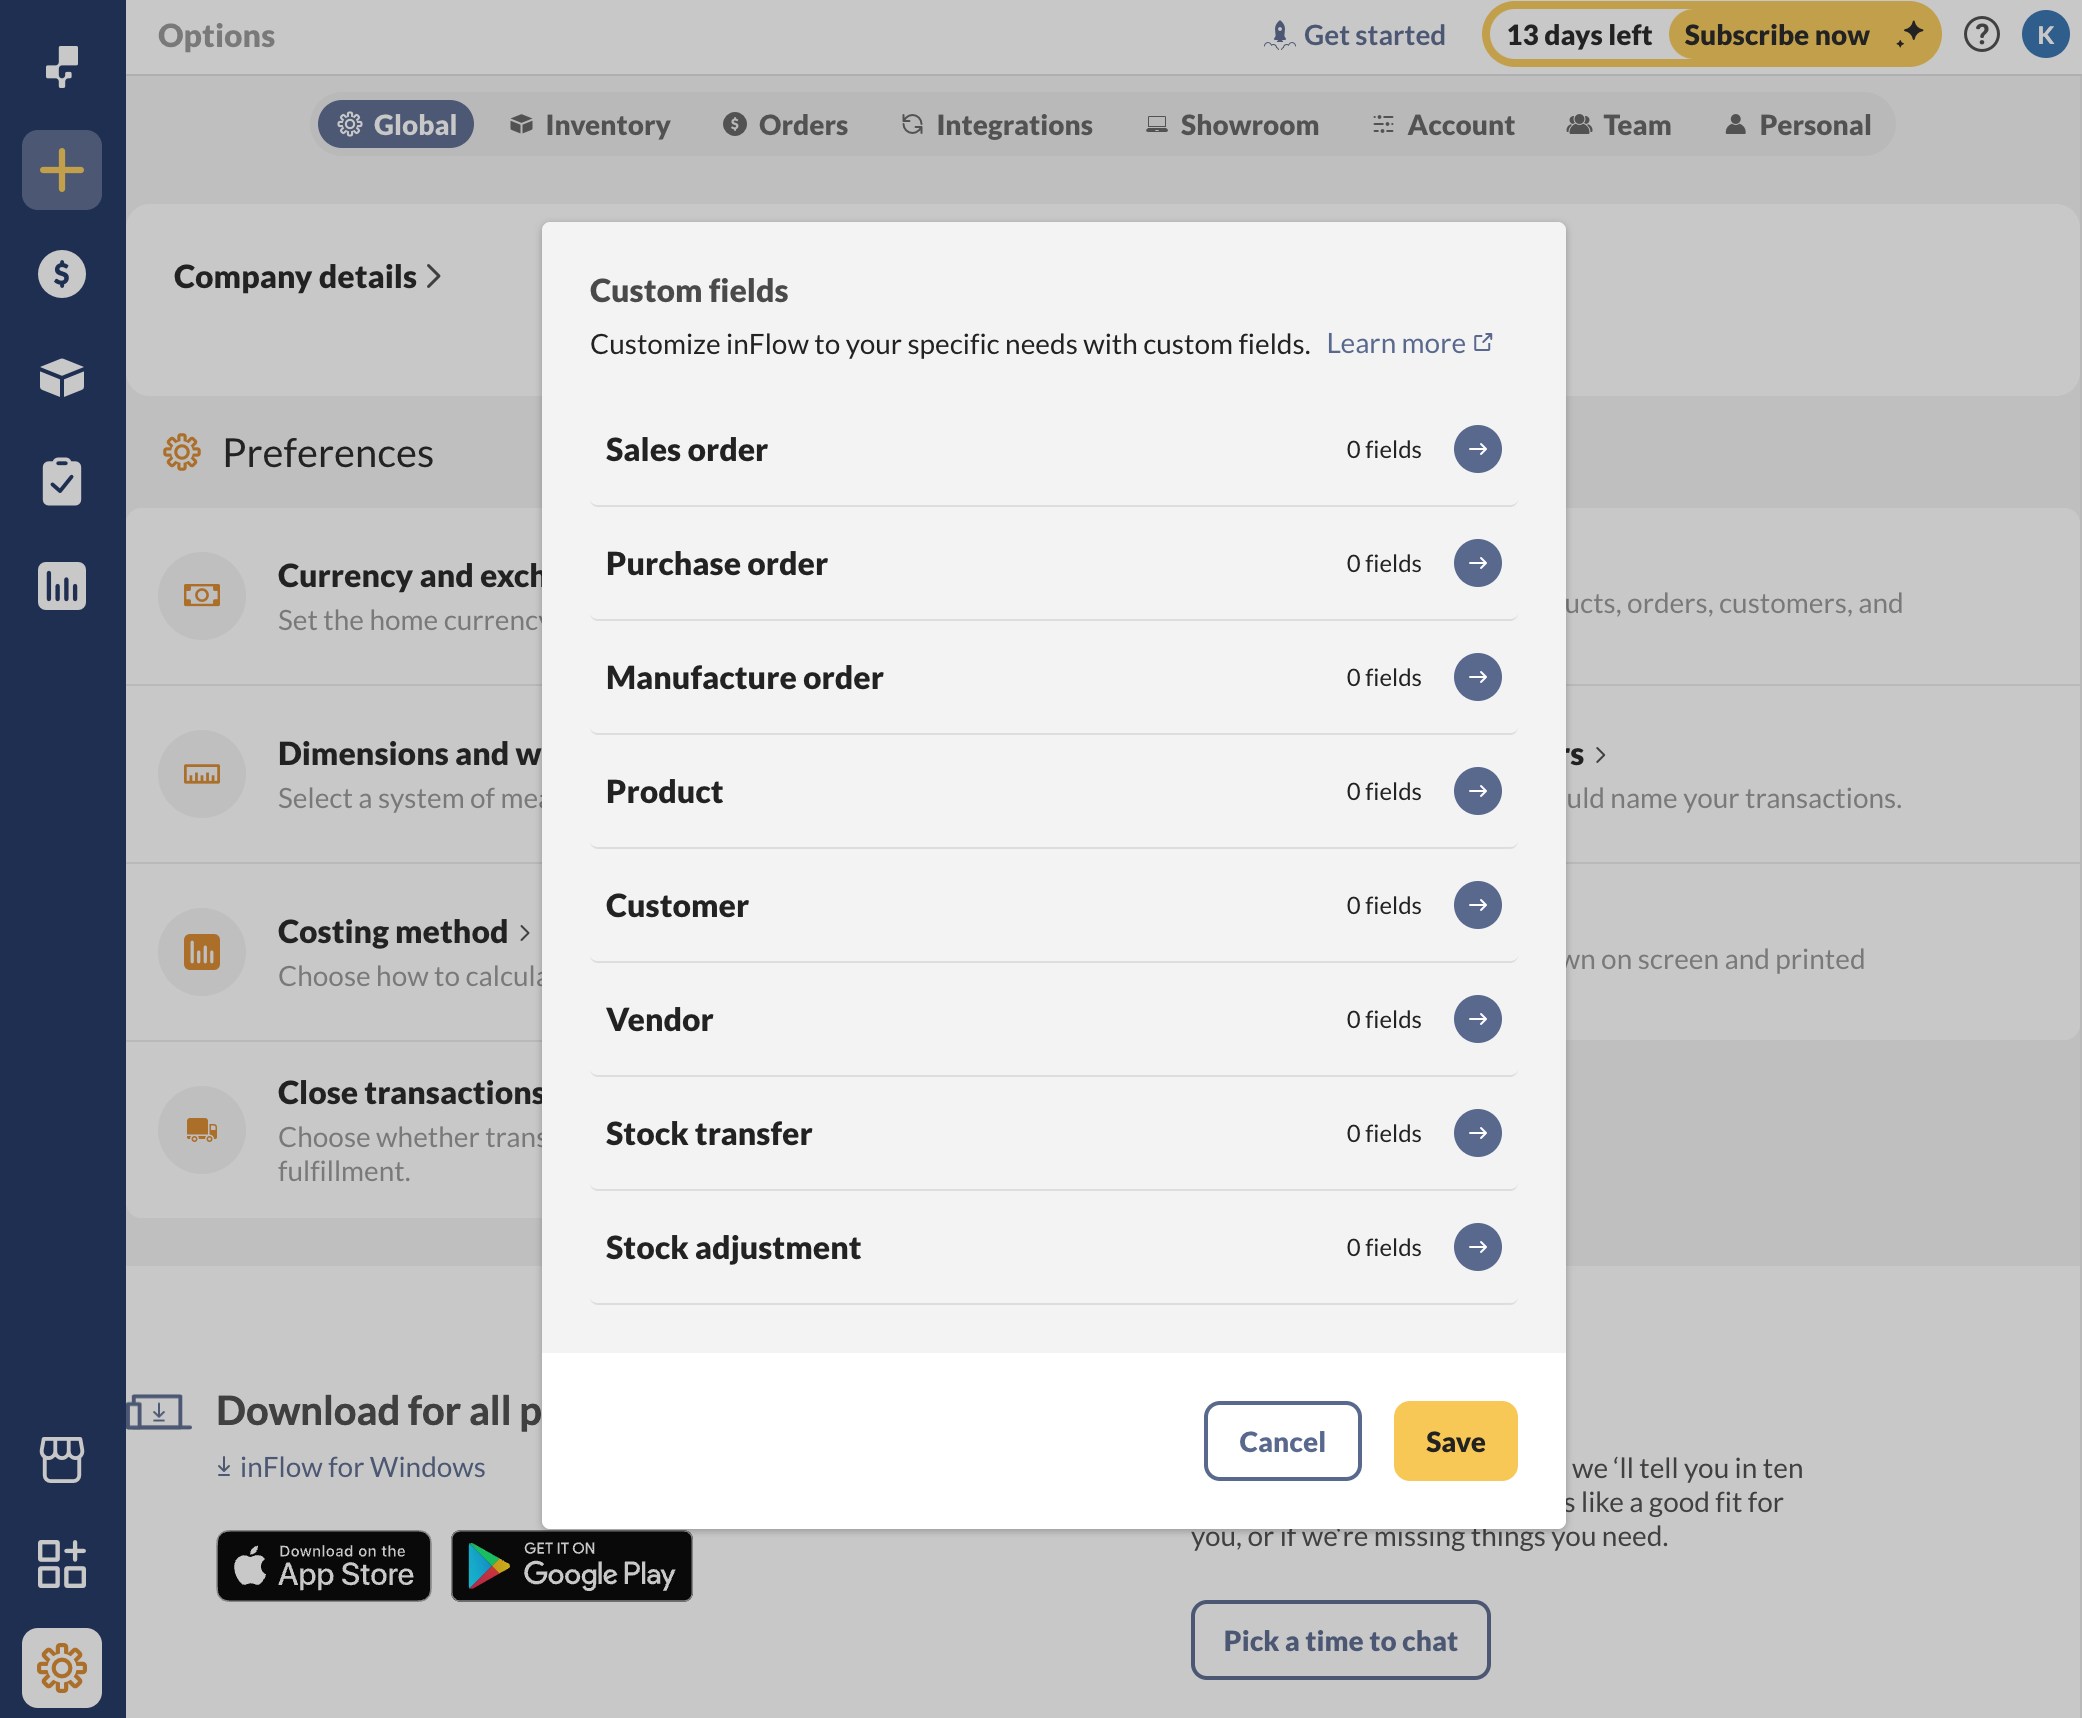
- Click Custom fields.
- Choose the section where you would like to create a custom field. (e.g., sales order, purchase order, etc).
- Enter the field name, and below, select the field type. If selecting a field other than text, fill out any applicable fields.
- If you would like to add another custom field, click on Add custom field below.
- Click Save when done.
How to set custom fields on products/orders
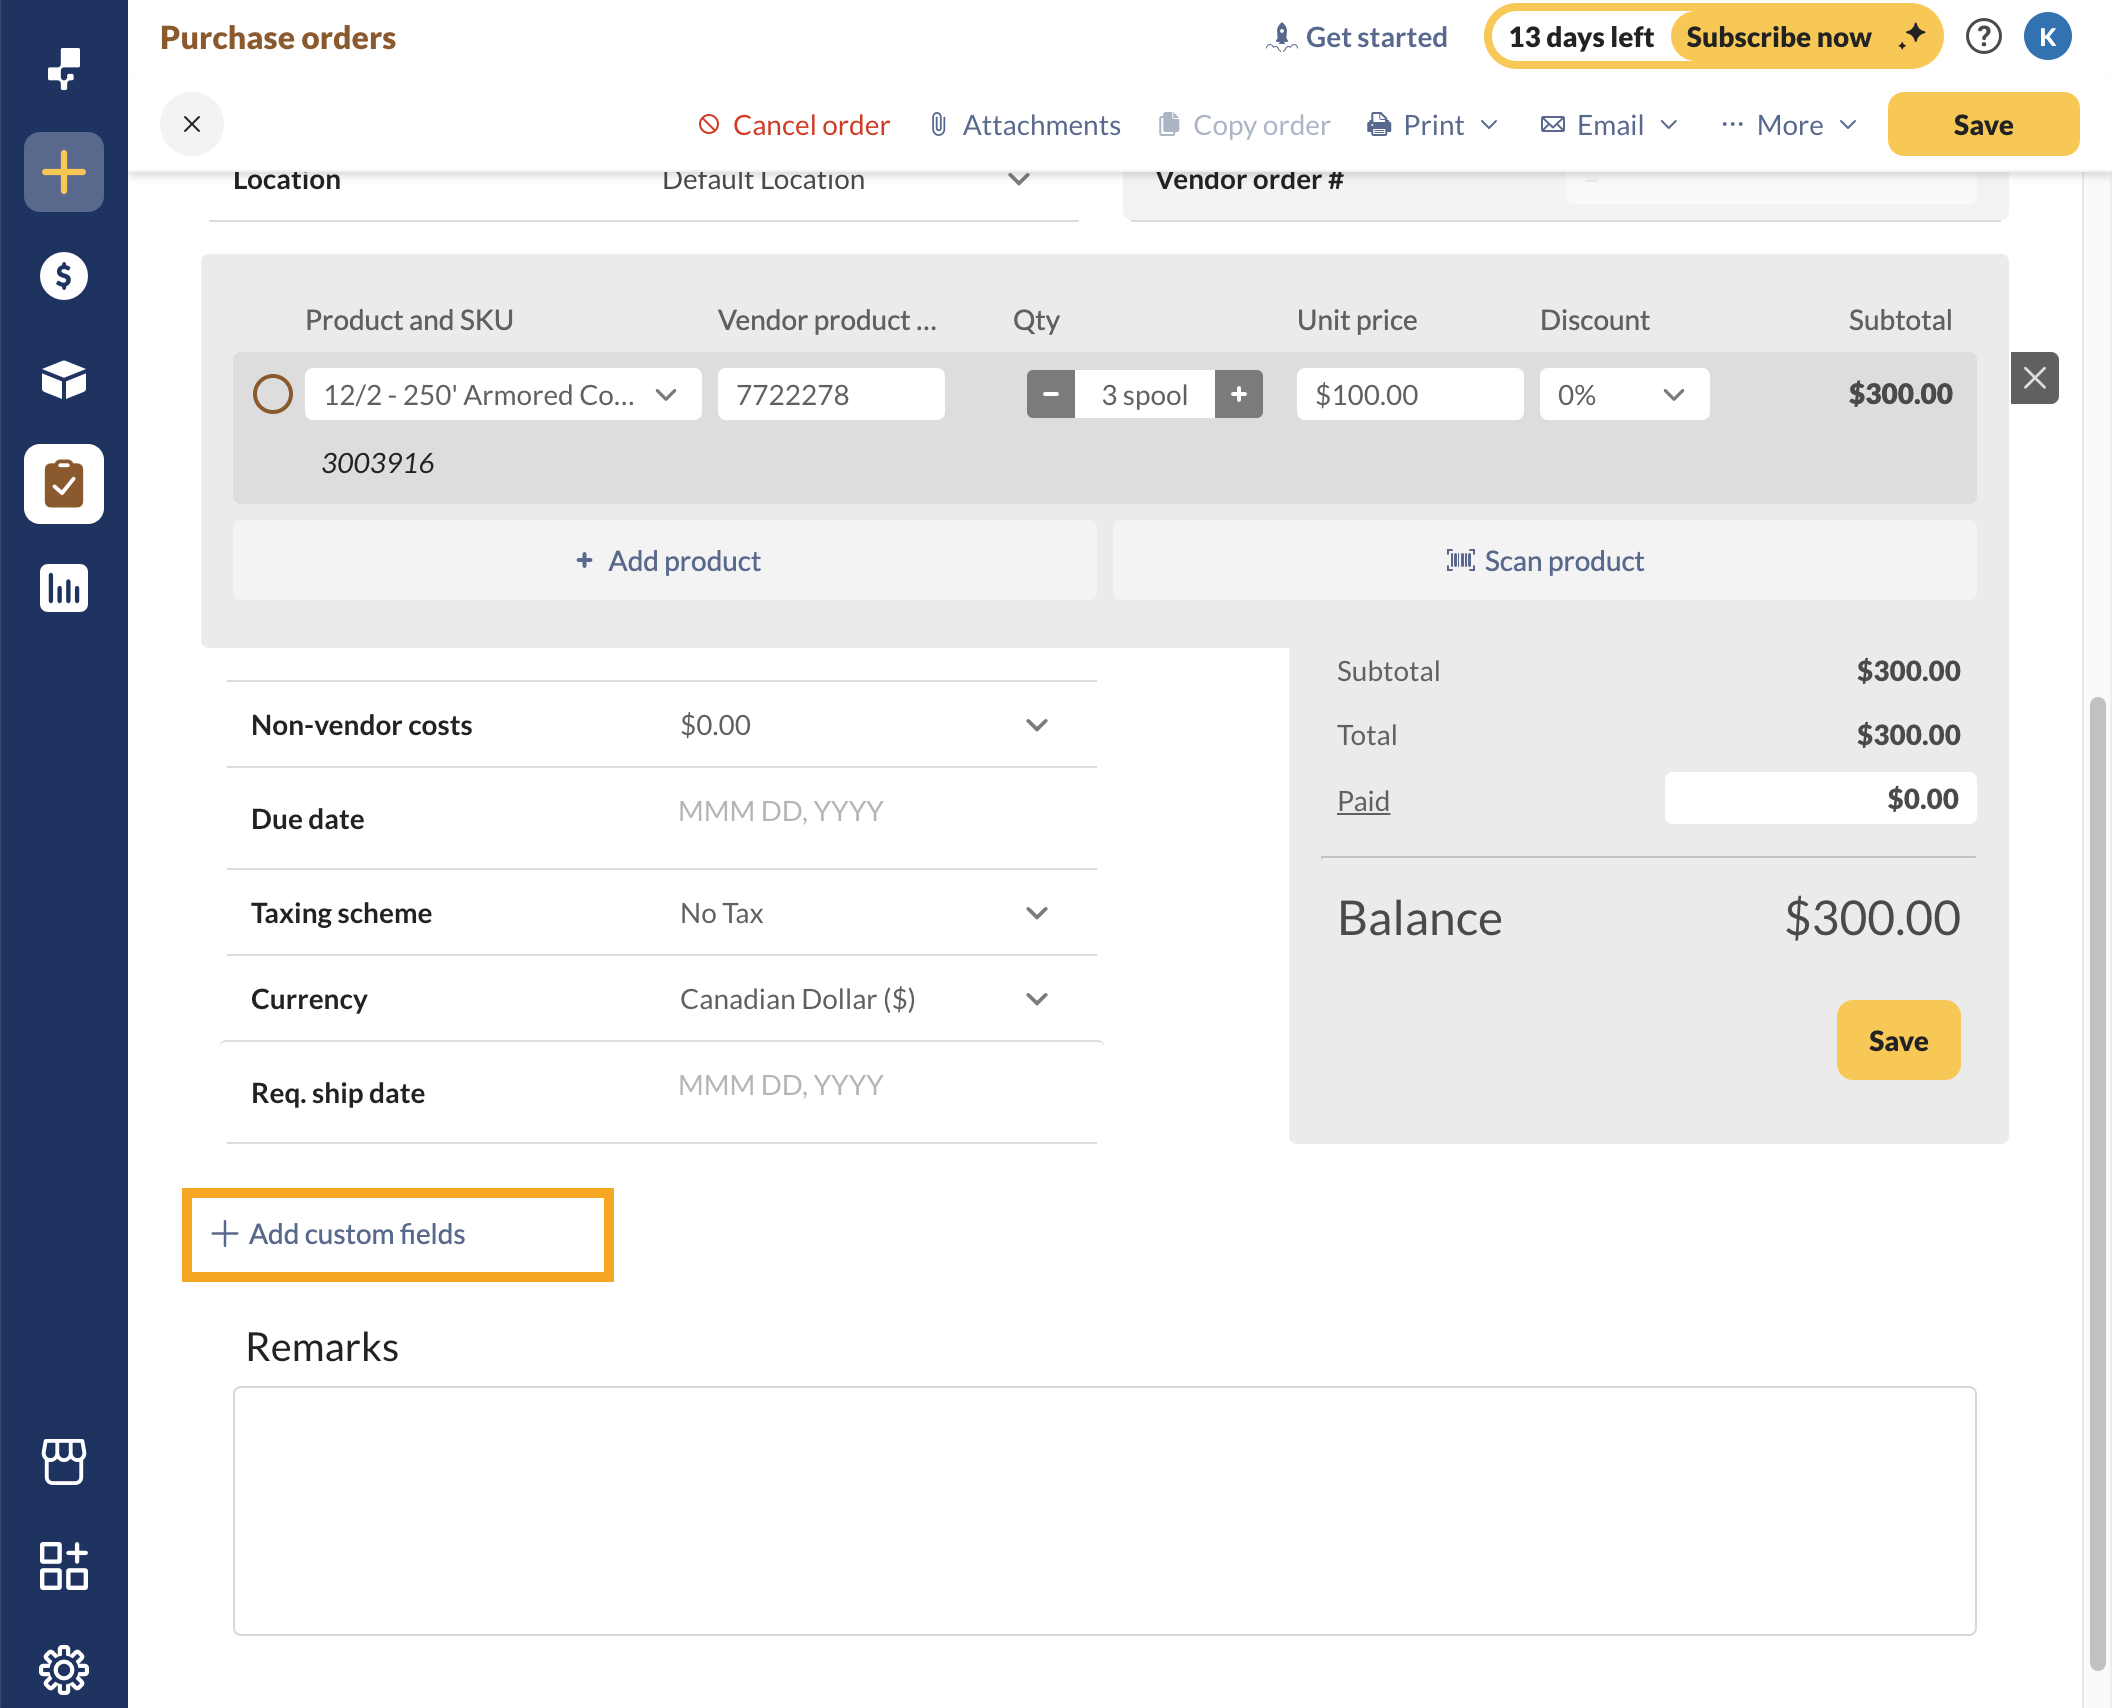
In inFlow, you can add custom fields on any product or order screen by selecting Add Custom Fields.
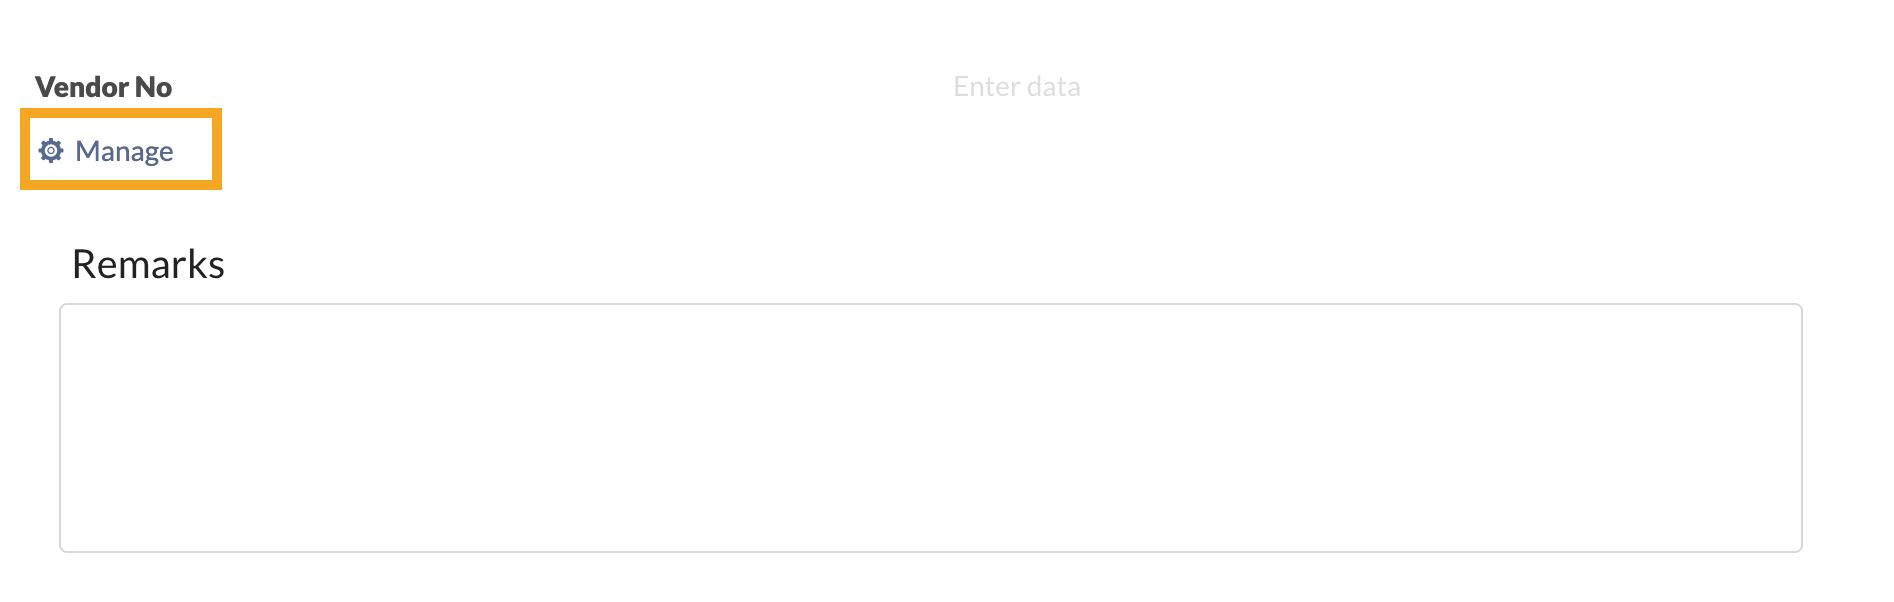
Once custom fields have been created, click on the Manage button to edit them.
Custom field examples
Text custom fields
Text fields allow you to type in any number of characters into the field that you want to track. These fields don’t require any additional setup.
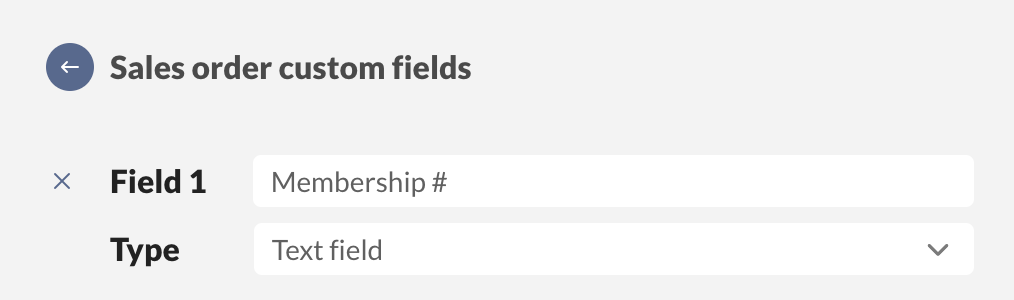
This custom field type is highly flexible, allowing you to enter any necessary written information into these fields.
Drop-down menu
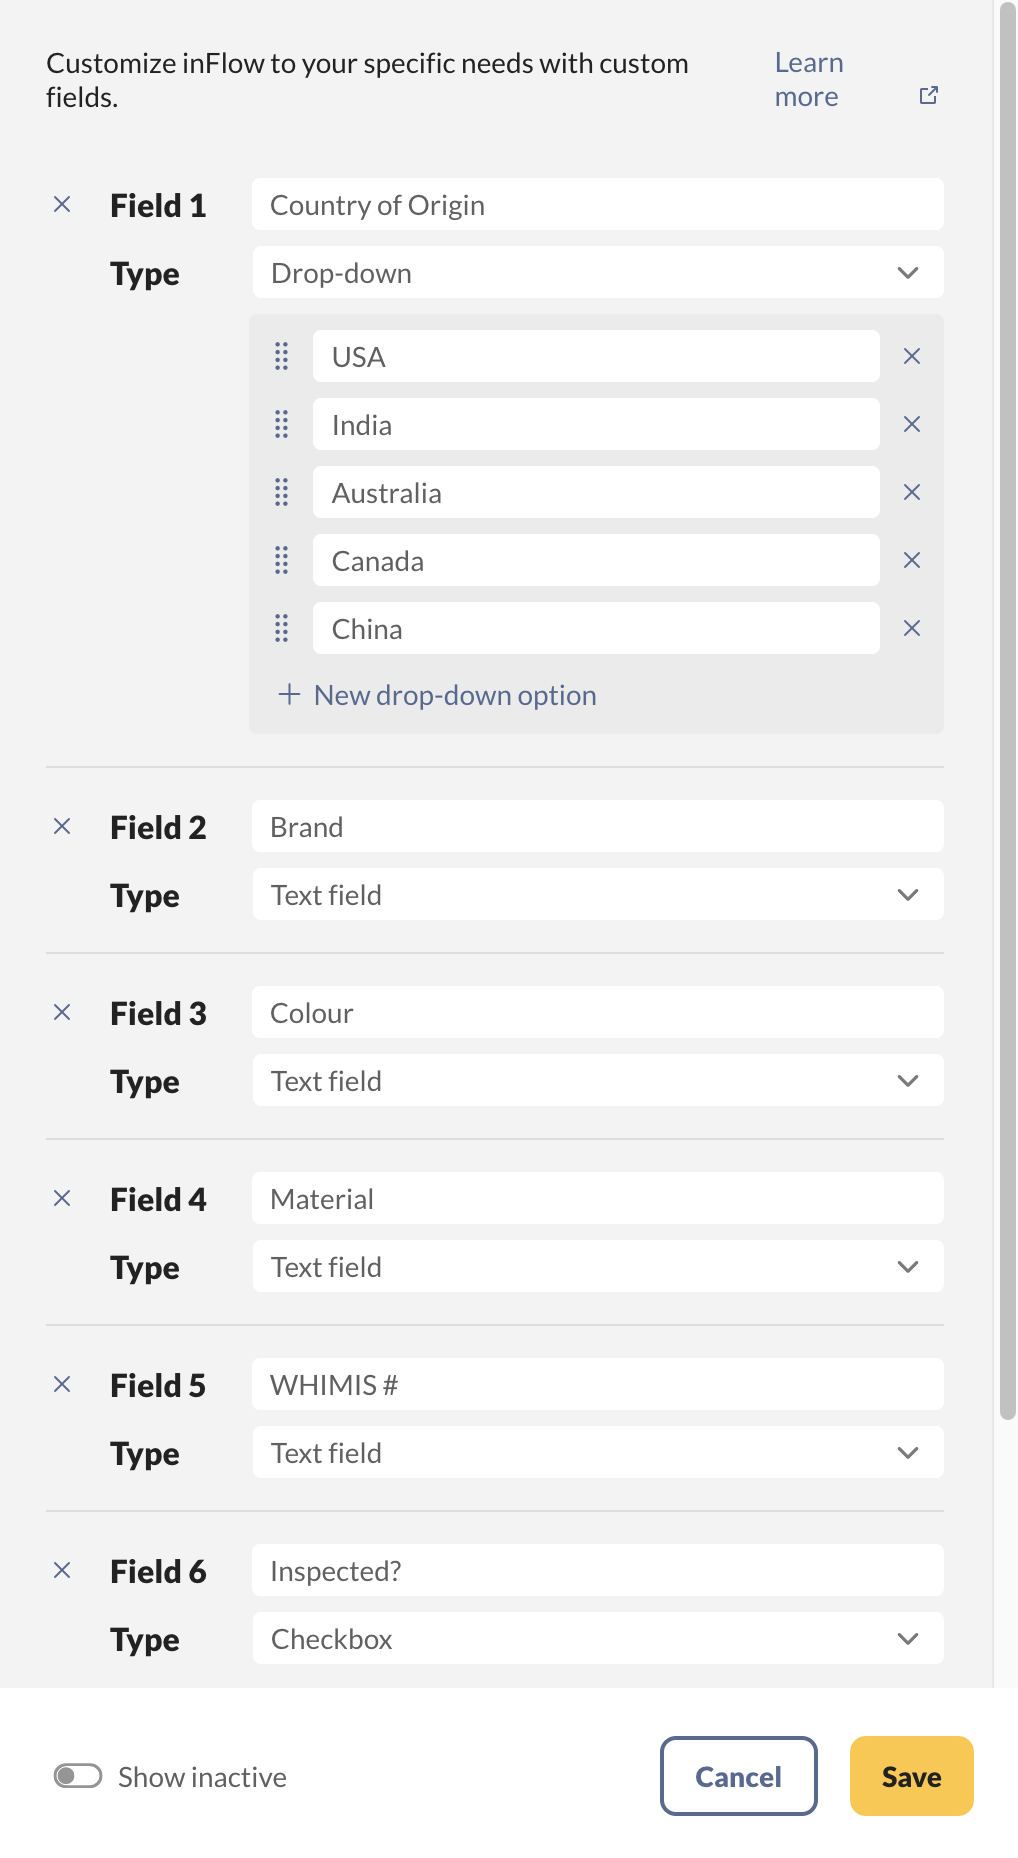
Drop-down menu custom fields enable consistent tracking. You can quickly add or remove options from the inFlow settings. Drop-down field options can have up to 100 characters.
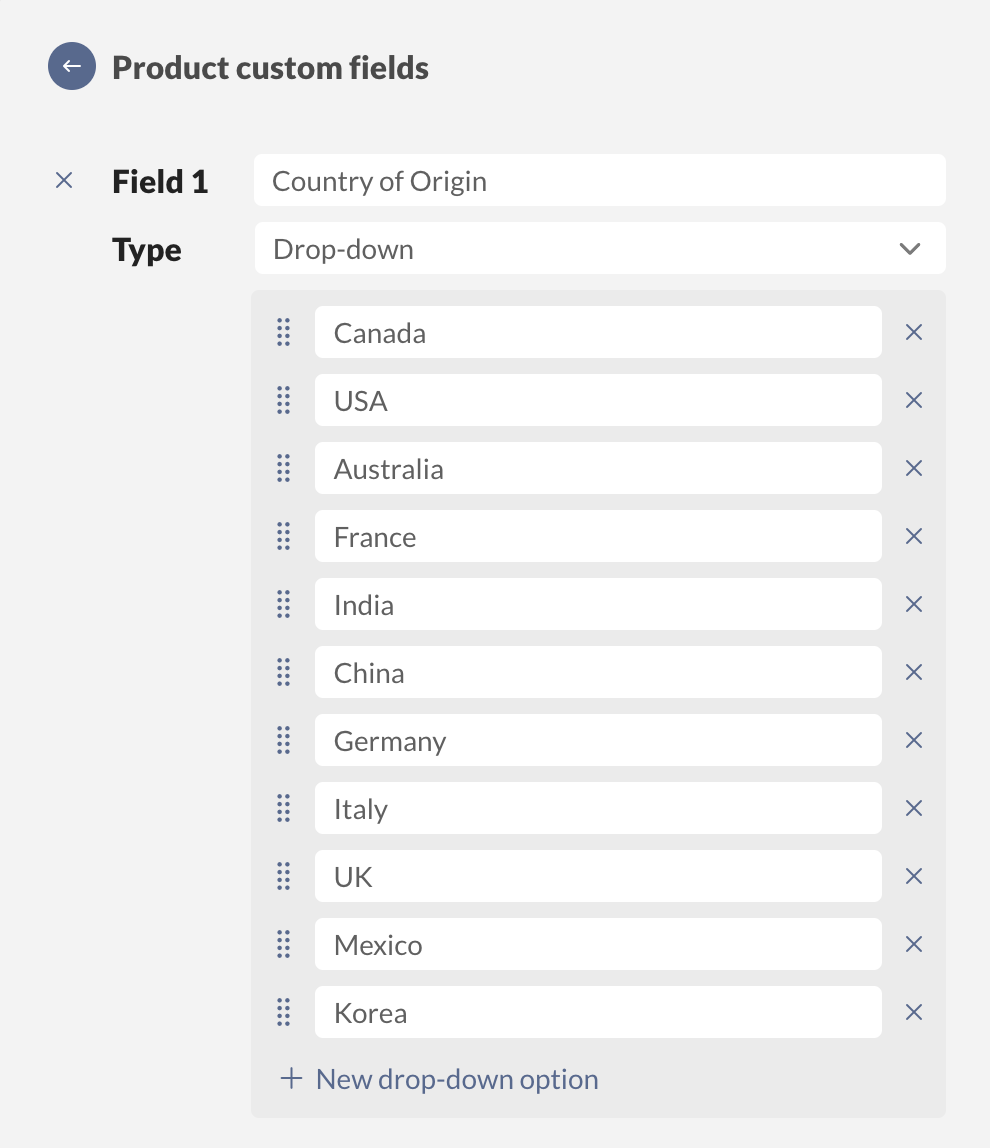
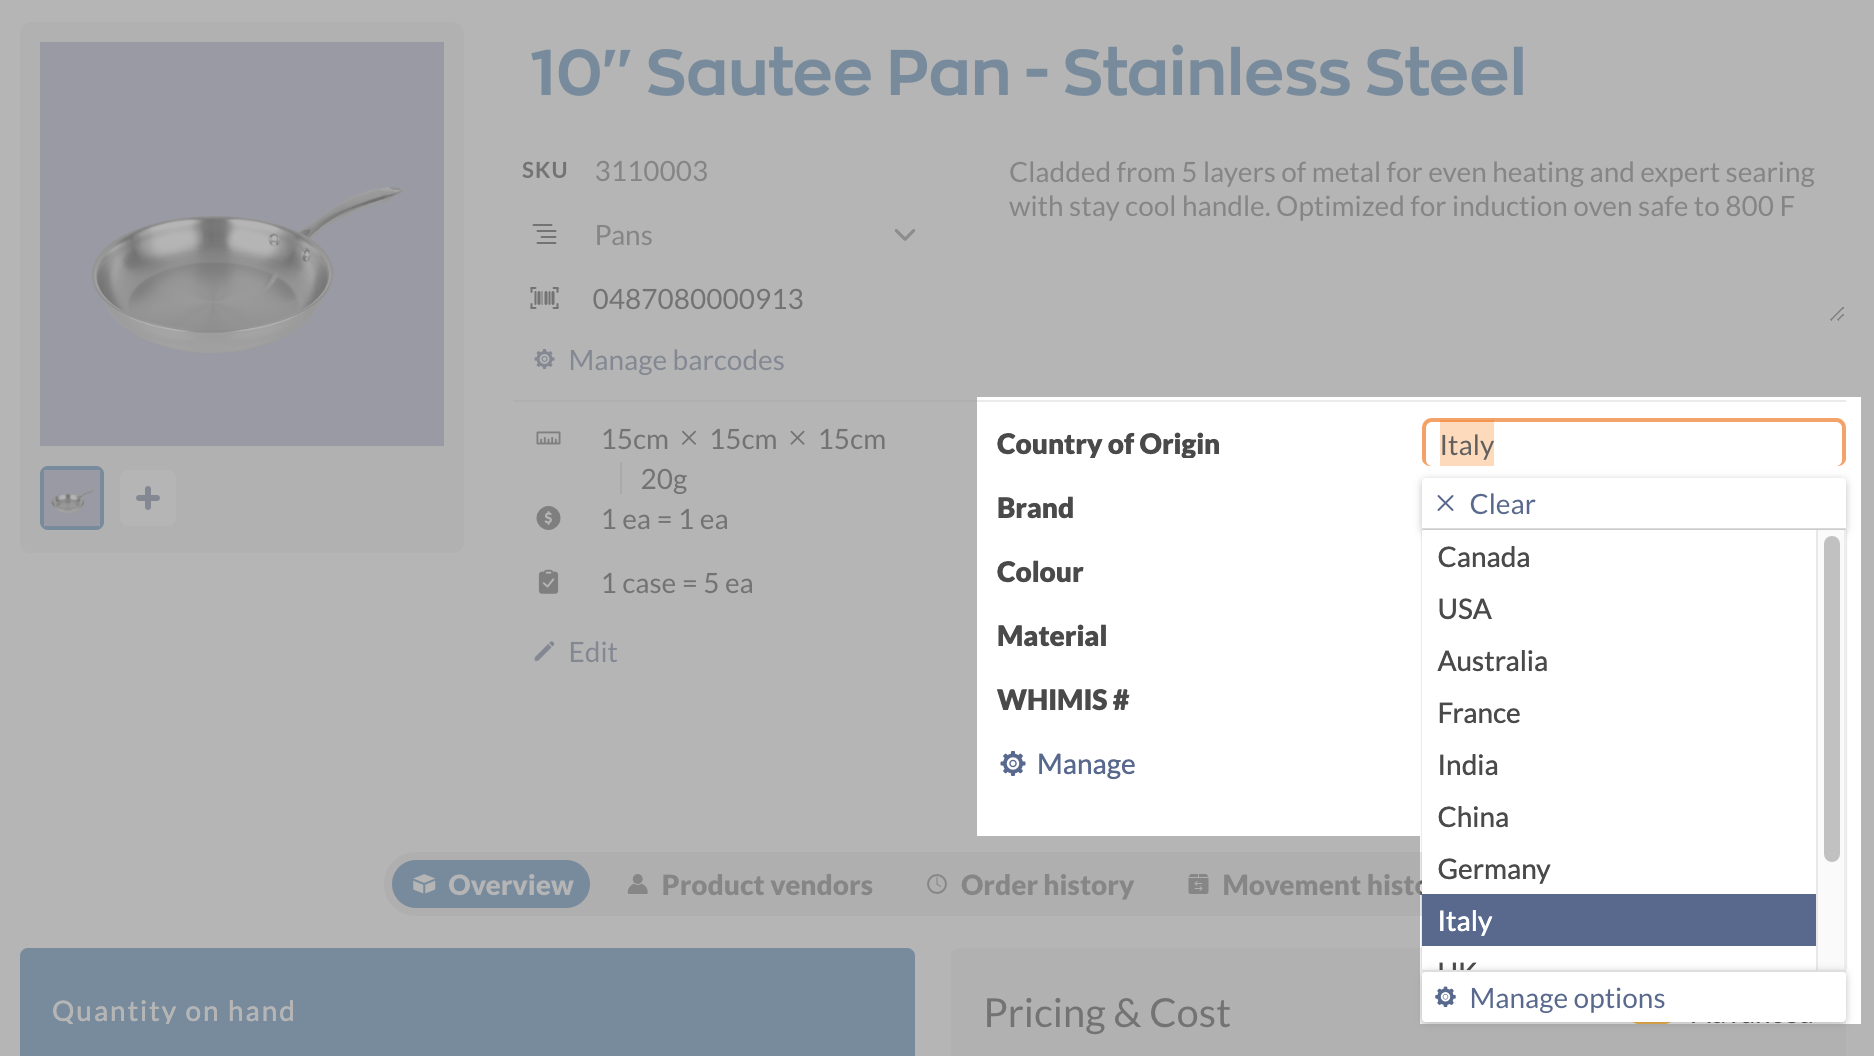
In the example pictured above, the drop-down field is used for tracking the country of origin of the product.
Drop-down menu fields are not available in inFlow for Windows. Instead, the corresponding custom field will display the values that were entered from inFlow for Web.
Date field
This field type brings up a calendar so you can pick a date, which helps cut down on mistakes and makes sure everything’s consistent instead of having to type it out manually.

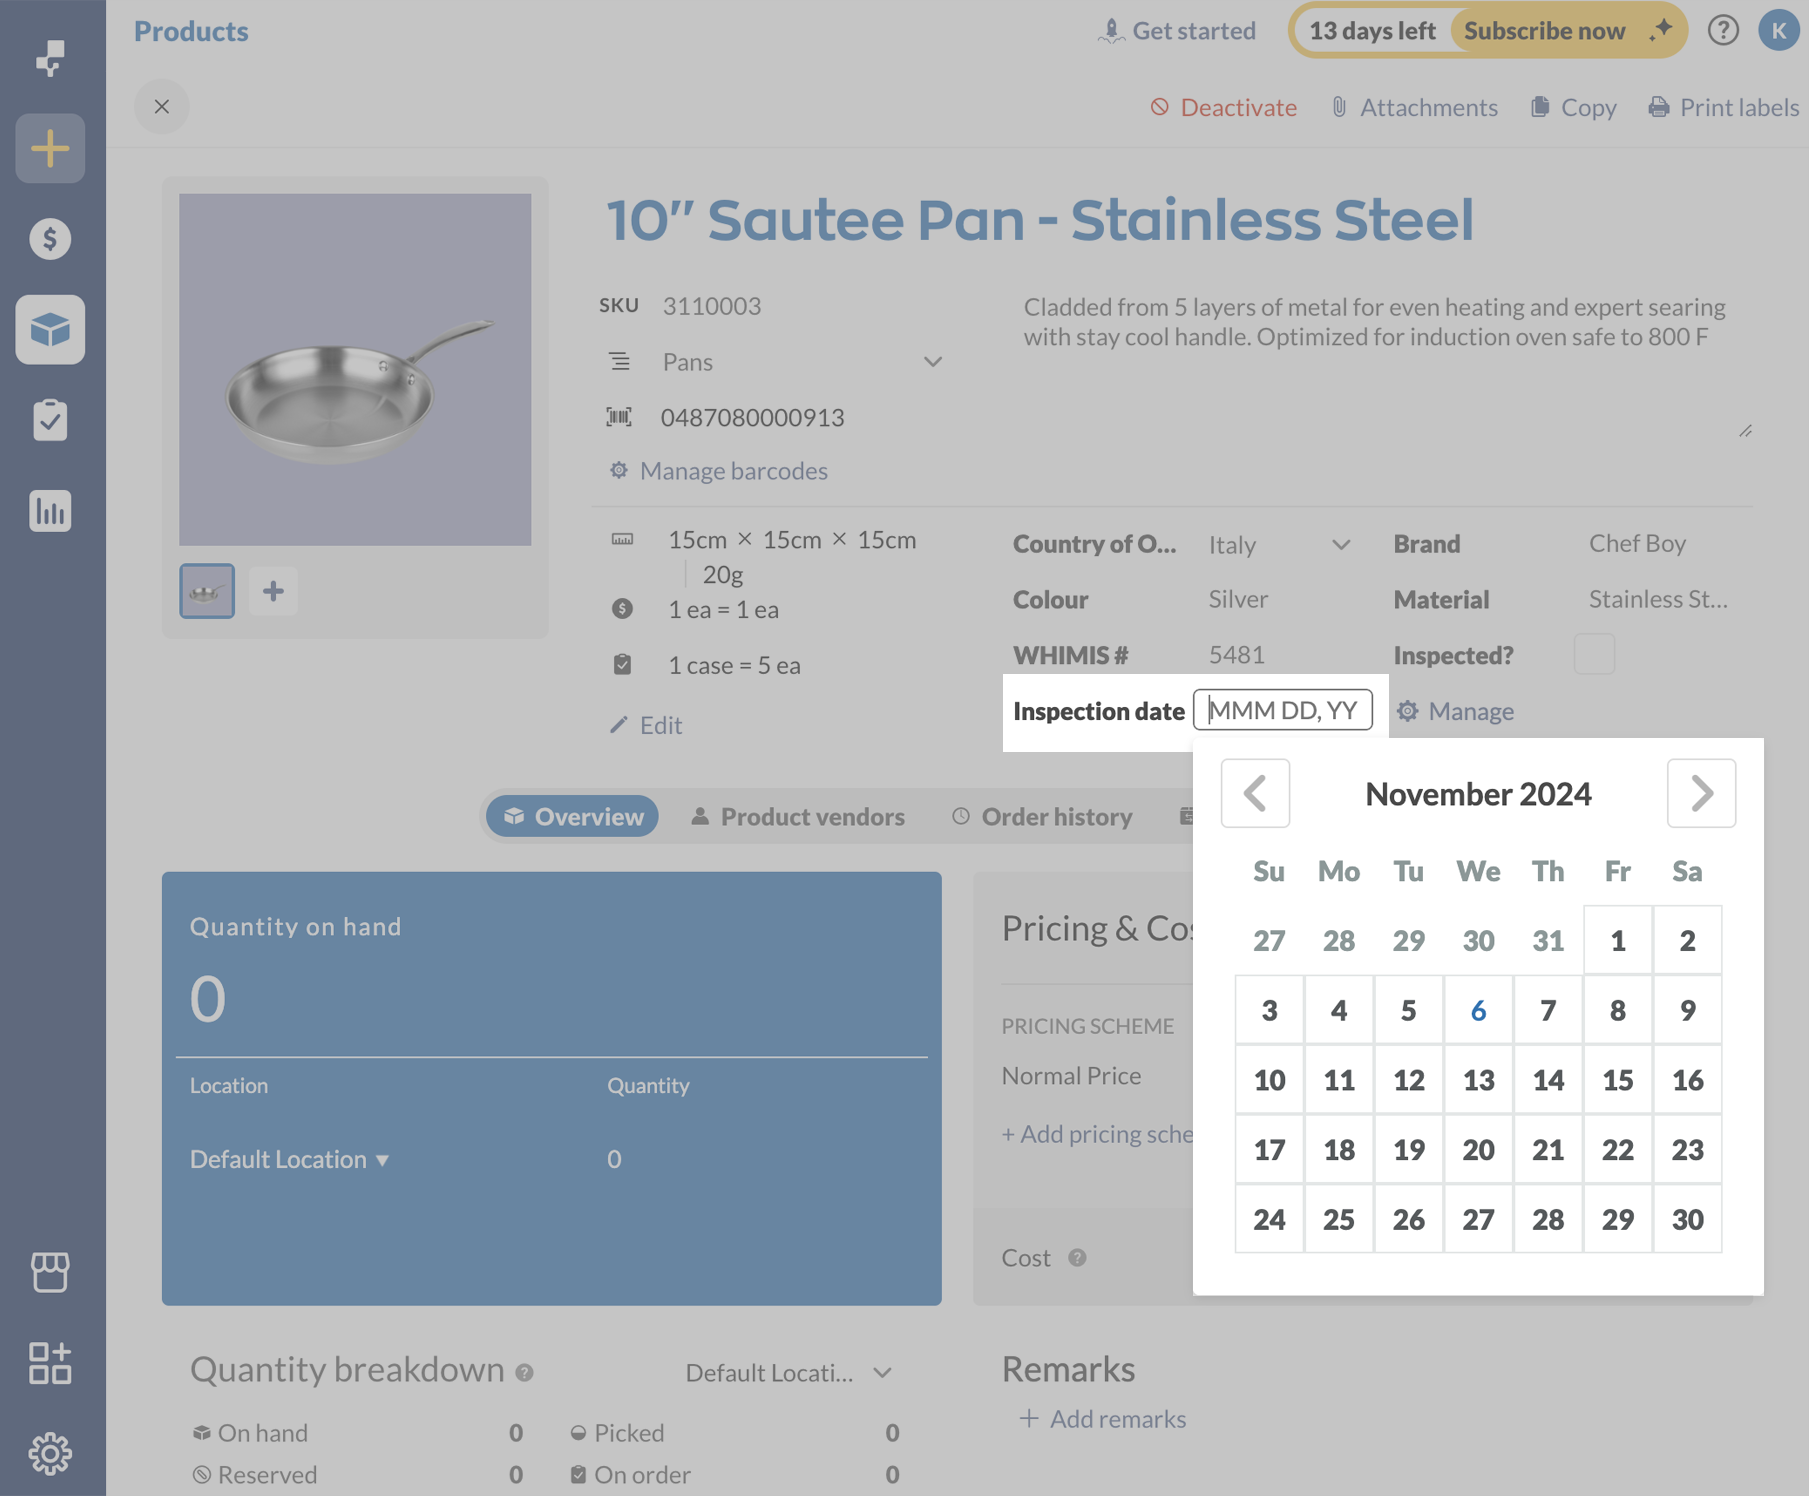
Date custom fields offer a quick way to track dates for when products/orders are audited, inspected, quality control, and more.
Note: Date custom fields are not available in inFlow for Windows. Instead, the corresponding custom field will display the date that has been entered.
Check box
If you need to add a checkbox to a product or an order, use this option.
Note: Checkbox custom fields are not available in inFlow for Windows. Instead, the corresponding custom field will show “Yes” or “No”.

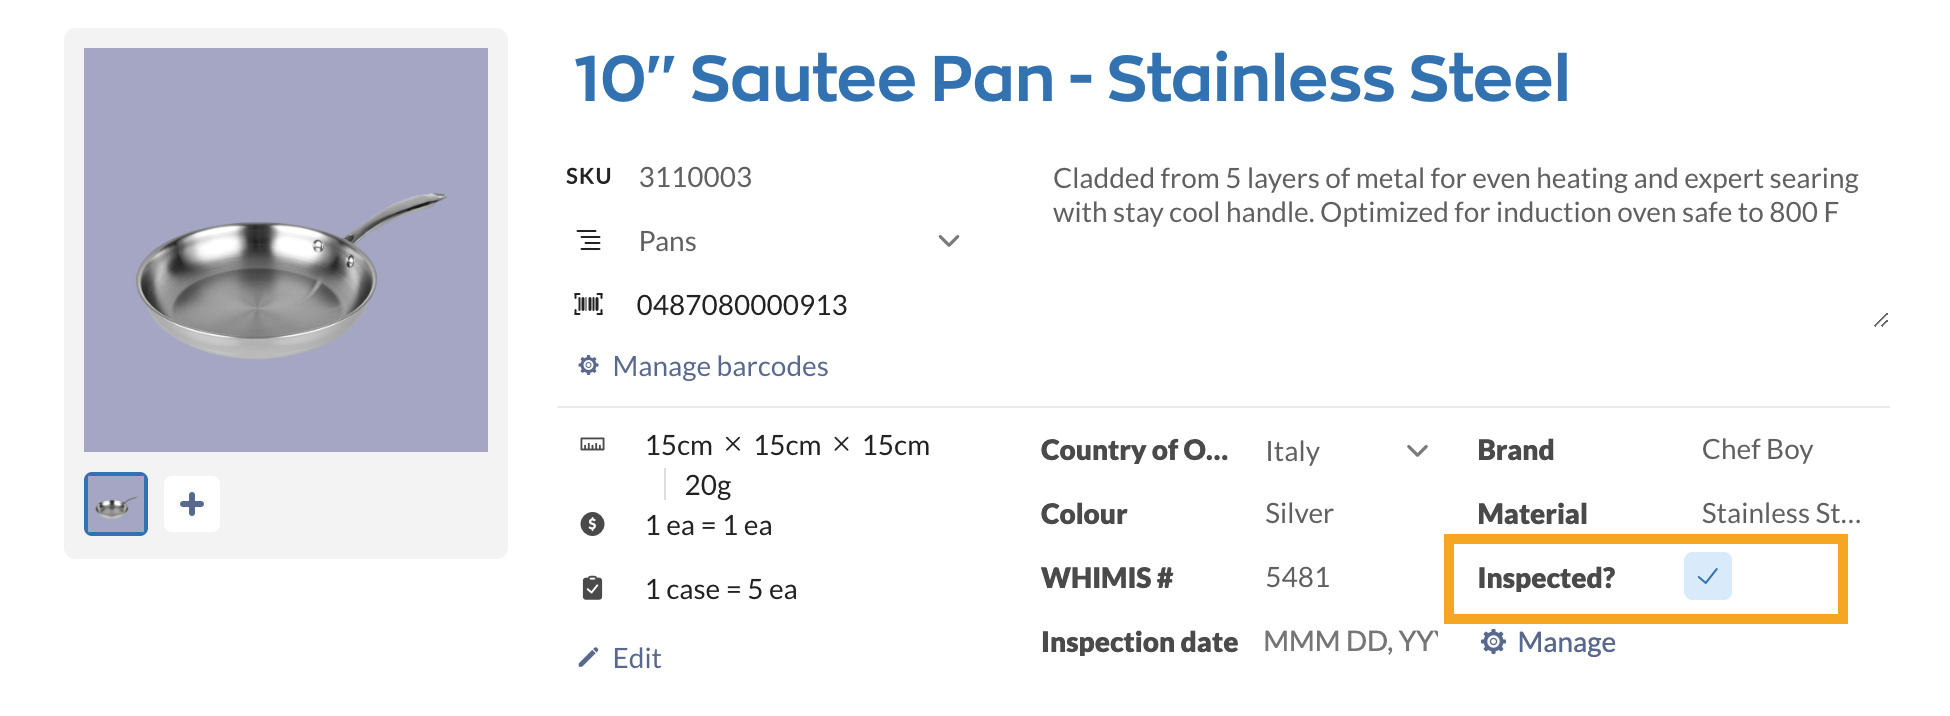
Checkbox fields are great if your team just needs to quickly mark if a product/order has been reviewed, been through quality assurance testing, and more.
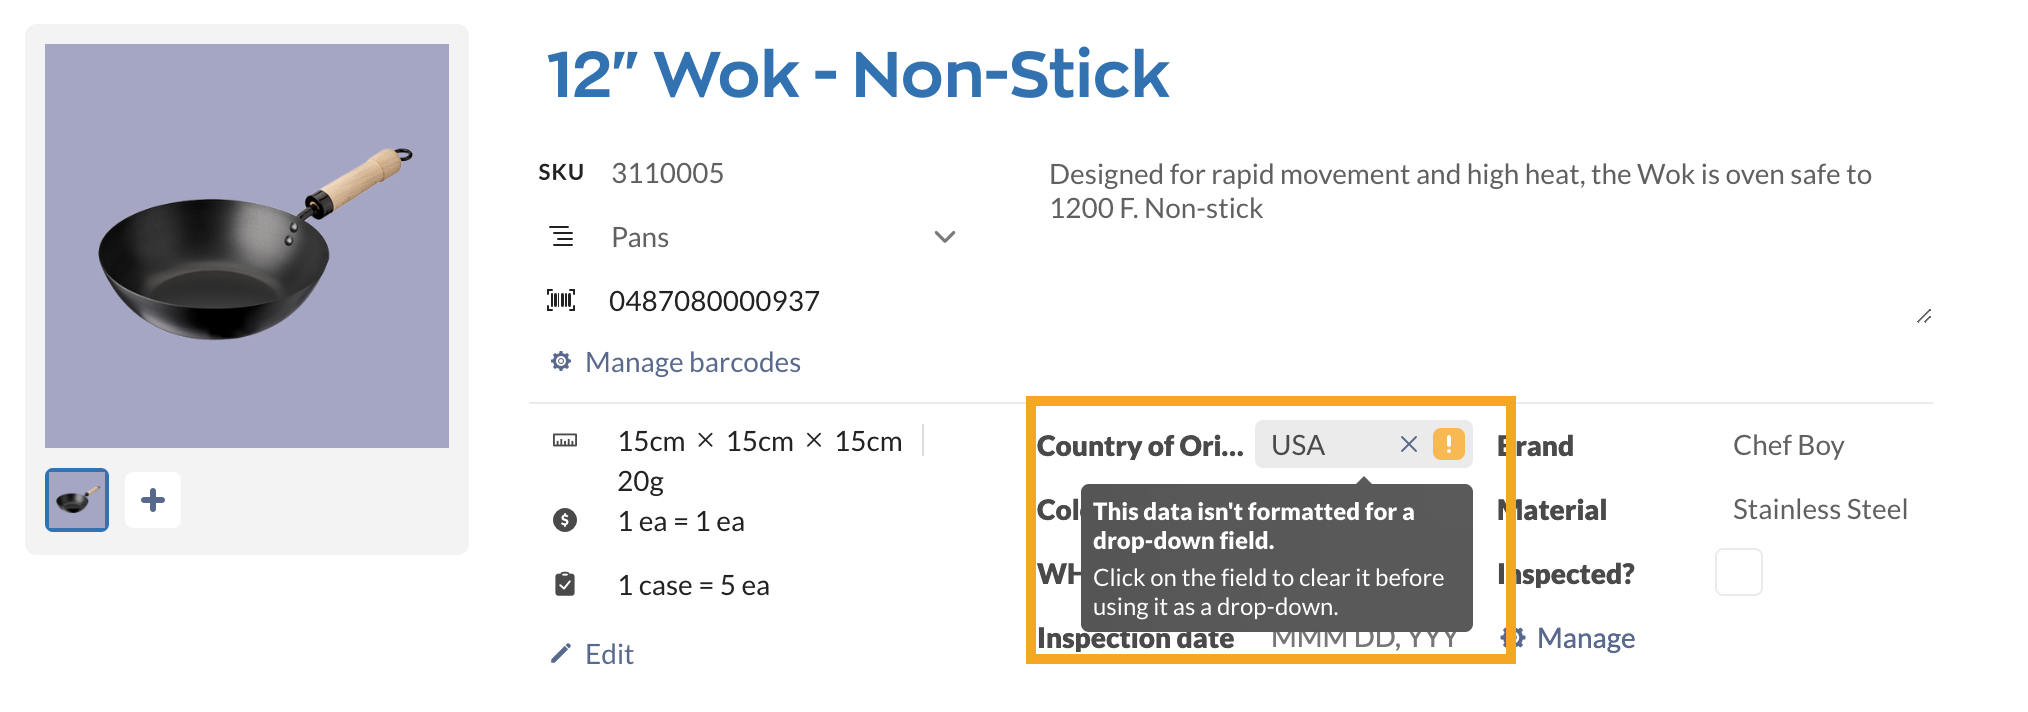
Custom field error
If you see an exclamation mark next to a custom field, it means the data in the field doesn’t match the custom field type that has been selected.
In the example pictured below, the custom field data doesn’t match the drop-down options for the field.
To remove or deactivate custom fields
- Click on the X icon next to the custom field that you would like to deactivate.
- Once you’re done, click Save.
To reactivate a previously removed custom field
- Toggle the Show inactive button to view all deactivated custom fields.
- Click the + icon next to the custom field to reactivate it.
- Once you’re done, click Save.
If a custom field is deactivated and later reactivated, the previous data will reappear in the field.
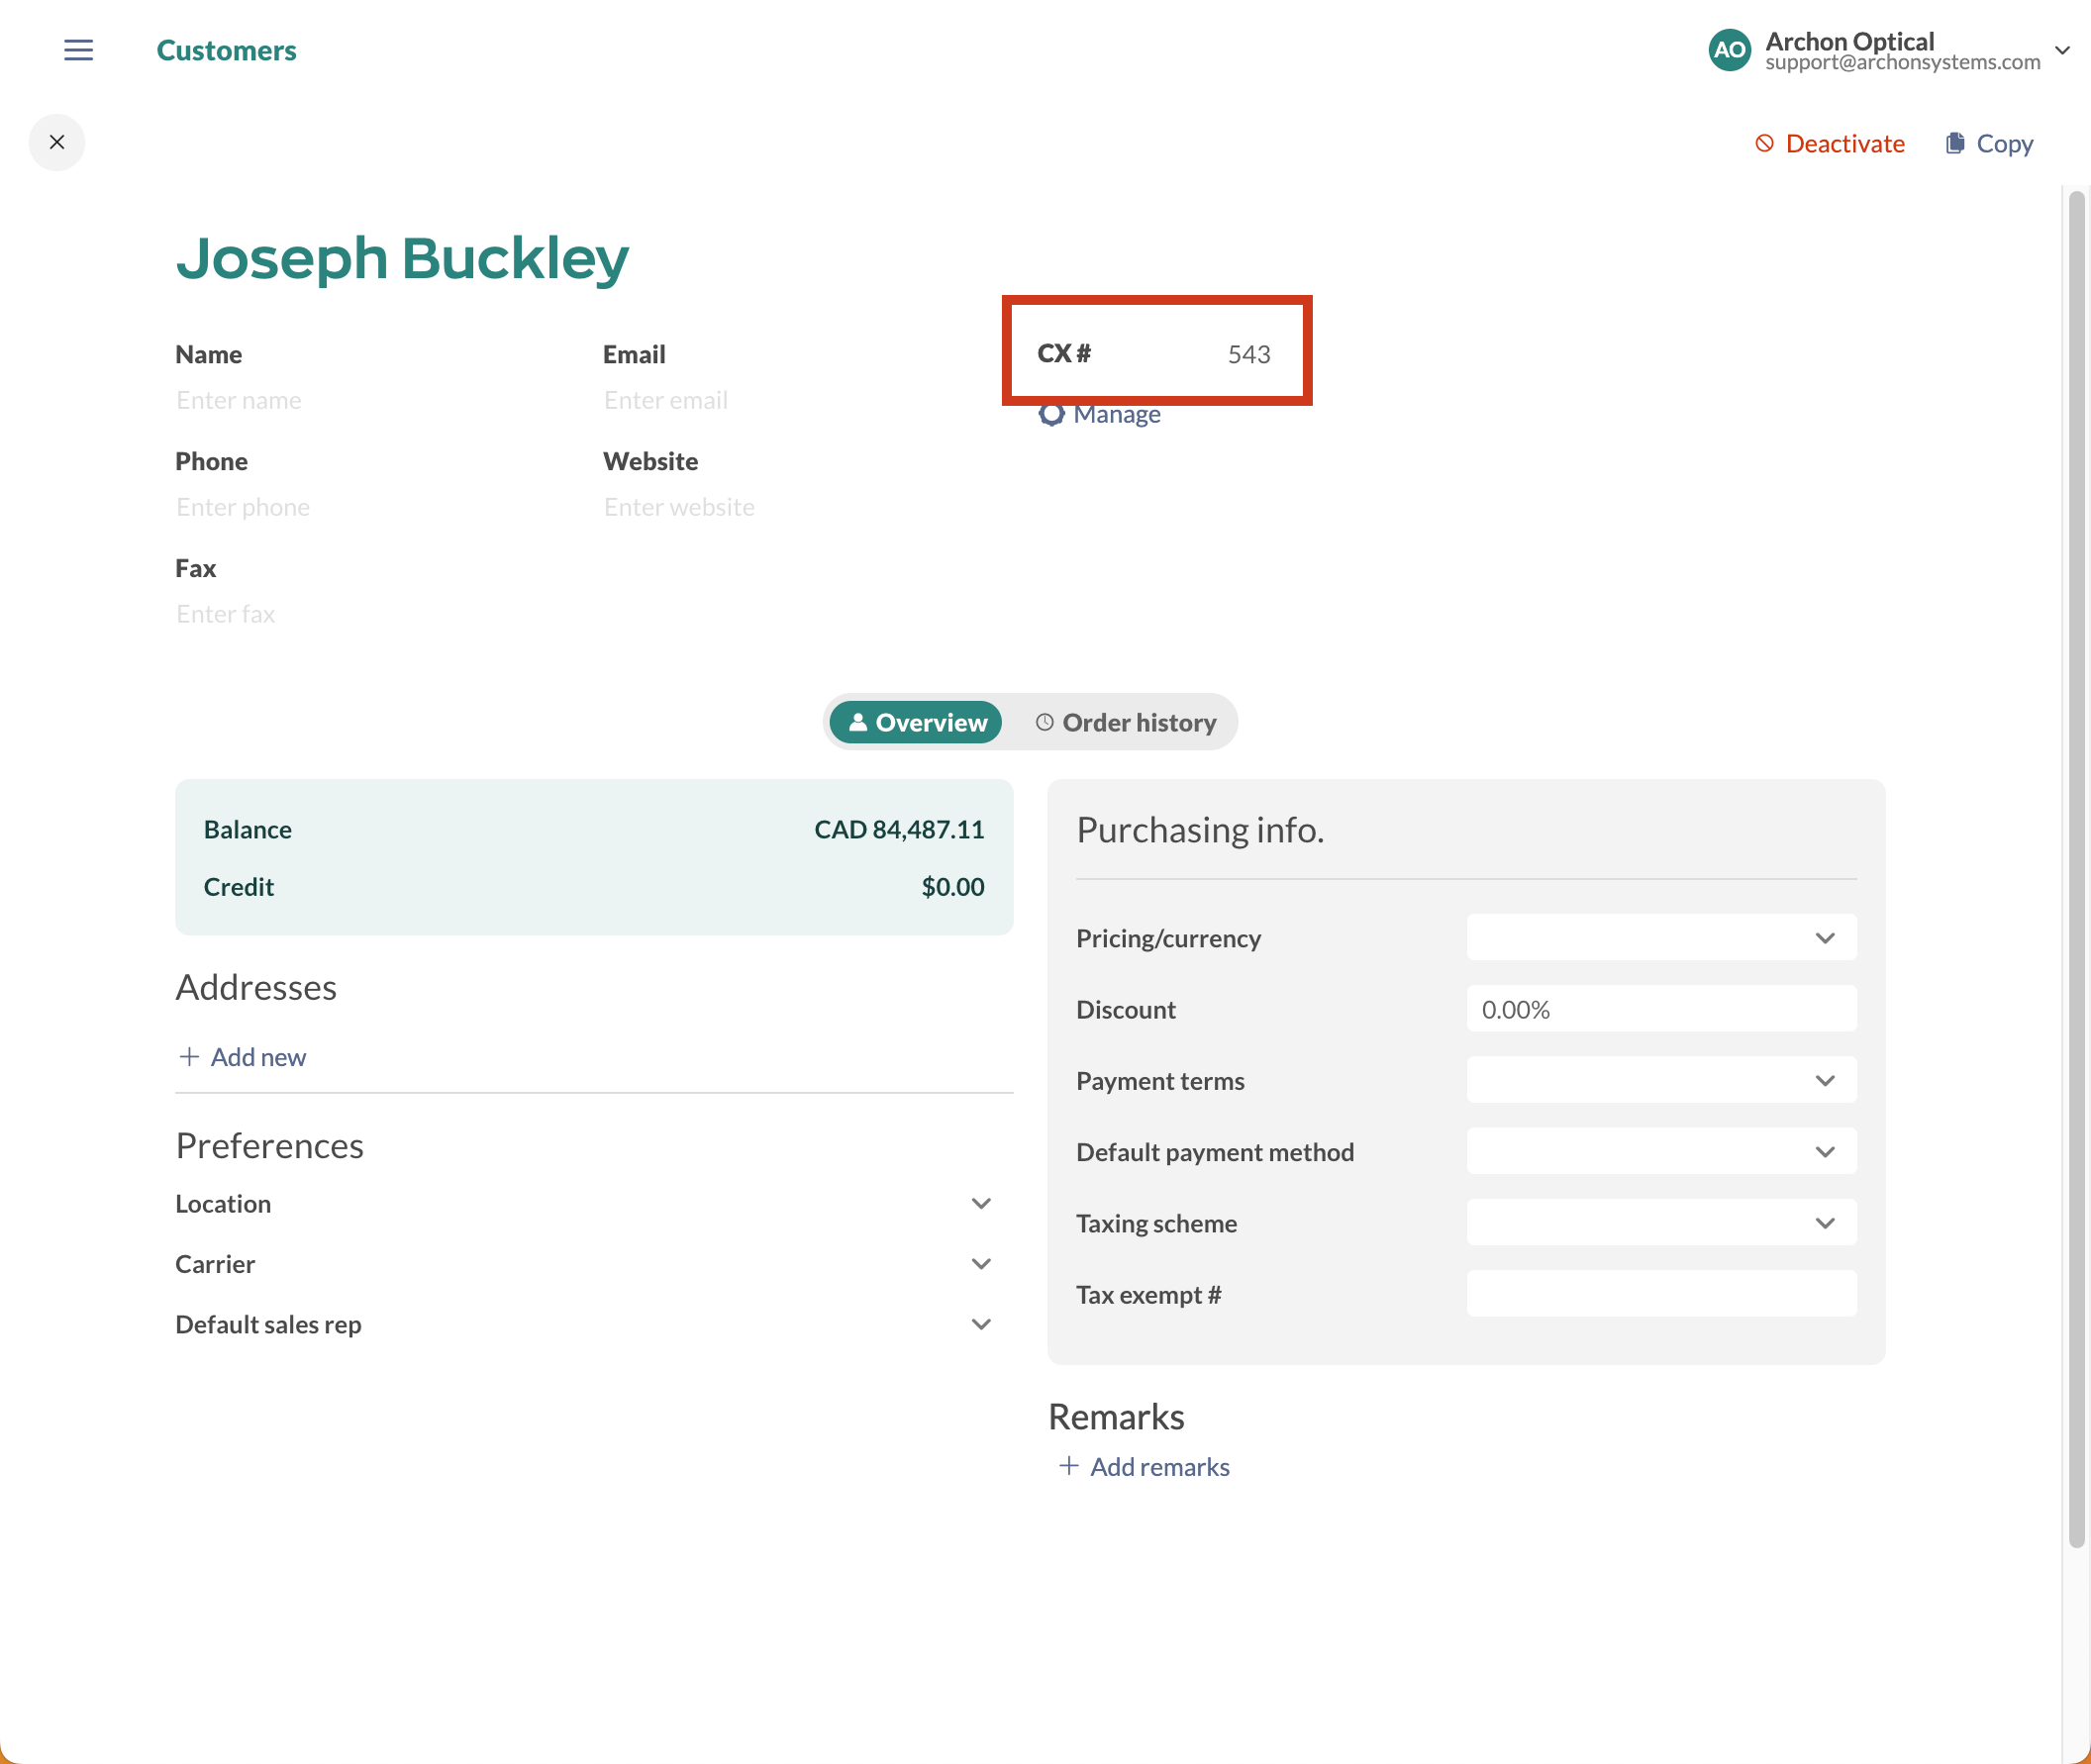
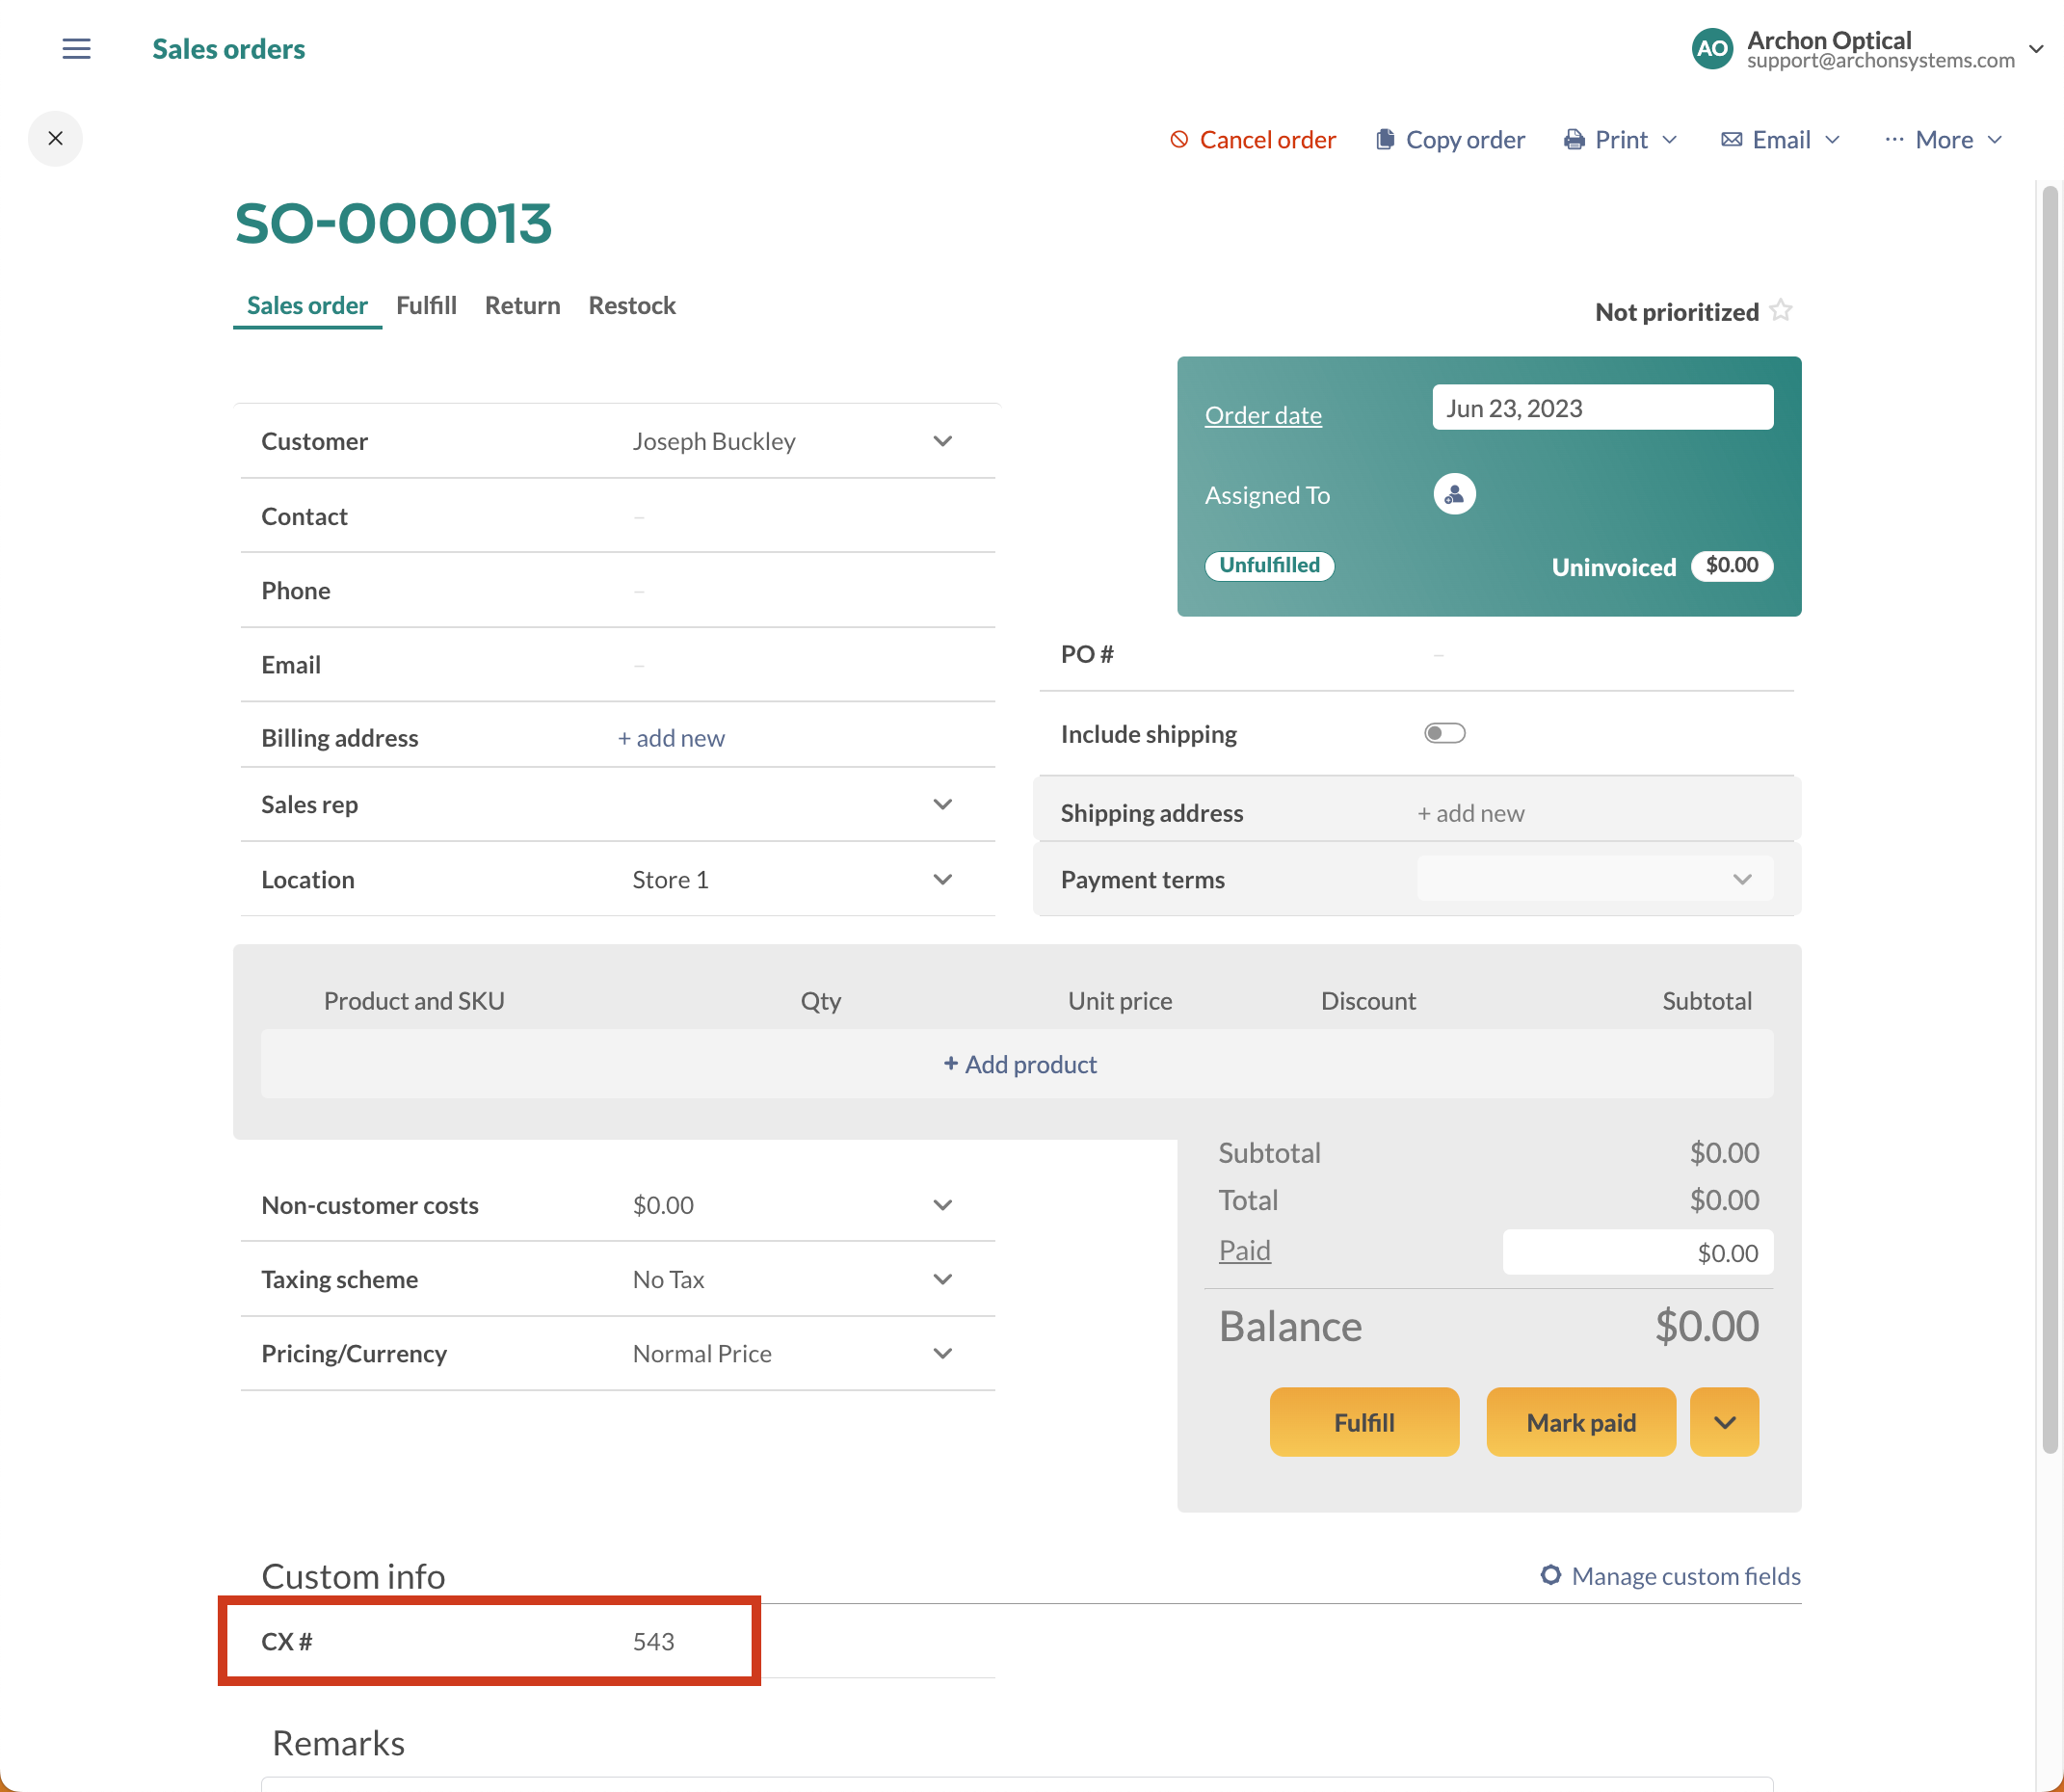
Connecting/linking custom fields

In inFlow, you can create custom fields that can connect to one another. Sales order custom fields can link with customer custom fields, and purchase order custom fields can link with vendor custom fields.
To do this, title the custom field on the customer or vendor record the same as the sales order or purchase order custom fields. This allows the information in the custom fields to be shared. See the below images for an example.
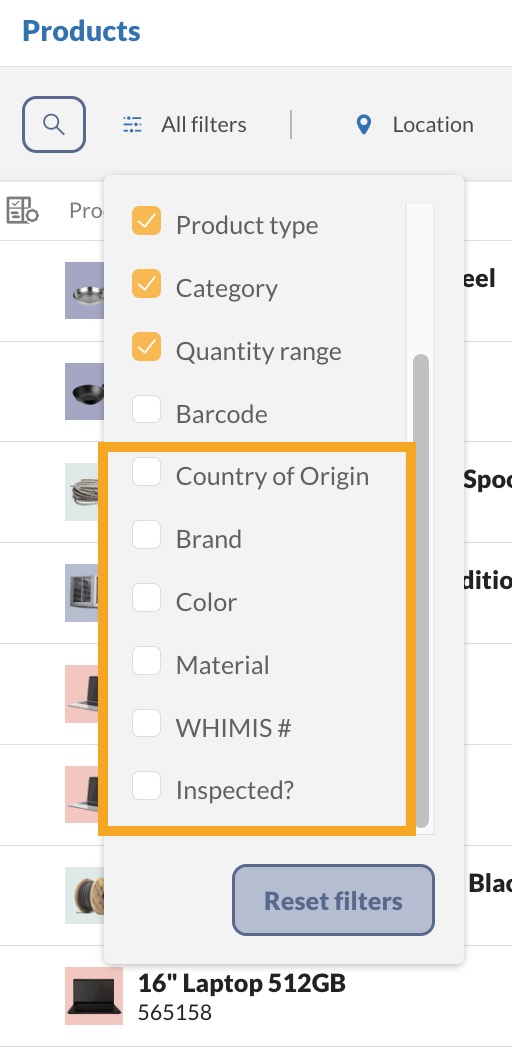
Filtering by custom fields
On any listing view, once you’ve created the custom fields, they will become an available filter you can use to narrow down your search. For the example below, the product custom field named “Country of Origin” is in the product list view.
How to import custom fields
Custom fields can be imported just like any other field in inFlow with three basic steps.
- Create custom fields in inFlow.
- Add custom field data to your CSV import.
- Import the CSV.
Create custom fields in inFlow
In inFlow, create the custom fields and select the custom field type.
- Go to inFlow’s Global settings (Main Menu > Settings > Global.)
- Click Custom fields.
- Choose the section where you would like to create a custom field. (e.g., sales order, purchase order, etc).
- Name the field and select the type. For drop-down menus, enter all the drop-down options before importing your CSV.
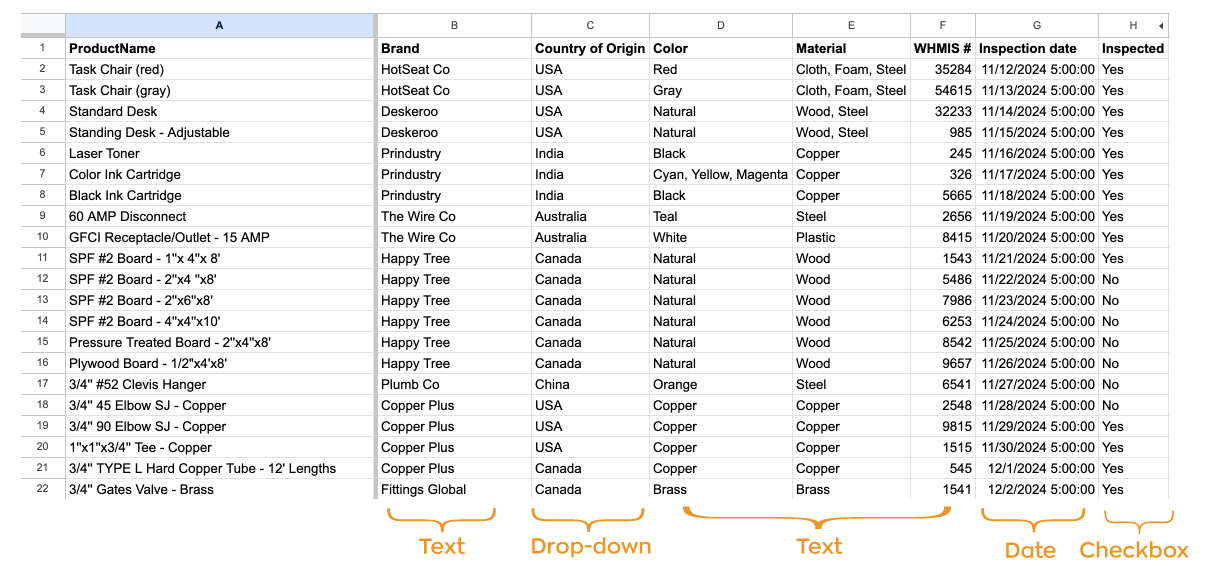
Add custom field data to your CSV import.
- On your CSV template, add columns with the same name as the custom field(s) you’ve added to inFlow.
- Fill out the custom field columns with the information that you want to be imported to inFlow.
Import the CSV
- In the Main Menu, hover over settings, then click Import.
- In the Data type drop-down menu, select Product details.
- Below, select the CSV file from your computer, then click Next.
- A preview of your import file will appear and will let you know how many line products you have in your file.
- If you don’t see any fields below, click on Edit data mapping.
- Match the product name and the custom fields to the matching fields from your CSV (in the drop-down menus)
- Once you’re satisfied that all the fields you need match, click Import.
- A confirmation message noting that your import is in progress will be displayed. Once the import is complete, the team member who started the import will receive an email with the results.
What else can I customize in inFlow?
In inFlow, you can customize different areas to meet your team’s needs.
Customizable inFlow features
- Rename fields: Rename most of inFlow’s fields to a term of your choice.
- Change order numbers: Change order prefixes.
- Document Designer: Create and customize sales and purchasing documents.
- Label Designer: Create product labels to include the barcode, image, and product name.
- Email Designer: Create email templates based on different inFlow features.

Windows
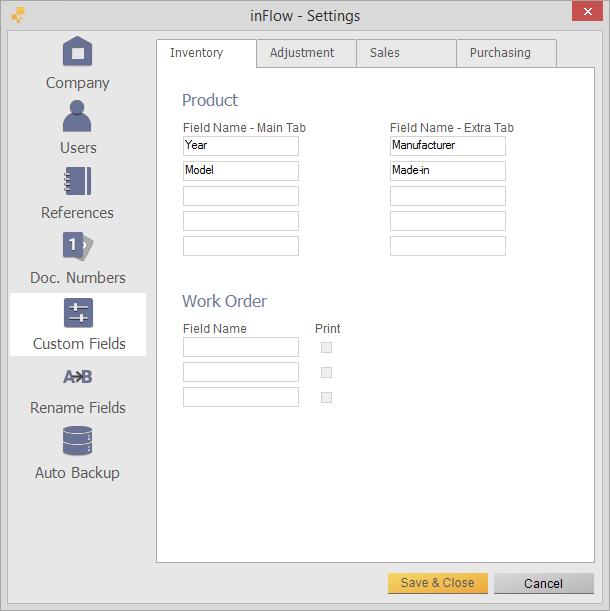
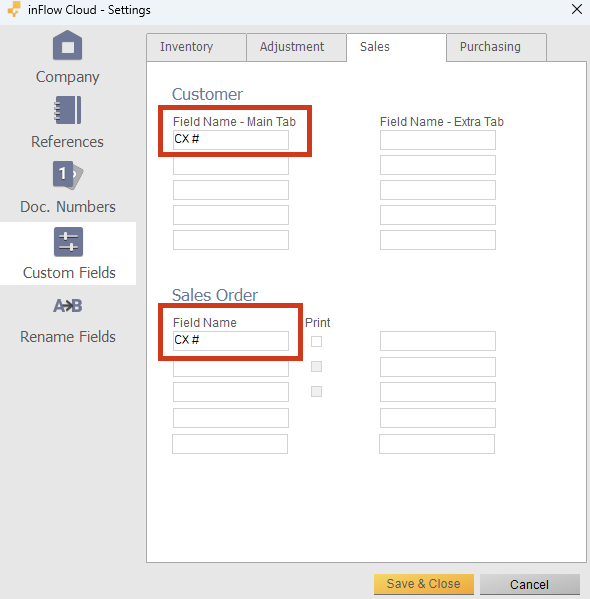
Setting up custom fields
You can add 10 custom fields per section. Take a look below to see how you can set them up.
- Go to Main Menu > Settings > Global.
- Choose the Custom Fields icon on the left.
- Select the correct tab (e.g., Sales = Customers, Sales Orders) according to where your custom fields should be.
- Enter your field names.
- Check the Print option if you’d like the custom field to show up on printed/exported records. If it’s an internal field only, uncheck it so that it only shows on the order screen but not on any printed documents
- Click Save & Close.
Linking custom fields
In inFlow, you can create custom fields that can connect to one another. Sales order custom fields can link with customer custom fields. Purchase order custom fields can link with vendor custom fields.
To do this, title the custom field on the customer or vendor record the same as the sales order or purchase order custom fields. This allows the information in the custom fields to be shared.


I STILL DON’T KNOW WHAT A CUSTOM FIELD DOES
Above under “filtering for custom fields” the instruction refer to “style” as an option but that isn’t reflected in the picture so it’s difficult to be sure how to filter with custom fields.
Where is main menu