How to create and complete stock counts (Windows)
Sometimes, you’ll want to do a physical count of what’s in your warehouse to check it against inFlow’s recorded stock levels. You can do this and set your stock levels with Stock counts.
Check out Stock counts on inFlow Inventory for Web for stock counts that can be divided by multiple sheets, among other features!
Count sheets/Stock-taking can help you do this quickly and, when you’re done, easily adjust the stock levels from the same screen.
Once you’ve started your count, as a general best practice, you must stop processing orders /inventory movement until you’ve finished your count. You can try counting smaller sections of your warehouse if you’re unable to stop inventory movement for certain items.
Creating a Stock count (formally called count sheet)
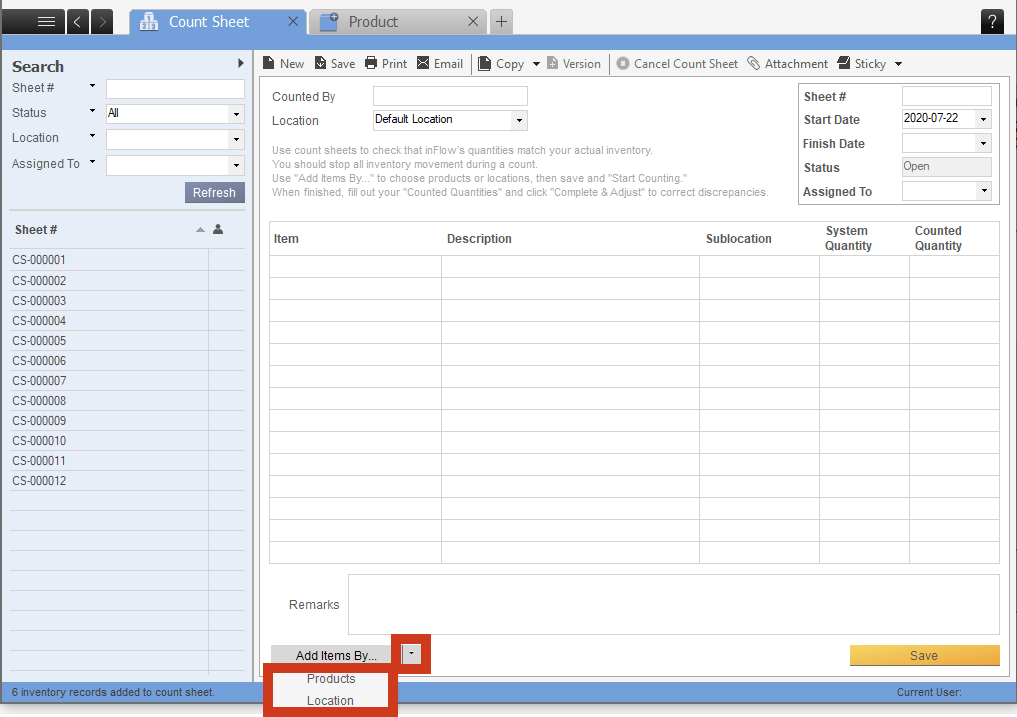
- Go to Main Menu > Inventory > Count Sheet.
- Choose the Location you will be counting.
- Click the Add Items By button in the bottom left to add all items from the set location.
- Make a list of items you’d like to count. You can add items by Products or by Location.
Add products to the count sheet
- Choose the items that you would like to include in your count from the list at the left. You can add them to the list on the right using the buttons in the center.
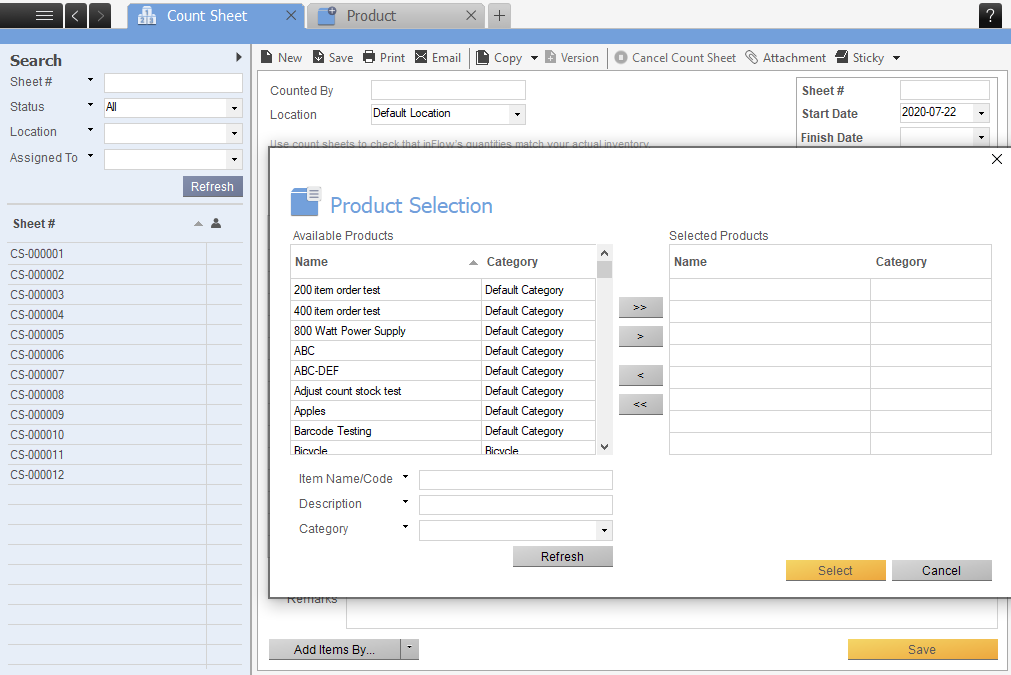
- When all the items you want to count have been added to the list on the right, click Select.
Have a specific list of items you can’t filter for? Hold down the CTRL key and click the individual items you want to count. Once they’re all selected, click the > button to add them to your list!
Note: If you have items you want to count in multiple locations, you will have to create a new count sheet for each location.
Start Counting
When you’re finished adding products and are ready to start your count:
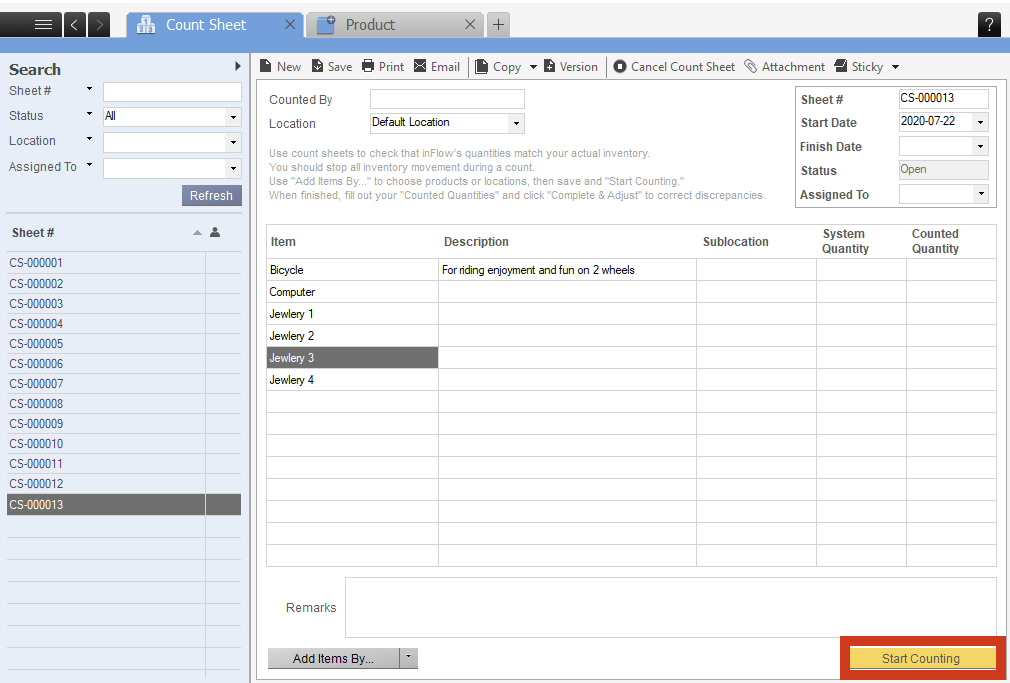
- Click the Start Counting button at the bottom of the screen (if you see Save instead, please click that instead, Start Counting will appear).
- A warning will appear asking you to stop all inventory movements during the count to prevent inaccuracies.
- When you’re ready, click OK to proceed.
- Once pressed you will see the System Quantity get populated. (what inFlow recorded the qty to be currently)
- Click Print to get a copy of your count sheet to use during your count. (If you’d rather use a list that doesn’t include stock estimates, click print prior to step 1 above.
- Count your stock!
- There are two ways to record the results of your count:
a) You can write the numbers down on the printed list, then enter them in the Counted Quantity column all at once.
b) Or you can enter them directly as you count.
TIP: If there’s no change to an item’s quantity, you can just leave it blank. - Once you’ve finished entering the counted numbers, you will see a Complete & Adjust button
- Click Complete & Adjust to adjust the system quantity based on your counted levels. inFlow will save a record of the change.


You can use the Count Sheet Report to review any loss/ shrinkage.
You can also click the Uncomplete button if you need to re-open the count sheet (though it’s important to note that this is not recommended as your system quantities may have changed by then).
Can I partially complete a count sheet?
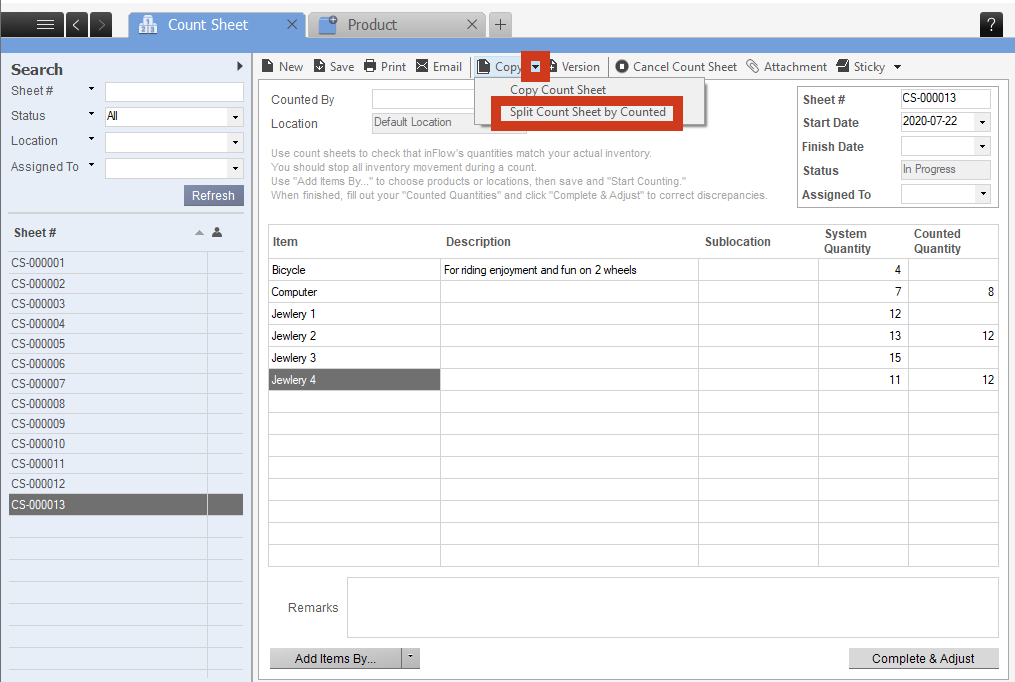
It’s not possible to partially complete a count sheet, but you CAN choose to split one you’ve already started. This will let you complete and adjust the items you have counted and leave the rest for another time.
To split your count sheet
- Enter all your counted quantities first, as any items without them will be moved to the new sheet during the split (i.e., don’t skip items that are unchanged).
- When you’re ready, click the Copy button at the top of the page and choose Split Count Sheet by Counted.
- A second count sheet will be created, containing any items that did not have a Counted Quantity entered on the old sheet. This new sheet will use the original Sheet # with a -2 at the end.
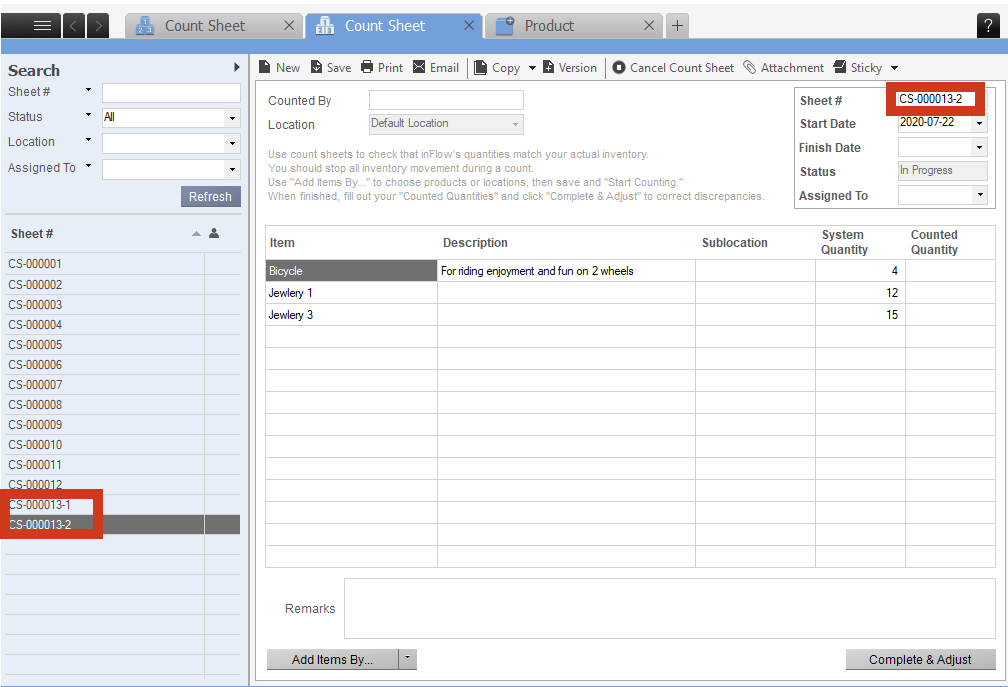
- Click the Count Sheet tab at the top of the screen to return to the original count sheet (your original sheet will be -1).
- Complete & Adjust.
- When you’re ready to finish counting, the sheet you created in Step 3 will be waiting!
If you’re not able to get back to this count sheet right away, you can save the count sheet and continue counting later. If there have been inventory movements since you started the count, then we suggest canceling and creating a new count sheet. It’s important to take a new snapshot of your system quantity so there are no data conflicts when doing your full count.
Use Copy > Copy Count Sheet to create a new version with all the same items and start counting!
Don’t forget to cancel the split version, as you won’t be using it.


0 Comments