How to transfer stock between locations
As demands change, being able to move your inventory to meet customer needs is essential. From asset tracking to running a retail store, stock transfers are helpful for moving your products from where they are to where you need them to be.
Please note that this feature is only available on select plans or add-ons.
Web

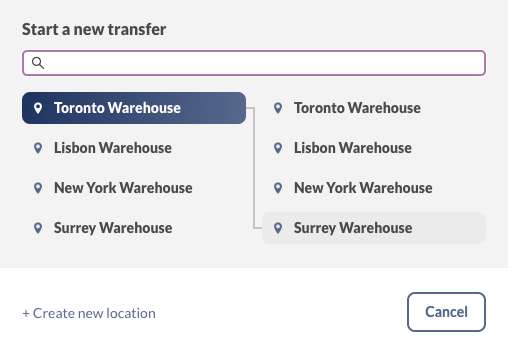
- Go to Main Menu > Create > Transfer.
- Select the sending location, then click on the destination location where you’re transferring the products.
Click on Create new location to add a new main location to inFlow.
Creating and sending a stock transfer
Now that you’ve created a stock transfer order, you can add the products that need moving.
- In the center of the page, click the +Add products button to add the products to transfer.
- When selecting your product, the drop-down menu will stay open. This is so you can select different products from the list to transfer. Click on the same product more than once to increase the quantity you want to transfer.
- When you’re done selecting the products, click outside the drop-down menu to continue processing the stock transfer. You can edit the quantity and the sublocations from here.
- When ready, click on the Send transfer button. You’ll notice that the order status is now set to In Transit to the destination location.
Note: the quantities listed in the product picker drop-down menu shows quantities available.
Customizing the stock transfer product list
Sorting products
To apply a filter, click the table headers that match your needs.
Rearranging products
Rearrange the products on the product table by clicking and dragging the grab handles located on the left side of each product.
Viewing product records
If you want to look at a product that is on the product list, hover over it and click the link to open it in a new tab.

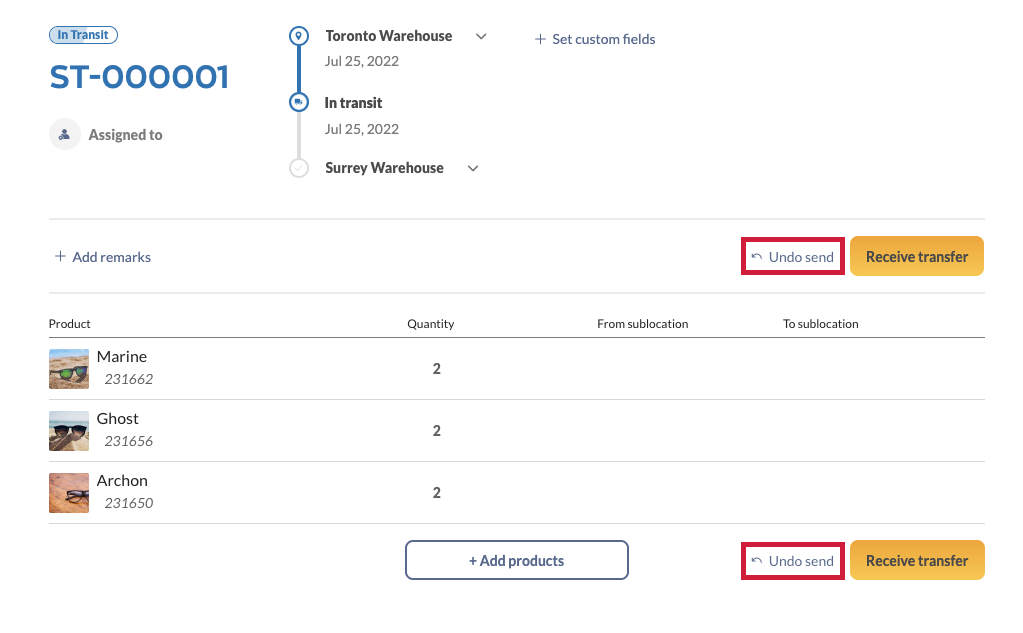
Undoing a sent transfer
If you sent a stock transfer by mistake, you can undo the transfer to restore your product quantities.
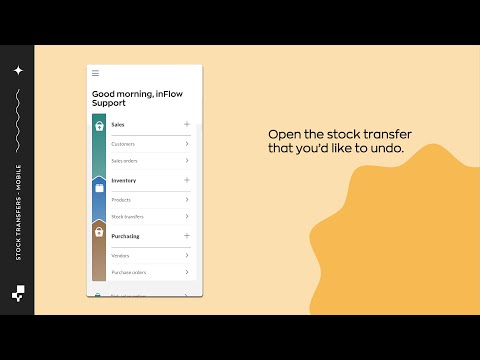
- Open the stock transfer that you’d like to undo.
- Click on Undo send located next to the Receive transfer button. The stock transfer will be saved, and the transfer status will change back to Open.
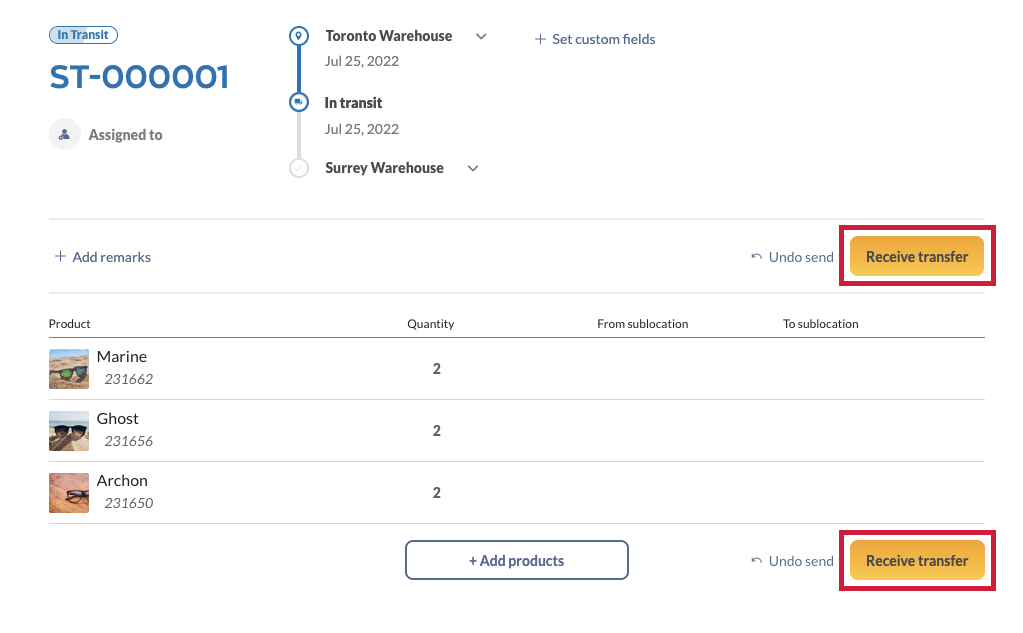
Receiving a stock transfer
When the products arrive at the destination location, you can open the stock transfer order and click the Receive transfer button. This completes the transaction.
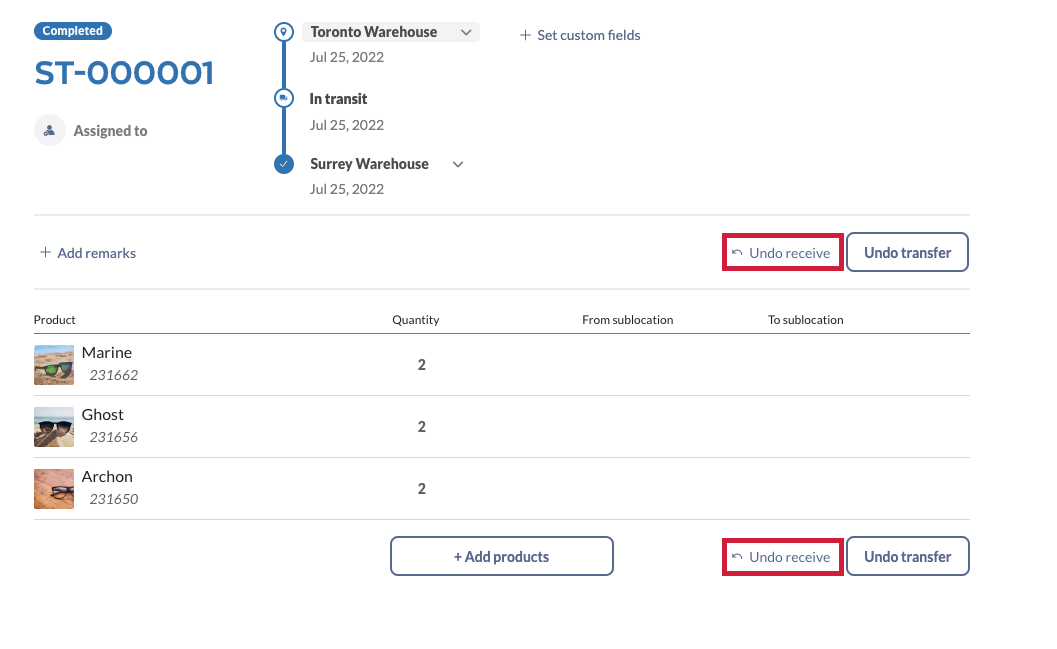
Undo a received transfer
If you received a stock transfer by mistake, you can undo that action to set the transfer back to the In transit status.
- Open the stock transfer that you’d like to undo.
- Click on Undo receive next to the Undo transfer button. The stock transfer will be saved, and the transfer status will change back to In transit.
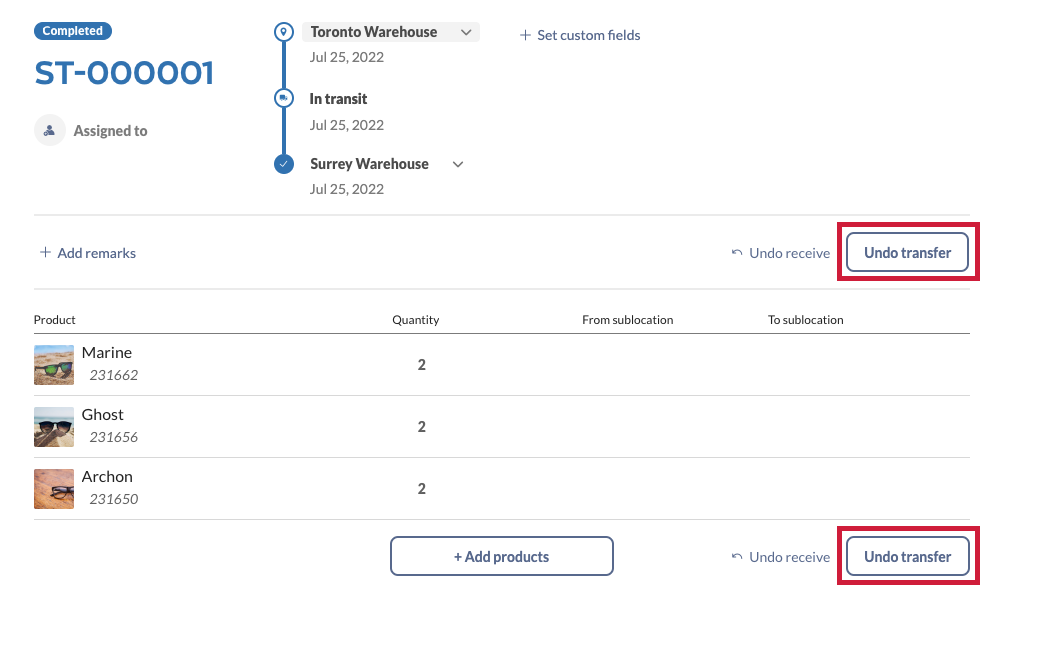
Undo transfer
If you’d like to undo the whole transfer, you can do that too.
- Open the transfer you’d like to change.
- Click on the Undo transfer button.
From here, your stock transfer will revert to Open status. You can also click the Cancel button at the top right of the screen if you don’t want to complete the transfer anymore.
Creating transfers with serialized products
Creating a stock transfer with serialized products is very similar there’s one extra step. See below for complete steps.
- Go to Main Menu > Stock transfer list.
- Click on the +New transfer button.
- On the window that loads, click on the location you want to transfer products from, then click the destination location.
- In the center of the page, click the + Add products button, and select the serialized products you need to transfer.
- Click outside the drop-down menu, and select the serialized product.
- Next to the quantity, click on the gray square symbol. This represents the serial numbers you need to select.
- A list of your serial numbers will load in a drop-down menu below the quantity. Select the serial numbers from the list that you’ll be transferring. The number of serial numbers selected will always equal the quantity of the product on the order (3 products = serial numbers).
- Once you’ve picked the serial numbers, the square will turn blue. This means you’ve selected enough serial numbers for the amount of products on the order. You can continue with the transfer.
Stock transfer options
Printing stock transfer documents
- To print a stock transfer, click the Print button at the top right side of the screen.
- A new tab will open where you’ll see a preview of the printout.
- Click on the Print button.
- Select your printing preferences, then click the Print button. Depending on your browser, you can remove the headers and footers.
Emailing stock transfer documents
- To email a stock transfer, click the Email button at the top right side of the screen.
- A new window will load with your email list in the Reply-to field. Enter the recipient’s email addresses into the fields.
- In the Message field, you can add any information you need for the recipients.
- Click on Preview document to look at what the printed document will look like.
- When done, click the Send button.
Editing stock transfer locations
If you need to change the locations on a stock transfer, you can do that by clicking on the location names. This will pull up a drop-down menu of your inFlow locations that you can select.
There isn’t an option to add a new location from the location drop-down menu. Be sure to add any new main locations to inFlow before making changes to the order.
Assigning team members to stock transfers
If a specific team member will be working on this stock transfer, you can assign them to the order.
How to assign a team member
- Under the stock transfer number, click on the Assigned to button.
- In the pop-up window, select the team member from the list below.
- Click Assign when done.
How to remove an assigned team member
- Select the name of the team member who’s currently assigned to the stock transfer.
- Click on the x Clear assigned link at the bottom right of the pop-up window.
- Click Unassign when done.
How to use custom fields on stock transfers
If your team tracks information that inFlow doesn’t have fields for, you can use the custom field to create the tracking that you need. You can name the custom field and type the information in the text field. You can add any information needed.
How to add new custom fields from the stock order screen
If your team has added custom fields to inFlow, you can use those fields on stock transfers too.
- Click on the +Set custom field button.
- If you don’t have any custom fields click on Manage custom fields.
- Enter a name next to Field 1. If you want this field to show up on printed documents, put a checkmark next to the Print option.
- Click on Save when done.
- To enter data into the newly made custom field, click on + Set custom field once again.
- Next to the new custom field, enter the information you want to track next on the order.
- Click the Save button when done.
How to add existing custom fields
If your team has added custom fields to inFlow, you can use those fields on stock transfers too.
- Click on the +Set custom fields button.
- On the pop-up window, enter information in the related type-in field.
- Click the Save button when done.
How to add remarks/notes
If you want to add more information about the stock transfer, you can do this by clicking +Add remarks. These remarks will also show on the stock order email and printed documents.
Note: To remove remarks, select all the information in the field, then press backspace or delete on your keyboard.
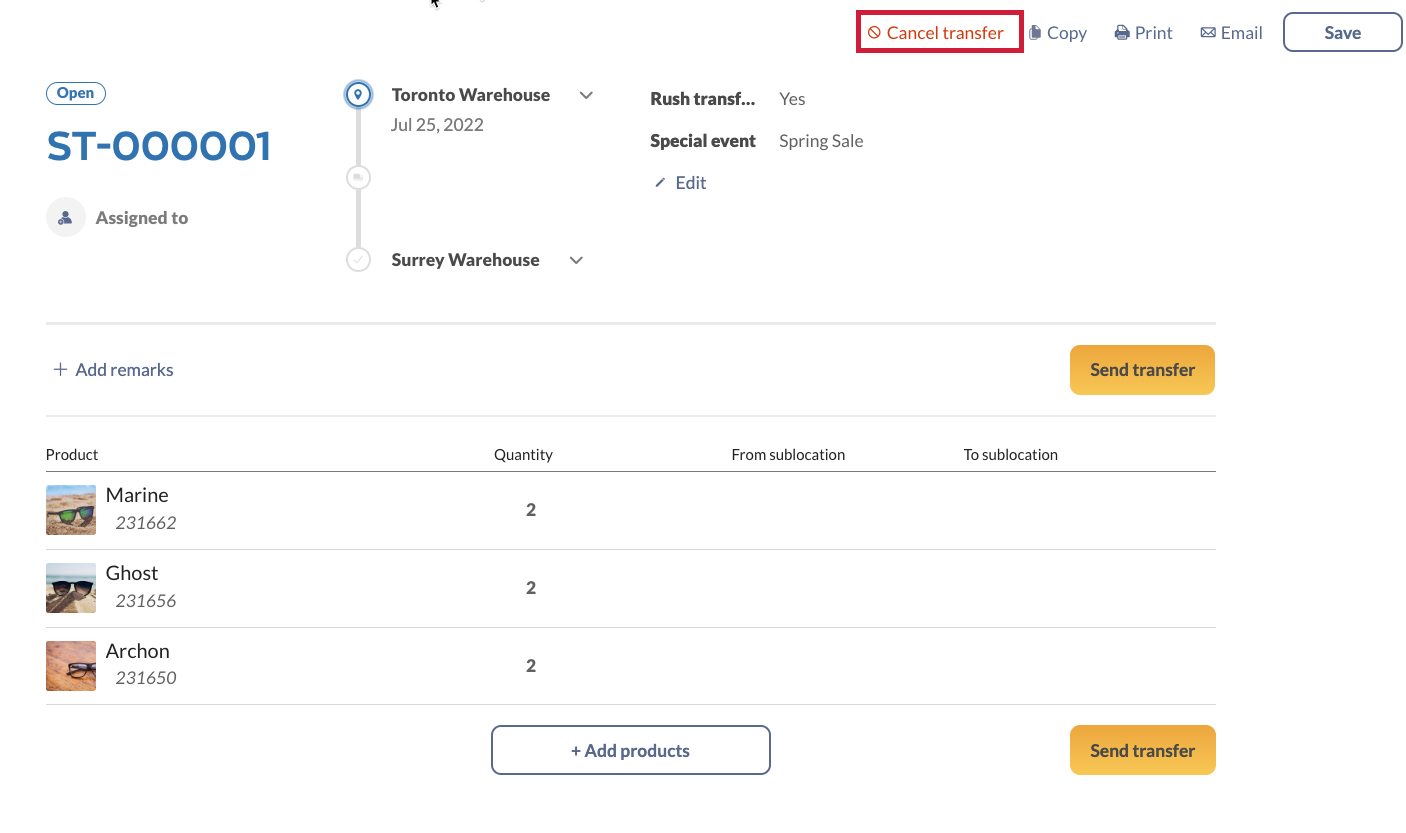
How to cancel a Stock transfer
If you need to cancel a stock transfer, you can do that no matter what the transfer status is on the order. This will return all product quantities back to where they were before the transfer.
To do this, click on the Cancel transfer button at the top right of the screen.
How to copy a stock transfer
You can also copy any stock transfer too. To do this, click on the Copy button at the top right of the screen.

Location restricted access
If your team members have location access rights, they can use the stock transfer feature too! The team member needs to be able to have access to the sending location or the destination location.
This means:
- A team member who has access to all locations or a team member with access to only the sending location can start a transfer.
- A team member with access to all locations or a team member with access to only the destination location can complete the transfer.
A team member can have location-based access rights and make transfers within the locations they have access to. All team members will only be able to make transfers within locations they have access to.
Note: At the moment higher tier plans have access to the Restrict access by location add-on. Get in touch with the inFlow team if you have any questions about this feature.
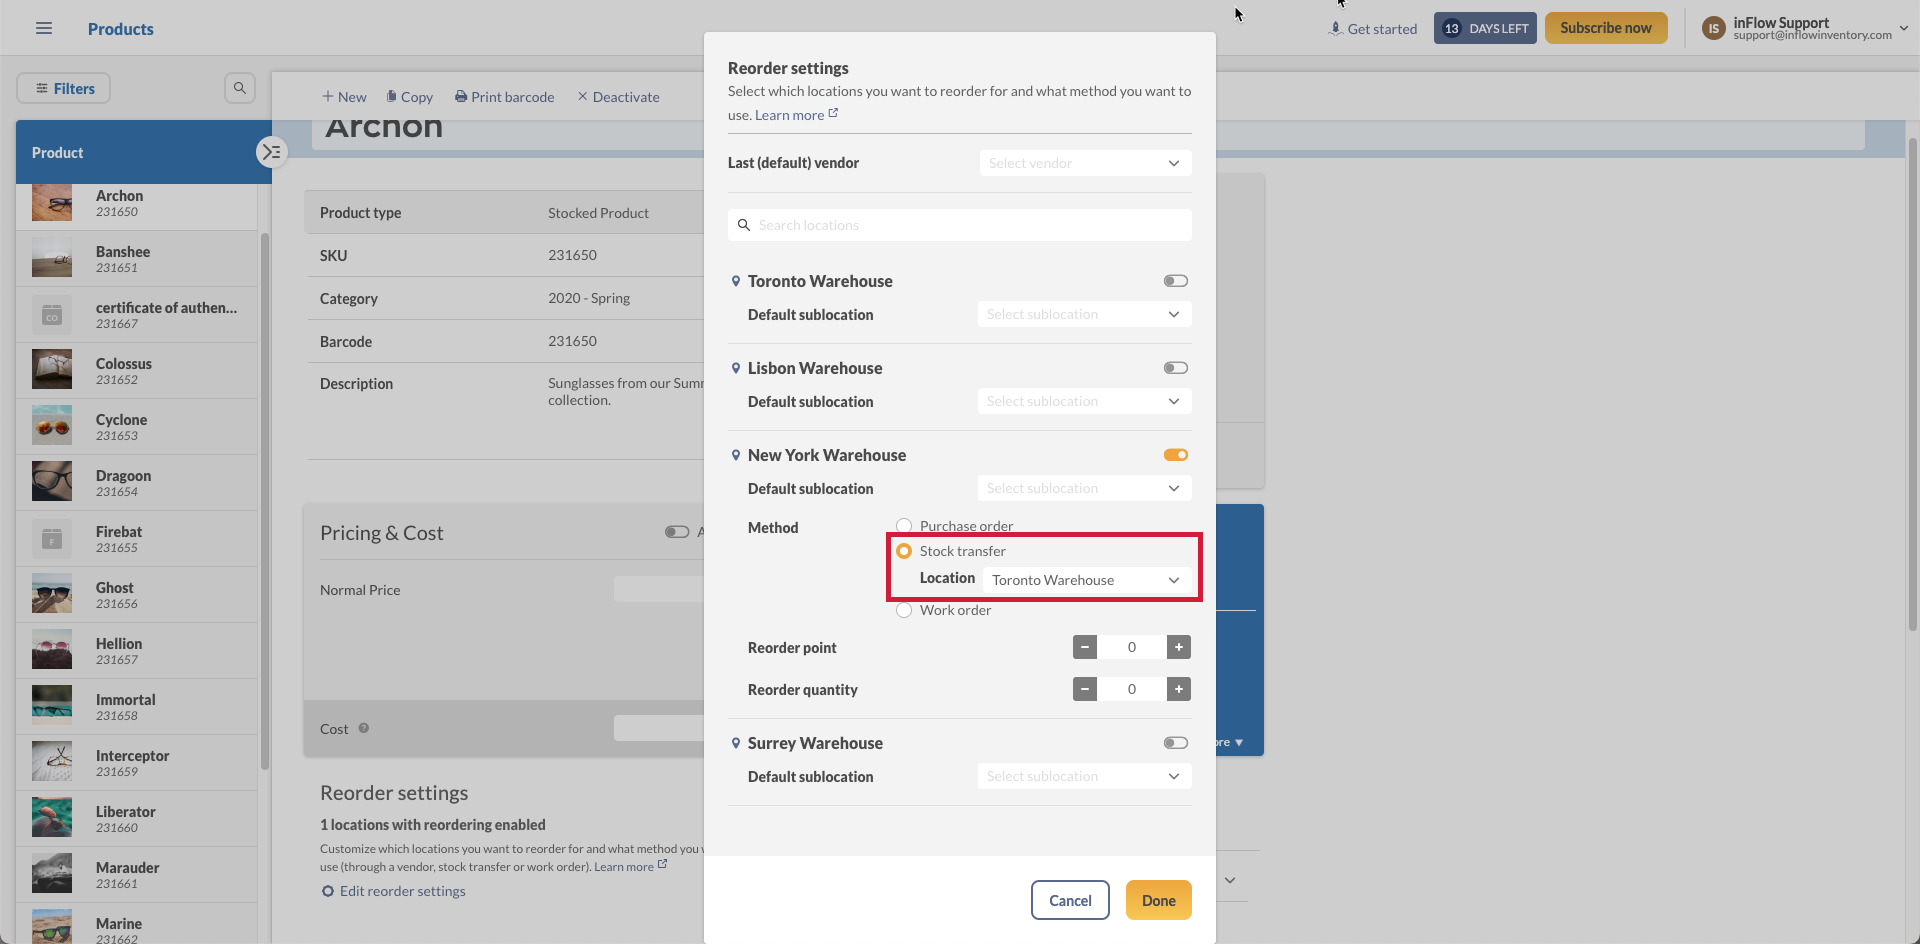
Reordering and stock transfers
If your team has a central warehouse, you can use that location for reordering. You can set product reorder settings to make a stock transfer from that warehouse when inventory goes below the reorder point.
On the product record, click the Edit reorder settings button to set this up. For full details on this feature, take a look at this guide.
Windows
Transferring stock from one location to another is easy in inFlow Inventory! You can also cancel the transfer later on if you make a mistake.
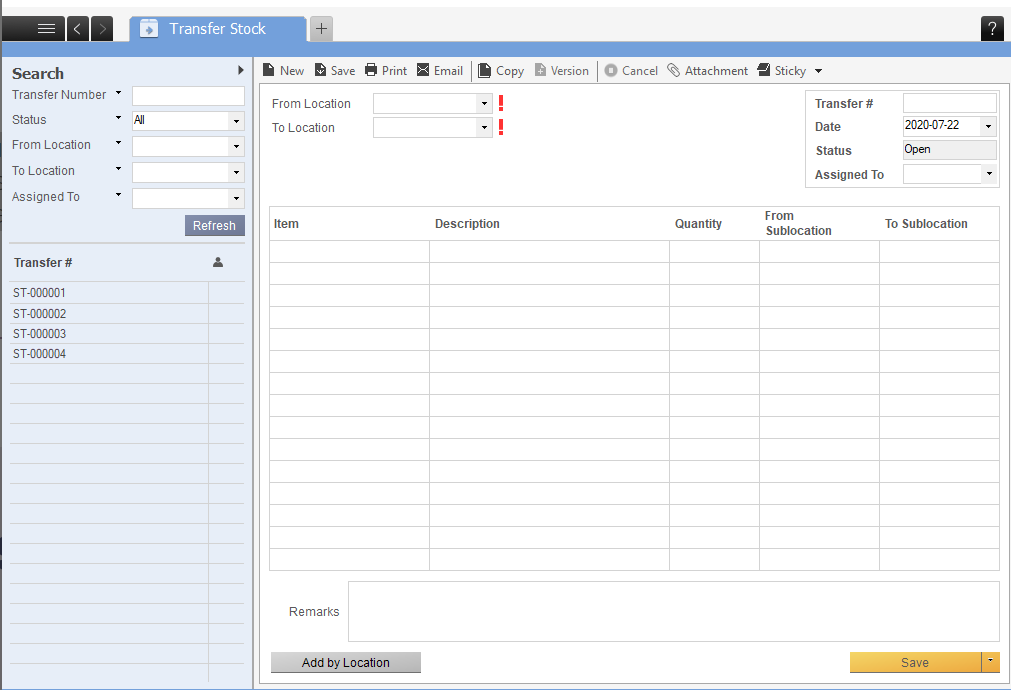
To transfer stock
- Go to Main Menu > Inventory > Transfer Stock.
- Choose the From Location and the To Location for the item you are transferring.
- Select the items you’d like to transfer or click Add by Location to add all the items at the chosen From Location.
- Add any remarks you have to the bottom, and when you’re ready, click Send Transfer.
- When the physical transfer is finished, click Receive Transfer.
Note: If you need to transfer items from different locations you’ll have to create separate transfer sheets for each location.
To cancel a transfer
- Go to Main Menu > Inventory > Transfer Stock.
- Click the Cancel button at the top of the screen.
This will revert the inventory movement (both receiving and sending) and disable further editing.
Mobile
- From the Homepage, tap on Stock transfers. (You can also tap on Main Menu > Stock transfers).
- Tap on the “+” symbol at the top right-hand corner.
- The From location is already pre-selected with your personal default location or inFlow default location. Tap on it if you want to choose another From location to transfer your products from.
- In the To location section, tap the destination location.
Note: The mobile app is limited to the locations already added to inFlow. There isn’t an option to add new locations or sublocations from the mobile app.

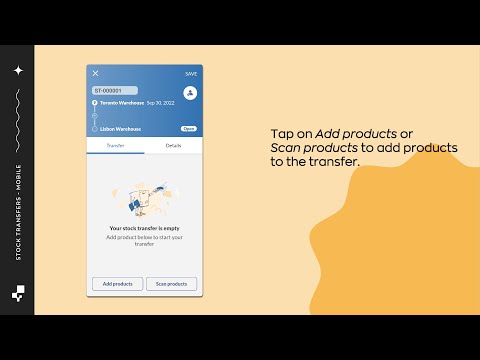
Adding products and sending a stock transfer
Now that you’ve created a stock transfer, you can add the products that need moving.
- Tap on Add products or Scan products to add products to the transfer. When scanning, you can scan the same barcode multiple times to increase the quantity. Or you can scan the barcode once, then type in the total quantity of how many you’re transferring.
- Tap Done when you’ve selected the desired products.
- When ready, tap on the Send transfer button. You’ll notice that the order status is now set to In transit.
Additional notes
- Quantities shown are quantity on hand. Take a look at this article to learn more about the different quantities in inFlow.
- Avoid transferring products that will create negative inventory. You’ll see a warning on-screen if there’s a product that will go into negative inventory.
- Sublocations can’t be added to a stock transfer from the mobile app. You can transfer to sublocations that have been created on the inFlow Web and Windows app. if there isn’t a default sublocation set.
Undoing a sent transfer
If you sent a stock transfer by mistake, you can undo the transfer to restore your product quantities.
- Open the stock transfer that you’d like to undo.
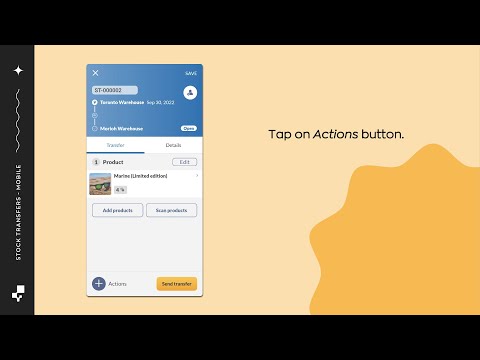
- Tap on Actions, located next to the Receive transfer button.
- Select Undo send. The stock transfer will be saved, and the transfer status will change back to Open.
Receiving a stock transfer
When the products arrive at the To (destination) location, you can open the stock transfer order and tap the Receive transfer button. This completes the transaction.

Undo a received transfer
If you received a stock transfer by mistake, you can undo that action to set the transfer back to the In transit status.
- Go to the Stock transfer list.
- Tap the Filter button.
- Select Completed, then tap Apply.
- Open the stock transfer that you’d like to undo.
- Tap the Actions button and select Undo receive. Once done, the stock transfer will be saved, and the transfer status will change back to in transit.

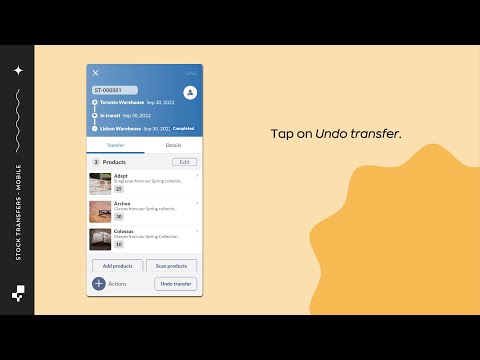
Undo a stock transfer
If you’d like to undo the whole transfer, you can do that too.
- Open the transfer you’d like to change.
- Tap on the Undo transfer button.
- You’ll see a warning asking you if you want to reopen the transfer. Tap on Continue.
From here, your stock transfer will revert to Open status. If you want to cancel the order, tap the Actions button, then select Cancel transfer.
Creating transfers with serialized products
Creating a stock transfer with serialized products is very similar. There’s one extra step. See below for the complete steps.
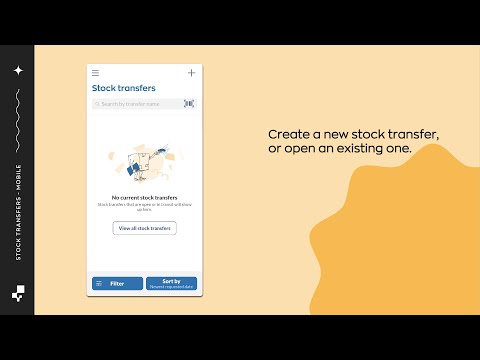
- Create a new stock transfer or open an existing stock transfer.
- Add the serialized product(s) to the order by selecting Scan products or Add products.
- Select the quantity you want to transfer. Then tap Set serials.
- Select the serial numbers from the list, or scan them. The number of serial numbers selected must match the quantity of the transferred products.
- Tap Done to return to the product selection screen. Then tap Done again.
- Once you’ve picked the serial numbers, the square symbol next to the transferred quantity will be grey. This means you’ve selected the correct number of serial numbers. If this symbol is blue, you need to select more serial numbers to match the transferred quantity.
- From here, you can tap Send transfer or Action to continue the transfer.
Stock transfer options
Emailing stock transfer documents
- To email a stock transfer, tap on the Actions button.
- Select Email transfer.
- The Reply-to field will load your email address based on your email settings.
- Toggle on the Cc & Bcc field if you want to add other email addresses to this email.
- In the To field, enter the recipient’s email address.
- You can change the subject line by selecting that field.
- In the Message field, you can add any information for your recipients.
- When done, tap the Send button at the top right-hand corner of the screen.
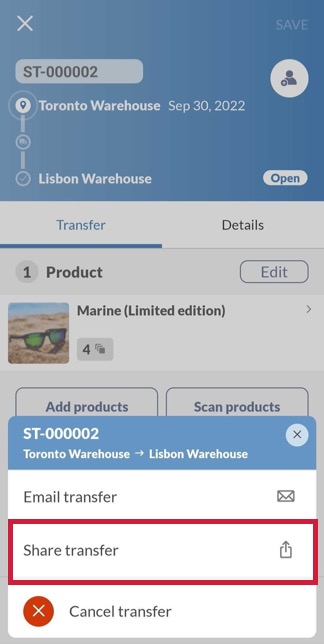
Sharing stock transfer documents
- To email a stock transfer, tap on the Actions button.
- Select Share transfer.
- Select the device contact or app you want to share the stock transfer to. A link will be sent to the recipient for them to open the stock transfer document.
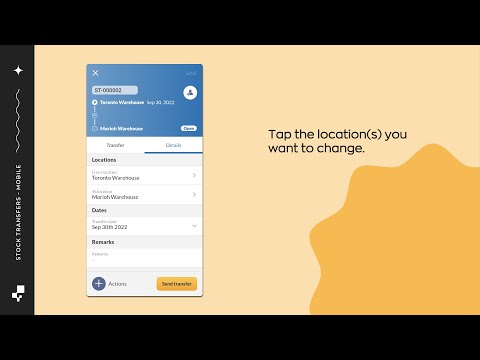
Changing stock transfer locations
- Tap on the Details tab.
- In the Locations section, tap the locations you want to replace.
- Tap the Save button, or return to the Transfer tab to continue.
Note: There isn’t an option to add a new location from the location drop-down menu. Be sure to add any new main locations to inFlow before making changes.
Assigning team members to stock transfers
If a specific team member will be working on this stock transfer, you can assign them to the order.
How to assign a team member
- Next to the stock transfer number, tap on the person symbol in the top right-hand corner of the screen.
- In the pop-up below, select the team member from the list. The person symbol is replaced with the initials of the team member it’s assigned to.

How to remove an assigned team member
- Tap on the initial of the team member who’s currently assigned to the stock transfer.
- Select Clear on the pop-up window. From here, the order will revert to being unassigned.

How to use custom fields on stock transfers
If your team tracks information that inFlow doesn’t have fields for, you can use the custom field to create the tracking that you need. You can name custom fields, and in the type-in field, you can add any information you’d like.
Note: Custom fields need to be added to inFlow via the Web or Windows app before they can be used on the Mobile app. Take a look at this article to learn how to add custom fields.
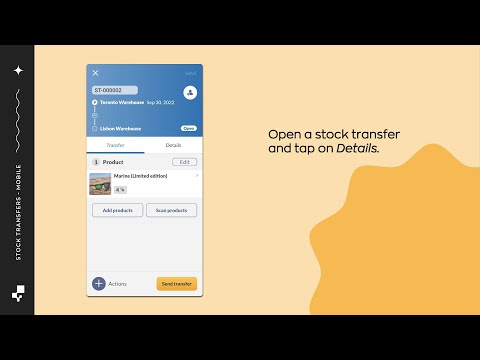
- Open a stock transfer and tap on the Details tab.
- Scroll to the Custom fields section. Any fields that have been added to inFlow will be here.
- Edit the desired field, then tap the Save button.
How to add remarks/notes
If you want to add more information about the stock transfer, you can use the Remarks field.
- On the stock transfer, tap on Details.
- Scroll to the Remarks section. Enter your information here.
- When done, tap Save or tap the Transfer button to return to the order.
Note: To remove remarks, select all the information in the field, then tap backspace on your device’s keyboard.
How to cancel a Stock transfer
If you need to cancel a stock transfer, you can do that no matter what the transfer status is on the order. This will return all product quantities to where they were before the transfer.
- To do this, tap on the Actions button.
- Select Cancel transfer.
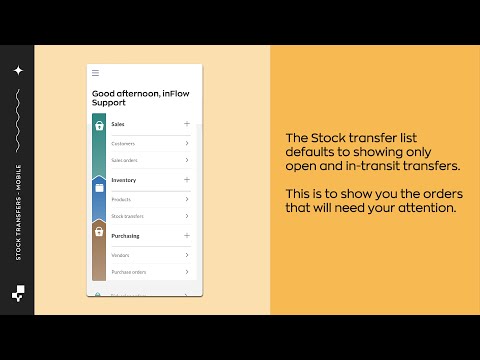
Stock transfer list view
When you go to the Stock transfer list, you’ll only see open and in-transit transfers. This is to show you the orders that need your attention the most.
If you want to look at completed or canceled orders, you can tap on the Filter button to choose transfers by
- Status
- Location
- Requested date
- Sent date
- Received date
- Assigned to.
You can also change the order of the listed transfers by tapping the Sort by button.
Location restricted access
If your team members have location access rights, they can use the stock transfer feature too! The team member needs to be able to have access to the sending location or the destination location.
This means:
- A team member who has access to all locations or a team member with access to only the sending location can start a transfer.
- A team member with access to all locations or a team member with access to only the destination location can complete the transfer.
A team member can have location-based access rights and make transfers within the locations they have access to. All team members will only be able to make transfers within locations they have access to.
Note: At the moment higher tier plans have access to the Restrict access by location add-on. Get in touch with the inFlow team if you have any questions about this feature.
Reordering and stock transfers
If your team has a central warehouse, you can use that location for reordering. You can set product reorder settings to make a stock transfer from that warehouse when inventory goes below the reorder point.
On the product record, click the Edit reorder settings button to set this up. For full details on this feature, take a look at this guide.


0 Comments