
How to rename fields in inFlow
You can easily rename fields in inFlow to suit your business needs! Take a look below to learn more.
Web

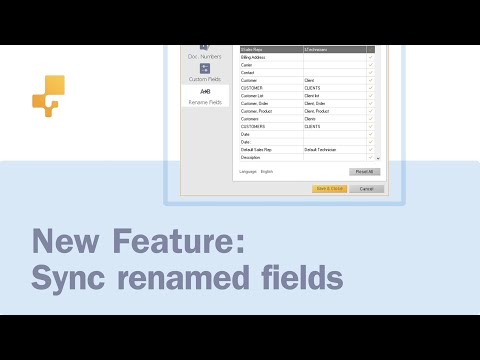
Take a look at the 0:17 mark of the video to find a guide on renaming fields in inFlow.
Renaming fields in the inFlow settings
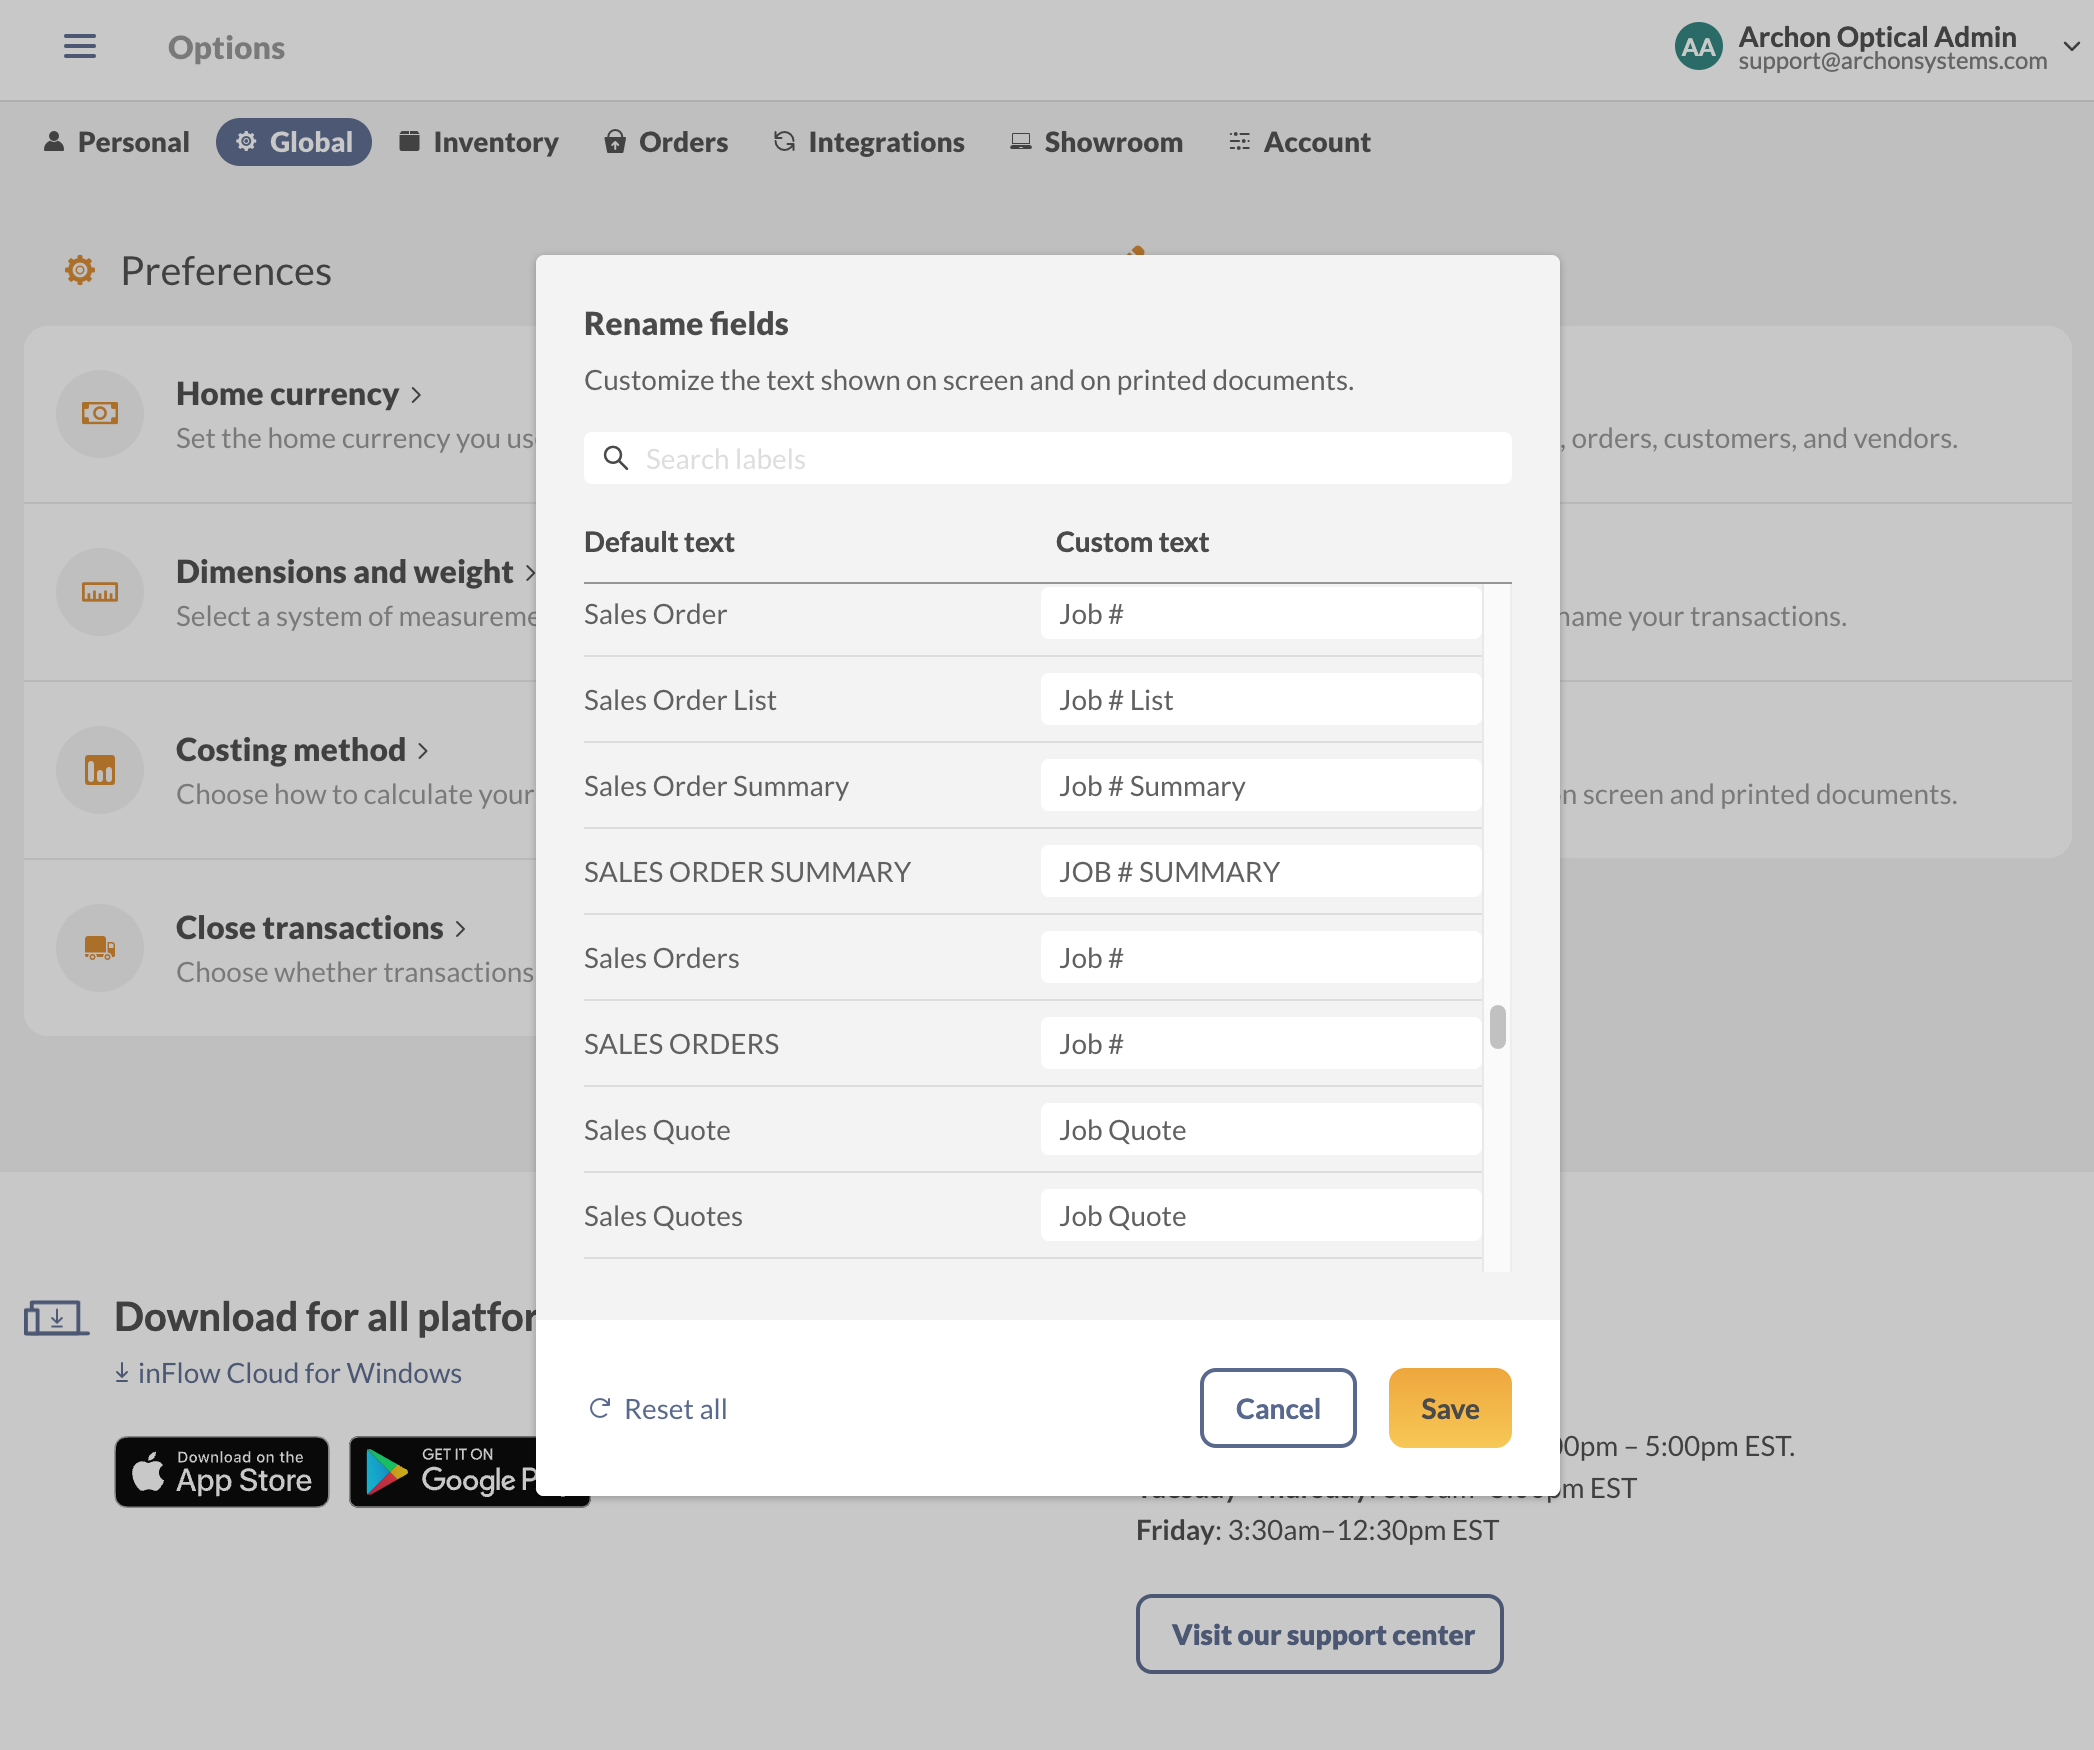
- Go to inFlow’s Global settings, then click on Rename fields.
- In the Rename fields window, search or scroll for the field you want to rename.
- Type in the new field name in the Custom text field.
- Click Save when done.
Some fields can only be changed and shown within the Windows app. While others will be renamed within the Windows, web, and mobile apps.
Want to customize document numbers to match?
If you’ve renamed fields and want your document numbers on invoices and receipts to match, you can make those changes with the document number settings.
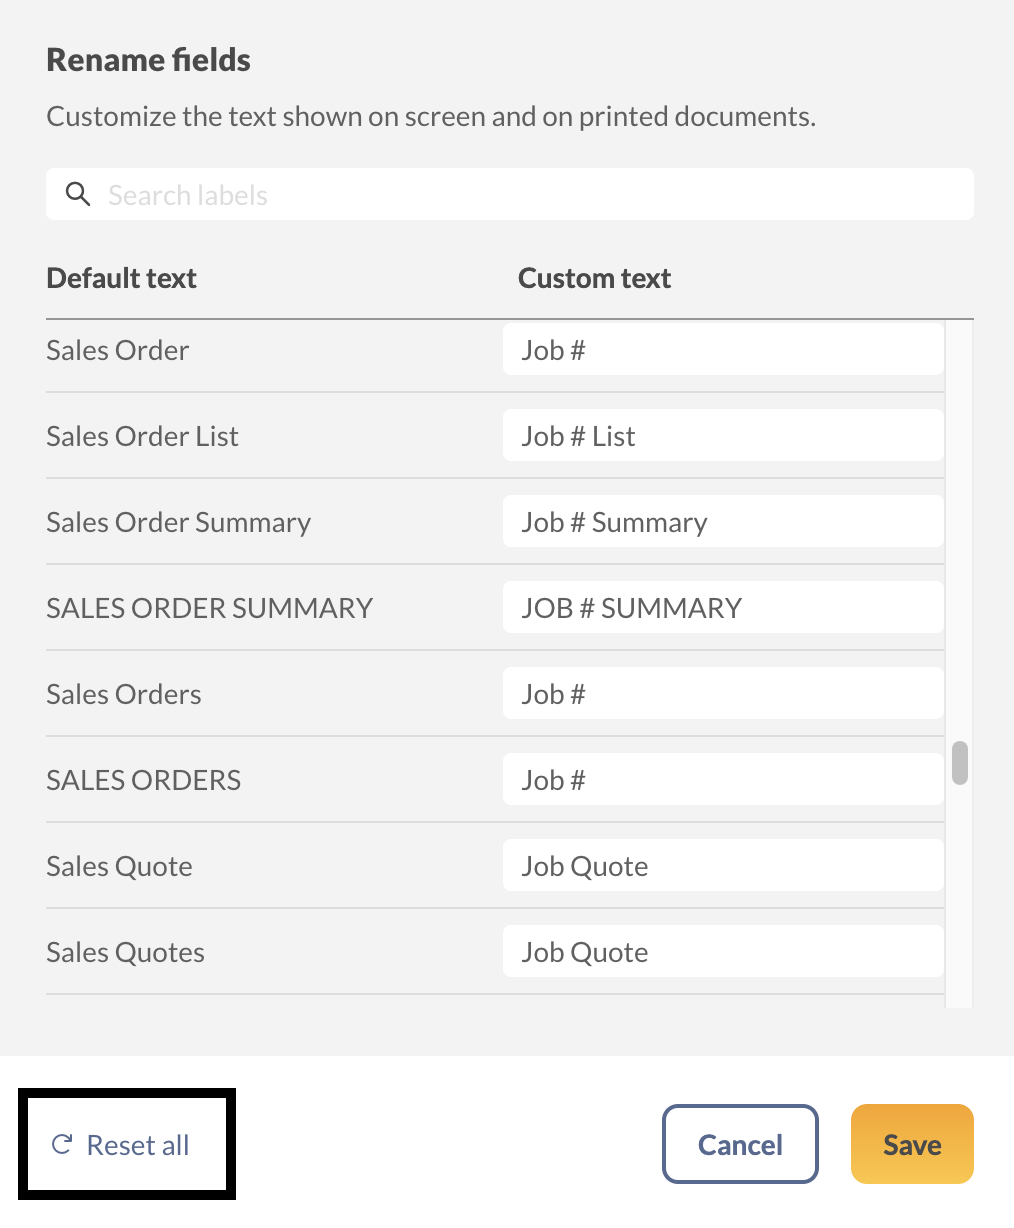
Resetting renamed fields
- Go to inFlow’s global settings, then click on Rename fields.
- Click on Reset all at the bottom of the window.
- Click Save when done.
What else can I customize in inFlow?
In inFlow, you can customize different areas to meet your team’s needs.
Customizable inFlow features
- Change order numbers: Change order prefixes.
- Custom fields: Track additional data with custom fields.
- Document Designer: Create and customize sales and purchasing documents.
- Label Designer: Create product labels to include the barcode, image, and product name.
- Email Designer: Create email templates based on different inFlow features.
Windows
Here’s a one-minute video to show you how renaming fields in the Windows app can affect web and mobile:
Renaming fields on the go
- Right-click the label you want to rename.
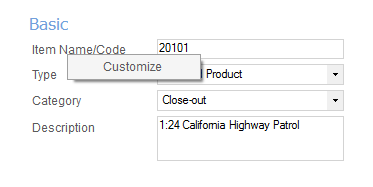
- Choose Customize from the drop-down.
- Enter the new label name into the Custom Text column.
- Click Save & Close.
Renaming fields in the inFlow settings
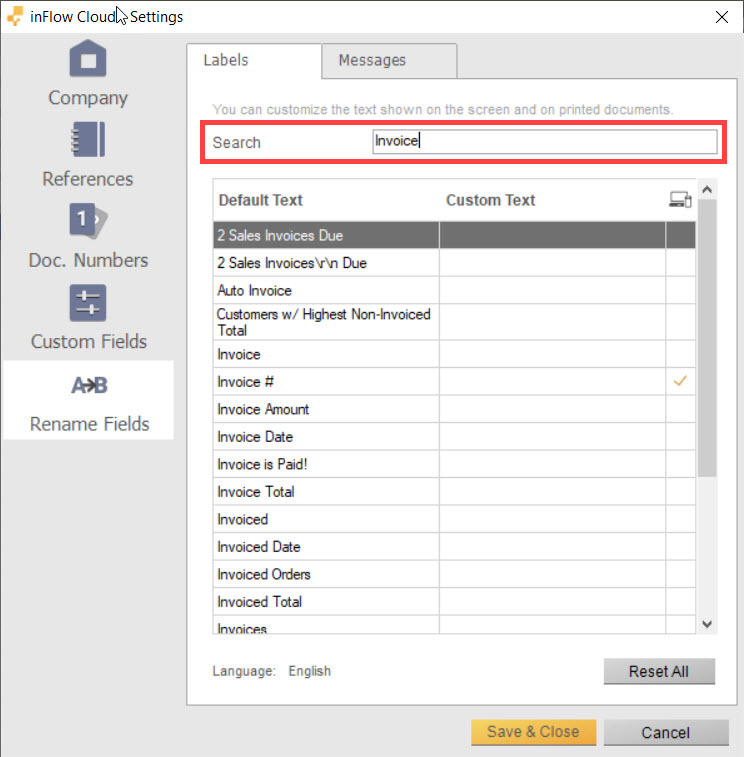
Some places in inFlow don’t have the Right-click > Customize option, so you can get to the same screen below by going to Main Menu > Options > Settings > Rename Fields.
You can search for a label you want to replace. For example, if you want to replace the word Invoice with Tax Invoice, you can search Invoice at the top, and it will show all labels with that word. You can then replace each one by typing into the Custom Text box beside each label.
Some fields can only be changed and shown within the Windows app. While others will be renamed within the Windows, web, and mobile apps.
You will also notice that there is a third column next to the Custom Text box. If there is a checkmark in the field, that means that the field will be renamed in the Windows, web, and mobile app.
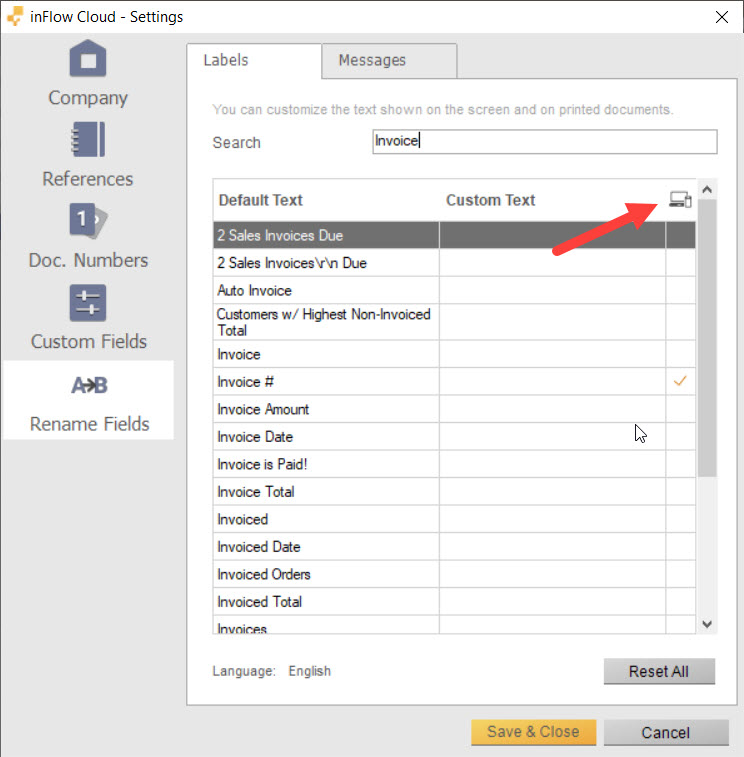
If you would like to filter through the fields to see which ones you’ve renamed, click on the Custom Text header. If you want to see which fields will transfer to the web and mobile app, click on the computer/mobile icon in the 3rd column.
Want to customize document numbers to match?
If you’ve renamed fields and want your document numbers on invoices and receipts to match, you can make those changes with the document number settings.
Resetting renamed fields
- Go to Main Menu > Options > Settings.
- Click Rename Fields on the left.
- Click the Reset All button near the bottom
- Click Save & Close.


0 Comments