How to transfer inFlow On-Premise data to inFlow Inventory
Are you using inFlow On-Premise and want to move to inFlow Inventory? Sure thing! You can migrate your existing data from inFlow Inventory, so you don’t have to re-do everything.
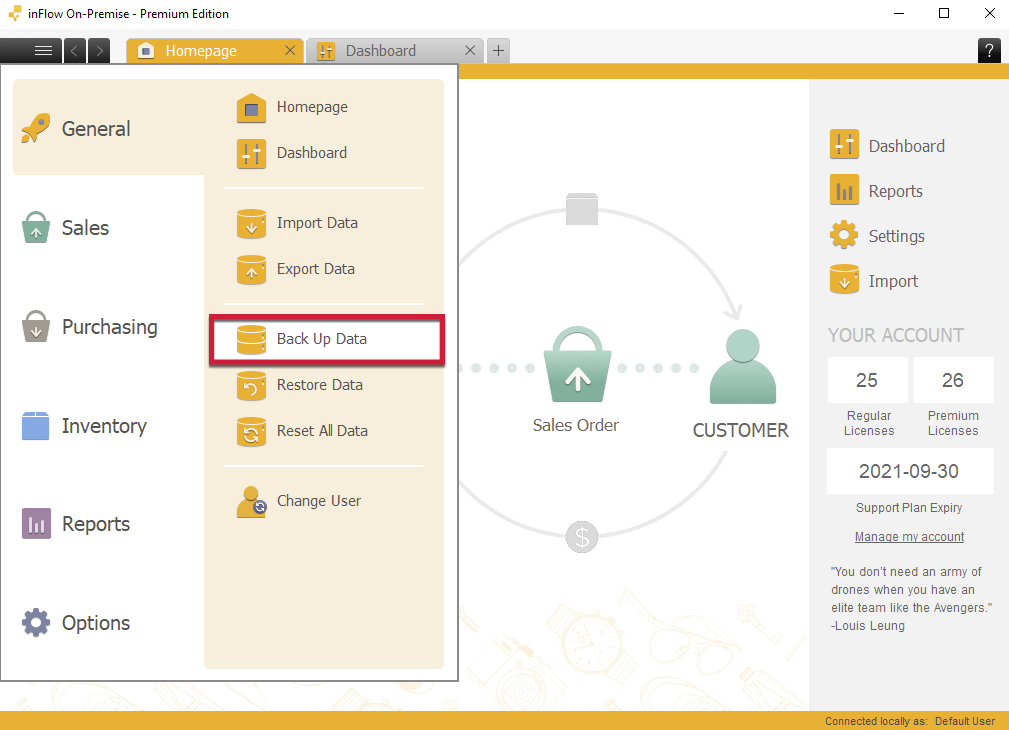
Create a backup file in inFlow On-Premise
- Open inFlow On-Premise on the main/server computer.
- Click the Main Menu button > General > Backup Data.
- Save the file to your computer.
- Click Save.
inFlow On-Premise and inFlow Inventory are two separate products that do not sync. An inFlow On-Premise backup file can be added to inFlow Inventory, but inFlow Inventory data can’t be transferred to inFlow On-Premise.

For full steps on backing up and restoring to inFlow On-Premise data take a look at this article.
Uploading the backup to inFlow Inventory
Now that your backup file has been made, it’s time to upload that to inFlow Inventory. Please note that any data you entered into inFlow Inventory before uploading an On-Premise backup will be cleared and replaced with the data in the backup.
inFlow Inventory can transfer On-Premise backup files from version 3.0.8 and newer. If you have an backup file made from an older version of inFlow On-Premise contact inFlow support for additional steps you’ll need to take.
- With an administrator account, I go to inFlow’s Account settings. (Main Menu button > Options. Select the Account tab.)
- Scroll down to the Manage my data section and click the Transfer data button.
- For step 1, select the Okay, done button since you’ve already made the backup file.

- Next, click the Browse button to upload your inFlow On-Premise backup file.
- Double-check that you’ve selected the correct backup file. If you haven’t, click on No, choose again. When you have the correct backup, select Yes, Continue to start the data transfer.

If you are giving inFlow Inventory a try, we recommend continuing to enter your data into both inFlow Inventory and inFlow On-Premise during your trial.
If you’d prefer to reset inFlow to a blank database, look at this article for detailed steps.


0 Comments