inFlow Smart Scanner 3
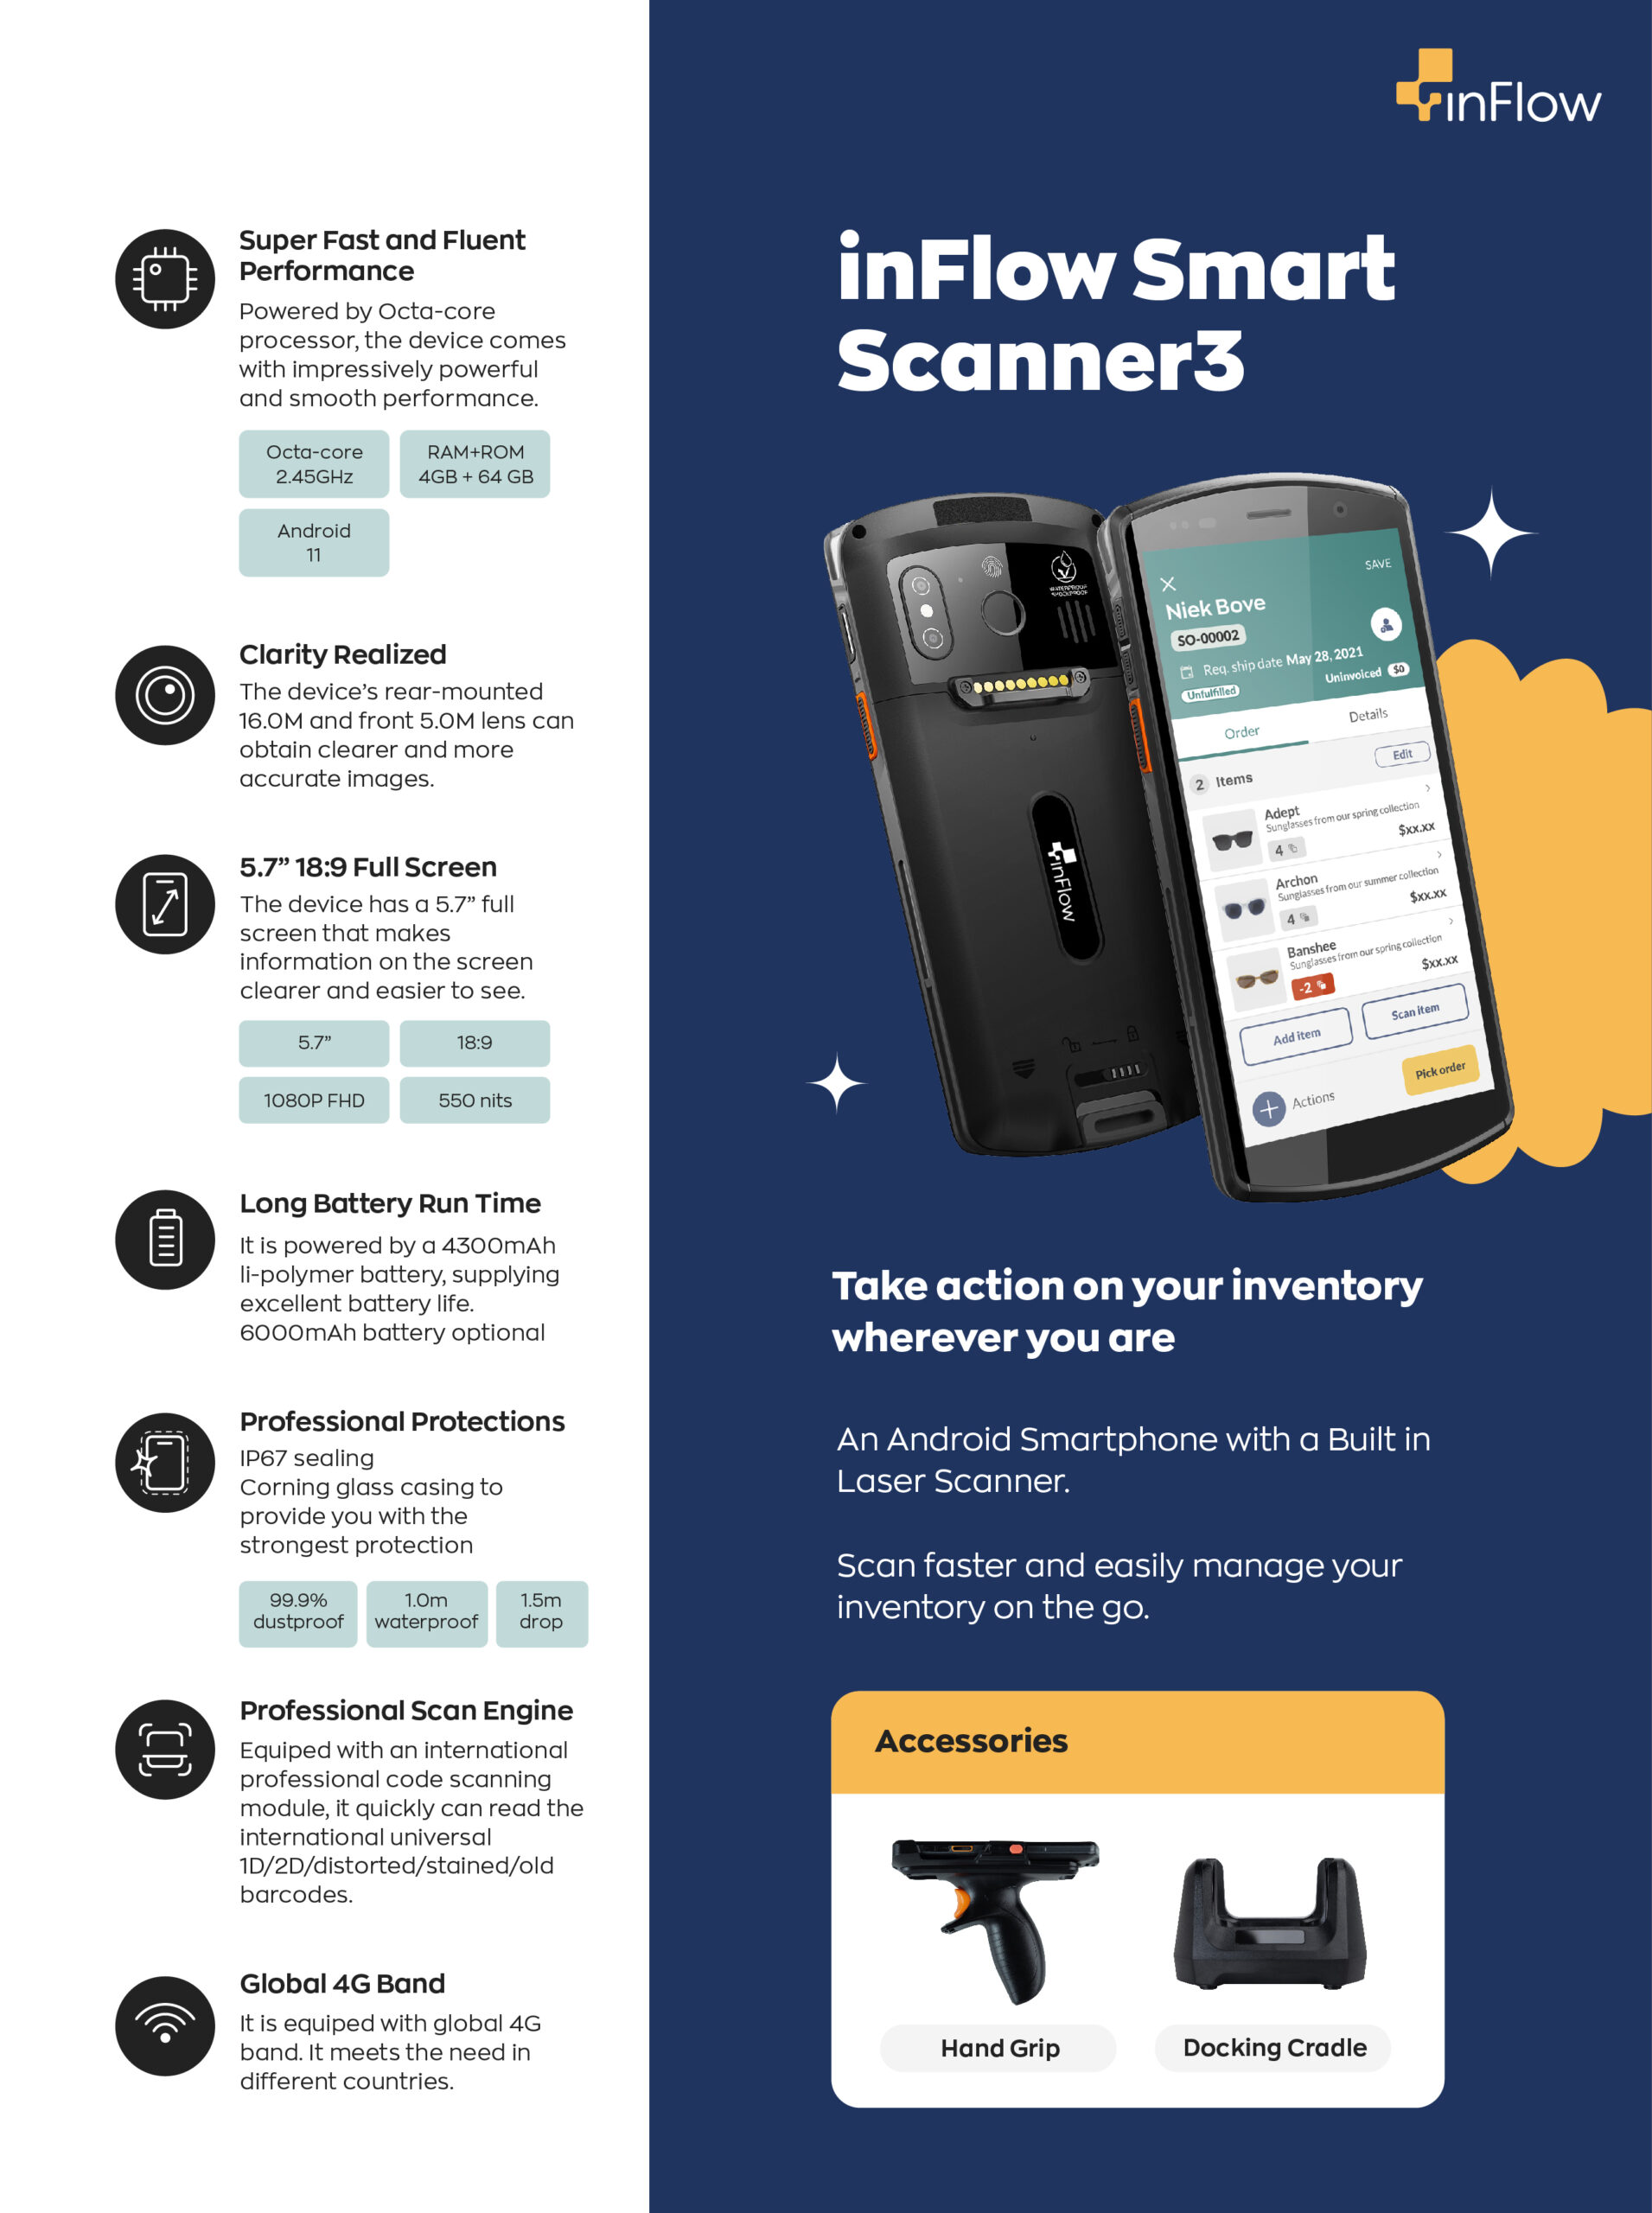
inFlow’s very own Smart Scanner is here! Featuring a built-in dedicated barcode scanner, you’ll be able to instantly scan your items at least 2x faster and more accurately than any camera app. If you don’t have one yet, you can get one here!
Scanner info
The Smart Scanner is perfect for warehouse management, mobile picking, counting inventory, mobile sales orders, easy stock adjustments, and more. It’s built tough to withstand your business’s day-to-day operations.
Here’s a two-minute overview of the Smart Scanner and its accessories:
Did you know you can buy barcodes with inFlow? We’ve teamed up with GS1 to be an official partner. This means you’ll have a UPC barcode that will be recognized by retailers such as Amazon and Walmart. For more details, check out the GS1 Barcode Shop.
Smart Scanner specifications
Find all the information you need to know about inFlow’s Android Smart Scanner here.
You can also download the full Smart Scanner Specifications.
Basic Characteristics
- Octa-core 2.45 GHz 64-bit processor
- RAM – 4GB ROM: 64GB
- O.S. – Android 13 (Earlier shipments came pre-installed with Android 11.)
Peripherals
- Camera – 13MP auto-focus color rear camera with flash, 5MP front-facing camera.
- NFC – RFID 13.56MHz, ISO15693, ISO14443A/B,Mifare, Felica.
- GPS – GPS, A-GPS, Bei-Dou satellite navigation system, GLONASS.
- Sensor – Light sensor, range sensor, acceleration sensor, compass, gyroscope, barometer.
- Slots – Micro SD/TF x 1, Nano- SIMx2.
- Interfaces – TypeC x 1, support OTG, support USB 3.1, Bottom POGO PIN x 2, back POGO PIN x 9.
- Audio – Dual-Microphone (noise cancellation), Speaker, Receiver, 3.5mm audio jack.
- Includes – Power adapter, data cable, and one battery.
Radio Communication
- Wi-Fi – IEEE 802.11a/b/g/n/ac/d/e/h/i/k/r/v/w (2.4G/5G dual band WIFI) IEEE 802.11ax ready
- Bluetooth – BT5.0 + BLE
- Cellular – 4G/ 3G/ 2G Dual-SIM, Dual-Standby
User Environment
- Operating Temperature -40°F to 158°F (-40°C to 70°C)
- Storage Temperature -40°F to 158°F (-40°C to70°C )
- Humidity 5% ~ 95% (No condensation)
- Drop Durability – 3 ft (1.5m)
- Sealing – IP67
Warranty
- Support – Ongoing with a subscription to inFlow Inventory
- Hardware – 2 year
Scanner comparison

Getting started
Click below to jump to a specific section in this guide.
For more info about the inFlow Inventory Companion app, check our Full Guide.
Installing the inFlow Inventory Companion App
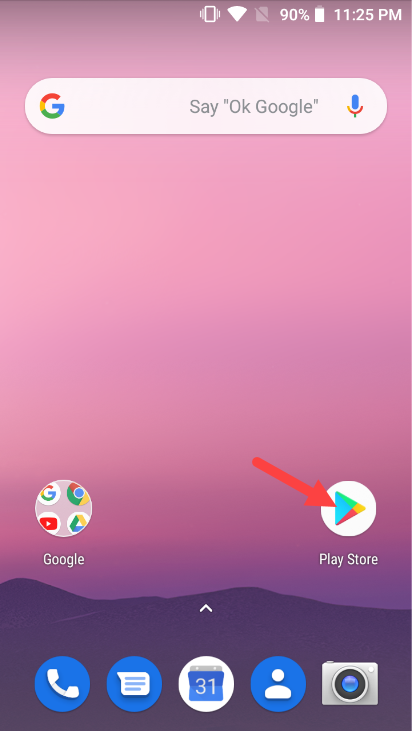
You can find a direct link to the inFlow Inventory Android app in the Google Play Store by clicking this link here, otherwise please find the app by searching in the Play Store, see the instructions below. 1. Open the Play Store from the main page.
1. Open the Play Store from the main page.
2. Login/create a Google/Gmail account (if you haven’t already).
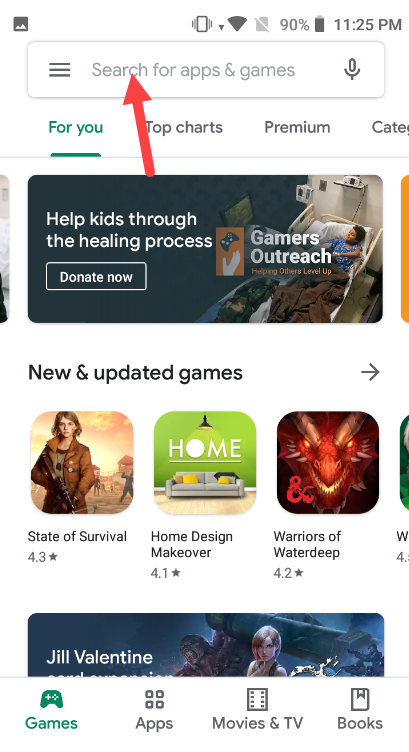
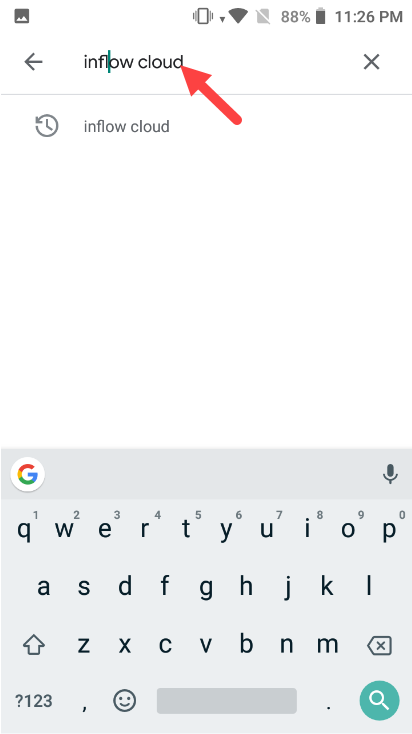
3. Search “inFlow cloud” in the Play Store search.
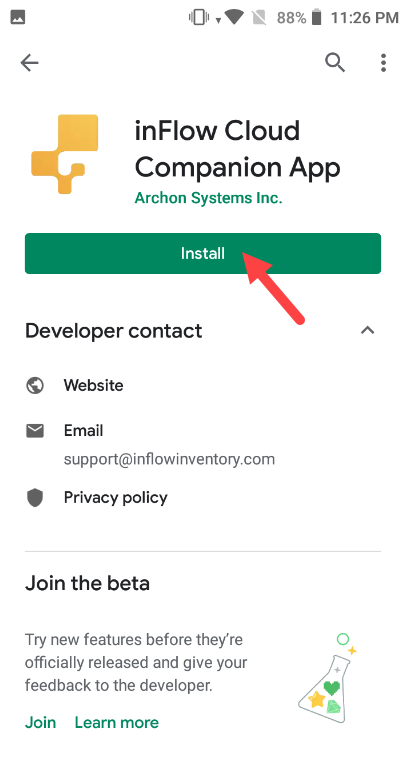
4. Install the inFlow Inventory Companion app.
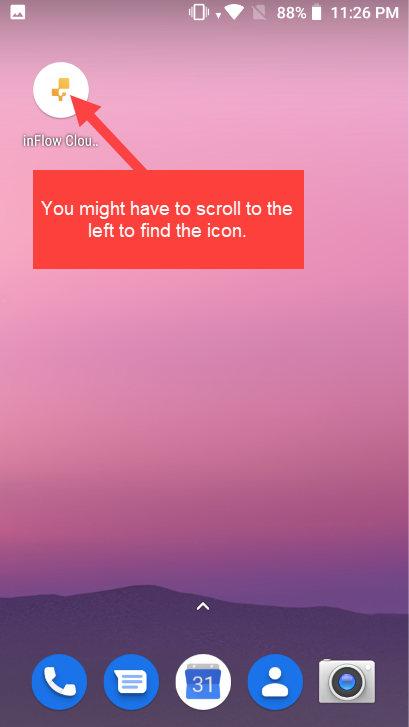
5. Find and open the inFlow Inventory app.
6. Log into your inFlow Inventory account with the same credentials you use on the web/desktop.
7. Start scanning!
Using the app and scanner
- Open the inFlow Inventory app.
- Login to your inFlow Inventory account.
- Click into any field you would search for a product (ie. Products search field)
- Use the orange button on either side to activate the scanner.
- Scan a barcode, an on-screen indicator will show you the results.
Scanner Debug App
The smart scanner comes preloaded with an app called Scanner. This app can be used to configure the way the built-in barcode scanner behaves and make any needed changes for the region/barcodes that you may be using.
Note: Most people will not need to modify these settings, these are strictly for people who want to change the default scanning behaviors.
Click below to jump to a specific section in this guide.
- Changing the Coding format
- Adding a prefix or suffix to your scanned barcodes
- Reset scanner options to default
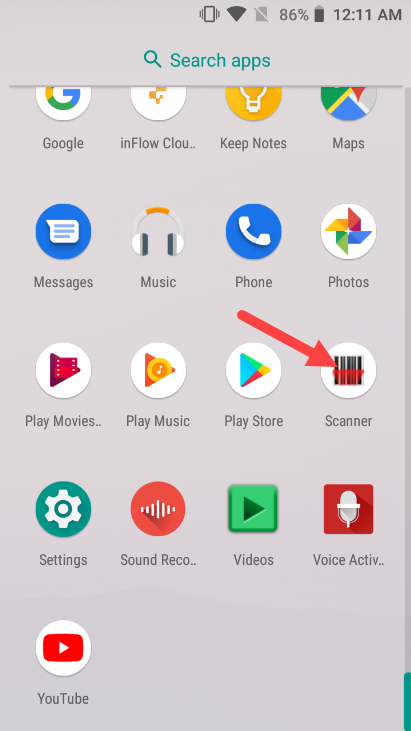
Changing the Coding format
- Open the scanner app.
- Click the gear icon in the top right of the screen.
- Scroll down to find Coding format header and click it.
- Choose a new coding format and click it (default is UTF-8).
- Your changes are saved right away.
Adding a prefix or suffix to your scanned barcodes
This will allow you to add a prefix or suffix to barcodes you scan, for example, if you have a product with a barcode ‘12345′, but you want all your barcodes to start with an ‘M’, you would add ‘M’ as a prefix and then when you scan a barcode, it would be input like ‘M12345′.
- Open the scanner app.
- Click the gear icon in the top right of the screen.
- Scroll down to find the Label formatting header and click it.
- To add a prefix, click on Label prefix and enter your desired prefix.
- To add a suffix, click on Label suffix and enter your desired suffix.
- Click Append formatting header, and select which labels you want to add to your barcodes (Label prefix for only a prefix, Label suffix for only a suffix, Label prefix and suffix for both etc).
- Your changes are saved right away.
Reset scanner options to default
- Open the scanner app.
- Click the gear icon in the top right of the screen.
- Scroll down to find Reset Configuration header and click it.
- Click OK when prompted.
- Scanner settings will reset back to default.
Enabling the Pistol Grip
- On the inFlow, Smart Scanner swipe up to open up all your apps
- Go to “Scanner”
- Hit the Gear icon in the upper right-hand corner
- Under Scan Handle make sure the box is checked off
Troubleshooting
Google/Android
The inFlow Smart Scanner uses the Android operating system. For general questions and articles related to how to use your new Android device, please visit: https://support.google.com/android/
I can’t access data from my T-mobile sim card
The smart scanner lets you use sim cards with wireless plans. For T-mobile customers, activate the sim card on a T-mobile device with a wireless plan first. Once that’s done, you can transfer the sim card to the Smart Scanner and you’ll have access to your data.
Which smart scanner do I have?
The inFlow Smart Scanners have continued to improve over the years. Most of the improvements from the two Smart Scanners are internal, but a quick way to know which scanner you’re using is by looking at the camera.
The Smart Scanner 3 has a single camera lens, whereas the Smart Scanner 2 has two lenses.
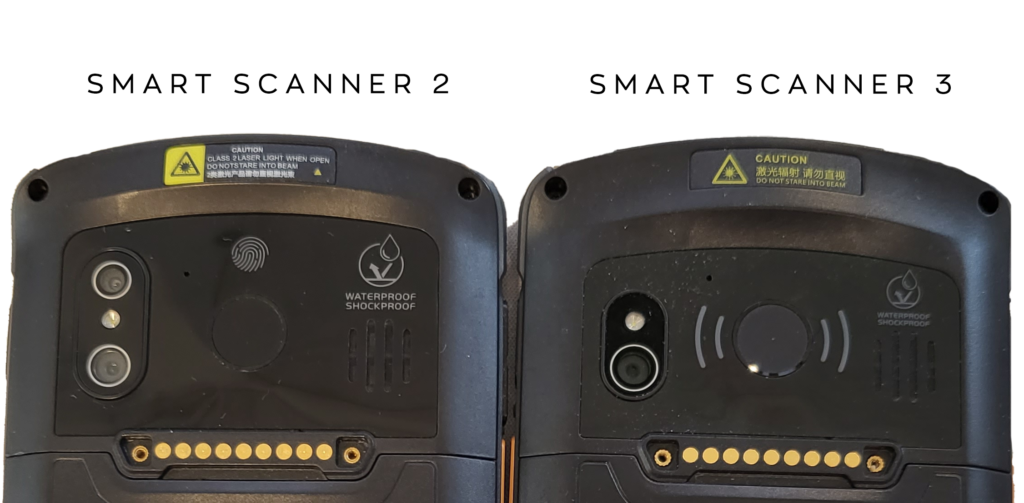
If you’re not using the Smart Scanner 3, you can read more about the Smart Scanner 2 here.


0 Comments