
How to import images in bulk to inFlow
Are you looking to upload product images in bulk to inFlow? If your images are saved online, you can import them to inFlow using a CSV.
Preparing images
Getting your images ready
In order to import your images, they must be stored online and have a public URL. If you have them stored locally on your computer, we recommend using Airtable to generate URLs for your images.
Before you start
- The product names/SKUs on your CSV must have a matching product name or SKU in inFlow.
- This import doesn’t create new entries in inFlow, it will only import images to existing products. As such, you’ll want to ensure the image names match your product names so that they map accordingly during import.
- This import method only supports one image per product.
- Airtable URLs are valid for 2 hours.
Note: inFlow Inventory is not affiliated with Airtable. For up-to-date guides on the steps suggested below, please see the Airtable Help Center.
Uploading your images to Airtable
- Sign up for a free account in Airtable (if you already have an account, skip this step and sign in).
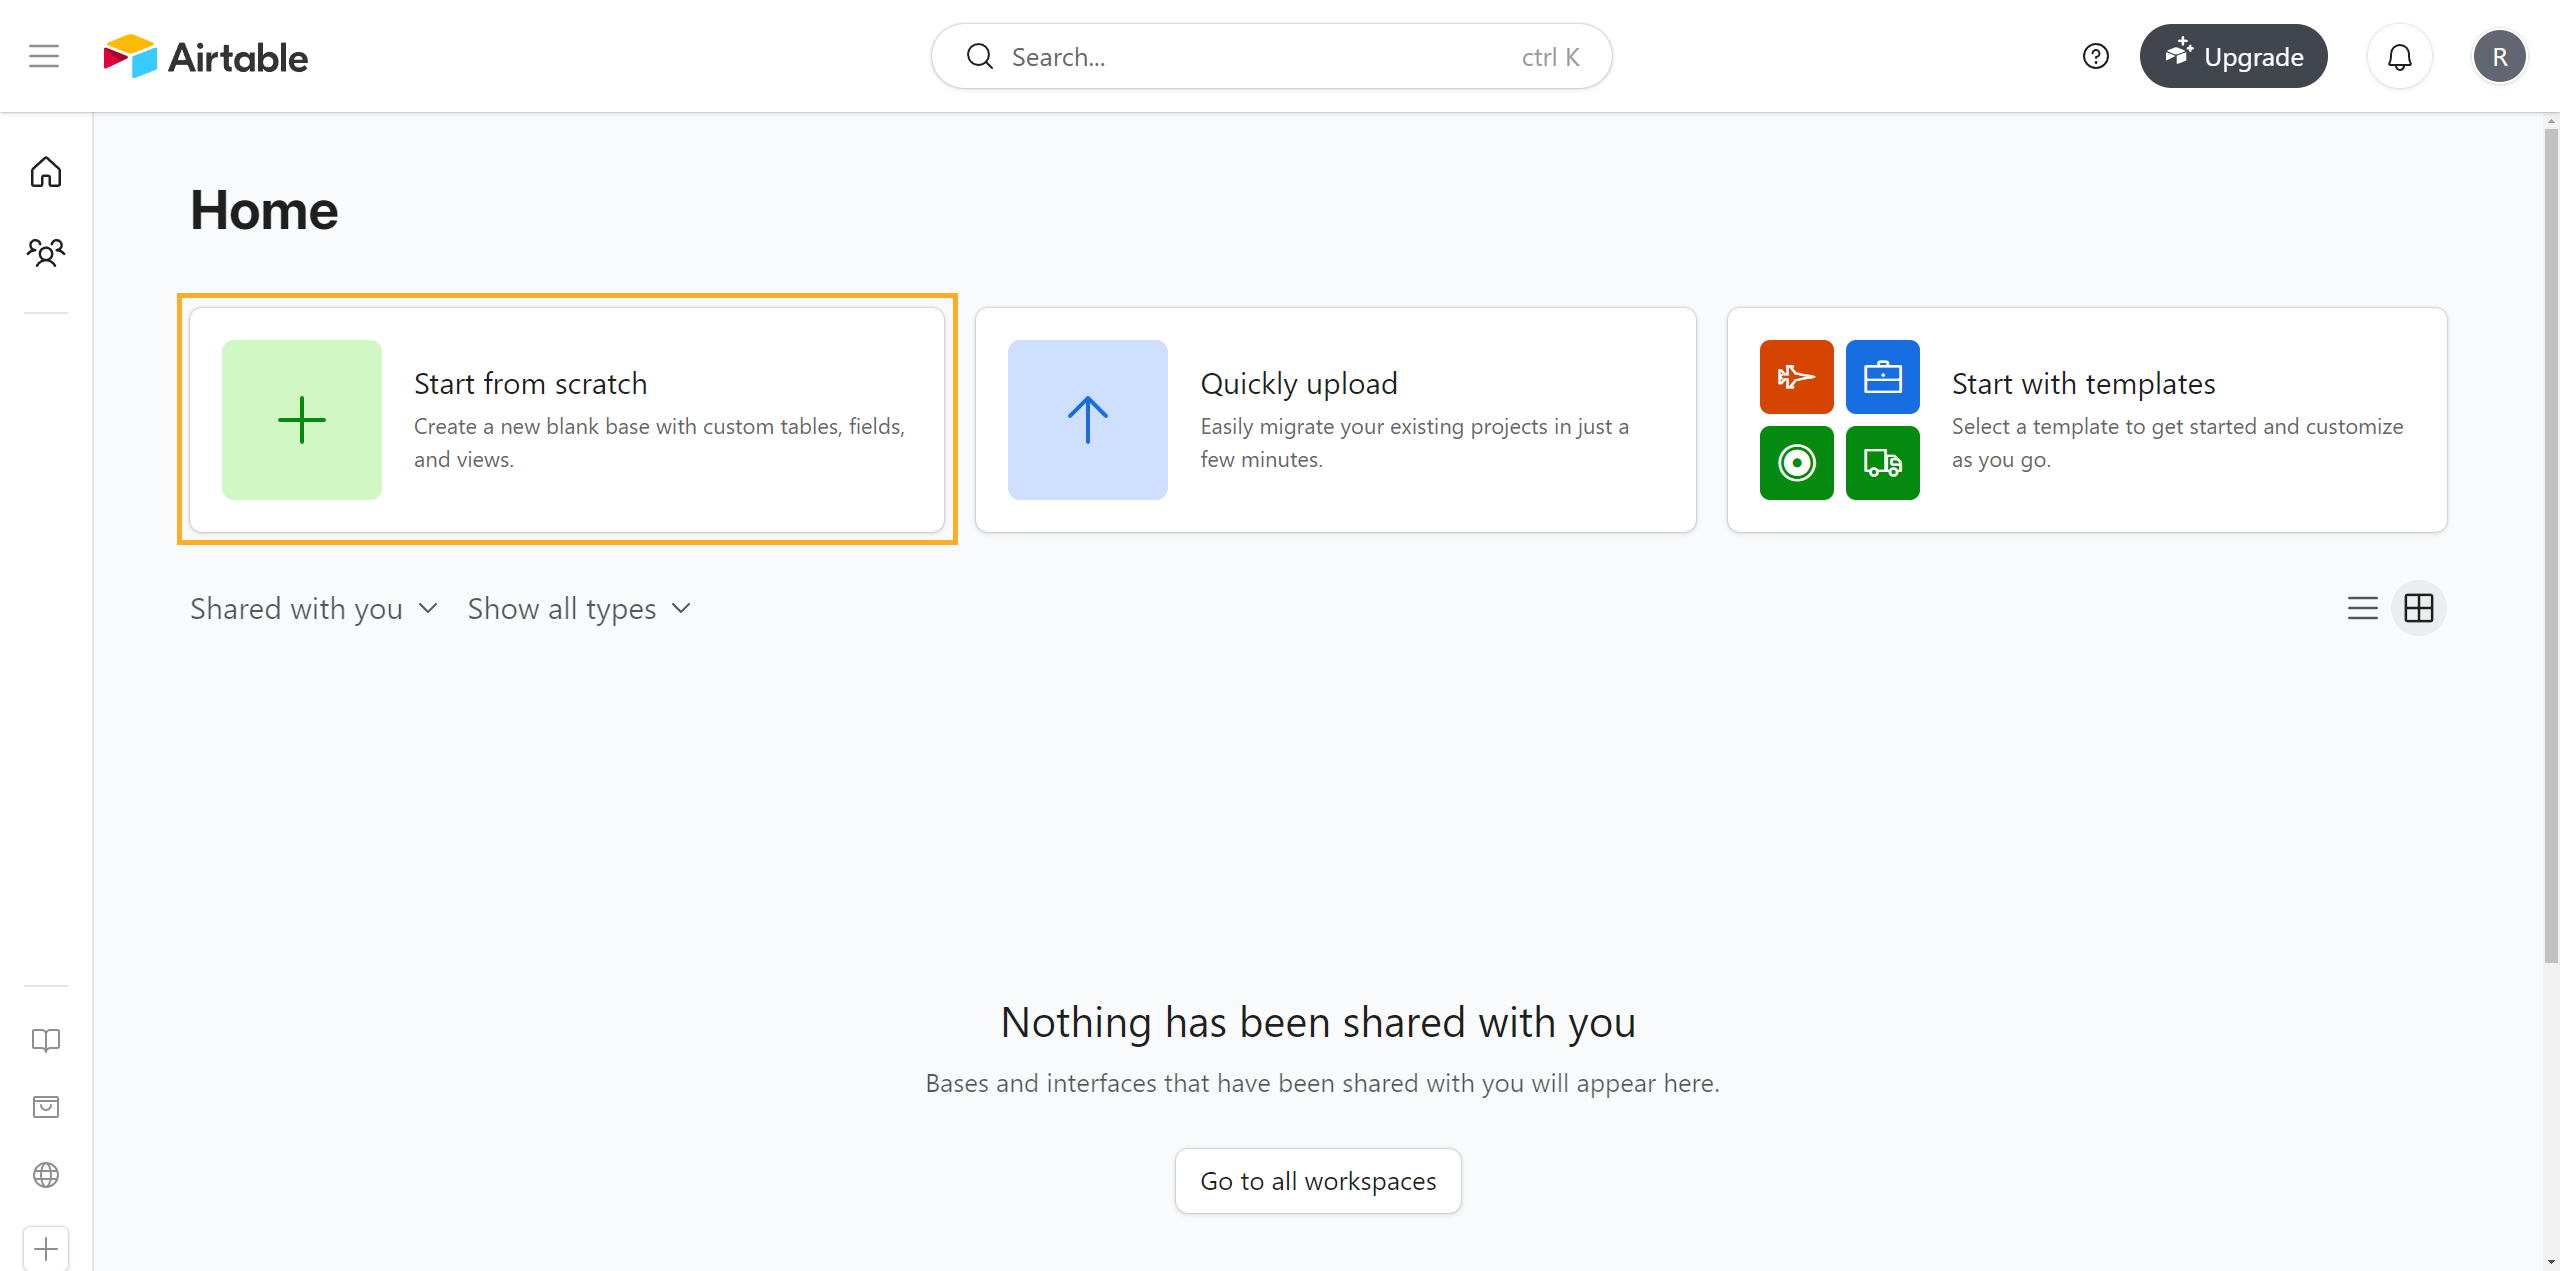
- On the Airtable homepage, click on Start from scratch.
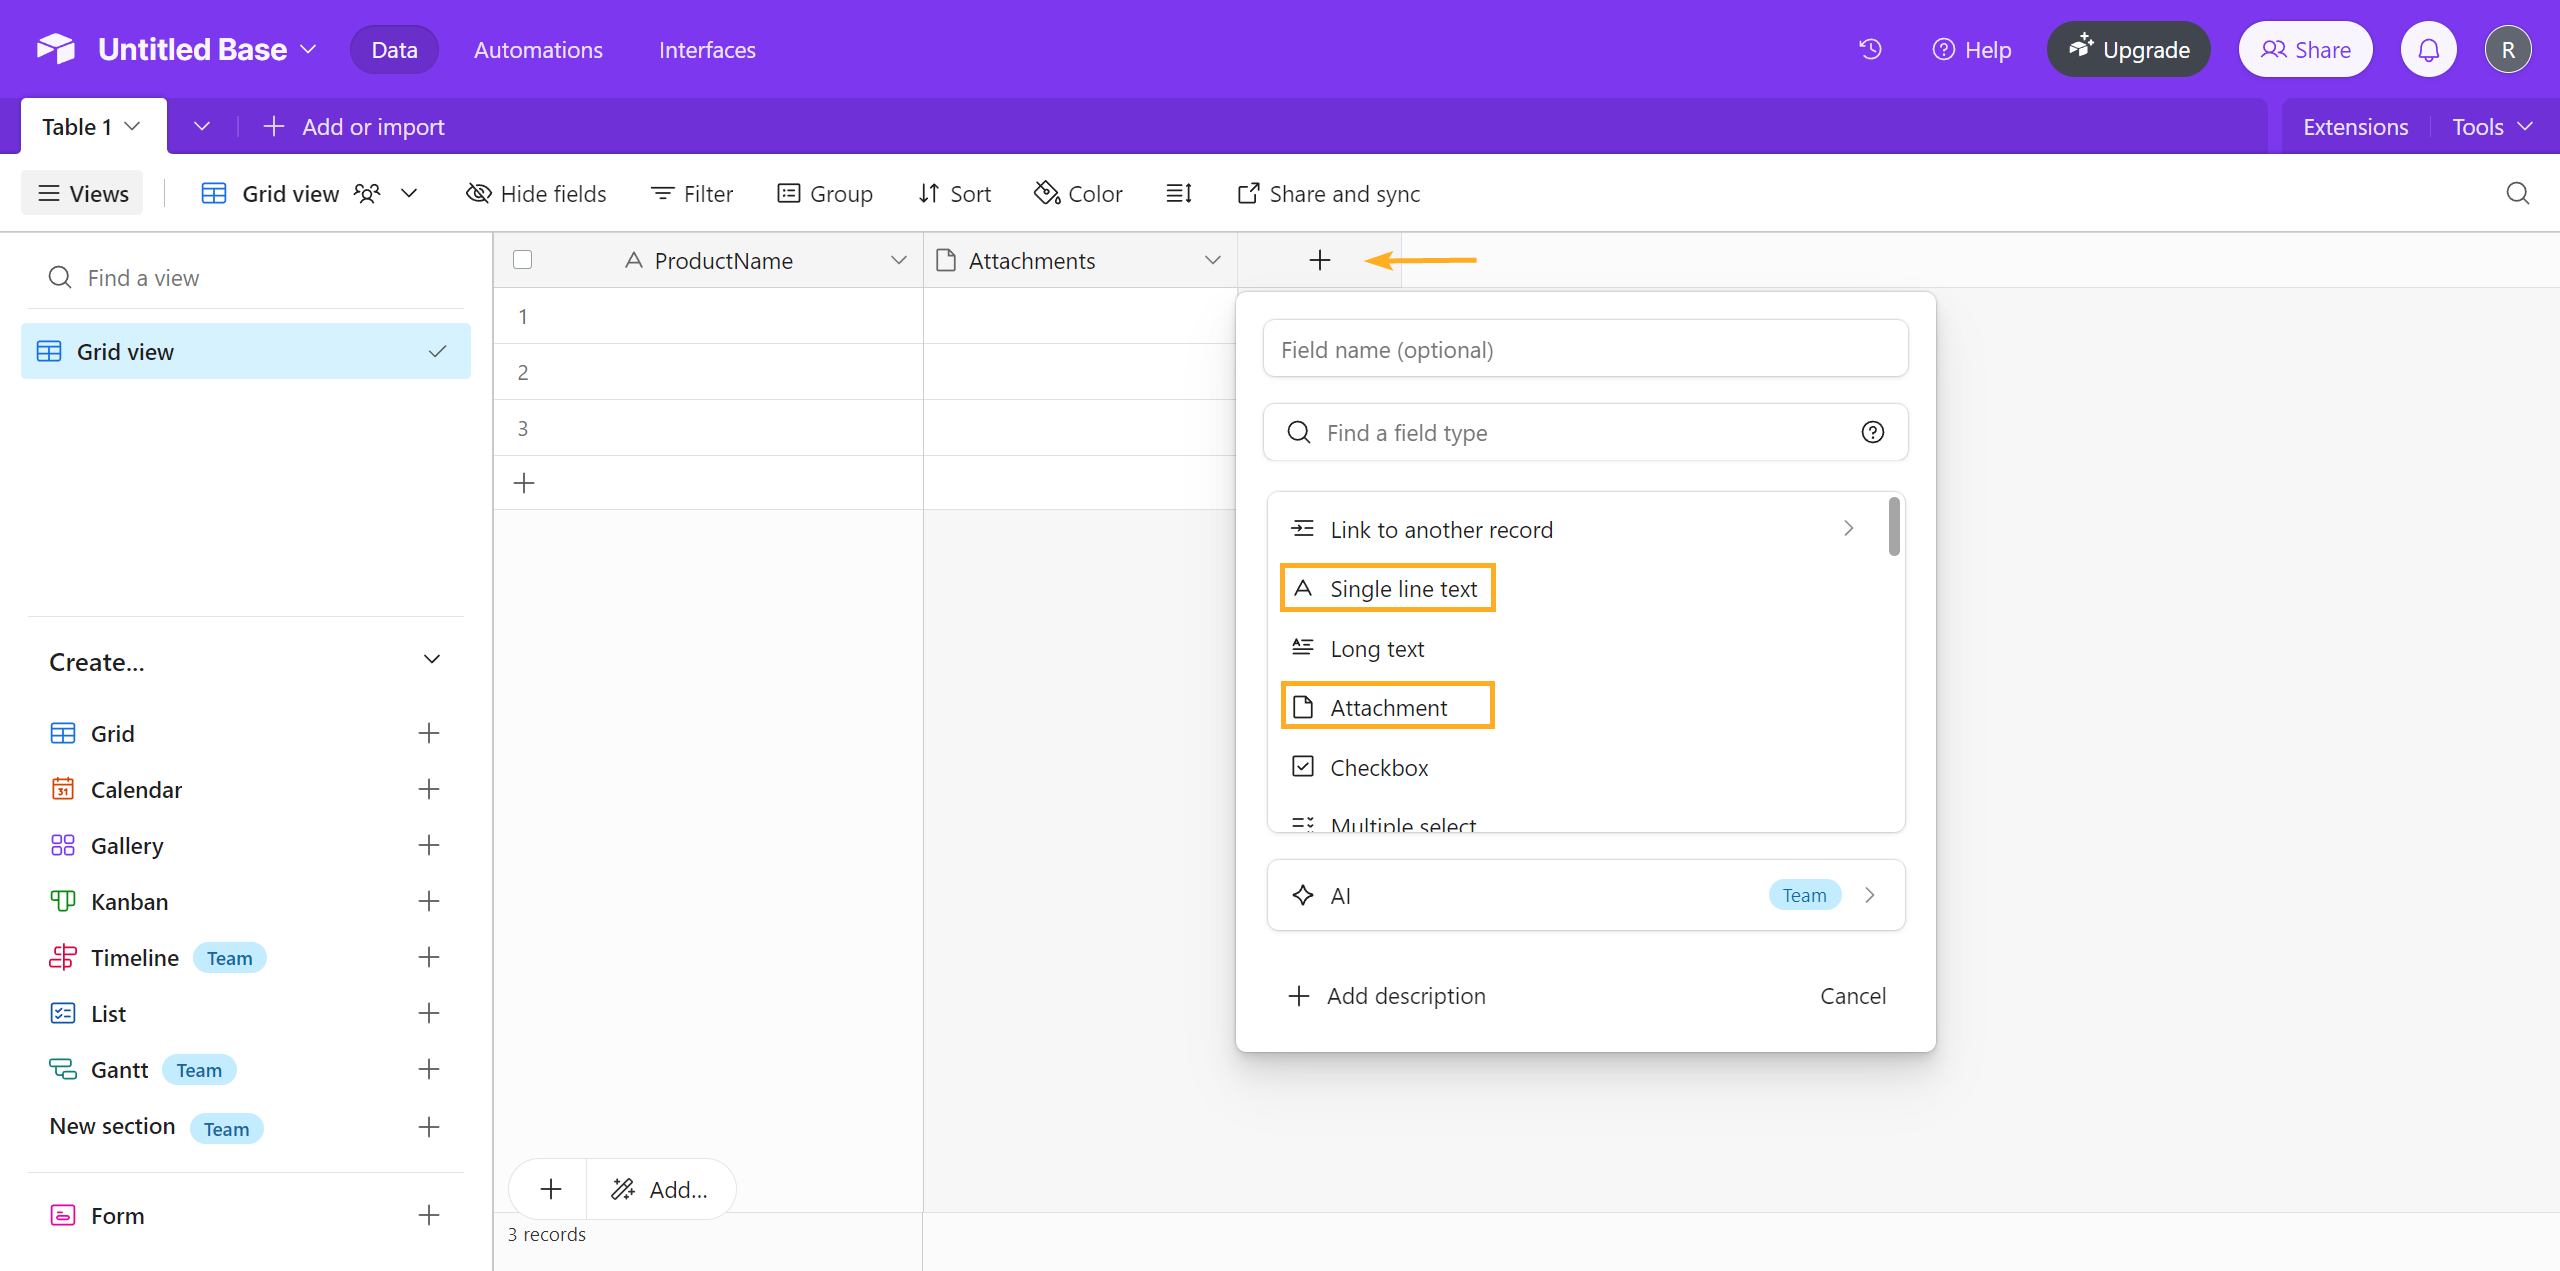
- Create 2 columns on the grid by clicking on the plus icon and name them (the naming convention is personal preference): one Single line text column named “FileName”; one Attachment column named “Attachments”.
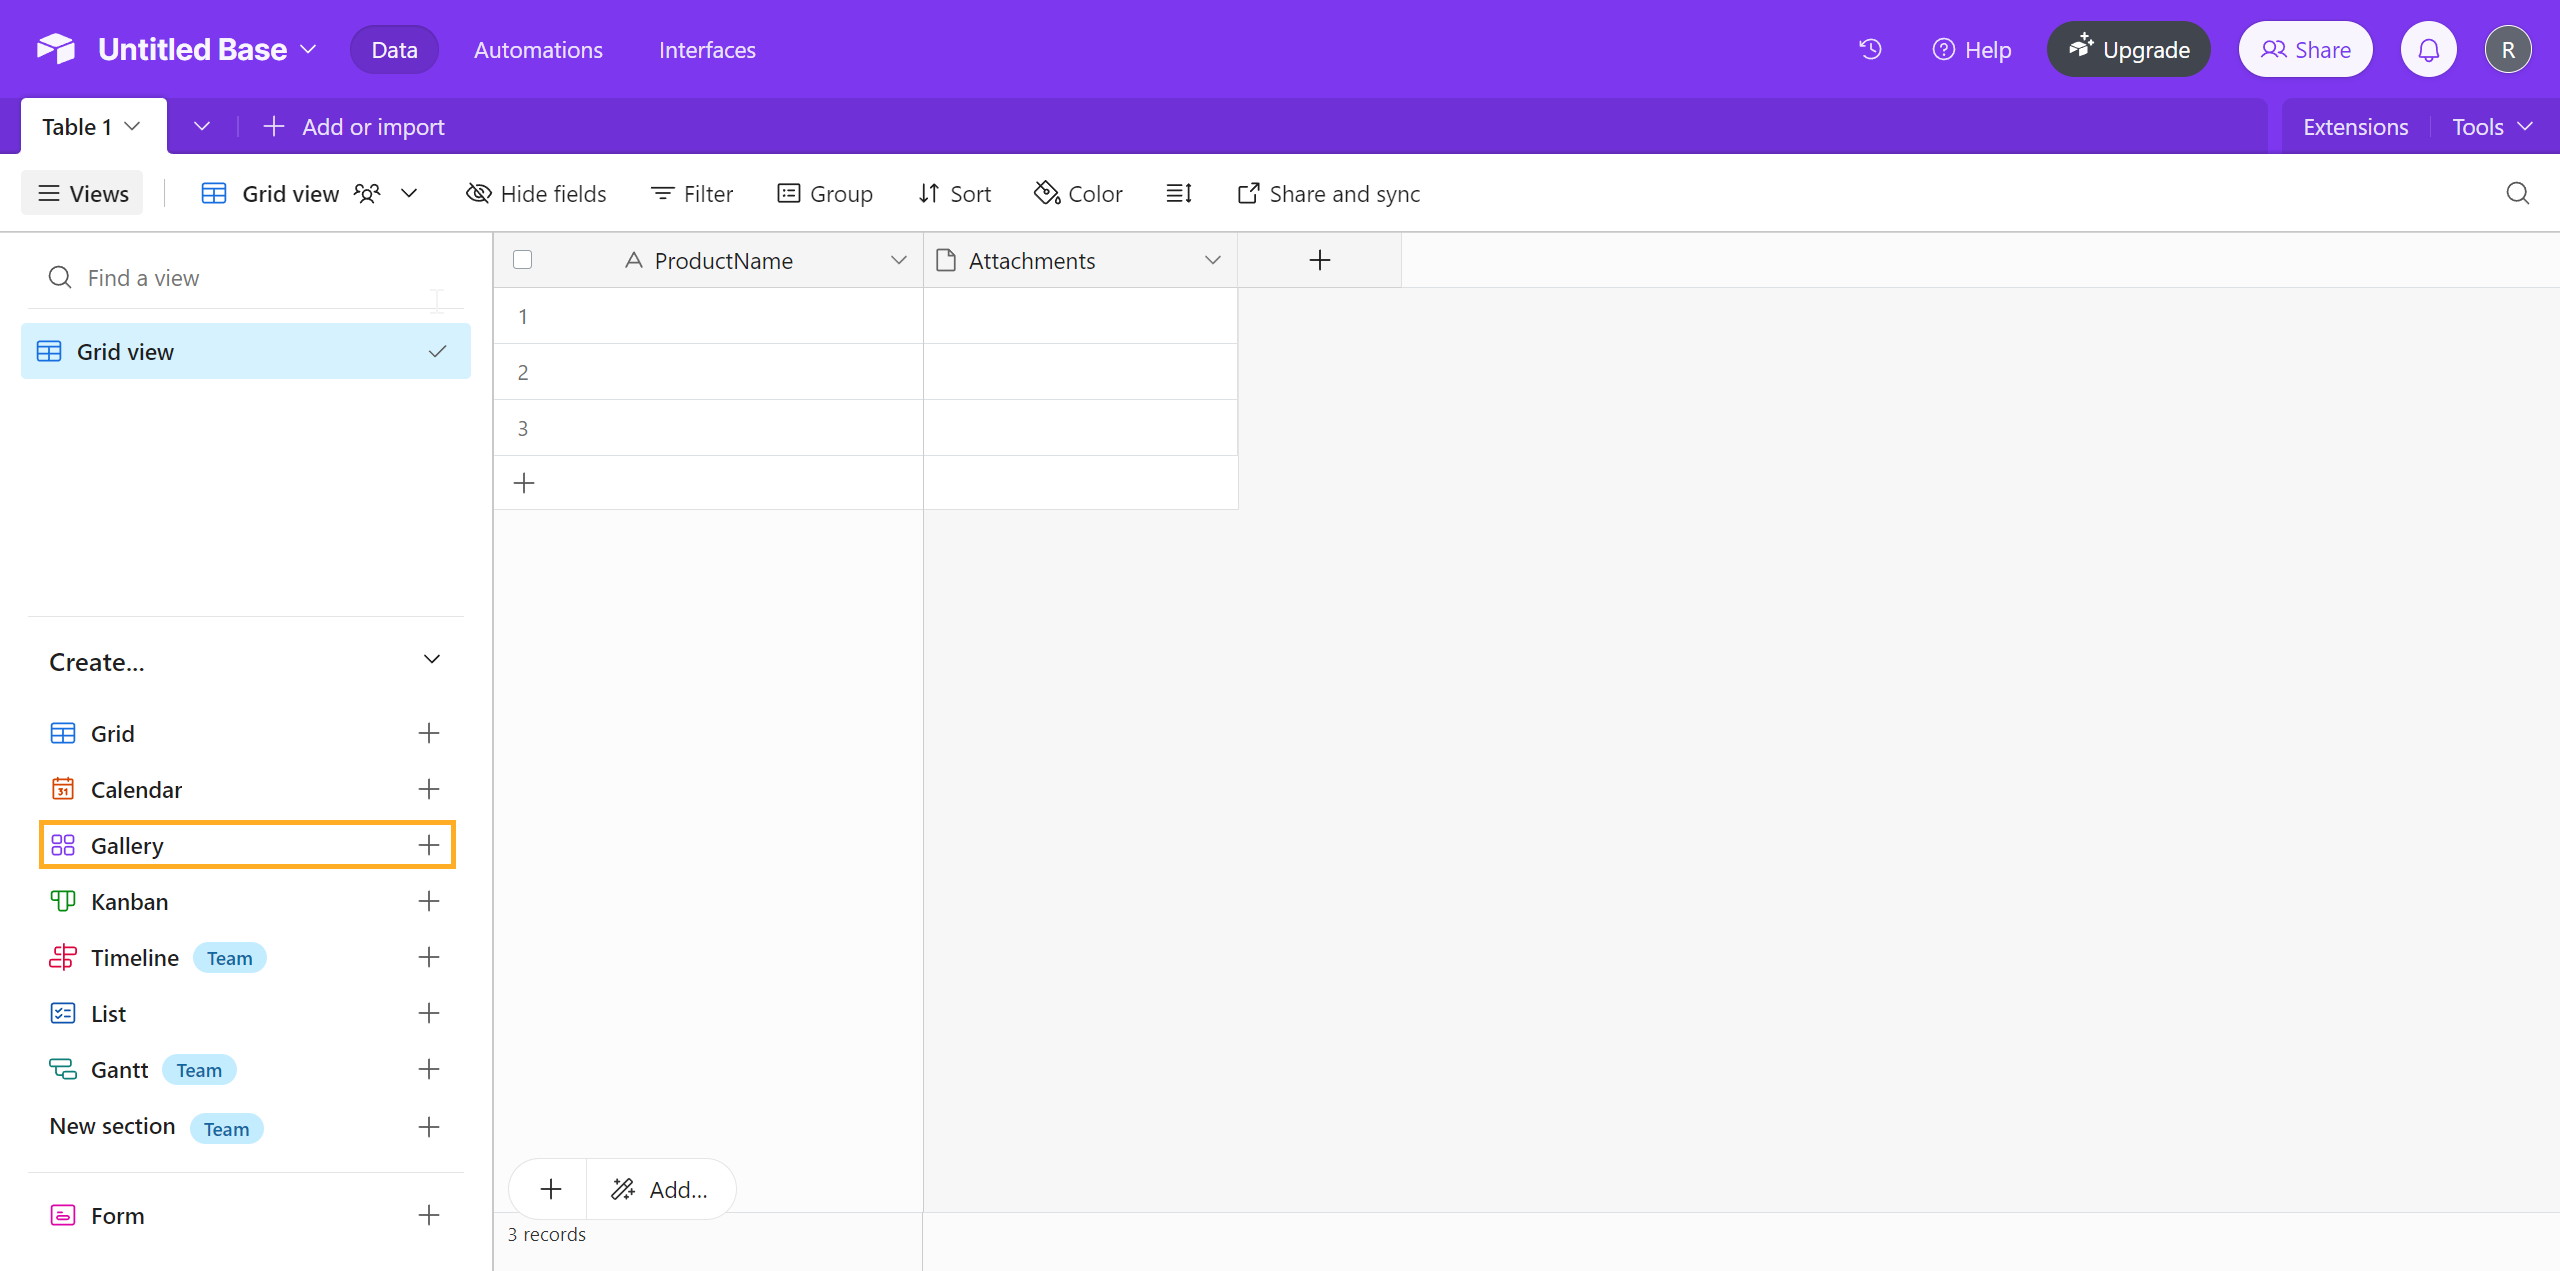
- Create a Gallery.
- From the Gallery tab, drag and drop your images onto the Add Record circle in the bottom right corner and have each item be created as a new entry. This can take up to a few minutes depending on the number and size of the images being imported.
Note: If Airtable is not allowing you to add images and returns the error “To drop files, choose an attachment image field”, you’ll need to delete the Gallery, ensure you have an Attachment type column in your Grid View, then recreate the Gallery and try again.
- Once the images from the Gallery have mapped over to the Grid view, you can download the CSV by clicking on Grid view in the top left corner, then Download CSV from the drop-down.

CSV setup
Article shortcuts
Editing the CSV (created with Airtable)
- To import images to inFlow, you must remove the file name and the parentheses () from the Attachments field.
- Add 2 empty columns in the middle (in columns B and C) and give them the similar headers as the other columns (A and D)
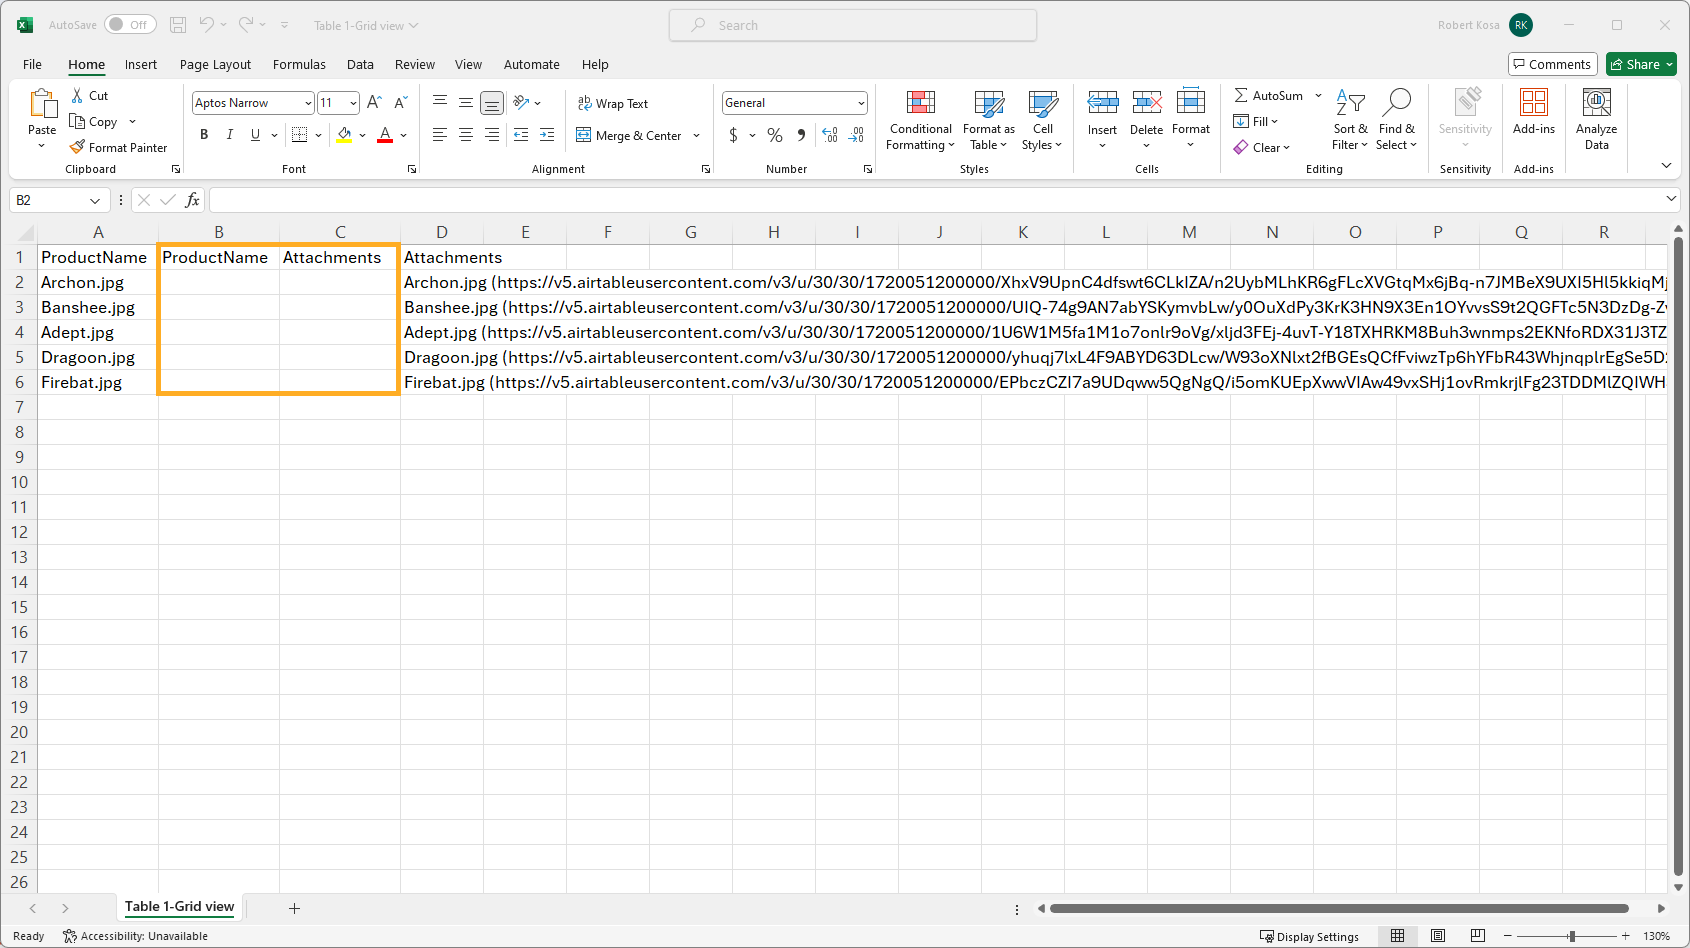
- Add the following formula to cell B2 (in the new ProductName column) to delete the extension from the file names, and apply the formula to all cells in the column that contain values in the adjacent cell:
=LEFT(A2,FIND(".",A2)-1)
- Add the following formula to cell C2 (in the new Attachments column) to extract the URL from column D, and apply to all cells in the column that contain values in the adjacent cell:
=MID(D2,FIND("https",D2),LEN(D2)-FIND("https",D2))
- Ensure that both columns B and C contain only the new values by copying the columns and pasting them back in the same spot. Otherwise, you’ll get errors when deleting columns A and D.
- Delete columns A and D.
- Save the file as a CSV to import to inFlow. Click on the Windows or Web article tab for steps for importing this CSV to inFlow.
Creating/editing the CSV (without Airtable)
If you already have URL links for your product images, you can create a CSV to upload to inFlow.
You can download a template for your picture import by
- Go to Main Menu > General > Export.
- Select Product Images from the Data type section.
- Click Export.
You can also create your own file by adding the following columns to the spreadsheet.
- Product Name / SKU (at least one field is required)
- Image URL
Things to note:
- The Product name or the SKU you enter in the spreadsheet must match the Product Name or SKU of your products in inFlow Inventory.
- If a product has multiple images, the first image that is imported will be set as the default image in inFlow.
- If you’re importing images for a product that already has them, they will be replaced with the imported ones. If you leave the URL column blank, it will delete all images associated with the product.
Saving as a .csv file from Excel
In order to import data which may contain special characters, save as CSV UTF-8 (Comma delimited)
Before you import, make sure your file is saved as a CSV.
- In your spreadsheet, click File > Save As.
- At the bottom of the window, click the Save as Type drop-down and select CSV (comma delimited).
- Click Save.
- Excel will warn you about the loss of formatting. This is not a problem. Click Yes to complete your save.
If using another spreadsheet program, save the file as a CSV before you import to inFlow.
Windows
Importing in the Windows App
- Go to Main Menu > General > Import Data.
- Select Product Images from the Data type drop-down menu.
- Browse your file location and select the CSV you prepared earlier.
- Click Next.
- On the mapping screen, match the columns to the fields in the CSV drop-down menu
- Click Import. You’ll receive an email when the import is complete.

Web
Importing in inFlow Inventory for Web
- Go to Main Menu > Import
- In the Data type field, select Product Images.
- Browse for the CSV you prepared earlier.
- Click Next.
- Match the columns in the CSV to the fields. Once you match the URL field, you’ll see a preview of the first image you’re importing.
- Click Import. You’ll receive an email when the import is complete.


0 Comments