How to set up payment terms in inFlow (net 30, net 60, etc.)
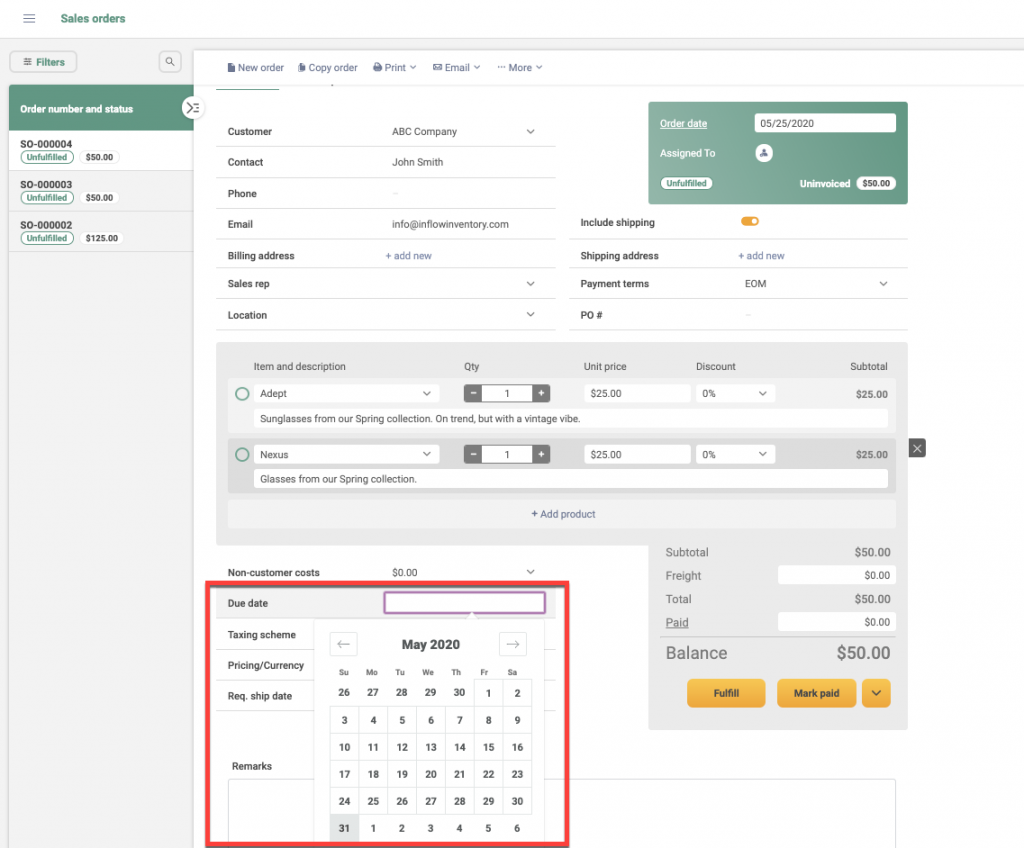
You can set up Payment terms in a sales order in inFlow Inventory to automatically set a due date for payment (customer payment or payment to your vendor).
For example, Net 30 is very common, and it means that the payment is due 30 days from the invoice date.
Web
In inFlow, we have already set up these default payment terms:

If you want to add/modify payment terms
- Go to https://app.inflowinventory.com/options/orders (If you’re already logged into inFlow, go to Main Menu > Options > Orders.)
- Click on the Payment terms button.
- Click on +Add payment term to enter another payment term to inFlow. Set the number of days for inFlow to calculate a due date (from the invoiced date). For example, “Net 45″would have a days due of 45 days from the invoiced date.
- If you want to remove payment terms you don’t use, click the “X” button next to the row you don’t want.
- Click Save when done.
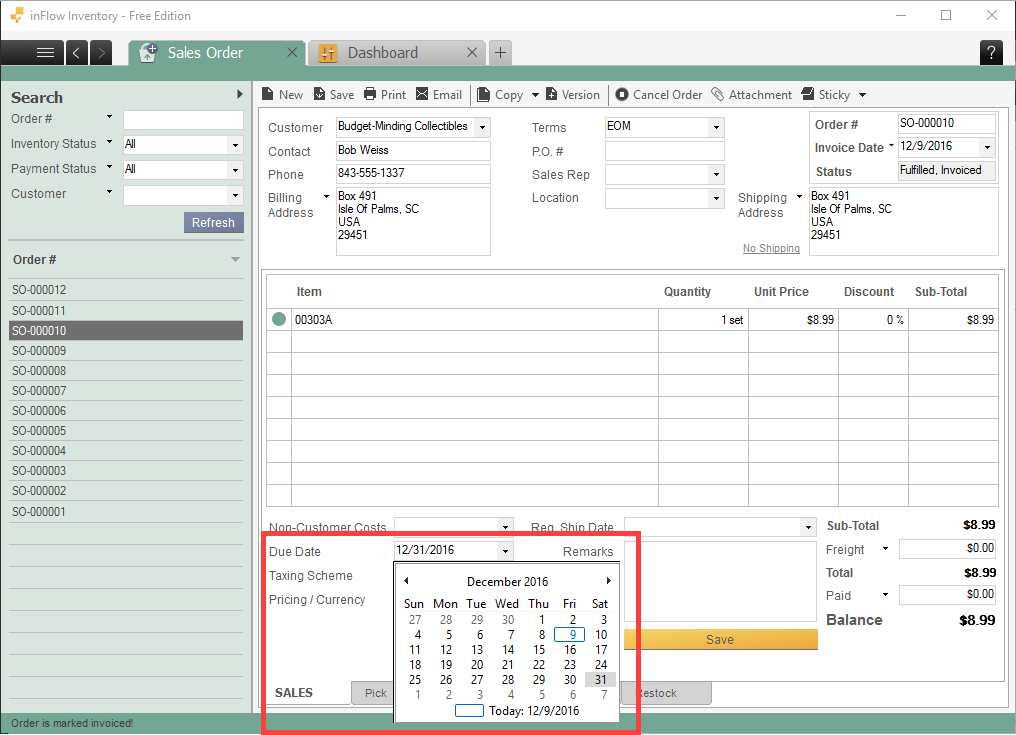
Note that inFlow isn’t able to handle payment terms with specialized “Days due.” For example, “EOM” or “end of month” payment terms would require a formula that calculates the number of days from the invoiced date to the end of that month. The “Days Due” column, as shown above, can only handle numbers, not formulas.
You can still create the payment terms if you want it to show up on the sales order, but make sure to set it as “0 days due” and you must manually set the Due Date on the invoice yourself.

Adding payment terms to customer records
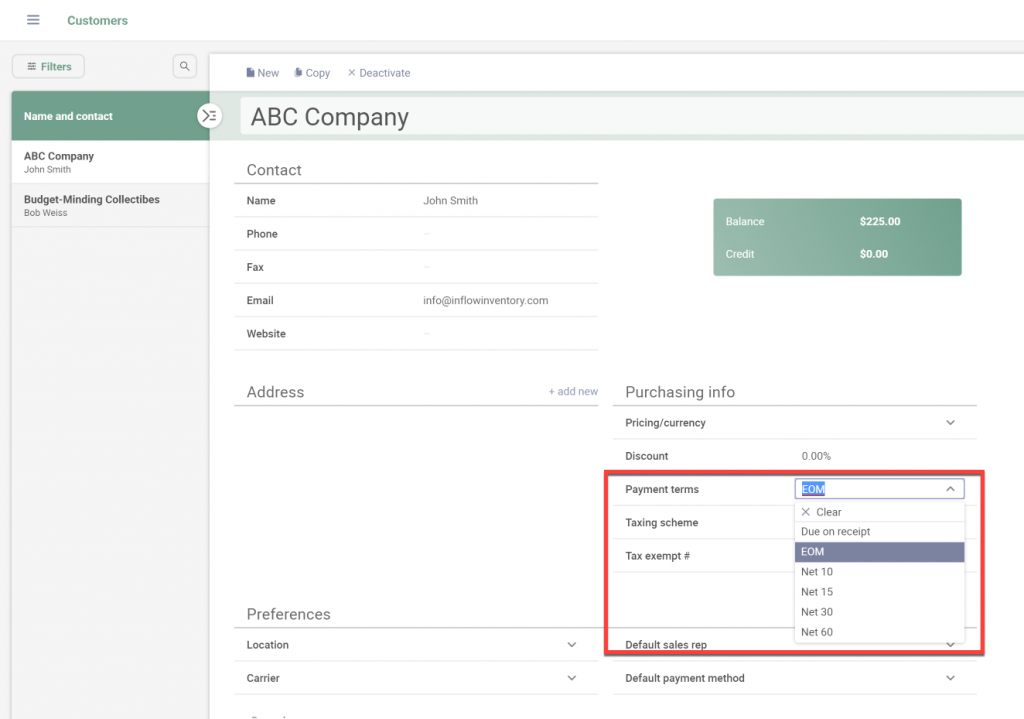
If you add a payment term to your customer’s records, sales orders will then auto-populate the Term field with the payment term you choose for your customer. To add a payment term to your customers, go to:
- Main Menu > Sales > Customer List.
- Double-click on a customer record profile from the list.
- On the Customer Info tab click the Payment Terms drop-down menu, then to select the option that your customer uses.

How payment terms work with the Online Showroom and inFlow Pay
If you use the Online Showroom with inFlow Pay, you have the option to omit the payment from view for any customer who has set payment terms on their profile.
To enable this, check off the Only require payment from customers whose Payment terms settings are due immediately on the Showroom checkout settings.
Windows
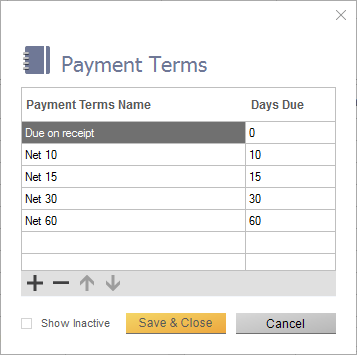
In inFlow, we have already set up these default payment terms:

If you want to add/modify payment terms
- Go to Main Menu > Options > Settings > References.
- Click on Payment Terms.
- Add a payment terms name and set the number of days for inFlow to calculate a due date (from the invoiced date). For example, “Net 45″would have a days due of 45 days.
- If you want to remove payment terms you don’t use, right-click on the row you don’t want and click Delete selected rows.
Note that inFlow cannot handle payment terms with specialized “Days due.” For example, “EOM” or “end of month” payment terms would require a formula that calculates the number of days from the invoiced date to the end of that month. The “Days Due” column, as shown above, can only handle numbers, not formulas.
You can still create the payment terms if you want it to show up on the sales order, but make sure to set it as “0 days due” and you must manually set the Due Date on the invoice yourself.

Adding payment terms to customer records
If you add a payment term to your customer’s records, sales orders will then auto-populate the Term field with the payment term you choose for your customer. To add a payment term to your customers, go to:
- Main Menu > Sales > Customer List.
- Double-click on a customer record profile from the list.
- On the Customer Info tab, click the Payment Terms drop-down menu, then select the option that your customer uses.

How payment terms work with the Online Showroom and inFlow Pay
If you use the Online Showroom with inFlow Pay, you have the option to omit the payment from view for any customer who has set payment terms on their profile.
To enable this, check off the Only require payment from customers whose Payment terms settings are due immediately on the Showroom checkout settings.


0 Comments