How to email invoices and other documents
You can send emails from inFlow without any additional setup. However, if you’d like to customize your email settings, follow the steps in this article. Otherwise, see below for how you can send emails from inFlow orders.
Web
Emailing from an order
The Action bar at the top of sales orders and any other printable record contains an Email button. Clicking this will load a drop-down menu where you can select which document to email.
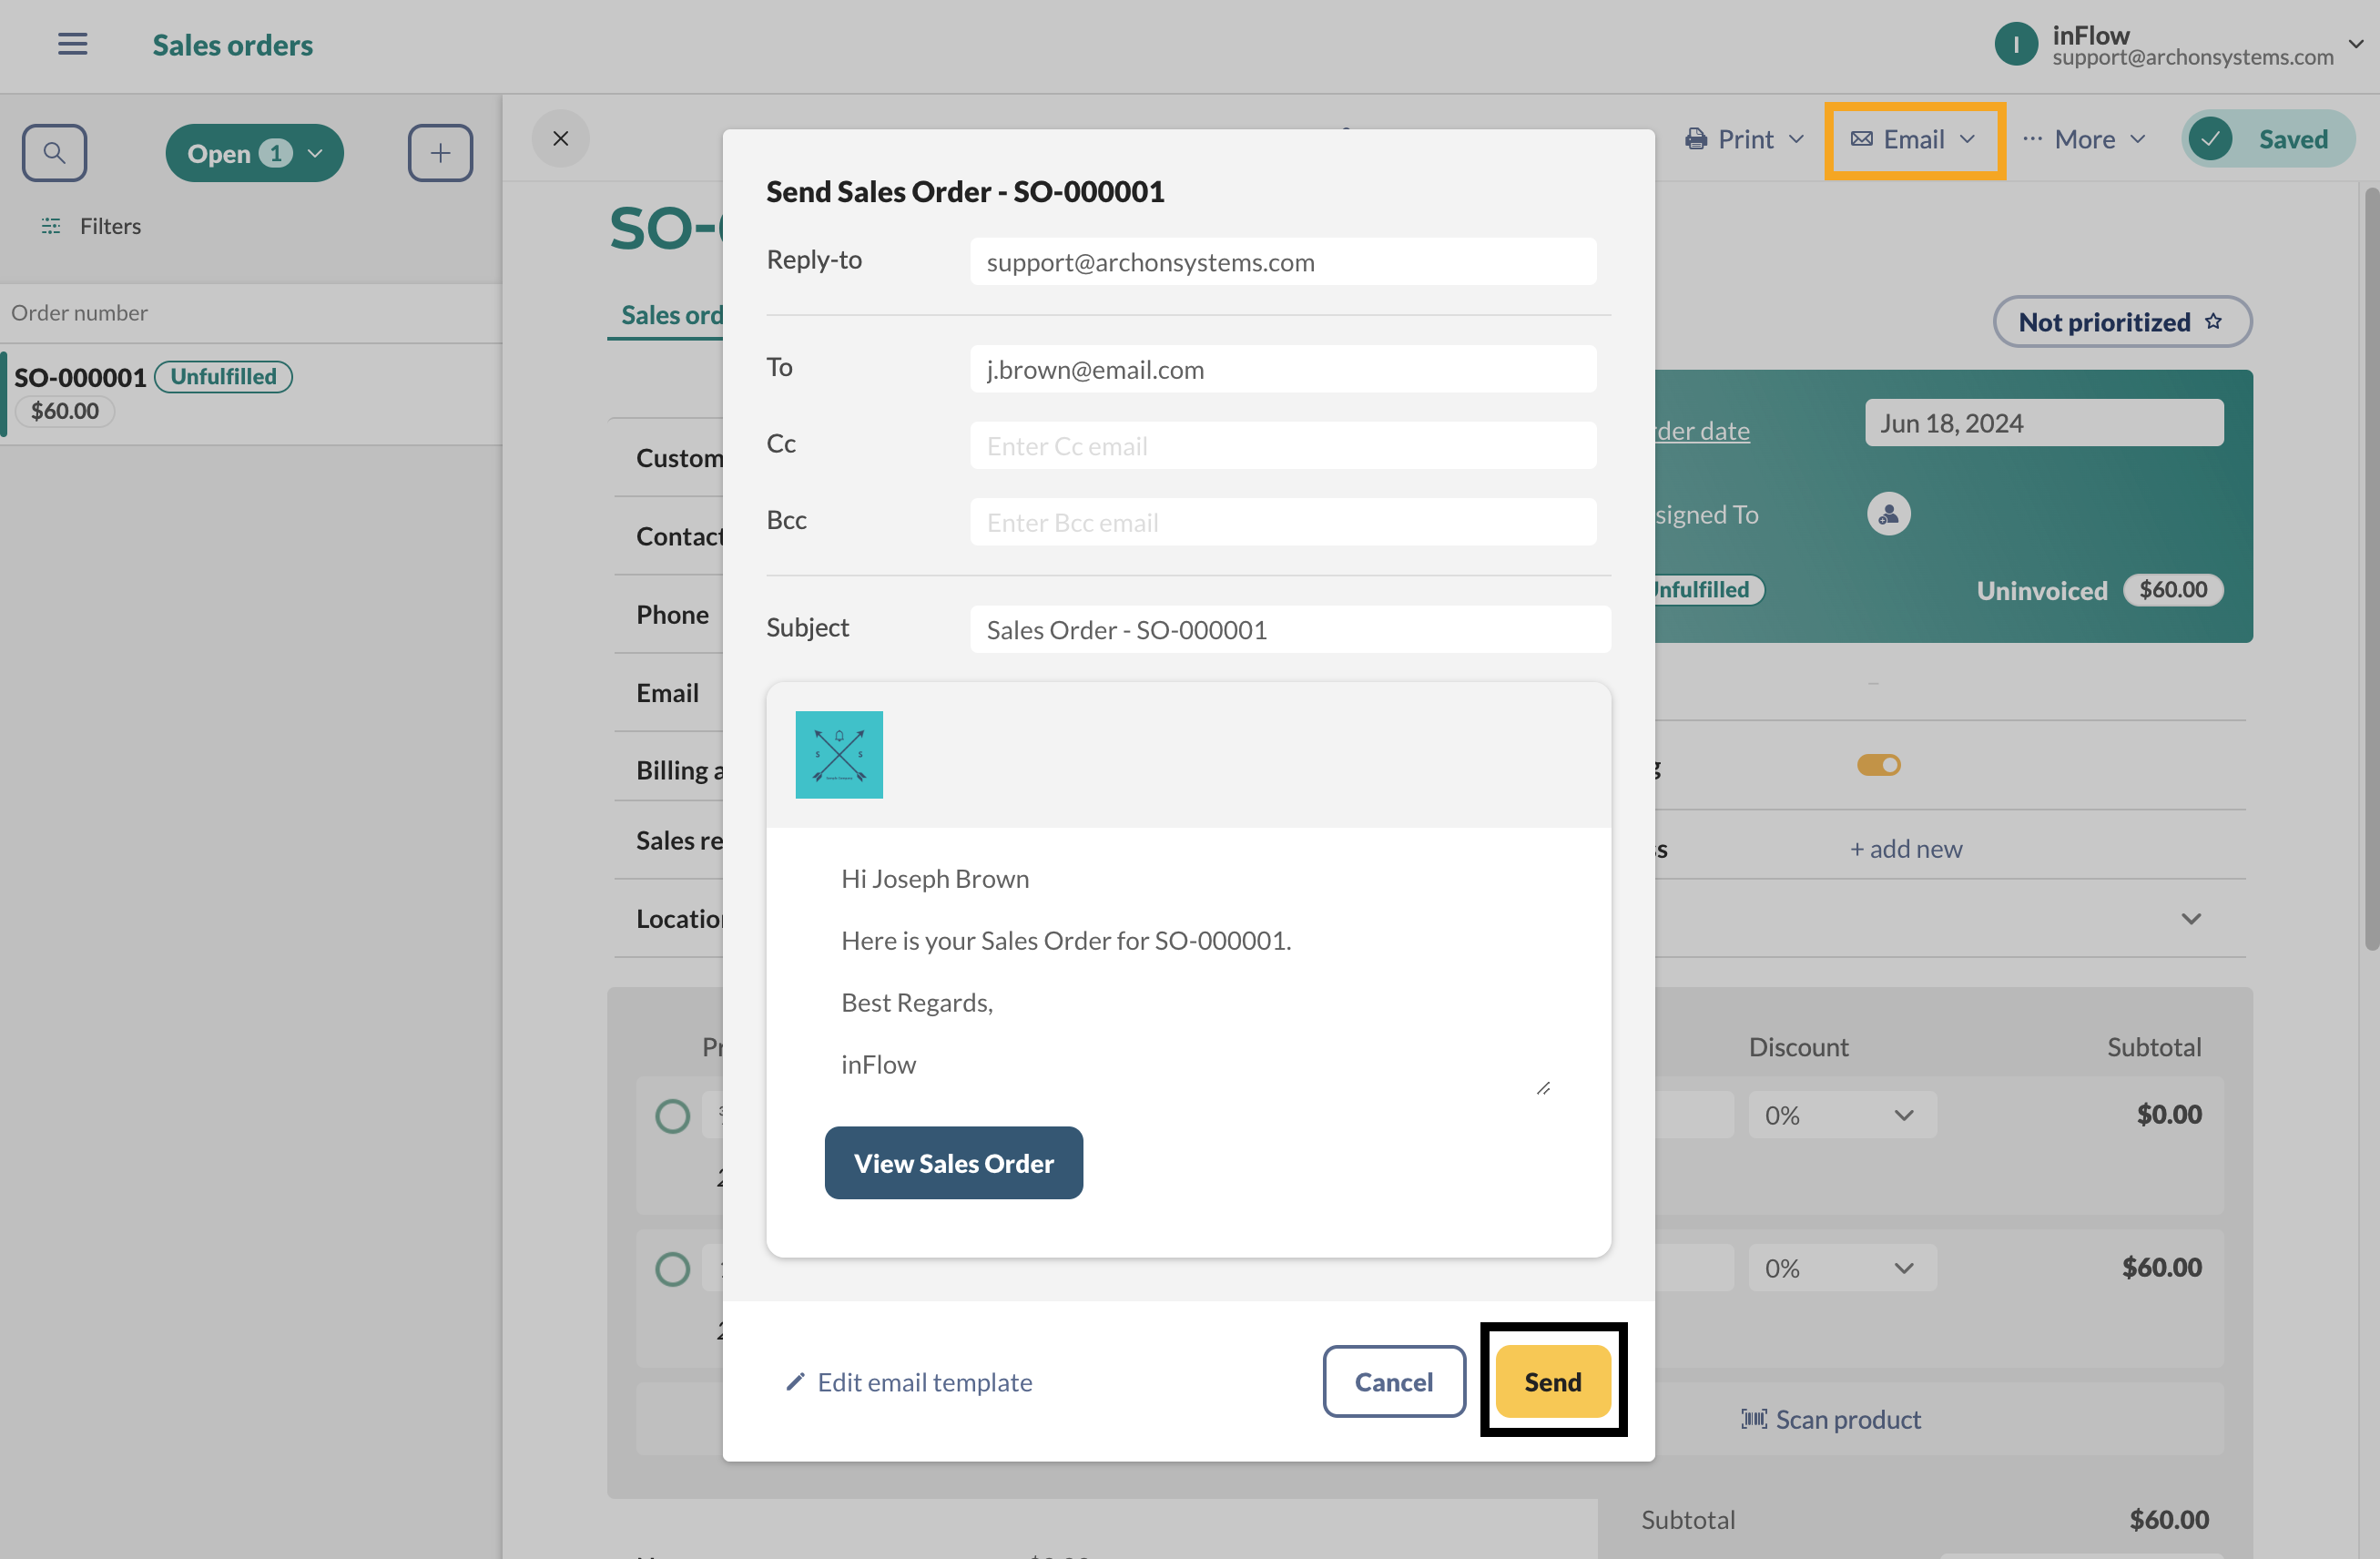
Select Edit email template to make changes to the email template. Take a look at this guide to learn more.
Available email fields
- Reply-to: The email address that replies to emails you send through inFlow will be sent to (not shown when using legacy email settings).
- To: The email address of your intended recipient. You may add multiple emails here by separating them with a comma.
- Cc: Click this to add a field where you can add other email addresses that will also receive the email by carbon copy.
- Bcc: Click this to add a field where you can add other email addresses that will also receive the email by blind carbon copy.
- Subject: The subject line of the email to be sent.
- Message: The body of the email to be sent.
- Attachment: The document will automatically be attached as a PDF file linked in the email (Microsoft Word custom documents can only be emailed from inFlow for Windows).
Customer information
The customer’s email address (from the Customer record) will automatically be filled out for Customer Statements and Sales documents, or a vendor’s email address for Vendor Statements or Purchase documents. If you change the “To” address, a save icon will appear next to the “To” field, allowing you to save the email address back to the Customer or Vendor record.
For other documents (such as those associated with a Manufacture Order, Stock Transfer, Stock Adjustment, or Count Sheet), clicking the save icon will remember this email address as the default recipient for the current inFlow user and that type of document.
Automatic Cc and Bcc
If you’ve saved emails into the Cc and Bcc fields, they will be automatically filled out.
Legacy email settings
Emails in inFlow Inventory for Web cannot be sent if your profile is using legacy email settings. For more information about our current and legacy email settings, please see this article.
Troubleshooting
If there’s an error sending an email, an error dialog window will be shown shortly afterward. If you’re having trouble getting emails to send, please take a look at our email troubleshooting guide.
Windows
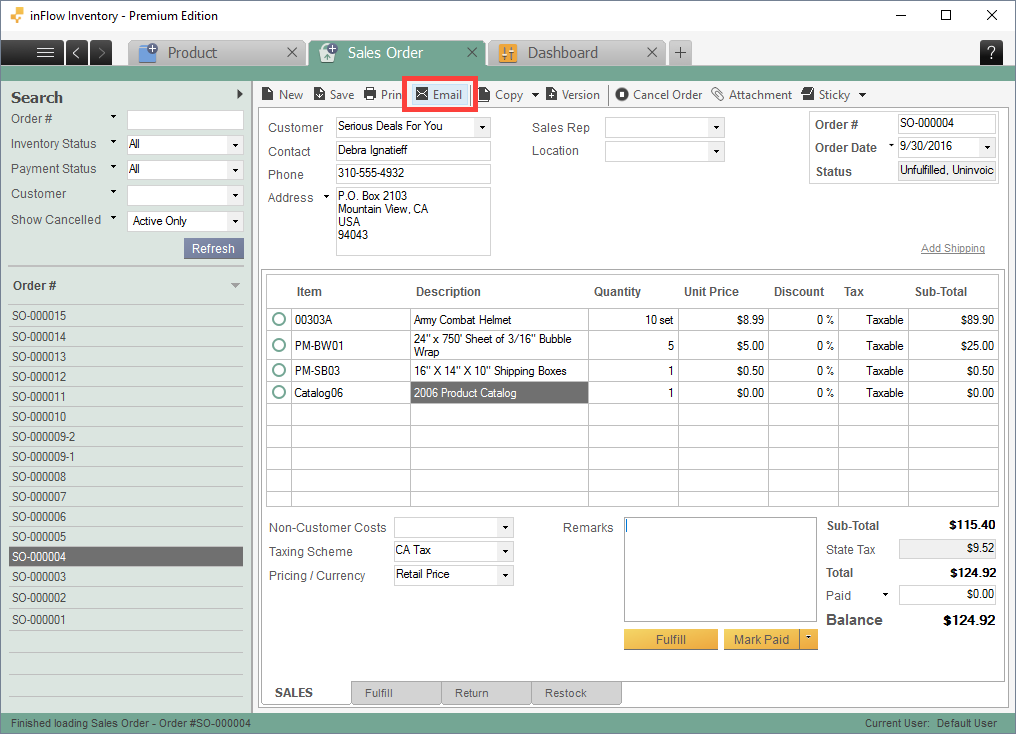
Emailing from an order
The Action bar at the top of sales orders and any other printable record contains an Email button. Clicking this will bring up a preview window where you can select which document to email.
Available email fields
- Reply-To: The email address that replies to emails you send through inFlow will be sent to (not shown when using legacy email settings).
- Cc: Click this to add a field where you can add other email addresses that will also receive the email by carbon copy.
- Bcc: Click this to add a field where you can add other email addresses that will also receive the email by blind carbon copy.
- To: The email address of your intended recipient. You may add multiple emails here by separating them with a comma.
- Subject: The subject line of the email to be sent.
- Message: The body of the email to be sent.
- Attachment: The document will automatically be attached in PDF format (custom documents will be attached in Microsoft Word .doc or .docx format).
Customer information
The customer’s email address (from the Customer record) will automatically be filled out for Customer Statements and Sales documents, or a vendor’s email address for Vendor Statements or Purchase documents. If you change the “To” address, a save icon will appear next to the “To” field, allowing you to save the email address back to the Customer or Vendor record.
For other documents (such as those associated with a Manufacture (Work) Order, Stock Transfer, Stock Adjustment, or Count Sheet), clicking the save icon will remember this email address as the default recipient for the current inFlow user and that type of document.
Automatic Cc and Bcc
If you’ve saved email addresses into the Default Cc and Default Bcc fields, the cc and bcc fields will be automatically filled out.
Troubleshooting
If there’s an error sending an email, an error dialog window will be shown shortly afterward. If you’re having trouble getting emails to send, please take a look at our email troubleshooting guide.
Mobile
Emailing from an order
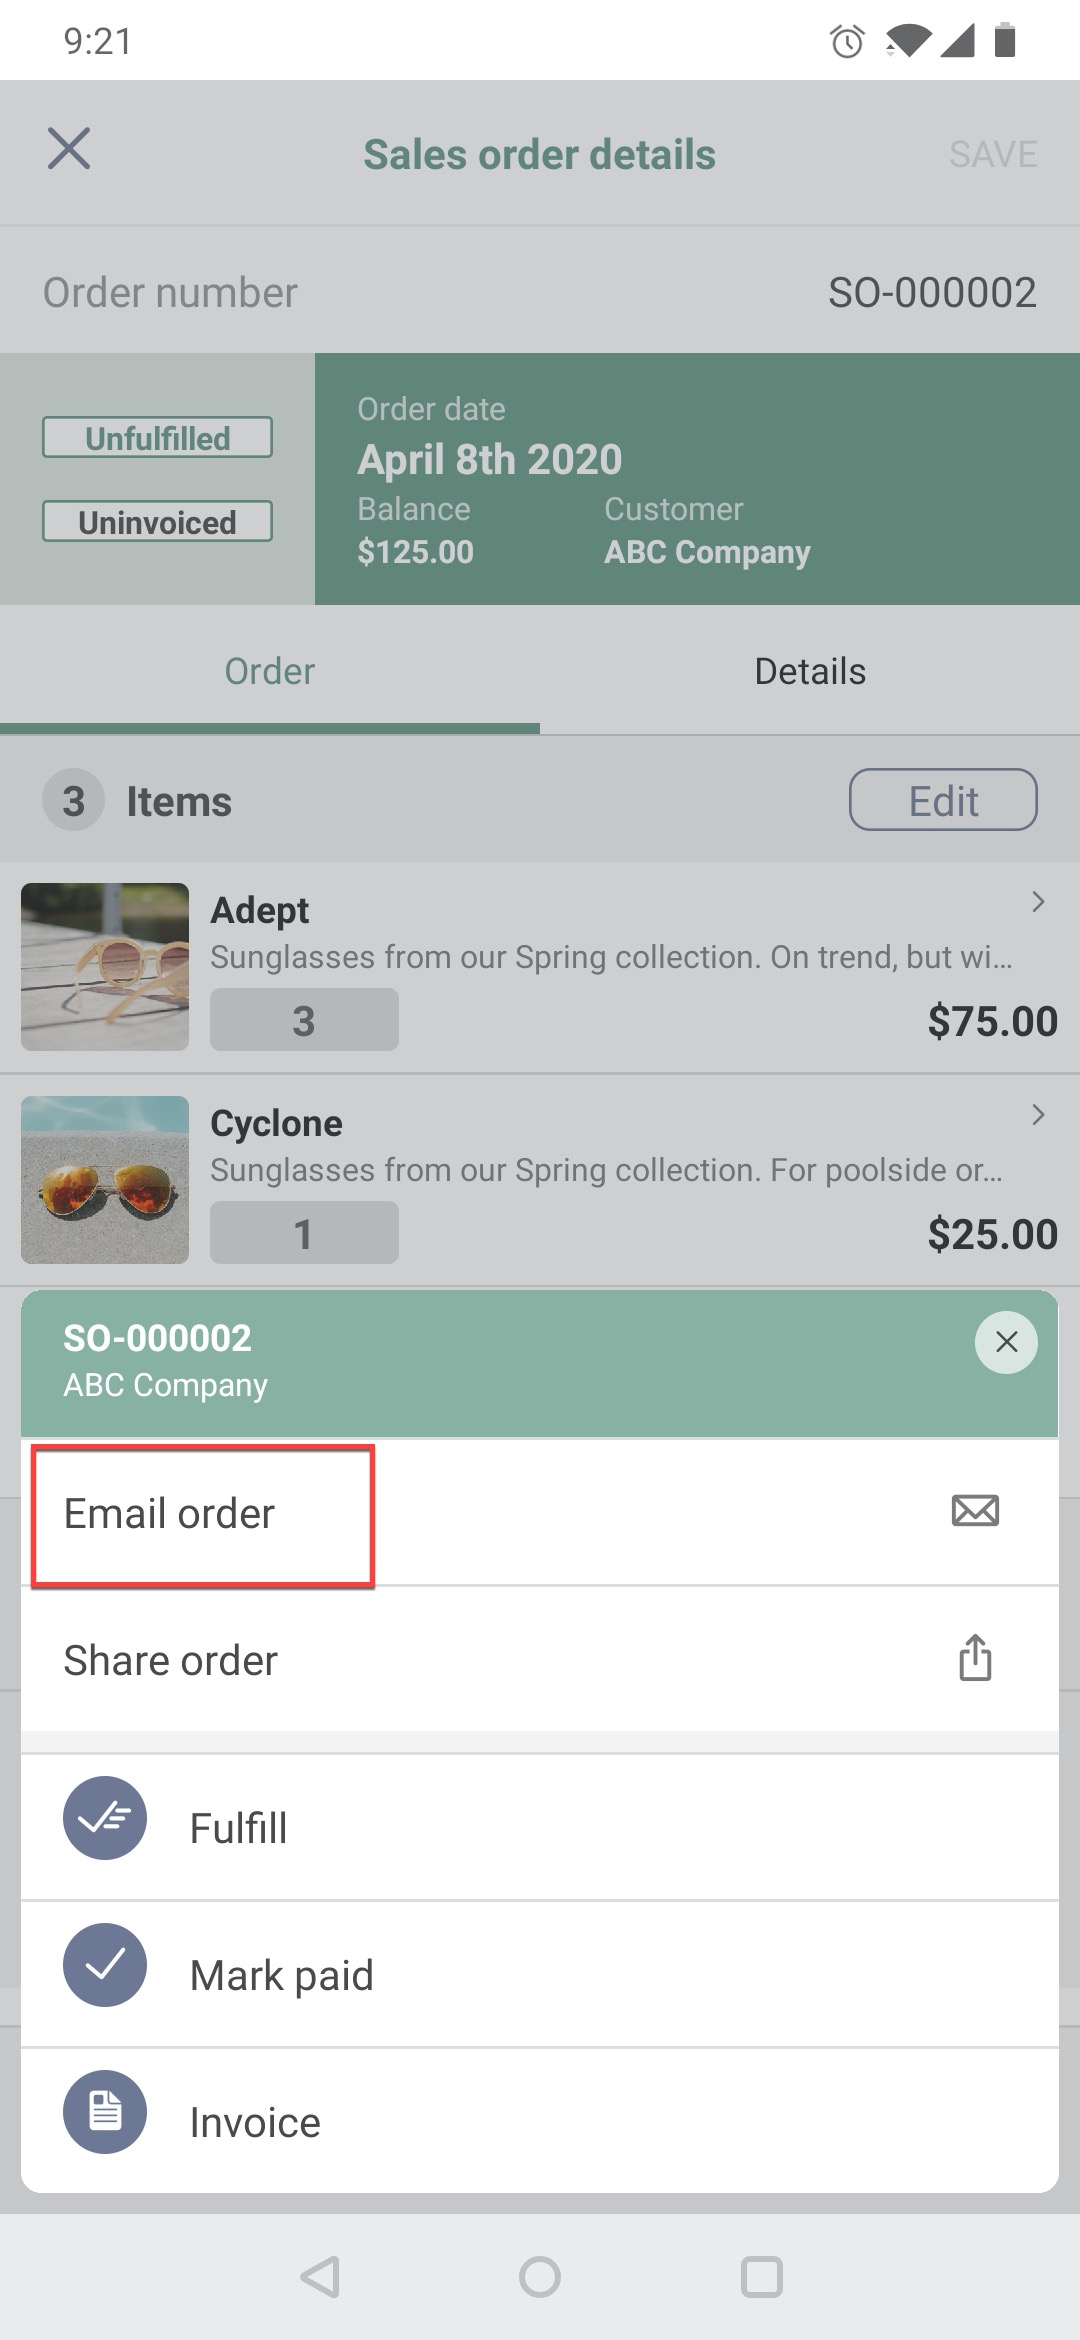
Emailing from the inFlow mobile app helps you get more done when on the go. See below for full steps on how to email from the mobile app.
- Open or create a new sales order.
- Once the order is ready to send to your customer or vendor, tap the Actions button at the bottom of the screen.
- Tap Email order.
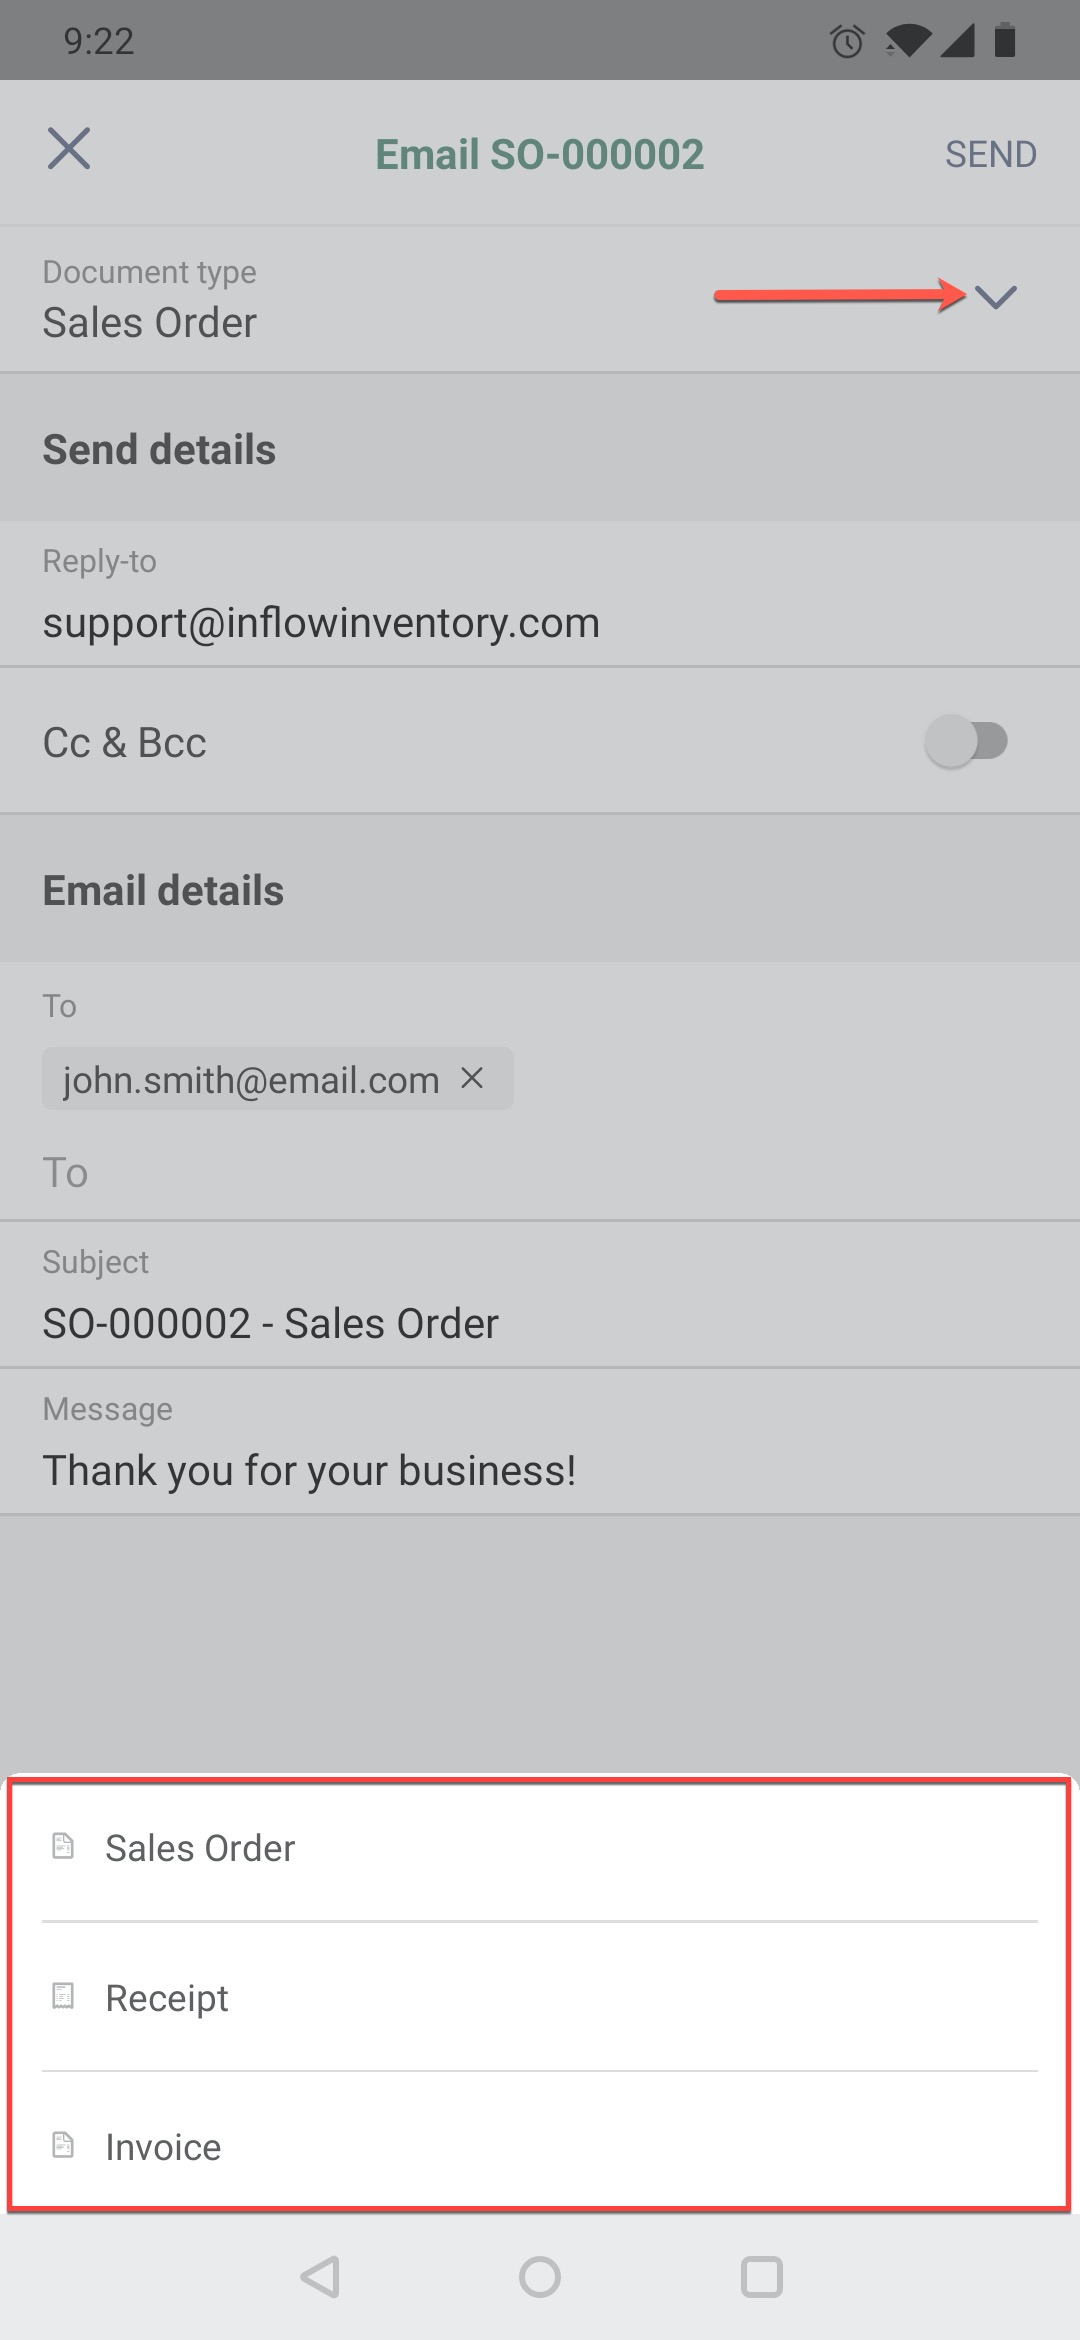
- Tap Document type if you’d like to change which document you’d like to send. If you change the document type, the subject line will also change too.
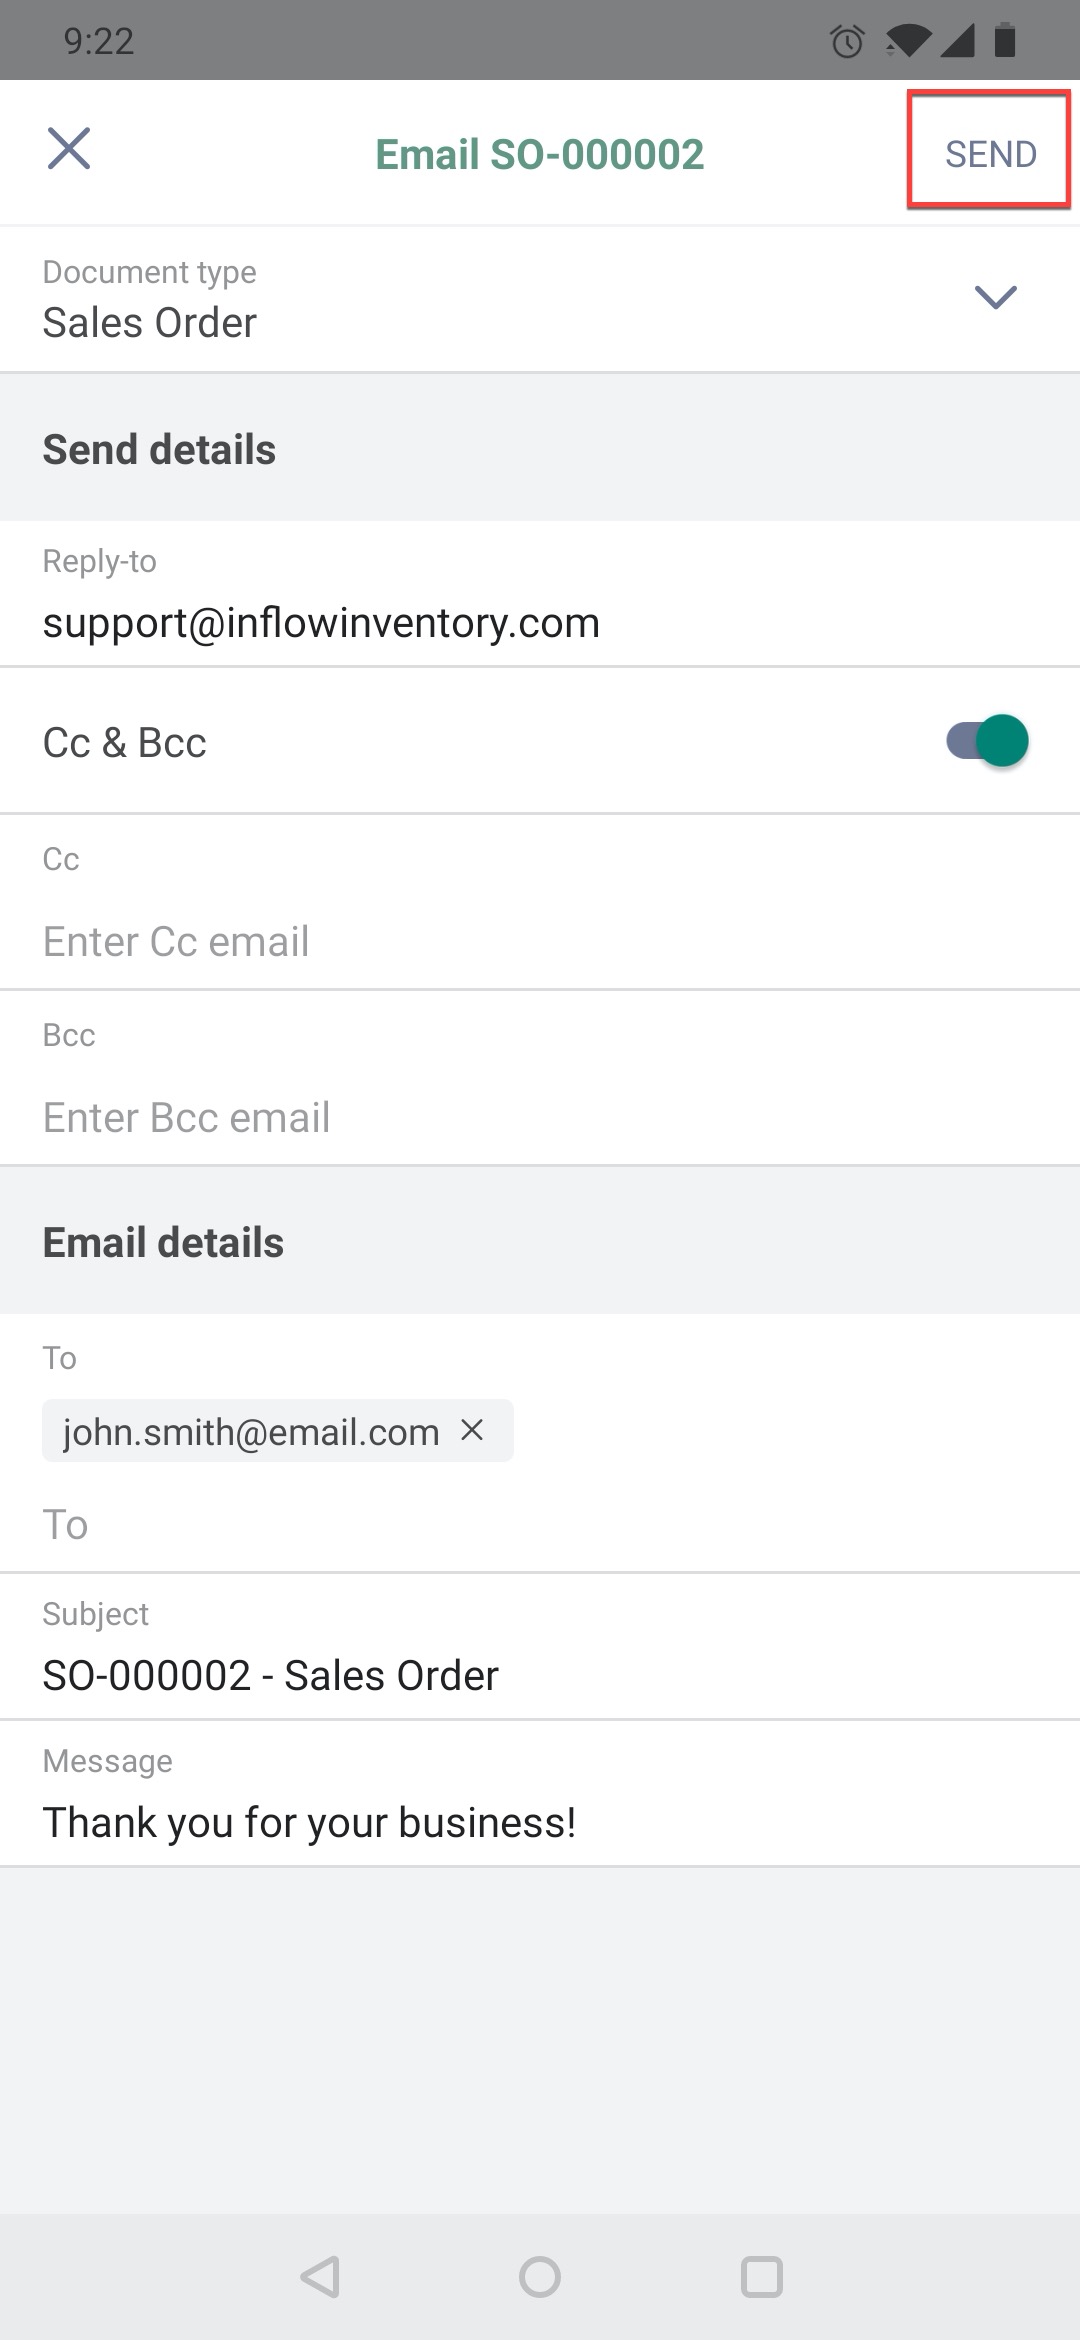
- You also have the option of adding a Cc & Bcc to the email.
- The To field is where you can add the email address of your customer or vendor. You can also add more than one email address here.
- At the bottom, you can type in a personalized message.
- When done, click Send at the top right-hand corner.
And now your email has been sent!
Just like sending an email from inFlow Inventory for Web, the recipient will be sent a link to the document that they can print or save as a .pdf file.
Available email fields
- Reply-To: The email address that replies to emails you send through inFlow will be sent to (not shown when using legacy email settings).
- Cc & Bcc: Toggle on the Cc and bcc, then add other email addresses that will also receive the email as a carbon copy.
- To: The email address of your intended recipient. You may add multiple emails here by separating them with a comma.
- Subject: The subject line of the email to be sent.
- Message: The body of the email to be sent.
- Attachment: The document will automatically be attached in PDF format that is linked in the email (custom documents can only be emailed from inFlow Inventory for Windows).
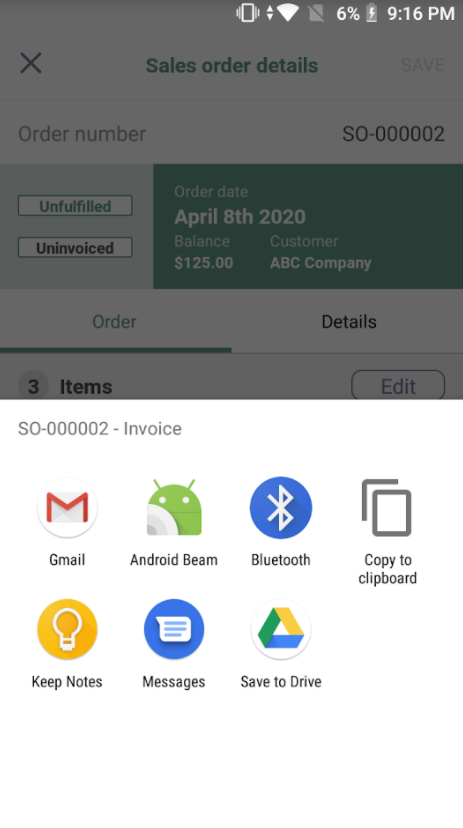
Sharing your sales order
You can email your order or share it from the inFlow Inventory mobile app with any of your phone contacts. See below for details.
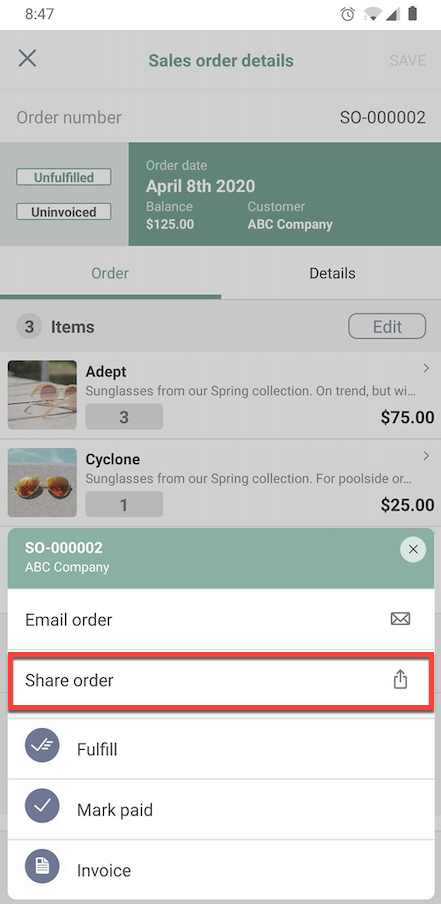
- First, tap on the Actions button.
- Click on Share order.
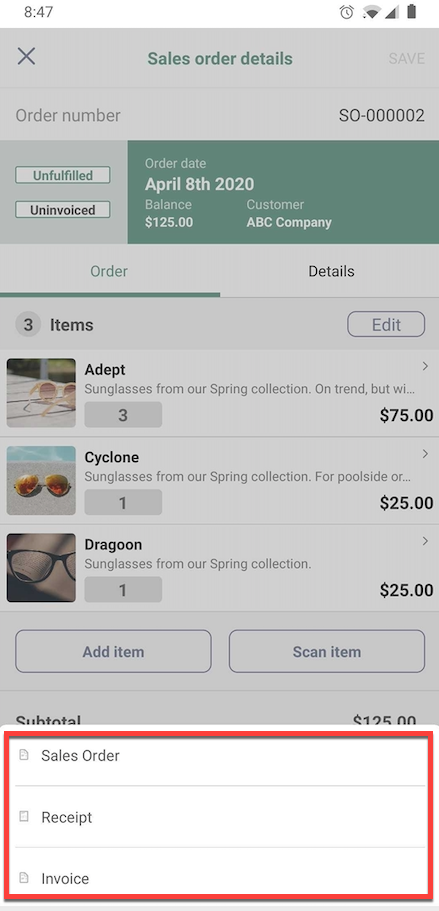
- Next, tap on which document you’d like to send from the options listed.
- A list of contacts and apps will be listed for you to share your order with. Select one. Then your document will be shared with that contact!


0 Comments