

Just like anything else in your business, it’s important to have a process for receiving and putting away inventory. Here at inFlow we like to break that down into three distinct steps: counting what you received, checking the packing slip against the purchase order (PO), and then labelling and putting away your products.
If you’re the watch-and-learn type, we’ve made a four minute video about the process. You should check it out here!

But if you can’t watch it right now, don’t worry, because we’ll break down all three of those steps below.
Step one: Count the inventory you received
We’ll start this step by assuming you’ve physically received the entire delivery and it’s sitting somewhere in your office or warehouse — preferably a clean, neat space so that you can count things easily.
Incoming deliveries should come with a packing slip from your vendor, which lists all of the products and quantities. You’ll want to keep that front and center.
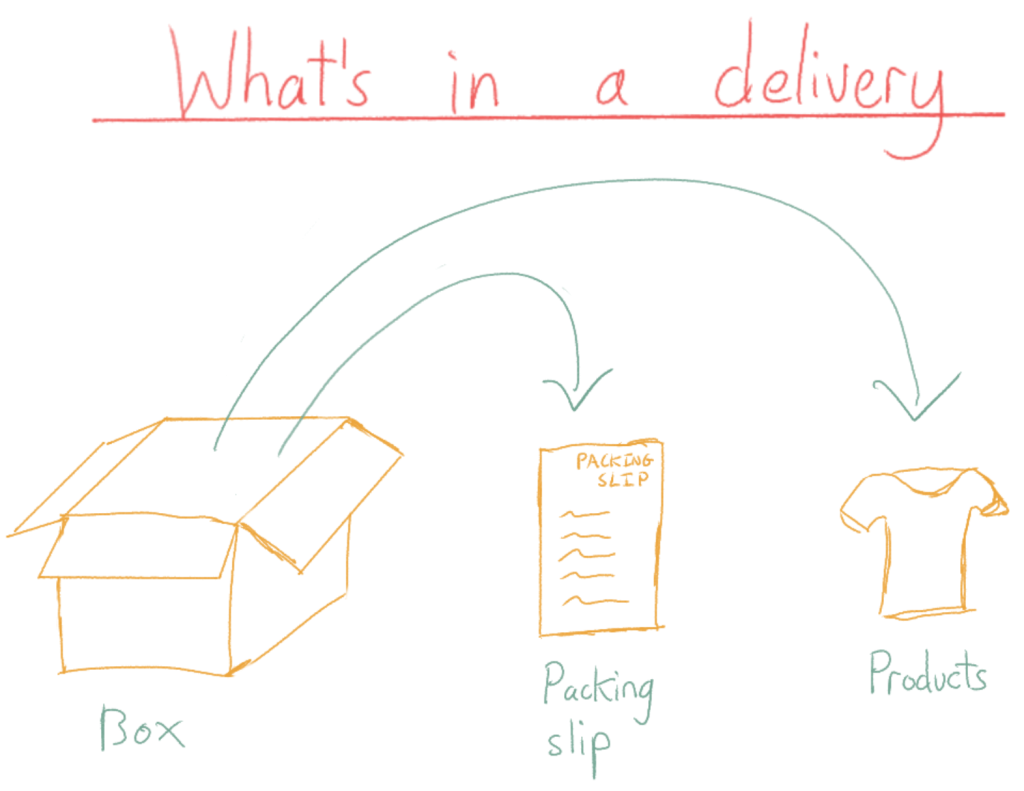
As Peter mentions in the video, you should compare what’s in each box to what’s on the packing slip. Specifically, you’ll want to check for missing items or whether the boxes contain items that aren’t on the packing slip (extra items).
You should also record whether any items are damaged so you can follow up with your vendor about them.
Step two: Make sure you received exactly what you ordered
The thing about most packing slips is they just show what’s in the box — so if one of your products was on backorder, it can be hard to tell if you’re missing something. That’s why you should compare your marked-up packing slip to the original PO you sent to your vendor.
This is important for two reasons:
- Sometimes you’ll submit a large purchase order that won’t fit in one delivery, so you’ll receive multiple smaller deliveries instead.
- Regardless of the delivery size, your PO might have items that simply aren’t on the packing slip or in the box (your vendor may have neglected to send them).
If your delivery is part of a larger order with items that are still in transit, use your packing slip to mark off the items you did receive, so it’s easier to tell which items you’re still expecting.
If you have any damaged items, this is a good time to contact your vendor about them so that they can refund you or send replacements.
If all of the items on the packing slip match the PO, then the order is complete and you’re ready for step three!
Step three: label and put away your inventory
Now that you’ve checked the packing slip against your purchase order, it’s time to print labels and put things away.
The contents of the labels are up to you, but we’d recommend basic details like the item name and barcode, to make things easier on your warehouse team. A good barcode system can increase accuracy when you pick and pack, and having a legible item name on the physical product can be handy if many of your products look alike.
The labels themselves should be placed on each individual product, but you can also place the labels directly on the shelves (so you can scan them instead) if the products are too small.
Once you have everything labelled, it’s time to put away your inventory. We suggest starting with a receiving note, which is a record that your warehouse team can work off of — and if you keep it around, it’s also useful later on if you need to double check where something was placed. You can create a receiving note in a spreadsheet with details like item name, quantity, location, and sublocation (if applicable).
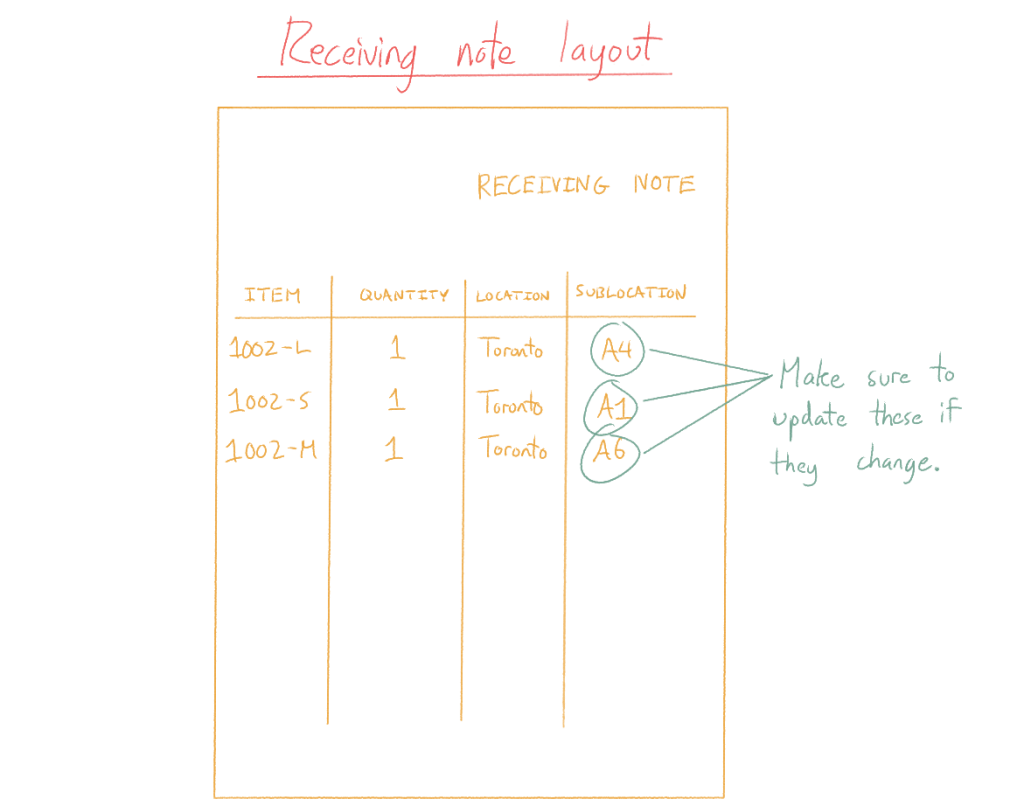
Fill the receiving note out before you actually put things away so you have an action plan ahead of time. If you’re using order management software, you can save time by printing a receiving note with all of the quantities and locations automatically filled.
Putting things away should be straightforward thanks to the receiving note, but be sure to jot down if you needed to store something in a different location (e.g., if Gray T-shirt was supposed to go in A4 and you used A3 instead, make sure that’s recorded on the receiving note).
Receive faster with an inventory management system
And that’s it — now you’ve got a solid set of steps to receive and also put away your inventory. If you aren’t using an inventory management system yet, inFlow Inventory can help you throughout this entire process by:
- generating and storing purchase order details
- tracking all outstanding purchase orders
- generating vendor emails in three clicks
- printing labels and receiving notes for incoming stock
- listing default locations to put away new stock
- creating a master record of where all your inventory is and who put it where
You can try inFlow Inventory for free today by heading to the link below!
how can i become an ambassador of your company
Hello is-haq bossa, we don’t have any ambassador programs right now but we do have an inFlow Community where you can meet other businesses and our team. We also post more insider information there, so it’s a good place to subscribe to if you want to keep up on on inFlow.
https://www.facebook.com/groups/inflowinventory