

What happens after a sales order comes in? Well, someone at your business has to pick them off the shelf and get the order ready for your customer.
It sounds simple when you recap it in a sentence, but there are a lot of little steps in the pick and pack process, and it turns out each one can be improved upon to make the whole process go faster.
In this post we’ll run through a few recommended workflows for how to accurately and quickly pick and pack sales orders in inFlow. We’ll then highlight a few features that will help you stay on track while you work.
Learn how to pick and pack with Cassandra
If you’d like to review the basics of how to pick and pack, we’ve made a great video featuring Cassandra from our Customer Success team and Devon from our developer team. Check it out here!

OK! Now that you’ve covered the basics, here’s how you can run through this workflow in inFlow.
Pick paper and software for the job
You don’t need that much in order to speed up your picking process, just these essentials:
inFlow Inventory for Windows (sign up here if you don’t have an account yet)
- An A4 or Letter-sized printer
- A warehouse or storage area with clearly labelled sections
- Products with barcode labels on them (optional, but highly recommended)
- USB or Bluetooth barcode scanner (if you have barcoded products)
We’ve spoken to many small businesses in different fields and one of our biggest takeaways was this: software alone is currently not a complete solution for inventory picking and packing at a smaller scale.
Given that reality, here is our recommended picking process, which uses a healthy dose of paper alongside of inFlow Inventory. We’ll provide each step so you can just copy it or follow along, and you’ll find a recap of our reasoning in italicized text (like this!) below.
How to pick and pack sales orders in inFlow
We’ll assume that you have a few people to take orders, pick the product from shelves and then pack it. But if you’re flying (Han) solo and playing the parts of order picker, order packer, and order taker, that’s fine too. As your business grows you’ll want to expand your picking process by splitting roles across multiple people.
Step 1: How to prepare a pick list
The order taker should reserve items for picking by selecting the Pick tab and selecting Auto-Fill. Then, select Print from the action bar and print the Pick List.
If the order picker doesn’t typically see items being printed, just send them a message to let them know an order is ready for picking!
Note: If you don’t see the Pick tab, you may need to select Add Shipping near the top right of the order to have inFlow expect this kind of workflow.
The use of Auto-Fill helps to reserve the products for your particular order. Without auto-filling, you risk that particular items on your order (especially serialized items) may be picked by someone else.
Step 2: How to pick items for a sales order
The order picker takes the pick list from the printer, grabs a cart or basket, and starts to pick items one by one. As each item is picked, you can track the progress by circling the quantity.
We’d like to offer other solutions to make picking easier in the future, but for now a pen and paper are the best tool for actual picking because paper isn’t heavy, and it can be folded or kept in a pocket as the picking happens.
We suggest circling instead of crossing numbers off because you’re less likely to obscure a number this way. Finally, the printed pick lists acts as the first checking mechanism, and we’ll introduce another one in Step 3.
What if there aren’t enough items to pick for the order?
If the order picker cannot pick all of the items on the order, they should bring the picked items to a packing station that has inFlow Inventory for Windows.
Then the order picker should open that sales order in inFlow Inventory and make corrections to the Pick tab to ensure that it reflects only what was picked (e.g., make sure it shows which are items missing).
Finally, they should flag the sales order so that the order taker knows that they need to order or allocate more stock.
This step ensures that inFlow’s records reflect exactly what was picked, and helps to flag inventory shortages as you discover them (instead of waiting for a cycle count).
Step 3: Verify picked products with a barcode scanner
You need a barcode scanner and barcoded products to do this efficiently, but checking for accuracy helps prevent costly mistakes, for money and for your reputation!
The packer (ideally a separate person) should open the order in inFlow Inventory for Windows, select the Ship tab, then select the Item field and scan each of the items that were picked.
The packer can use the Packed indicator (see the image below) to see how much they still need to pack, and whether there are any discrepancies between the Pick and Ship tabs.
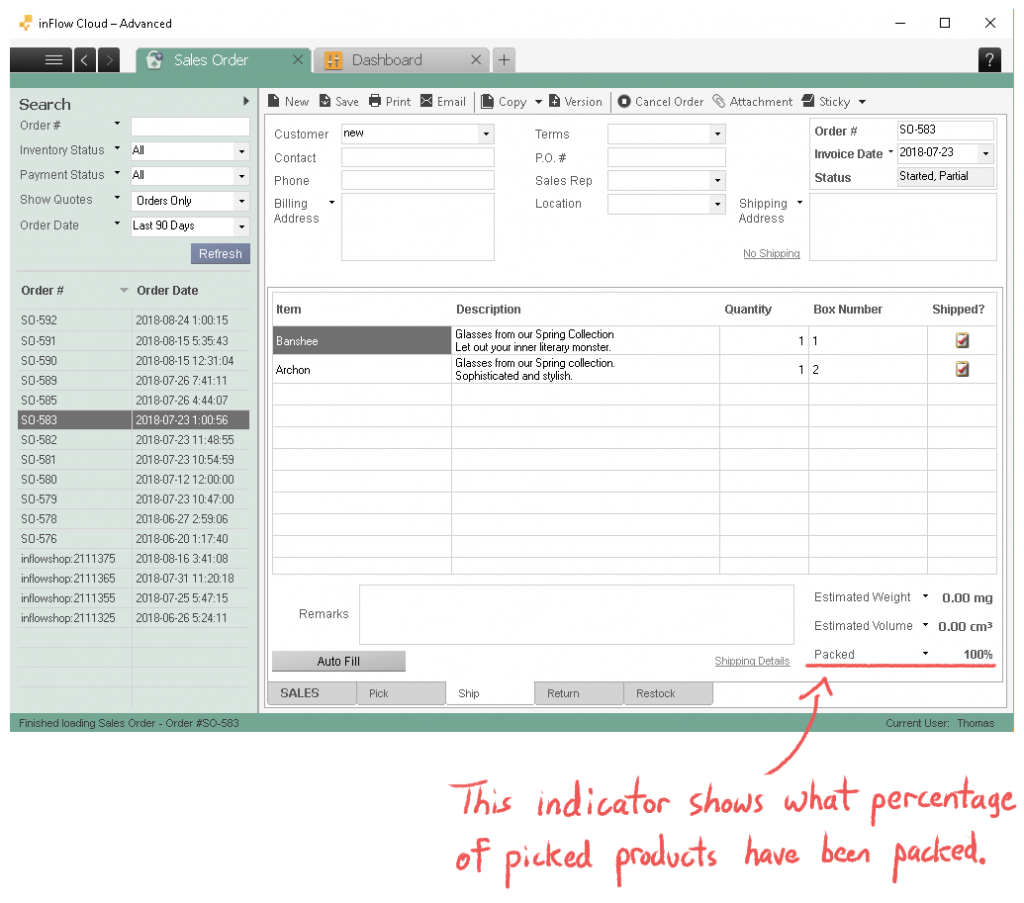
If there is a discrepancy, they can get quick details by clicking on the Packed indicator to see a filtered list of items with discrepancies (e.g., the packer packed more than was needed).
Step 4: Pack and ship the products
If you skipped Step 3 (accuracy check), then just select Fulfill on the SALES tab to mark the order as shipped.
At this point it’s time for the packer to:
- Print a packing slip from inFlow Inventory (click on Print while viewing that order)
- Print shipping labels and other necessary shipping documents (this is also made easier with our DYMO integration).
- Seal the boxes for the order.
- Schedule a pickup time with a shipping provider like USPS, UPS, or FedEx.
- Ship the order out the door!
A dedicated packer is great if you process a lot of orders each day, since they can efficiently process batches of orders without having to leave their work station.
inFlow features to help you pick and pack faster
In addition to that workflow above, there are other notable inFlow features that can make picking and packing easier.
The SALES tab has colored circles in the left-most column, and their appearance helps you quickly see whether a product is unfulfilled, picked, or shipped.
The quantity field will show a red exclamation mark if you don’t have enough to fulfill the order, or a yellow exclamation mark if fulfilling this order will cause you to run short on other orders.
![]()
Finally, the Ship tab not only shows what was shipped — it also has a dedicated column to record what box it was placed in. This is handy for tracking larger orders with multiple boxes, or an order that isn’t shipped all at once.
We hope you’ve found this pick and pack article useful, and if you have any questions, just let us know in the comments!
If you haven’t tried inFlow yet, now is the perfect time to start. Try out our picking workflow for yourself and see how much you can speed up your order fulfillment!


Can you fix this problem? I tried to sync to QuickBooks.
Sync failed for Sales Order SO-000003A
Invalid account type: You can’t associate a product or service with accounts of certain types (such as Accounts Receivable and Accounts Payable). If the product or service is something you sell, use an income account. If the the product or service is something you buy, use an expense account.
December 10, 2018 2:22pm
Are there any 3rd party shipping software that can integrate with Inflow to print lables? Or a way to scan a barcode on the picklist and it popluates the ship address in the shippers software?
Hi Gabe, unfortunately we don’t have any shipping integrations for inFlow right now. But you can export sales orders — all of them or just a subset — with shipping information to CSV. I know that’s not the same thing, but I just thought I’d let you know in case it helps!
In the meantime I’ll forward your feedback to our developers. Thanks for stopping by!
Hi does inflow on premise have the capability to print a pick list?
Hi Mikopena, yes it does! We’ve got instructions on how to do that in our support KB: https://onpremise.inflowinventory.com/support/article/34463690/how-do-i-print-a-document/
Great guide The step-by-step process for efficient pick and pack with InFlow Cloud is incredibly helpful and easy to follow
Hey rmklabour,
We appreciate you saying that! We aim to provide great content that’s clear and concise, and it sounds like we delivered!
Cheers,
Jared